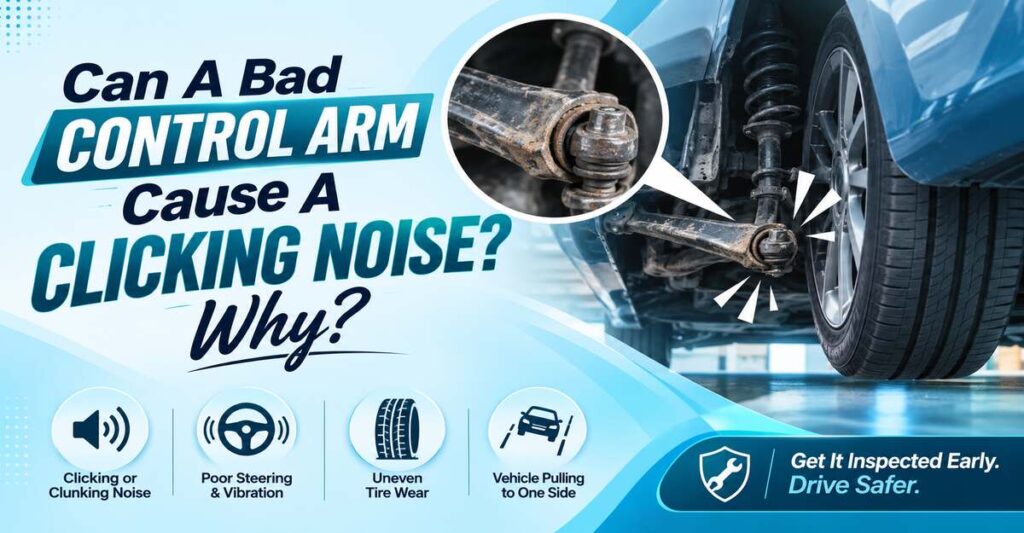
Yes. A bad control arm causes a clicking noise when its integrated ball joint wears past spec, its bushing sleeve cracks, or a mounting bolt loosens. The classic control arm symptom is a deep clunk over bumps, but a severely deteriorated joint or shifting arm produces a sharp, rhythmic metallic click instead.
At a Glance
- A clicking control arm is caused by three specific failures: a worn integrated ball joint, a collapsed rubber bushing, or a loose or under-torqued mounting bolt.
- Ball joint radial play over 0.02–0.05 inches (0.5–1.3 mm) is a total failure and produces a distinct metallic click as the ball slaps its socket.
- Clicking mainly while turning usually points to a CV axle; clunking over bumps points to a control arm but a bone-dry ball joint can mimic a bad CV joint exactly.
- A control arm that shifts more than 1/8 inch (3 mm) under a pry bar has a structurally collapsed bushing.
- The standard 12-and-6 o’clock tire shake test fails on pre-loaded multi-link and coil-on-arm suspensions, hiding real wear.
What does a bad control arm actually sound like?
A bad control arm most often makes a deep, low-frequency metallic clunk or thud when the suspension loads and unloads hitting a pothole, a speed bump, or a driveway lip. That is the textbook sound. Clicking is the secondary signature that appears at more advanced stages of wear.
The sound tells you which part is failing. A rubber bushing tearing or separating gives you the classic muffled clunk. A metal-on-metal ball joint that has lost its nylon bearing cup gives you a sharper, higher-pitched click or snap because there is no longer any elastic material to absorb the impact just steel striking steel. A loose mounting bolt lands somewhere in between: a single hard “click-snap” as the arm slides and stops against its bracket.
Rule of thumb from the shop floor: dull and low means rubber, sharp and metallic means metal. If your quiet clunk has recently sharpened into a distinct click, the failure has progressed from the bushing into the ball joint, and you have moved from “monitor it” to “fix it now.”
Which control arm part makes the clicking : bushing or ball joint?
The integrated ball joint is the most common source of a true metallic click; the bushing more often clunks. A ball joint that has worn through its internal nylon seating cup lets the ball rattle inside its socket, producing a crisp click every time load direction changes.
The bushing contributes clicking in one specific way: when its inner rubber sleeve cracks or collapses, the metal arm is free to shift inside its mounting bracket and tap the chassis. So both parts can click, but the character differs. A cracked bushing sleeve gives a shift-then-tap sound tied to bumps and load changes; a failed ball joint gives a rapid, repeatable click tied to steering and wheel movement.
Here is the practical distinction most beginners miss: on the majority of modern front control arms, the ball joint is integrated pressed permanently into the arm and not sold separately. That means once the ball joint is the culprit, you are replacing the whole arm regardless of whether the bushings are still good. Diagnosing which part clicks matters less for the repair than confirming it is the control arm at all.
How worn does a control arm have to be before it clicks?
A control arm typically begins clicking once ball joint radial play exceeds 0.02–0.05 inches (0.5–1.3 mm) or bushing shift exceeds 1/8 inch (3 mm). Those are the two hard thresholds. Below them the arm is quiet; above them it announces itself.
Two field checks pin this down:
- The 1/8-inch (3 mm) bushing rule. Wedge a pry bar between the subframe and the control arm and apply pressure. A healthy bushing gives firm, rubberized resistance and barely moves. If the arm shifts more than 1/8 inch easily, the inner rubber has structurally collapsed and the arm is now free to slide and click against the chassis.
- Ball joint play. Most manufacturers treat any lateral (radial) play beyond 0.02–0.05 inches as total failure. At that point the ball is slapping its socket walls, which is exactly what converts a dull hum into a sharp metallic click.
Suspension geometry works in fractions of an inch, so these tolerances are not conservative padding they are the point where the noise physically begins. If you can measure play at or past these numbers, the click you hear is confirmed, not imagined.
Why does the clicking change with turning, braking, or accelerating?
The clicking changes because different maneuvers load different parts of the control arm, and each failure mode responds to a specific direction of force. Matching the noise to the maneuver is the fastest way to isolate the cause.
If it clicks when you turn the steering wheel, suspect the ball joint. A bone-dry joint that has lost its nylon cup binds and then releases in tiny increments as the wheel turns, producing a rapid click-click-click.
If it clicks only under acceleration or braking, suspect a loose or under-torqued mounting bolt. The arm slides fore-and-aft inside its subframe bracket as torque loads and unloads, giving a single sharp “click-snap” on the gas and again on the brake this is the classic Torque Shift Click.
If it clicks over bumps regardless of direction, suspect the bushing. Vertical suspension travel flexes the collapsed rubber and lets the arm tap the chassis.
One noise, three signatures. Note when it happens before you crawl underneath you will know where to look before you touch a tool.
Is it a bad control arm or a bad CV axle?
The traditional rule is: clicking while turning equals a bad CV axle; clunking over bumps equals a bad control arm. That rule is correct roughly 80% of the time and should be your first assumption when the click appears mainly during tight, slow turns like parking-lot maneuvers.
The dangerous exception is a completely dry control arm ball joint. When the joint loses its internal nylon seating cup and goes bone-dry, the raw metal ball binds against its socket. As you turn, it releases in rapid micro-increments rather than gliding, and this produces a “click-click-click” that mimics a failing outer CV joint almost perfectly.
How to separate them: a CV axle click gets faster with wheel speed and is strongest at full steering lock while accelerating around a corner. A control arm ball joint click tracks steering input and suspension load, and often persists straight ahead over bumps where a CV joint stays silent. If in doubt, a chassis-ear microphone clipped to the arm versus the axle settles it in one test drive. Do not assume CV — a snapped control arm is a far more serious failure.
How do I tell a control arm click from a sway bar link or strut mount?
Location and trigger separate them. A sway bar (stabilizer) link clicks or rattles over small, sharp bumps and during side-to-side body roll, and the sound comes from low and outboard near the wheel. A control arm click is tied to larger suspension loads and steering, and comes from further inboard where the arm meets the subframe.
A strut mount is different again: it produces a click or pop specifically when you turn the steering wheel while stationary or at low speed, because the entire strut rotates on a worn bearing. If cranking the wheel lock-to-lock in your driveway produces a top-of-the-strut-tower click you can feel through the spring, it is the mount, not the arm.
Quick triage: sway bar link failures are the cheapest and most common cause of front-end clicks, so rule them out first grab the link and shake it, or pry against it. Strut mounts announce themselves during stationary steering. What is left clicking tied to bumps, load, and steering that travels from the inboard subframe area points back to the control arm. Working cheapest-to-most-serious saves you from replacing an arm when a $25 link was the problem.
How do I diagnose a clicking control arm at home?
Diagnose it in four steps, and adapt step 3 to your suspension type:
- Log the noise. Note exactly when the click happens turning, braking, accelerating, or over bumps. This alone narrows the cause to ball joint, bolt, or bushing before you lift the car.
- Lift and inspect. Raise the vehicle safely on stands and visually check the bushings for cracked, split, or extruded rubber, and check the ball joint boot for tears or grease slung across nearby parts.
- Test for play. Grab the tire at 12 and 6 o’clock and rock it, then at 3 and 9. Any knock or play warrants a closer look. Then use a pry bar between the subframe and arm if the arm shifts more than 1/8 inch (3 mm), the bushing is gone.
- Check bolt torque. Confirm the horizontal and vertical mounting bolts are tight to spec; a backed-off bolt is a common, cheap fix.
The shake test in step 3 is not reliable on every car see the next question. If you own a multi-link, coil-on-arm, or premium European suspension, a chassis-ear microphone or a jack-and-pry-bar approach is worth the extra effort.
Why does my shake test show nothing even though I hear clicking?
The 12-and-6 o’clock shake test fails silently on two common suspension designs, so a “no play” result does not clear the control arm. This is the single biggest false-negative in home diagnosis.
Pre-loaded / tensioned suspensions. Many multi-link front ends common on Mercedes-Benz and Audi keep the control arms under heavy spring tension even with the wheels hanging free. You physically cannot exert enough force by hand to make a worn joint click. The fix is a chassis-ear microphone, or compressing the suspension with a jack while levering a heavy pry bar to reveal the play.
Loaded ball joints (coil-on-arm). On many trucks and older RWD cars, the coil spring presses directly down onto the lower control arm. Lifting the vehicle by the frame wedges the ball joint tight into its socket and masks all wear shake the wheel and you feel nothing, and wrongly conclude the arm is fine. To test correctly, place the jack directly under the lower control arm to relieve spring pressure, then check for play.
Bottom line: know your suspension type before you trust a shake test. On these two layouts, “it doesn’t move” and “it isn’t worn” are not the same statement.
Can a control arm fail with no clicking or clunking at all?
Yes hydraulic (fluid-filled) control arm bushings can fail completely and silently. Many premium vehicles, notably BMW and Audi, use hydro-bushings in their thrust arms to dampen vibration. When these fail, the rubber stays physically intact, so there is no click and no clunk.
Instead the internal fluid leaks out silently, and the only early symptoms are non-acoustic: a high-speed steering wheel shimmy in the 55–70 mph range and sudden brake wander, where the car pulls or drifts under braking. Owners often chase a “balance and alignment” problem for months because there is no noise pointing at the suspension.
This is why “it’s quiet, so the control arms are fine” is a mistake on these platforms. If you drive a European vehicle with a highway shimmy and brake wander but zero clicking or clunking, inspect the thrust arm bushings for weeping fluid or a collapsed, sunken appearance. The absence of noise is not the absence of failure — on hydro-bushing cars it is a distinct failure mode in its own right.
Is it safe to drive with a clicking control arm, and for how long?
It is risky, and the safe answer is to stop driving on it once the noise turns metallic. NHTSA data indicates that in accidents caused by a completely snapped or separated control arm, 67% of those vehicles had shown documented clicking, snapping, or clunking for more than three months beforehand. The noise is the warning, and it is usually a long one.
The failure is also progressive and expensive. A shifting control arm increases emergency braking distances by 15–20% because the wheel physically migrates rearward under load. Left alone, the deflection is absorbed by the tie rods and sway bar links, which drives overall front-end repair costs up 40–60% as those parts wear out early.
Practical guidance: a faint intermittent clunk over bumps is a “fix it within a week or two” situation. A sharp, repeatable metallic click especially one that appears during turning or braking means the ball joint is metal-on-metal and can separate. Do not drive at highway speed on that. A separated control arm drops the wheel and causes immediate loss of control, which is exactly the catastrophic outcome the three-month warning window is trying to prevent.
Can a clicking control arm cause my steering wheel to vibrate?
Yes. When a worn bushing or ball joint can no longer hold the wheel hub rigidly, the wheel oscillates minutely back and forth under driving load, and that oscillation travels up the steering column as a vibration you feel in your hands.
The vibration has a telltale pattern: it typically worsens during braking and at highway speed, because both increase the load trying to deflect the loose wheel. This is also why a clicking control arm is easy to misdiagnose as an out-of-balance tire or a warped brake rotor the symptoms overlap.
The distinguishing clue is the combination. A balance problem gives you smooth vibration at a steady speed with no noise. A control arm gives you vibration plus the click or clunk, often with the vibration getting sharply worse under braking. On hydro-bushing European cars, remember the earlier exception: you can get the shimmy and brake wander with no noise at all. If you have vibration and clicking together, chasing tire balance will not fix it the play in the suspension has to be removed at the source.
How much does it cost to fix a clicking control arm?
Expect roughly $150–$550 per control arm for parts and labor on most mainstream vehicles, with the arm itself running $50–$250 and labor adding $100–$300. Premium European models with hydraulic thrust arms and multi-link setups can push a single arm past $500–$800 once the part cost and alignment are included.
Three cost drivers matter. First, whether the ball joint is integrated: if it is, you replace the whole arm, which raises the part price but is unavoidable. Second, the alignment budget an additional $80–$150 because it is mandatory after the job (covered below). Third, the fore-warning discount: catching it early, while it is still a bushing clunk, avoids the 40–60% cost escalation that comes from letting the loose arm chew through tie rods and sway bar links.
One money-saving note that surprises beginners: buying a “loaded” control arm one that arrives with new bushings and a fresh ball joint already pressed in usually costs less all-in than paying a shop for press labor to replace individual components in your old arm. The assembly looks pricier on the shelf and is cheaper on the invoice.
Should I replace just the bushing or the whole control arm?
Replace the whole arm as a loaded assembly in almost every case. While individual bushings can be pressed out on some vehicles, doing so is financially inefficient once you count the shop press labor, and it leaves the aging ball joint untouched.
A “loaded” control arm arrives pre-installed with brand-new inner bushings and a fresh outer ball joint. It guarantees a complete noise fix in one shot and eliminates hours of press work. Pressing a single bushing into your original arm can also crack a worn ball joint or distort the arm, meaning you are back under the car weeks later.
The narrow exception is a high-quality arm with a separately serviceable ball joint and only one clearly failed bushing, where the arm and remaining joint are otherwise young and undamaged. On those some trucks and older platforms replacing the single component is defensible. But if the ball joint is integrated, or the arm has age and corrosion on it, the loaded assembly wins on both cost and reliability. Professionals default to the whole arm precisely because coming back to fix the part they left behind is the most expensive outcome of all.
Why is my front end clicking right after a new control arm install?
The mounting bolts were almost certainly torqued while the car was lifted, which twists the new rubber bushings past their design limit. Control arm bushings must be final-torqued only when the vehicle is resting at normal ride height on its own weight on a drive-on ramp or alignment rack not while hanging on jack stands or a two-post hoist.
Here is the mechanism. The rubber bushing bonds the inner sleeve to the outer sleeve. If you torque the bolt with the suspension drooping, you lock that rubber in the drooped position. When the car comes down and the suspension settles to ride height, the rubber is forced to twist past where it was clamped and it tears, immediately, producing fresh pops and clicks on a brand-new part.
The fix: loosen the through-bolts, lower the car so the suspension is loaded at ride height, then torque to spec. Many DIYers learn this the hard way after ruining a set of new arms. If your new control arm started clicking within the first day, it is not a defective part it is an installation sequence error, and it is correctable without buying anything.
Do I need an alignment after replacing a control arm?
Yes, without exception. Replacing a control arm changes your camber, caster, and toe angles even when you install an identical OEM part, because manufacturing carries microscopic dimensional variances and unbolting the arm disturbs the existing settings.
Skipping the alignment is not a small gamble. Incorrect toe scrubs a fresh set of front tires with aggressive feathered wear in under 1,000–2,000 miles fast enough that you can destroy new rubber before your next oil change. The cost of the alignment is a fraction of the cost of the tires it protects.
Plan the alignment as part of the job, not an optional follow-up. Book it for the same day or immediately after, and drive gently until it is done. The only scenario where you might defer briefly is a very short, careful low-speed drive straight to the alignment shop anything more and the toe wear clock is already running. Treat “new control arm” and “alignment” as a single repair, because that is how the tires treat it.
The Bottom Line
Yes, a bad control arm can absolutely cause a clicking noise specifically a worn integrated ball joint, a collapsed bushing sleeve, or a loose mounting bolt, with the sharp metallic click signaling the failure has reached the metal. Match the noise to the maneuver: clicking on turns leans toward a ball joint (or a CV axle, its close mimic), while clunking over bumps leans toward a bushing. Two nuances decide your next move: the standard tire-shake test lies on pre-loaded and coil-on-arm suspensions, so a “no play” result does not clear the arm; and because 67% of catastrophic control arm separations were preceded by months of noise, a sharp, repeatable click is a warning to stop driving and fix it now, not later.