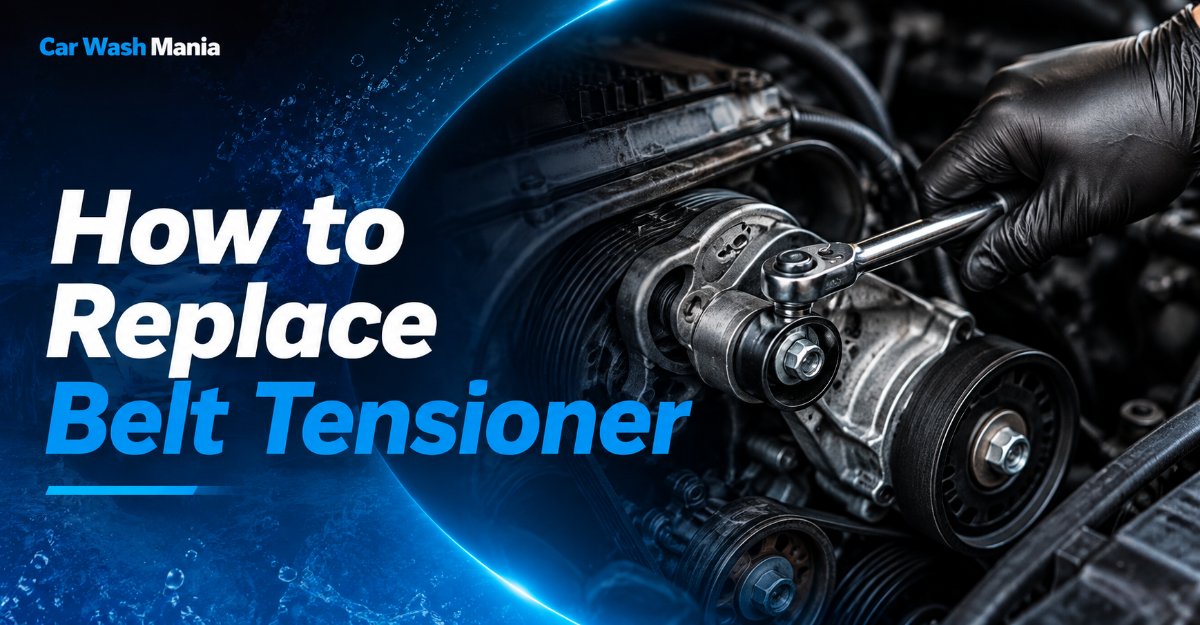
Learning how to replace a belt tensioner involves verifying the correct part, recording the belt route, unloading the spring, inspecting every pulley, installing the tensioner to specification, refitting the belt, and testing its tracking. Expect 45 minutes to 3 hours. Difficulty is moderate, and success depends most on correct routing, alignment, and bolt torque.
Before You Start
Time required:
- Experienced DIYer: 30–60 minutes on an accessible layout
- First-time DIYer: 1.5–3 hours
- Tight transverse-engine layout: 2–4 hours
Difficulty: Moderate
Typical DIY cost:
- Tensioner assembly: approximately $50–$250
- Serpentine belt: approximately $20–$80
- Belt-and-pulley kit: approximately $100–$350
Typical professional cost: Approximately $334–$409 for a straightforward drive-belt tensioner replacement in the United States, before taxes, location adjustments, or related repairs.
Required tools and materials:
- One vehicle-specific belt-tensioner assembly
- One correct serpentine belt, when replacement is due
- Vehicle-specific belt-routing diagram
- Vehicle-specific mounting-bolt torque specification
- 3/8-inch and 1/2-inch ratchets
- Metric or SAE socket set, as required
- Long-handled breaker bar or serpentine-belt tool
- Torque wrench covering the specified torque
- Socket extensions and universal joint, if access is restricted
- Trim tool or screwdriver for covers
- Flashlight
- Phone or camera
- Paint marker or masking tape
- Nylon brush and clean shop towels
- Safety glasses
- Mechanic’s gloves
- Wheel chocks
- Floor jack and axle stands only if underbody access is required
Prerequisite conditions:
- The engine must be switched off and cool enough to touch.
- The keys must be removed from the vehicle.
- The vehicle must be on firm, level ground.
- You must know whether the repair involves an accessory-drive tensioner rather than a timing-belt tensioner.
- You must have the exact routing and torque information for the vehicle.
Warning: Never disassemble a sealed automatic-tensioner housing. Its internal spring is heavily preloaded, and the assembly is not intended for internal repair.
Phase 1: Verify and Prepare the Repair
Step 1: Confirm the Tensioner Is the Correct Repair
Verify that the accessory-belt tensioner is faulty before removing any parts.
With the engine off, inspect the tensioner, belt, and neighboring pulleys under bright light. Look for a pulley that is tilted relative to the belt, belt-edge fraying, rust-colored residue around the tensioner, a cracked casting, a leaking hydraulic damper, or a tension indicator outside its permitted range.
Start the cold engine only when a safe viewing position is available. Observe from the side of the accessory drive, not directly in line with the rotating belt. The arm may make small controlled corrections, but rapid hammering, repeated travel between its stops, or visible pulley wobble indicates a problem requiring further diagnosis.
Listen for:
- A rhythmic chirp that rises with engine speed
- A squeal during startup or accessory engagement
- A grinding or dry-bearing sound
- A rattling tensioner arm
- Belt slap or flutter
Switch the engine off before touching anything. A pulley that makes noise is not automatically the tensioner; an idler, alternator, water pump, air-conditioning clutch bearing, crankshaft damper, or contaminated belt can produce similar symptoms.
You’ll know it worked when the observed fault points to the tensioner assembly or its pulley and you have ruled out an obviously seized accessory, major fluid leak, or damaged crankshaft pulley.
Common mistake: Replacing the tensioner solely because the belt squeals. Oil, coolant, incorrect belt length, pulley misalignment, low manual tension, or another failed bearing can create the same noise.
Confirm It Is Not a Timing-Belt Tensioner
An external serpentine belt is normally visible on the front or side of the engine and drives accessories. A timing belt runs behind protective covers and synchronizes the crankshaft and camshaft.
Stop if the component is inside the timing cover. Timing-tensioner replacement may require locking tools, engine-support equipment, timing marks, and an entirely different procedure.
Step 2: Match the Part and Obtain Specifications
Match the new tensioner and belt to the vehicle’s exact engine and production configuration.
Use the VIN, model year, engine code, production date, and accessory package when ordering. Compare catalog data for:
- Mounting-hole count and spacing
- Locating-pin position
- Pulley diameter
- Pulley width
- Smooth or grooved pulley face
- Tensioner-arm shape
- Release-tool size and location
- Rotation direction
- Belt rib count
- Belt effective length
Obtain three pieces of service information before proceeding:
- Belt-routing diagram
- Tensioner mounting-bolt torque
- Any component-removal or engine-support instructions
Do not substitute a generic 20–45 N·m range for the actual torque. Small bolts threaded into aluminum may require much less; large central fasteners may require substantially more.
You’ll know it worked when the replacement tensioner visually matches the catalog illustration and you have an exact routing diagram and torque specification for the vehicle.
Common mistake: Matching only the vehicle’s year and model. A single model year can use multiple engines, belt lengths, tensioners, or accessory arrangements.
Step 3: Secure the Vehicle and Create Access
Park the vehicle securely, cool the engine, and remove only the parts needed for safe tool access.
Place the transmission in Park or first gear, apply the parking brake, and chock at least one wheel. Remove the ignition key or keep the keyless transmitter away from the vehicle.
Allow at least 30–60 minutes of cooling after normal driving. Wait longer after overheating or extended highway use. The exhaust manifold, radiator hoses, cooling fan, and metal accessory brackets can remain hot after the temperature gauge falls.
Disconnect the negative battery terminal when:
- The electric cooling fan could activate near your hands
- The alternator electrical connection will be disturbed
- A powered component must be removed
- The manufacturer directs disconnection
Before disconnecting, check whether the vehicle requires a radio code, window initialization, steering-angle reset, or idle relearn.
Remove the engine cover, air-intake duct, splash shield, wheel, or coolant reservoir only when the repair information requires it. If a mount must be removed, support the engine at the approved lifting or support point before loosening the mount.
You’ll know it worked when the tensioner, belt, mounting bolts, and tool-release point are visible and reachable without placing the tool against a hose, wiring loom, fan blade, or fragile plastic fitting.
Common mistake: Levering an intake tube, coolant reservoir, or wiring harness aside with the tensioner tool. Remove the obstruction properly instead.
Phase 2: Remove the Belt and Tensioner
Step 4: Record the Belt Routing
Photograph and mark the belt path before releasing the tensioner.
Clean enough dust from the pulleys to identify every contact surface. Take at least three photographs:
- A wide image showing the complete accessory drive
- A close image of the tensioner and nearby pulleys
- A side-angle image showing which pulleys use the ribbed or smooth belt surface
Find the underhood routing decal. If it is missing or unreadable, draw the system and label the:
- Crankshaft pulley
- Alternator
- Air-conditioning compressor
- Water pump
- Power-steering pump, when belt-driven
- Idler pulley
- Tensioner pulley
As a routing cross-check, the ribbed side of the belt normally runs on grooved pulleys, while the smooth back runs on smooth pulleys. Exceptions exist, so the service diagram remains the authority.
Mark the belt’s running direction with an arrow when you intend to reuse a recently installed belt and the manufacturer permits reuse.
You’ll know it worked when you can trace the entire belt from the crankshaft pulley and return to the starting point without guessing at any pulley.
Common mistake: Taking one close photograph that omits the lower crankshaft or compressor pulley. Take a wide image before moving the belt.
Step 5: Release Tension and Remove the Belt
Rotate the tensioner in the specified direction and slip the belt from one accessible pulley.
Fit the correct tool squarely into the tensioner’s 3/8-inch drive, 1/2-inch drive, hex boss, or specified fastener. Ensure the socket or tool is fully seated.
Hold the handle so you can control the spring throughout its travel. Keep fingers, clothing, and hoses away from the belt-to-pulley pinch points. Rotate the tensioner only in the direction specified by the routing decal or service information. Depending on the design, this may be clockwise or counterclockwise.
Move the arm steadily until the belt becomes loose. Do not force the arm beyond its mechanical stop. With your free hand outside the pinch zone, slide the belt from an easy smooth pulley or upper accessory pulley.
Let the tensioner return slowly to its unloaded stop. Never allow it to snap back. Remove the belt from the remaining pulleys and feed it out of the engine compartment.
Inspect the removed belt for:
- Missing rib material
- Crosswise cracks
- Polished or glazed ribs
- Frayed edges
- Exposed cords
- Oil swelling
- Coolant contamination
- Embedded stones
- Uneven rib wear
You’ll know it worked when the belt is completely removed, the tensioner has returned gently to its stop, and no hose, connector, or pulley flange has been damaged.
Common mistake: Pulling on the tensioner-pulley retaining bolt as though it were the release point. On some designs this can loosen the pulley bolt. Use only the designated drive feature or service-specified fastener.
What to Do if the Tensioner Will Not Move
Stop applying force and verify:
- The correct component has been selected
- The specified rotation direction is correct
- The socket is on the release boss rather than a mounting bolt
- The tool is not contacting another component
- The tensioner is not seized
- The system is not manually adjusted
Do not add a pipe extension until you know the tool point and direction are correct. Excessive leverage can crack the tensioner or break a fastener.
Step 6: Inspect Every Pulley and Accessory
Check the complete accessory drive while the belt is removed.
This inspection prevents a failed accessory from damaging the new tensioner.
Rotate every accessible idler and accessory pulley by hand. A healthy free-spinning idler should feel smooth and quiet, without rough spots or side-to-side looseness. Some accessories naturally have more resistance than an idler:
- An alternator turns with moderate magnetic and bearing resistance.
- A water pump may have steady seal resistance.
- An air-conditioning pulley may freewheel while the clutch hub remains stationary.
- A power-steering pump may resist turning because it is moving fluid.
- A vacuum pump or supercharger may have application-specific resistance.
Check each pulley for:
- Grinding or scraping
- Notchy rotation
- Binding
- Visible wobble
- Axial or radial play
- Cracked flanges
- Damaged grooves
- Rubber or belt deposits
- Misalignment with neighboring pulleys
Inspect the crankshaft harmonic balancer. Look for cracked, swollen, displaced, or separating rubber between its inner and outer sections. Check for engine-oil, power-steering-fluid, or coolant leaks above the belt.
Automatic tensioners should move smoothly through their intended range and return with firm spring force. Dayco advises that the pulley turn freely and that the automatic-tensioner arm move smoothly without binding.
You’ll know it worked when every pulley turns as its design permits, no pulley is loose or visibly misaligned, and no active leak can contaminate the replacement belt.
Common mistake: Assuming all pulleys should spin freely for several revolutions. Driven accessories often have normal internal resistance. Compare feel, sound, play, and manufacturer guidance rather than spin duration alone.
Stop the Repair When You Find
- A seized or severely rough accessory
- A leaking water pump
- A separating crankshaft damper
- A bent accessory bracket
- Oil or coolant actively reaching the belt
- Significant pulley misalignment
- Metal debris around an accessory bearing
Correct the underlying fault before installing the belt.
Step 7: Remove the Old Tensioner
Support the tensioner and remove its mounting fasteners without disturbing unrelated bolts.
Identify each fastener using the replacement part and service illustration. Automatic tensioners commonly use one central fastener or two to three mounting bolts. Hydraulic arrangements may also have a separate damper attachment.
Clean debris from the bolt heads so the socket seats fully. Use a six-point socket where possible. Break each bolt loose while keeping the tool straight. If several bolts are present, loosen them gradually before removing them completely.
Support the tensioner with one hand as the final bolt comes out. Pull the assembly straight away from the engine. Note:
- Locating-pin position
- Spacer or sleeve orientation
- Bolt lengths and locations
- Bracket position
- Any rear alignment tab
- Whether thread-locking compound was specified
Do not pry against a plastic timing cover, coolant outlet, or aluminum sealing surface.
You’ll know it worked when the complete tensioner comes away without broken fasteners, and the engine mounting face, locating hole, and bolt threads remain undamaged.
Common mistake: Removing the tensioner-pulley bolt instead of the assembly mounting bolt. Compare the replacement assembly before loosening anything.
Handle a Stuck Bolt Safely
Apply controlled force with a correctly fitting six-point socket. Stop if the bolt head begins to round, the tool twists excessively, or the aluminum mounting boss moves.
Limited penetrating oil may help an exposed steel fastener, but keep it off the belt and pulley surfaces. Heat near fuel, wiring, plastic, seals, or an aluminum engine casting requires professional judgment and is not a suitable first-time repair technique.
Phase 3: Install the New Components
Step 8: Compare and Install the New Tensioner
Compare the old and new assemblies, align the locating features, and torque the mounting bolts to specification.
Place the tensioners side by side in the same orientation. Confirm:
- Identical bolt-hole pattern
- Matching locating pin or indexing lug
- Same pulley diameter and width
- Same number of pulley grooves
- Same arm offset
- Same release-tool location
- Similar operating range
- Correct spacer arrangement
A replacement part may have a revised casting, but all functional dimensions must match.
Clean the engine mounting face with a nylon brush and dry cloth. Remove loose corrosion and debris without gouging aluminum. Do not apply grease, anti-seize, silicone, or thread locker unless the manufacturer specifies it; these products can change tightening friction and bolt clamping force.
Position the locating pin fully in its hole. Hold the tensioner flat against the mounting face and start every bolt by hand for at least three full turns. If a bolt will not turn easily, remove it and correct the alignment rather than using a ratchet to force it.
Snug multiple bolts evenly. Tighten them with a calibrated torque wrench to the exact vehicle-specific value and sequence. Do not use the generic 20–45 N·m range as a substitute.
You’ll know it worked when the housing sits completely flush, the locating pin is engaged, the pulley is parallel with the other pulleys, and every fastener has reached the specified torque without binding.
Common mistake: Tightening the first bolt while the locating pin is sitting on the edge of its hole. This can crack the tensioner casting or leave the pulley misaligned.
Never Open the Tensioner Housing
The internal spring is preloaded. Continental states that automatic tensioners are non-serviceable and must not be opened in an attempt to repair internal components. Replace the assembly rather than dismantling it.
Step 9: Route and Install the Belt
Route the correct belt around every pulley and place it over the final accessible pulley while holding the tensioner released.
Compare the new and old belts before installation. The new belt should have:
- The same rib count
- The specified effective length
- The correct width
- The correct profile
- No shipping damage or sharp bends
Route the belt according to the diagram, leaving one accessible pulley for last. Usually, a smooth idler or upper pulley is easier than a deeply flanged grooved pulley.
Seat the belt fully on each pulley as you work. Use a flashlight and mirror to inspect lower pulleys. Ensure:
- Every rib enters a matching groove
- No rib rides on a pulley flange
- The belt is not twisted
- The belt passes on the correct side of every idler
- The smooth side touches smooth pulleys where the diagram indicates
- No hose or wiring loom is trapped beneath the belt
Rotate the tensioner smoothly with the belt tool. Slip the belt over the final pulley without placing fingertips between the belt and pulley. Hold the belt in position and release the tensioner slowly.
Remove the tool only after the arm has loaded the belt completely.
You’ll know it worked when the belt is taut, follows the routing diagram exactly, and is centered in every visible groove with no twists or offset ribs.
Common mistake: Checking only the upper pulleys. A belt commonly sits one groove out on the lower crankshaft or compressor pulley, where it is difficult to see.
Do Not Confuse a Stretch Belt With a Serpentine Belt
Some engines use an elastic stretch belt for one accessory and a conventional tensioned belt for another. A stretch belt has no automatic tensioner and requires a specified installation tool. Continental instructs installers to use the appropriate tool and verify that the belt is seated in every groove.
Phase 4: Verify and Test the Repair
Step 10: Check Alignment and Run the Engine
Inspect the stationary belt completely, restore removed components, and test its tracking from a safe position.
Before starting the engine, inspect every visible pulley again. Press lightly on a long belt span only to confirm that the belt is loaded; automatic-tensioner systems do not use hand-measured deflection as their primary adjustment.
When the manufacturer permits manual crankshaft rotation, use the specified crankshaft socket and rotate the engine clockwise through two complete crankshaft revolutions. Never use the starter motor for this check, and never rotate an engine backward unless its service procedure permits it. Recheck belt seating afterward.
Reinstall all removed items:
- Splash shields
- Wheel and wheel fasteners
- Engine mount and bracket, if removed
- Air-intake duct
- Coolant reservoir
- Engine cover
- Electrical connectors
- Negative battery terminal
Torque wheel and mount fasteners to their separate specifications.
Clear all tools and towels from the engine bay. Start the engine and observe from the side for 20–30 seconds. Do not lean over the belt. Check that:
- The belt tracks centrally
- The tensioner makes only controlled corrections
- No pulley wobbles
- No rib climbs a flange
- No chirp, squeal, grinding, or knocking develops
- The battery warning light remains off
- Engine temperature remains normal
- Power steering operates normally, where belt-driven
Switch on the air conditioner and electrical loads for another 30–60 seconds. Shut the engine off and perform a final stationary inspection. Recheck the mounting area for looseness and the belt edges for fresh dust or fraying.
You’ll know it worked when the belt remains centered and quiet under changing accessory loads, the tensioner does not strike its stops, and no warning light or fluid leak appears.
Common mistake: Reaching toward a moving belt to examine alignment. Stop the engine before making any close inspection or correction.
Common Mistakes and How to Fix Them
The Belt Is One Rib Out of Position
Symptoms: One belt edge sits higher than the pulley, fresh rubber dust appears, or the belt begins walking sideways.
Fix: Stop the engine immediately. Release the tensioner, remove the belt from the affected pulley, and center every rib. Inspect all lower pulleys with a mirror before restarting. Replace the belt if a rib or cord has been cut.
The Belt Route Is Wrong
Symptoms: The belt appears too long or short, the tension indicator is outside its operating range, an accessory rotates incorrectly, or the belt contacts itself or another component.
Fix: Do not force the tensioner farther. Compare the route with the underhood decal and service diagram. Confirm that the belt passes on the correct side of each smooth idler and that its part number and effective length are correct.
The New Tensioner Does Not Sit Flush
Symptoms: A visible gap remains between the housing and engine, the pulley is tilted, or a bolt becomes tight before the housing seats.
Fix: Remove the tensioner. Find the locating pin, alignment lug, trapped spacer, debris, or incorrect part. Hand-start all bolts only after the housing lies flat. Never pull the housing into place by tightening the bolts.
A Mounting Bolt Will Not Reach Torque
Symptoms: The bolt continues turning, feels elastic, binds early, or pulls aluminum from the hole.
Fix: Stop immediately. Remove the bolt and inspect its threads, length, hole, and mounting alignment. A stripped aluminum thread may require a manufacturer-approved thread repair. Do not install a larger bolt or add thread locker as a substitute.
The New Belt Squeals
Symptoms: Squealing occurs at startup, during steering, when the air conditioner engages, or under electrical load.
Fix: Check belt routing, part number, contamination, pulley alignment, accessory resistance, and tensioner operating range. Repair active oil or coolant leaks and replace a contaminated belt. Do not use belt dressing; Continental advises against sprays or chemicals as a noise remedy.
The New Tensioner Arm Oscillates Excessively
Symptoms: The arm rapidly swings, repeatedly approaches its stops, or the belt flutters under load.
Fix: Recheck belt length and routing. Inspect the crankshaft damper, overrunning alternator pulley, idlers, compressor, accessory bearings, and pulley alignment. A new tensioner cannot compensate for a seized accessory or torsional vibration from another failed component.
Variations for Different Belt Systems
Spring-Loaded Automatic Tensioners
These are the most common modern type. Use the specified square drive, hex feature, or service-tool point to unload the spring. No manual belt-tension adjustment is required after installation. The critical controls are correct belt length, smooth arm movement, pulley alignment, and mounting-bolt torque.
Hydraulic Tensioners
A hydraulic design may use a separate damper connected to a pivoting arm. Follow the model-specific sequence for damper and arm fasteners. Some hydraulic units must be compressed slowly in a vise and pinned before installation. Compressing one rapidly can damage its seals or internal valving.
Never assume the procedure used for a spring tensioner applies to a hydraulic unit.
Manual or Fixed Tensioners
A manual system uses an adjusting bolt, sliding accessory, or eccentric pulley instead of a self-loading spring. Loosen the pivot and locking fasteners before turning the adjuster.
Set tension using the manufacturer’s gauge, force-deflection specification, or frequency specification. Dayco gives a general recommendation for some manually tensioned serpentine applications of 35 pounds per rib initially and 30 pounds per rib after five minutes of run-in, but the vehicle-specific specification takes priority.
Dual-Belt and Stretch-Belt Layouts
Some engines have a main serpentine belt plus a separate air-conditioning or water-pump belt. Identify which belt and tensioner are being serviced before disassembly.
Elastic belts require the designated installation tool and are installed under tension while the crankshaft is rotated as instructed. Do not replace a conventional belt with a stretch belt or vice versa.
Tight Engine Bays
Access may require removal of a wheel, inner fender liner, intake duct, engine mount, or reservoir. Use a low-profile serpentine-belt tool rather than stacking adapters that may slip.
When an engine mount blocks the tensioner, support the engine only at the approved point and torque all mount fasteners using the service sequence. This variation may move the repair beyond a beginner’s safe skill level.
How Long Does Belt-Tensioner Replacement Take?
A straightforward longitudinal-engine layout may take an experienced technician 30–60 minutes. A first-time DIYer should allow 1.5–3 hours for access, routing verification, pulley inspection, and careful testing.
Expect 2–4 hours when the repair requires:
- Wheel and splash-shield removal
- Engine-mount removal
- Cooling-fan removal
- Multiple belts
- Corroded fasteners
- Restricted transverse-engine access
- Replacement of idlers or another accessory
The repair should not be rushed. Ten extra minutes spent inspecting the lower pulleys is preferable to destroying the new belt during startup.
How Much Does Belt-Tensioner Replacement Cost?
DIY costs commonly include:
- Tensioner: $50–$250
- Serpentine belt: $20–$80
- Idler pulley: $20–$100 each
- Complete accessory-drive kit: $100–$350
- Specialty tool rental or purchase: $0–$80
RepairPal’s current general estimate for drive-belt tensioner replacement is approximately $334–$409, including estimated parts of $210–$227 and labor of $124–$183. Taxes, location, vehicle design, and related repairs are additional.
Costs rise when an engine mount, cooling fan, seized accessory, crankshaft damper, or multiple belt-drive components must also be replaced.
Frequently Asked Questions
Can I Replace Only the Tensioner Pulley?
Some tensioners permit pulley-only replacement, but the pulley is not the complete tensioning mechanism. Replace the full assembly when the arm binds, spring force is weak, pivot play tilts the pulley, the housing is cracked, or the damper has failed. Never open the sealed spring housing to repair internal parts.
Must I Replace the Serpentine Belt Too?
Replace the belt when it is cracked, frayed, glazed, contaminated, stretched beyond the tensioner’s operating range, missing rib material, or of unknown age. A recently fitted belt may be reusable if it is undamaged and the manufacturer allows it, but inspect the belt, tensioner, and pulleys as one system.
Which Way Do I Turn the Belt Tensioner?
There is no universal direction. Depending on the tensioner’s position and design, it may release clockwise or counterclockwise. Follow the underhood routing decal or vehicle service information. Stop if the tool reaches a hard stop immediately or if the pulley fastener appears to loosen.
Can I Drive With a Bad Belt Tensioner?
Driving is risky because the belt can slip, derail, or break. Depending on the vehicle, that may stop the alternator, power steering, or belt-driven water pump and cause loss of assistance or engine overheating. Shut the engine off if the belt is fraying, walking off a pulley, or producing severe noise.
Do I Need a Torque Wrench?
Yes. Tensioners are frequently attached to aluminum brackets or engine castings. Under-tightening can allow movement and misalignment; over-tightening can strip threads, crack the housing, or break the bolt. Use the exact vehicle specification rather than copying a torque value from a different engine.
Why Is the New Tensioner Still Shaking?
Moderate controlled movement can be normal as accessory loads change. Rapid oscillation suggests an incorrect belt, misrouting, pulley misalignment, a damaged crankshaft damper, a seized accessory, or a failed overrunning alternator pulley. Reinspect the complete accessory drive instead of immediately replacing the new tensioner again.
Conclusion
The reliable way to learn how to replace a belt tensioner is to treat the belt drive as a complete system. Verify the diagnosis, record the route, control the spring safely, inspect every pulley, align the locating features, use the exact mounting torque, seat every belt rib, and test tracking under load. Stop rather than force any mismatched, seized, or misaligned component.


