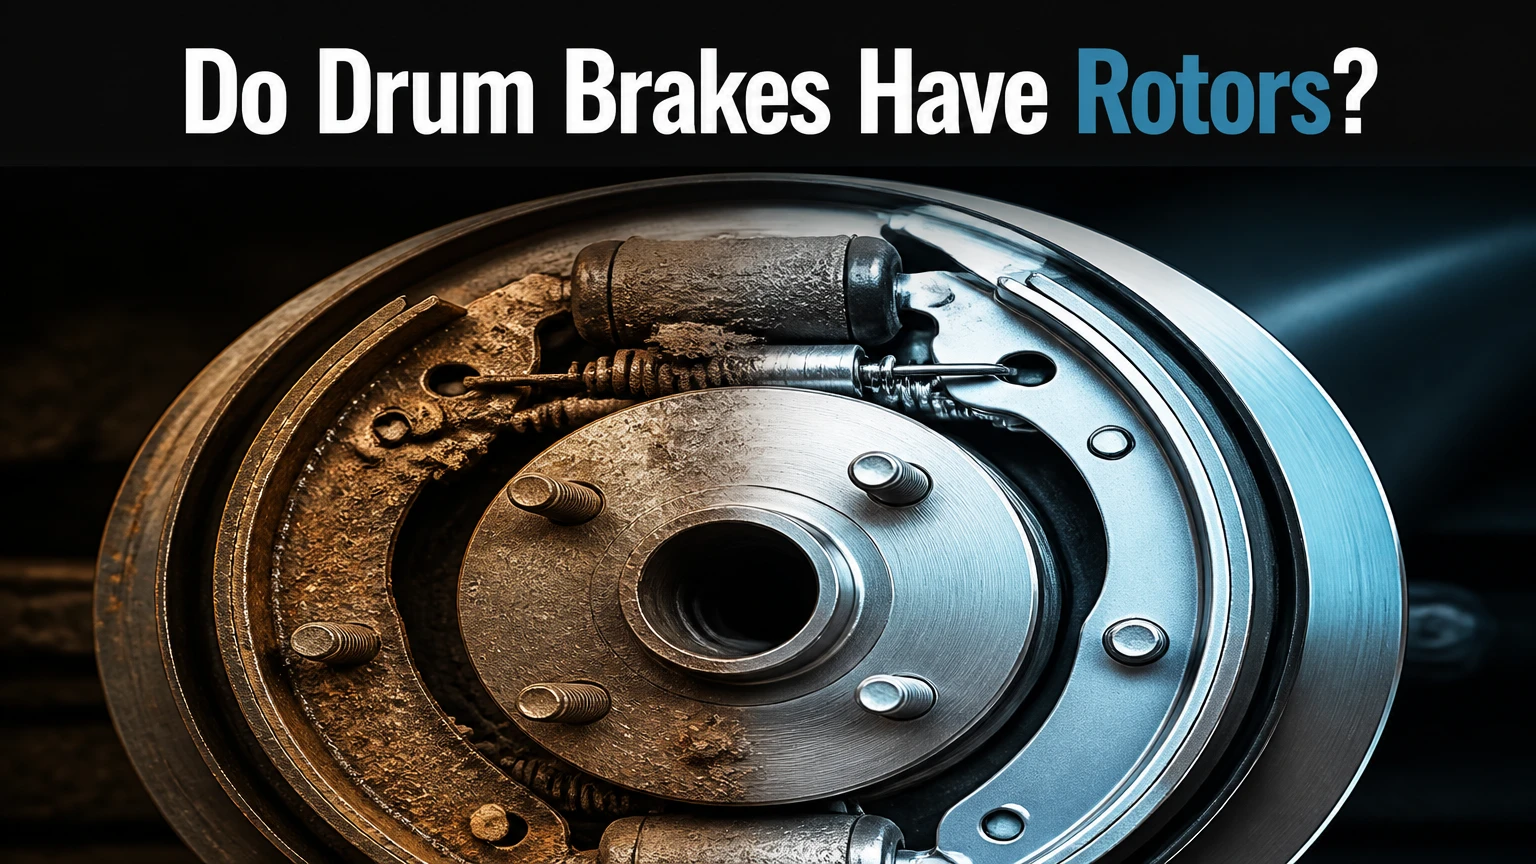
No, drum brakes do not have rotors. Instead of a flat rotor disc, a drum brake system relies on a hollow, bowl-shaped cast iron drum that rotates alongside the vehicle wheel. Rotors are cylindrical metal discs used exclusively in disc brake systems, where hydraulic calipers clamp flat brake pads against the outer disc surfaces.
Key Facts: Drum Brakes vs. Brake Rotors
- No Rotors Included: Drum brake systems do not use rotors; they use closed brake drums housing internal friction shoes.
- Friction Surface: Drum brakes apply friction outward against the inner wall of a rotating drum bowl. Disc brakes apply friction inward against both flat sides of a spinning rotor disc.
- Primary Components: A drum brake assembly consists of a brake drum, brake shoes, hydraulic wheel cylinder, backing plate, return springs, and an automatic star-wheel adjuster.
- Vehicle Application: Drum brakes are predominantly installed on the rear axles of economy passenger cars, light trucks, travel trailers, and commercial vehicles.
- The Hybrid Exception: Some vehicles feature rear disc brake rotors with an integrated internal “drum-in-hat” mechanism designed specifically for the mechanical parking brake.
What Is the Structural Difference Between Drums and Rotors?
The primary structural difference lies in the geometry of the rotating friction surface and how clamping force is applied against it. A brake rotor is an open, flat metallic disc mounted to the wheel hub. A hydraulic caliper straddles the rotor, squeezing two flat friction pads against its exterior faces to slow rotation.
In contrast, a brake drum is a deep, enclosed cylindrical bowl made from cast iron. It bolts directly to the wheel axle studs and covers internal hardware mounted to a fixed backing plate. Curved, crescent-shaped friction components called brake shoes sit inside the drum. When you step on the brake pedal, these shoes press radially outward against the drum’s smooth interior surface.
| Structural & Operational Feature | Drum Brake System | Disc Brake System |
| Rotating Friction Component | Cast iron cylindrical drum | Flat, solid or vented steel/iron rotor disc |
| Stationary Friction Material | Curved brake shoes with friction linings | Flat brake pads inside a hydraulic caliper |
| Direction of Applied Force | Outward radial expansion against inner wall | Inward axial clamping on both outer sides |
| System Enclosure | Fully enclosed behind a backing plate | Open to ambient airflow and environment |
| Heat Dissipation Rate | Low (thermal energy is trapped in the drum) | High (direct ambient cooling dissipates heat fast) |
| Manufacturing & Assembly Cost | Lower initial production and unit cost | Higher production cost due to precision casting |
| Parking Brake Efficiency | High leverage built-in mechanical actuation | Requires secondary mini-drums or electronic actuators |
What Components Are Inside a Drum Brake System?
A drum brake assembly is a enclosed mechanical and hydraulic system mounted to the axle hub. Every component sits inside the protective cavity behind the brake drum:
- Brake Drum: The heavy, machined iron housing that spins with the wheel and absorbs friction kinetic heat.
- Backing Plate: A thick stamped steel mounting plate bolted to the axle housing. It supports all internal brake components, absorbs braking torque, and acts as a dust shield.
- Wheel Cylinder: A dual-piston hydraulic cylinder mounted at the top of the backing plate. Fluid pressure forces its internal pistons outward in opposite directions to push the shoes.
- Brake Shoes: Crescent-shaped steel frames welded to curved friction linings. Linings consist of heat-resistant organic, semi-metallic, or ceramic compounds bonded or riveted to the steel web.
- Return and Hold-Down Springs: High-tensile steel springs that hold the shoes flush against the backing plate pads and snap the shoes back into rest positions when hydraulic pedal pressure drops.
- Star-Wheel Adjuster (Self-Adjuster): A threaded screw gear positioned between the lower tips of the brake shoes. As the friction linings wear down over time, this mechanism rotates to spread the shoes outward, maintaining consistent pedal movement.
How Do Drum Brakes Work Step-by-Step?
Drum brakes operate by converting fluid hydraulic force into expanding mechanical mechanical leverage.
- Pedal Depresion: The driver presses the brake pedal, pushing mechanical linkages that activate the hydraulic master cylinder.
- Hydraulic Pressurization: The master cylinder forces pressurized brake fluid through steel lines toward the wheel assembly.
- Piston Extension: Pressurized fluid enters the wheel cylinder, driving two opposing internal pistons outward.
- Shoe Expansion: The expanding pistons push the primary (front) and secondary (rear) brake shoes radially outward.
- Inner Wall Friction: The curved brake linings contact the inside machined surface of the rotating brake drum. The resulting friction converts vehicle kinetic energy into thermal energy, slowing the wheel down.
- Mechanical Self-Energization: As friction engages, the rotation of the drum pulls the primary shoe into the braking surface. This wedging action creates a “servo effect,” naturally amplifying braking power without requiring extra pedal pressure.
- Spring Retraction: Releasing the brake pedal relieves hydraulic fluid pressure. Heavy return springs instantly pull the brake shoes back inward, separating them from the drum face.
Can a Vehicle Have Both Rotors and Drum Brakes?
Yes, a vehicle can feature both rotors and drum brakes, and many modern cars, SUVs, and light trucks do.
The most common configuration is a split-axle setup: disc brakes (with rotors and calipers) are installed on the front axle to handle 70% of stopping loads, while cost-effective drum brakes handle the rear axle.
The second configuration is the “Drum-in-Hat” hybrid system:
      +-------------------------------------------------------+
      |               DISC BRAKE ROTOR ASSEMBLY               |
      |                                                       |
      |  [Outer Ring Surface]  <--- Clamped by Caliper Pads   |
      |                               for Primary Braking     |
      |                                                       |
      |  [Inner Center "Hat"]  <--- Actuated by Internal      |
      |                             Brake Shoes for Parking   |
      +-------------------------------------------------------+
In a drum-in-hat design, the rear wheel uses a standard rotor disc for primary hydraulic stopping power. However, the raised center portion (“hat”) of the rotor is hollow. Inside this center cavity sits a miniaturized drum brake shoe mechanism connected directly to the mechanical parking brake cable. When you pull the emergency brake lever, mechanical shoes expand against the inside of the rotor hat to lock the parked car securely in place.
What Are the Main Types of Drum Brake Systems?
Automotive manufacturers utilize four principal drum brake designs based on vehicle weight, actuation type, and load demands:
1. Leading-Trailing Shoe System
Uses one leading shoe that rotates with drum direction (creating a wedge effect) and one trailing shoe that rotates against drum direction. This design produces stable, predictable braking force in both forward and reverse directions. It is the standard baseline rear brake configuration for passenger compact cars.
2. Duo-Servo System
Features two brake shoes linked at the bottom by a floating star-wheel adjuster pin. When applied, drum rotation drags the primary shoe, which forcibly drives the secondary shoe into the drum wall. This double self-energizing design provides maximum stopping torque and is widely used on heavy pickup trucks, large SUVs, and commercial vans.
3. Air-Actuated Drum Brakes (S-Cam Brakes)
Replaces hydraulic fluid cylinders with compressed air actuators. High-pressure air drives a pushrod that turns an internal “S-shaped” metal cam shaft. The twisting S-Cam mechanically forces the brake shoes apart against the massive heavy-duty iron drum. This is the mandatory industrial standard on long-haul commercial semi-trucks, trailers, and transit buses.
4. Electric Drum Brakes
Utilizes an integrated 12V electrical circuit rather than hydraulic lines or air tanks. Applying the tow vehicle’s pedal sends electric current to an internal electromagnet inside the drum assembly. The magnet adheres to the spinning drum face, mechanically pulling an actuating lever that drives the shoes outward. Electric drum brakes are the industry standard on travel trailers, RV campers, and utility haulers.
How Do You Identify Which Brake Type Your Vehicle Has?
You can identify whether your axle uses drums or rotors without taking off the wheels by looking directly through the wheel spokes:
- Visual Check Through Rims: Look at the wheel assembly behind the rim spokes. If you see a flat, smooth, silver metal disc gripped by a thick hydraulic clamp (caliper), you have disc brakes with rotors. If you see a large, dark, solid cylindrical bowl with no visible caliper or pads, you have drum brakes.
- Parking Brake Cable Test: Inspect the rear side of the wheel backing plate from underneath the chassis. Drum brake systems feature a distinct steel parking brake cable entering the bottom or side of the fixed backing plate.
- Vehicle Service Manual or VIN Lookup: Decoding your Vehicle Identification Number (VIN) or checking your owner’s manual under “Brake Specifications” will explicitly state whether your rear axle uses solid/vented rotors or cast iron drums.
What Are the Essential Service Specifications for Drum Brakes?
Maintaining drum brakes within factory mechanical limits ensures safe operation and prevents structural component failure:
- Braking Force Bias Ratio: Front axle disc brakes perform roughly 70% of total vehicle deceleration work, while rear drum setups manage the remaining 30%.
- Maximum Stamped Inside Diameter (Max Dia): Every cast iron brake drum has a maximum safe wear diameter cast directly onto its exterior metal face (e.g.,
"MAX DIA 230.5mm"). If machining or wear expands the inner diameter beyond this limit, the drum thinness risks catastrophic thermal cracking and must be discarded. - Friction Lining Wear Limit: Standard organic or semi-metallic drum shoe linings must be replaced when friction material wears down to 1/16 inch (approx. 1.6 mm) above the rivet heads or steel backing plate.
- Thermal Fade Threshold: Standard passenger vehicle drum friction linings experience severe thermal fade when continuous friction causes internal drum temperatures to exceed 315°C (600°F).
- Service Lifespan: Heavy-duty cast iron drums typically last 100,000 to 150,000 miles (160,000 to 240,000 km). Brake shoes typically require replacement every 40,000 to 50,000 miles (65,000 to 80,000 km) under normal city driving conditions.
How Much Does Drum Brake Repair Cost?
Replacing or servicing drum brakes is typically less expensive than servicing high-performance disc rotor systems due to lower parts manufacturing costs:
| Repair Service Tier | Replaced Components & Labor Included | Average Labor Hours | Estimated Total Cost (Per Axle) |
| Basic Maintenance | Rear brake shoe replacement, hardware cleaning, backing plate pad lubrication | 1.5 – 2.0 Hours | $250 – $400 |
| Standard Drum Service | New brake shoes, full spring hardware kit, and drum surface lathe machining | 2.0 – 2.5 Hours | $350 – $550 |
| Full Axle Overhaul | Brand new friction shoes, new hardware, and two brand-new cast iron drums | 2.0 – 3.0 Hours | $450 – $750 |
| Complete System Rebuild | Shoes, drums, spring hardware, plus new hydraulic wheel cylinders & brake fluid flush | 2.5 – 3.5 Hours | $600 – $950 |
Common Installation Pitfalls to Avoid
Servicing drum brakes involves many small springs and moving parts. Mechanics and DIYers should avoid these four critical installation mistakes:
- Swapping Return Springs: Left and right shoe return springs frequently carry different color-coded tension values. Swapping their positions prevents proper shoe retraction, causing constant brake drag, lining overheating, and severe fuel mileage reduction.
- Reusing Aged Wheel Cylinders: Installing new brake shoes while leaving old, high-mileage hydraulic wheel cylinders in place often leads to early failure. Aging rubber seals crack under new tension, leaking corrosive brake fluid directly onto fresh shoe linings.
- Reversing the Star-Wheel Adjuster: Installing the self-adjuster thread assembly upside down or on the wrong side causes the star-wheel to unscrew in reverse during operation. The shoe clearance gap widens over time, causing a low, spongy brake pedal.
- Flipping Primary and Secondary Shoes: In duo-servo systems, the primary shoe (placed toward the front of the vehicle) has a shorter friction lining length than the secondary shoe (placed toward the rear). Reversing these positions causes erratic, grabby braking and premature lockup.
Troubleshooting Common Drum Brake Symptoms
- Symptom: Low, Spongy Pedal Feel
- Root Cause: Trapped air bubbles in the hydraulic fluid line, excessive shoe clearance from an unadjusted star wheel, or worn wheel cylinder internal seals.
- Remedy: Manually adjust the star-wheel screw through the backing plate slot to reduce shoe travel, inspect wheel cylinders for leaks, and perform a complete hydraulic fluid bleed.
- Symptom: Loud, Harsh Metal-on-Metal Grinding
- Root Cause: Friction shoe linings have worn away completely, causing the steel shoe web to scrape directly against the inner cast iron drum wall.
- Remedy: Discontinue driving immediately. Replace the brake shoe set, replace or machine the scored brake drum, and install new hold-down hardware.
- Symptom: Violent Steering Wheel or Pedal Pulsation
- Root Cause: The brake drum bowl has warped “out-of-round” due to intense heat stress or uneven lug-nut torque.
- Remedy: Measure inner diameter tolerances with a drum micrometer gauge. Machine the drum true on an automated brake lathe, or replace it if it exceeds the maximum diameter spec.
- Symptom: Rear Wheel Dragging or Excessive Heat Build-Up
- Root Cause: Broken return springs, a seized parking brake cable linkage, or overtightened self-adjuster mechanism.
- Remedy: Remove drum, replace fatigued hardware springs, lube backing plate slide pads with high-temperature brake lubricant, and free binding parking brake cables.
Frequently Asked Questions
Why do some modern cars still use drum brakes on the rear wheels?
Manufacturers use rear drum brakes because they are lightweight, cost-effective to produce, and highly reliable for parking brake integration. Since 70% of stopping weight shifts to the front wheels during braking, rear drum brakes easily provide sufficient stopping power for light passenger cars while lasting up to 150,000 miles.
Can I replace my drum brakes with disc brake rotors?
Yes, you can install a rear disc brake conversion kit. Conversion kits include new rotors, calipers, mounting brackets, flex hoses, and parking brake cables. While conversion improves heat dissipation and visual styling, it requires mechanical modifications to hydraulic proportioning valves and handbrake linkages.
What happens if a drum brake lining gets soaked in brake fluid?
Friction linings absorb hydraulic fluid like a sponge, permanently destroying their coefficient of friction. Contaminated shoes will slip under pressure, cause erratic vehicle pulling, or lock up unpredictably. Fluid-soaked brake shoes cannot be cleaned with brake spray; they must be replaced immediately along with the leaking wheel cylinder.
Do brake shoes wear down faster than brake pads?
No, brake shoes generally last significantly longer than front brake pads. Because rear drum brakes handle only about 30% of total vehicle deceleration force, a set of quality brake shoes frequently lasts twice as long as front disc brake pads under standard driving conditions.
The Bottom Line
Drum brakes do not have rotors—they use a round cast iron drum bowl combined with internal expanding brake shoes. Rotors belong strictly to disc brake systems where calipers clamp pads against a flat metal disc. Understanding these basic component differences helps you purchase the correct replacement parts, properly diagnose braking noises, and keep your vehicle stopping safely.


