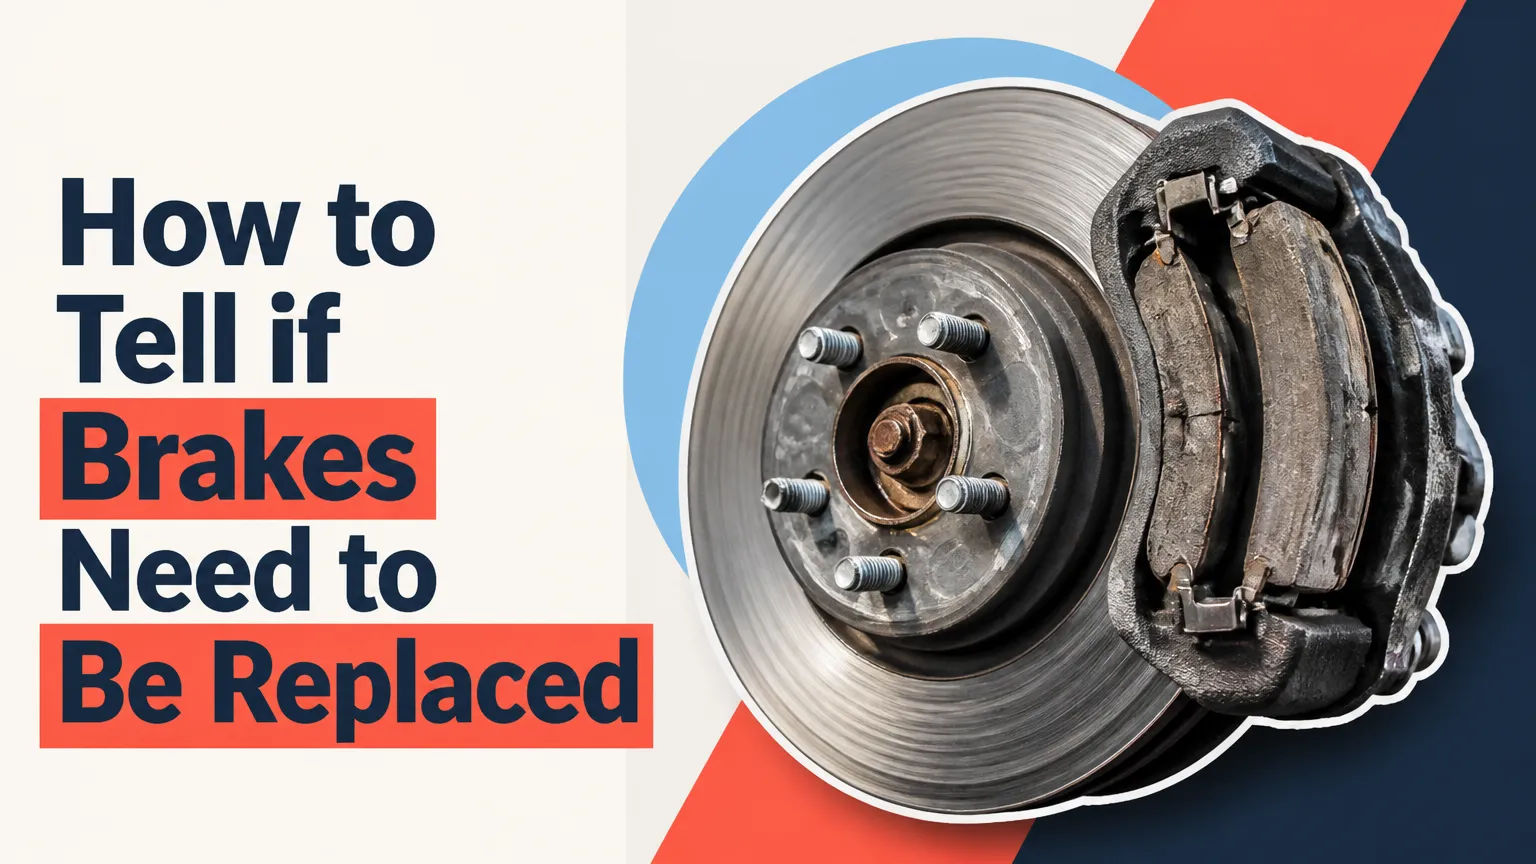
To determine if your vehicle’s brakes need replacement, perform a fluid check, a road diagnostic, and a direct physical measurement of the brake pad friction material. This process involves 7 actionable steps: verifying fluid level, conducting an acoustic road test, securing the vehicle, removing the wheel, measuring the friction material, inspecting the rotor surface, and torqueing the assembly to specification. Complete inspection requires approximately 45 to 60 minutes, basic mechanical tools, and costs under $15 for measuring equipment. Success relies on isolating the friction material from its steel backing plate during measurement.
+-----------------------------------------------------------------------------------------+
|                                    BEFORE YOU START                                     |
+-----------------------------------------------------------------------------------------+
| Time Required:    45 to 60 minutes total                                                |
| Skill Level:      Beginner to Intermediate                                              |
| Cost Range:       $0 (visual through spokes) to $15 (for gauge tools)                   |
|                                                                                         |
| Required Tools & Materials:                                                             |
| [ ] Hydraulic Floor Jack (1 unit) - Rated for 2-3 tons                                  |
| [ ] Jack Stands (2 units) - Rated for vehicle weight                                    |
| [ ] Wheel Chocks (2 units) - Rubber or heavy plastic                                    |
| [ ] Lug Wrench or Breaker Bar (1 unit) - Sized to match vehicle lug nuts                |
| [ ] Brake Pad Lining Thickness Gauge set or Digital Vernier Caliper (1 unit)            |
| [ ] Flashlight or LED Headlamp (1 unit) - 300+ lumens                                   |
| [ ] Torque Wrench (1 unit) - 1/2-inch drive, 20-150 ft-lbs range                        |
| [ ] Wire Brush & Brake Cleaner Spray (1 can) - For clearing brake dust                  |
|                                                                                         |
| Safety Prerequisites:                                                                   |
| Park strictly on level, solid concrete. Never work on asphalt on hot days, dirt, or     |
| slopes. Wear safety glasses and a dust mask to avoid inhaling particulate brake dust.    |
+-----------------------------------------------------------------------------------------+
Phase 1: Diagnostic Checks Without Wheel Removal
Step 1: Check Brake Fluid Reservoir Levels
Open the vehicle engine hood and locate the translucent brake fluid reservoir mounted on the master cylinder near the firewall on the driver side.
Observe the fluid level relative to the MIN and MAX indicators molded on the side of the plastic reservoir. As brake pad friction material wears away, the hydraulic caliper pistons extend further outward to push the thinner pads against the rotor. This displacement draws a larger volume of brake fluid into the calipers, causing the fluid level in the reservoir under the hood to drop naturally.
  [ MAX Indicator ] -------------------- (New Pad Fluid Level)

  [ MIN Indicator ] -------------------- (Worn Pad Fluid Level - Inspect Pads)
Success Check: You have located the reservoir and noted the fluid level. A fluid level sitting near or at the MIN mark without visible external fluid leaks indicates substantial pad wear.
Common Mistake: Topping off the brake fluid when it approaches the MIN line. Do not add fluid if the pads are simply worn. When you eventually compress the caliper pistons to install new pads, that extra fluid will overflow the reservoir and spill corrosive fluid across your engine bay.
Step 2: Perform an Acoustic and Tactile Road Test
Drive the vehicle on a quiet, low-traffic road at speeds between 20 mph and 40 mph with the radio off and windows rolled down.
Apply the brakes using light, medium, and firm pedal pressure to evaluate acoustic and physical feedback. Listen for a high-pitched metallic squeal that occurs while driving or braking. This sound is produced by a small metal spring tab (the mechanical wear indicator) dragging against the rotor surface when the friction material wears down to approximately 2 mm. Listen for a harsh, rasping grinding noise, which signals that the friction material is entirely exhausted and the steel backing plate is rubbing directly against the brake rotor.
SOUND PROFILE DIAGNOSTIC TABLE:
+-------------------------------+-----------------------------------+-----------------------------------+
| Sound / Sensation             | Root Cause                        | Action Required                   |
+-------------------------------+-----------------------------------+-----------------------------------+
| High-Pitched Squeal (Braking) | Wear indicator touching rotor     | Schedule pad replacement within   |
|                               |                                   | 500 miles.                        |
| Continuous Squeal (Driving)   | Wear indicator bent/fully engaged | Replace pads immediately.         |
| Deep Metal-on-Metal Grinding  | Zero friction pad remaining       | Replace pads and rotors           |
|                               |                                   | immediately.                      |
| Pulsating Brake Pedal         | Rotor thickness variation or pad  | Inspect and measure rotor runout; |
|                               | deposits                          | replace or turn rotors.           |
+-------------------------------+-----------------------------------+-----------------------------------+
Success Check: You’ve identified whether your brakes produce a wear-indicator squeal, a plate-on-plate grind, or a high-frequency pedal pulsation under load.
Common Mistake: Mistaking temporary surface-rust squeaking for worn pads. Morning squeaking after rain or damp weather is normal as the pads sweep off surface oxidation. True wear-indicator noise persists consistently across multiple stops after the components warm up.
Phase 2: Vehicle Prep, Lifting, and Wheel Removal
Step 3: Secure the Vehicle and Crack the Lug Nuts
Park the vehicle on a hard, completely flat concrete surface, shift into Park (or 1st gear for manual transmissions), and engage the parking brake firmly.
Place two wheel chocks snugly in front of and behind the tires on the opposite end of the car from where you are lifting. If inspecting the front brakes, chock the rear tires.
Take your lug wrench or breaker bar, fit the correct socket size to the lug nuts, and turn each lug nut counterclockwise $1/2$ turn while the tire remains planted on the ground.
          [ Front Wheel Left ]                  [ Front Wheel Right ]
          (Crack Lugs 1/2 Turn)                (Crack Lugs 1/2 Turn)
                   |                                     |
                   +------------------+------------------+
                                      |
                                  [ CAR ]
                                      |
                   +------------------+------------------+
                   |                                     |
          [ Rear Wheel Left ]                   [ Rear Wheel Right ]
             (Chocked Rear)                        (Chocked Rear)
Success Check: Every lug nut on the wheel to be inspected is loose enough to turn easily with a hand wrench, but the wheel remains seated tight against the hub.
Common Mistake: Attempting to break lug nuts loose after lifting the wheel off the ground. The tire will spin freely in the air, making it dangerous to apply heavy force while the car sits on a jack.
Step 4: Lift the Vehicle and Set Jack Stands
Locate the factory-designated pinch welds or frame lift points behind the front wheels or ahead of the rear wheels (consult your owner manual for precise notch locations).
Position your hydraulic floor jack under the lift point, ensuring the jack saddle aligns directly with the reinforced steel ridge. Pump the jack handle until the tire clears the ground by 2 to 3 inches.
Slide a jack stand directly under the secondary frame support point next to the jack. Slowly turn the hydraulic release valve on the floor jack counterclockwise to lower the vehicle weight onto the jack stand until the car rests completely solid.
       [ VEHICLE PINCH WELD / FRAME ]
                     |
            +----------------+
            |  JACK STAND    |  <-- Primary Load Bearer
            +----------------+
                     |
       [ SOLID CONCRETE SURFACE ]
Success Check: The vehicle sits immobile on the jack stand with zero wobble when you push against the quarter panel with your body weight.
Common Mistake: Working on a vehicle supported only by a hydraulic jack. Hydraulic seals can fail without warning. Always transfer the vehicle load entirely onto rated jack stands before placing any body part under or near the wheel well.
Step 5: Remove the Wheel and Position Safety Backups
Unscrew the pre-loosened lug nuts completely by hand and set them aside in a clean tray.
Grasp the outer edges of the tire at the 3 o’clock and 9 o’clock positions, pull the wheel straight off the hub threaded studs, and slide it flat under the vehicle frame adjacent to your jack stand. This provides a secondary steel barrier in the improbable event of a jack stand failure.
[ HUB ASSEMBLY ] ──> Remove Wheel ──> Place Wheel Flat Under Side Frame Rail
Success Check: The wheel is detached, exposing the rotor, brake caliper, and brake lines, with the rim safely placed beneath the frame rail.
Common Mistake: Sticking corrosion can fuse aluminum rims to iron hubs, preventing the wheel from sliding off. If stuck, thread one lug nut back on two turns for safety, then strike the rubber tire sidewall firmly with a dead-blow mallet or your palm at the 12 o’clock and 6 o’clock positions until the bond breaks.
Phase 3: Measuring and System Diagnostics
Step 6: Measure Brake Pad Friction Material Thickness
Direct your light source into the top and side inspection windows of the steel brake caliper housing.
Locate the brake pad assembly, which consists of two distinct layers: a thick steel backing plate (typically painted black or metallic gray) and the porous, darker friction material pressed directly against the smooth face of the brake rotor.
Insert your color-coded brake pad thickness gauge or digital caliper through the housing window to measure the thickness of the friction material layer only. Do not include the steel backing plate in your measurement.
       +-------------------------------+
       |     STEEL BACKING PLATE       |  <-- DO NOT MEASURE (4-6 mm thick)
       +===============================+
       |       FRICTION MATERIAL       |  <-- MEASURE THIS LAYER ONLY
       +-------------------------------+
       =================================  <-- BRAKE ROTOR SURFACE
Measure both the outer pad (visible from the outside face) and the inner pad (visible through the rear caliper slot). Compare your reading to standard wear specifications:
WEAR SPECIFICATION REFERENCE CHART:
+-------------------------------+-----------------------+-----------------------------------------------+
| Thickness (mm / Inches)       | Wear Status           | Mandatory Action                              |
+-------------------------------+-----------------------+-----------------------------------------------+
| >= 6 mm (1/4 in or thicker)   | Good Condition        | Safe. Recheck at next oil change.             |
| 4 mm - 5 mm (3/16 in)         | Moderate Wear         | Plan for replacement within 1,000-3,000 miles.|
| 3 mm (1/8 in)                 | Critical Wear Limit   | Replace pads immediately.                     |
| <= 2 mm (1/16 in or less)     | Metal-to-Metal Danger | DO NOT DRIVE. Replace pads and rotors.        |
+-------------------------------+-----------------------+-----------------------------------------------+
                   +----------------------------------+
                   | MEASURED FRICTION MATERIAL THICKNESS |
                   +----------------------------------+
                                    |
          +-------------------------+-------------------------+
          |                                                   |
      [ >= 6 mm ]                                         [ <= 3 mm ]
          |                                                   |
  (Pad Life Good)                                 (Replace Immediately)
          |                                                   |
  Recheck at Next Oil Change                      Schedule Immediate Service
Success Check: You have accurately measured the thinnest section of friction material on both the inner and outer pads and confirmed whether the value is equal to or less than 3 mm.
Common Mistake: Measuring the steel backing plate along with the friction material. A completely worn pad might have 0 mm of friction material but still show 5 mm of total thickness if you include the steel backing plate. Always measure from the steel-to-friction bonding line to the rotor surface.
Step 7: Inspect Rotor Condition and Reassemble to Specification
Examine the flat surface of the brake rotor under bright light. Run a fingernail radially across the swept face from the inner center to the outer perimeter.
Look for deep scores or grooves deeper than 1.5 mm, distinct blue heat discoloration spots (which indicate thermal hot spots and localized metal hardening), or a raised outer edge lip.
To reassemble, lift the wheel back onto the wheel hub studs. Thread all lug nuts by hand until they seat snugly against the rim face. Lower the hydraulic jack until the tire contacts the ground enough to stop it from spinning, but does not support full vehicle weight.
Set your torque wrench to your manufacturer spec (typically 80 to 100 ft-lbs for cars, 100 to 140 ft-lbs for trucks/SUVs) and tighten the lug nuts in a criss-cross star pattern. Lower the vehicle completely to the ground and remove the jack.
   Lug Nut Tightening Sequence (5-Lug Star Pattern):

                          ( 1 )

             ( 4 )                     ( 3 )

                   ( 2 )         ( 5 )
Success Check: The wheel is mounted flush to the hub, with all lug nuts tightened to spec using a calibrated torque wrench in a star pattern, and the vehicle is fully lowered back on the ground.
Common Mistake: Tightening lug nuts sequentially in a circle rather than a star pattern. Circular tightening can seat the rim unevenly against the hub, leading to wheel wobble, unnatural vibration, or a warped brake rotor.
Common Mistakes and How to Fix Them
Measuring Backing Plate Thickness
- The Mistake: Placing gauge jaws over the outer back edge of the pad caliper assembly, recording a reading of 5 mm to 6 mm, and assuming the pad is safe when it is actually down to bare backing metal.
- The Recovery Fix: Shine your lamp directly into the gap where the pad touches the rotor. Locate the seam line between the shiny/painted steel plate and the coarse ceramic/semi-metallic pad material. Re-measure strictly from that seam line to the rotor face.
Ignoring Tapered Pad Wear
- The Mistake: Measuring only the top visible corner of the brake pad. Caliper slides can stick, causing the pad to wear at an angle where the bottom or leading edge is completely worn down while the top edge measures 5 mm.
- The Recovery Fix: Measure the pad thickness at both the top and bottom ends of the pad backing plate. Use the lowest measurement as your driver metric for replacement.
Overlooking Sticky Caliper Slide Pins
- The Mistake: Replacing brake pads without inspecting the caliper slide pins when you notice significant wear differences (over 2 mm variance) between the inner and outer pads.
- The Recovery Fix: Remove the caliper mounting bolts, pull the slide pins out of their rubber boots, clean off old grease with brake cleaner, wire-brush any rust, and re-apply high-temperature silicone-based brake grease before mounting new pads.
Skipping Secondary Jack Stand Backups
- The Mistake: Trusting a hydraulic floor jack alone while leaning your head inside the wheel well to get a clear visual reading.
- The Recovery Fix: If you discover you have raised the car without a jack stand, step away immediately. Lower the car, position a jack stand beneath the designated frame point, lower the load onto the stand, and double-check stability before continuing.
Process Variations
Variation 1: Inspection Through Open Alloy Wheel Spokes (No-Lift Method)
- When to Use: When your car features open-spoke alloy wheels and you want a quick diagnostic without lifting the vehicle.
- Process Adjustments: Park on level ground, turn the steering wheel to full lock outward (turn left to inspect driver side, right for passenger side). Flash a 300+ lumen light directly through the wheel spokes at the caliper window. Slide a physical brake pad gauge directly onto the outer friction pad. Note that this method only measures the outer pad; you must still perform a full wheel-off check if you suspect inner pad drag.
[ TURN STEERING FULL LOCK ] ──> [ SHINE LIGHT THROUGH SPOKES ] ──> [ INSERT GAUGE DIRECTLY ]
Variation 2: Vehicles with Electronic Parking Brakes (EPB)
- When to Use: Checking or replacing rear brake pads on modern vehicles equipped with a console button for the parking brake instead of a hand lever.
- Process Adjustments: Do not engage the electronic parking brake before lifting the rear axle, or the caliper pistons will clamp tight onto the rotors, preventing visual measurement and wheel hub movement. Chock the front wheels firmly on level ground, switch the ignition on (engine off), and use the console switch or diagnostic scan tool to put the EPB into Maintenance/Service Mode before turning off the car to begin work.
How Long Does It Take / What Does It Cost?
INSPECTION & REPLACEMENT COST COMPARISON:
+-------------------------------+-----------------------+-----------------------------------------------+
| Route                         | Estimated Cost Range  | Time Investment                               |
+-------------------------------+-----------------------+-----------------------------------------------+
| DIY Visual/Gauge Inspection   | $0 - $15              | 30 to 60 minutes                              |
| Professional Brake Inspection | $0 - $100 (Often free | 1 to 2 hours (including shop wait times)      |
|                               | with service)         |                                               |
| DIY Pad Replacement (Parts)   | $40 - $100 per axle   | 1.5 to 2.5 hours                              |
| Shop Pad & Rotor Replacement  | $300 - $600 per axle  | 2 to 4 hours                                  |
+-------------------------------+-----------------------+-----------------------------------------------+
An inspection takes roughly 15 minutes per wheel if you pull the rim, or under 5 minutes per wheel if your alloy spokes allow a direct view. Doing the check yourself requires an upfront investment of $10 to $15 for a gauge set if you don’t already own one, compared to shop diagnostic fees that range from $50 to $100 (though many shops roll this fee into the repair cost if you hire them for the fix).
Frequently Asked Questions
How many miles do brake pads typically last?
Brake pads generally last between 30,000 and 70,000 miles. Lifespan varies based on pad compound (organic, semi-metallic, or ceramic), driving habits, and environment. Urban stop-and-go driving wears pads significantly faster than highway cruising.
Can I replace just the brake pads and not the rotors?
You can replace only the pads if the rotors exceed minimum thickness specifications, show no deep scoring or heat cracks, and have negligible runout. However, installing fresh pads onto worn or uneven rotors often leads to noise, reduced stopping efficiency, and rapid pad wear.
Why are my new brakes squeaking after replacement?
New brakes can squeak due to a lack of silicone grease on caliper contact points, improper pad bedding, anti-rattle clips vibrating, or moisture accumulation. If squeaking persists beyond 200 miles of normal driving, re-inspect the installation for binding pads or unlubricated slide pins.
What happens if I drive with brake pads under 3 mm?
Driving with pads under 3 mm risks friction material separation, reduced stopping power, excessive heat buildup, and severe scoring of the brake rotor. Once friction material hits 0 mm, metal-to-metal grinding severely impairs braking force and significantly increases repair costs.
Why is my inner brake pad wearing faster than my outer brake pad?
Uneven wear usually points to sticking caliper slide pins or a seizing caliper piston. When slide pins dry out or corrode, the caliper cannot float back and forth smoothly, causing the inner pad to drag constantly against the rotor face even after you release the brake pedal.


