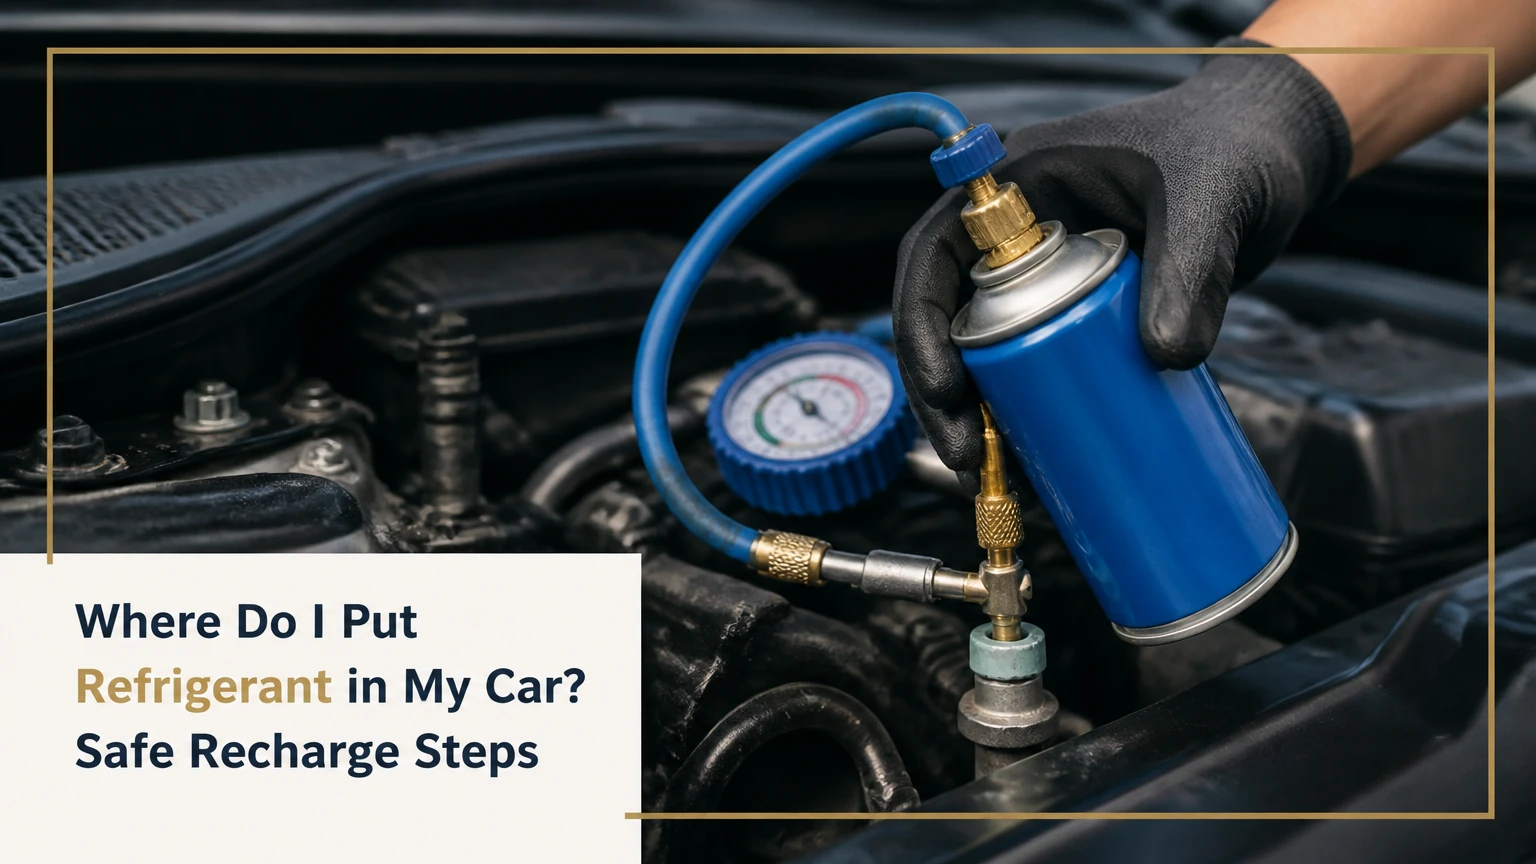
You must add refrigerant exclusively into the low-pressure service port of your vehicle air conditioning system. The low-pressure port sits on the thickest aluminum tubing located between the AC compressor and the cabin firewall. This port features a plastic cap marked with the letter “L” and accepts a standardized quick-connect coupler to prevent accidental connection to the high-pressure side.
Key Facts / At a Glance
- Automotive AC systems contain a low-pressure side (suction) and a high-pressure side (discharge).
- Refrigerant is always added to the low-pressure side while the engine and AC compressor are actively running.
- Modern vehicles use either R-134a or R-1234yf refrigerant. These chemicals are highly specific and cannot be mixed.
- Hooking a pressurized canister to the high-pressure port will cause the can to burst violently from severe backpressure.
- Hybrid and electric vehicles require specialized polyolester oil. Standard over-the-counter DIY kits will destroy their high-voltage insulation.
Before You Start
- Total Time: 15-30 minutes.
- Difficulty: Intermediate.
- Cost: $40-$130 for a DIY canister with an integrated gauge.
- Prerequisites: The system must already hold some pressure. A completely empty system requires a professional vacuum process before accepting new gas.
- Tools and Materials: One can of exact-match vehicle refrigerant with a trigger gauge, safety goggles, heavy work gloves, and a digital meat thermometer.
- The Success Factor: Accurate ambient temperature measurement determines the exact target pressure for your specific system.
Where Do I Put Refrigerant in My Car to Recharge It?
You put refrigerant directly into the low-pressure service fitting located in the engine bay. The automotive air conditioning layout divides into two specific halves separated by the expansion valve and the compressor. The low-pressure side carries cold gas back to the compressor, while the high-pressure side carries boiling liquid away from it.
Identifying the Low-Pressure Side Versus the High-Pressure Side
Finding the correct port requires visual confirmation of the aluminum tubing size. The low-pressure line is physically the thickest metal tube in the air conditioning circuit, measuring approximately 0.625 inches in diameter. It feels cold to the touch when the system operates. The high-pressure line is noticeably thinner, measuring roughly 0.375 inches in diameter, and burns to the touch during operation.
Automakers intentionally design the service ports in different physical sizes to prevent user error. An R-134a low-pressure port has a 13-millimeter outer diameter. The high-pressure port measures 16 millimeters. A standard low-pressure quick-connect coupler will physically not fit over a high-pressure fitting.
Port Locations by Engine Layout
Vehicle manufacturers place the low-pressure port in varying locations depending on the engine orientation and engine bay packaging.
- Transverse Engines (Front-Wheel Drive): The low-pressure port is typically located near the passenger-side firewall, high up near the windshield cowl.
- Longitudinal Engines (Rear-Wheel Drive): The port often sits adjacent to the engine block on the passenger side, mounted directly above the wheel well.
- Compact Vehicles: You may find the port hidden beneath plastic engine covers or tucked underneath the air intake housing.
What Are the Automotive Refrigerant Types?
Automotive AC systems are tightly engineered around a single specific chemical formulation. Mixing different refrigerants will destroy the compressor internals and cross-contaminate expensive professional recovery machines.
The Society of Automotive Engineers (SAE) standard J2843 mandates that recovery equipment must verify refrigerant purity before operation. If you mix gases, repair shops will charge you a heavy contamination fee.
R-134a Specifications
R-134a (Tetrafluoroethane) is a hydrofluorocarbon standard on vehicles built between 1994 and 2015. It operates efficiently but carries a Global Warming Potential (GWP) rating of 1430. Cans of R-134a feature standard right-hand clockwise threads on their mounting valves.
R-1234yf Specifications
R-1234yf (Tetrafluoropropene) is a hydrofluoroolefin standard on vehicles manufactured from 2016 onward. It features an ultra-low GWP of less than 1, meeting strict modern environmental regulations. To prevent accidental mixing, R-1234yf canisters utilize left-hand counter-clockwise threads.
Table 1: Automotive Refrigerant Type Comparison
| Feature | R-134a (Hydrofluorocarbon) | R-1234yf (Hydrofluoroolefin) |
|---|---|---|
| Primary Era | Vehicles built 1994 to 2015 | Vehicles built 2016 to present |
| Global Warming Potential | High (1430 GWP) | Ultra-Low (Less than 1 GWP) |
| Flammability Rating | Completely non-flammable | Mildly flammable (A2L safety rating) |
| Coupler Design | Standard clockwise can threads | Counter-clockwise can threads |
| Average DIY Kit Cost | $40 to $70 | $80 to $130 |
| Low-Port Diameter | 13 millimeters | 14 millimeters |
How Does the Air Conditioning System Work?
Automotive refrigerant is a specialized chemical compound that transitions rapidly between gas and liquid states to absorb and transfer thermal energy. The system does not actively create cold air. It removes existing heat from the passenger cabin and vents it into the outside atmosphere.
- The AC Compressor: The engine belt spins the compressor pulley. The compressor draws in cool, low-pressure gas from the cabin and pressurizes it into a hot, high-pressure gas (typically reaching 200-250 PSI).
- The Condenser: Located directly in front of the vehicle radiator, the condenser receives this hot gas. Outside air passing through the grille cools the gas until it condenses into a high-pressure liquid.
- The Expansion Valve: This small valve acts as a bottleneck. It suddenly restricts flow, causing a massive pressure drop. The high-pressure liquid expands instantly into a freezing cold, low-pressure mist (dropping down to roughly 30-40 PSI).
- The Evaporator: Buried deep inside the dashboard, the evaporator core fills with this freezing mist. The cabin blower fan pushes warm interior air across the icy metal fins. The refrigerant absorbs the heat, boiling back into a gas, and returns to the compressor to begin the cycle again.
Table 2: AC Component Pressure and State Transitions
| System Component | Refrigerant State | Typical Pressure (PSI) | Typical Temperature (Fahrenheit) |
|---|---|---|---|
| Exiting Compressor | High-Pressure Gas | 200 – 250 PSI | 150 – 170 Degrees |
| Exiting Condenser | High-Pressure Liquid | 180 – 220 PSI | 110 – 130 Degrees |
| Exiting Expansion Valve | Low-Pressure Mist | 30 – 40 PSI | 32 – 40 Degrees |
| Exiting Evaporator | Low-Pressure Gas | 35 – 45 PSI | 45 – 55 Degrees |
Step 1: Preparation and Safety Checks
Wear heavy work gloves and safety glasses before opening the vehicle hood. Automotive air conditioning operates under immense physical pressure, and venting liquid refrigerant onto bare skin causes immediate severe frostbite.
Check the specification decal located on the underside of the hood or atop the radiator shroud. This sticker explicitly states whether your car requires R-134a or R-1234yf. Purchase only the exact match. Verify the ambient outside temperature using a weather application or thermometer. You cannot accurately recharge an AC system if the outside air temperature sits below 65 degrees Fahrenheit.
You will know the preparation is complete when you have identified the thick aluminum line, located the plastic “L” cap, and wiped the metal port completely clean of grease. Dirt forced into the system valve will create a permanent mechanical leak.
Step 2: System Evaluation and Pressure Testing
Start the vehicle engine and engage the parking brake. Set the interior air conditioning controls to maximum cooling, turn the recirculation function on, and turn the blower fan to its highest setting.
Take your unpierced recharge kit and pull back the outer metal collar on the quick-connect hose. Push the hose firmly down onto the low-pressure port and release the collar to lock it in place. Observe the gauge on the hose. You must take an active reading only when the compressor clutch is actively spinning. A static reading taken while the compressor is off will always show an artificially high pressure.
According to a 2023 study by the Mobile Air Climate Systems Association (MACS), relying on a simple color-coded gauge leads to a 40 percent overcharge rate among DIY mechanics. You must match the gauge reading to the ambient outside temperature.
Table 3: Ambient Temperature to R-134a Low-Side Pressure Chart
| Ambient Outside Temp | Acceptable Low-Side PSI | Acceptable High-Side PSI | Center Vent Temp |
|---|---|---|---|
| 65 Degrees F | 25 – 35 PSI | 135 – 155 PSI | 35 – 42 Degrees |
| 75 Degrees F | 35 – 45 PSI | 150 – 170 PSI | 38 – 46 Degrees |
| 85 Degrees F | 45 – 55 PSI | 175 – 200 PSI | 43 – 53 Degrees |
| 95 Degrees F | 50 – 55 PSI | 215 – 245 PSI | 50 – 58 Degrees |
| 105 Degrees F | 50 – 55 PSI | 250 – 270 PSI | 54 – 62 Degrees |
Note: DIY trigger gauges only read the low-side PSI. Professional manifold gauges read both sides.
If the low-side gauge reads below the acceptable PSI range for your current outside temperature, proceed to the dispensing phase. If the gauge rests inside the acceptable range but the cabin air remains warm, stop immediately. Your system has a mechanical blockage, a failed blend door actuator, or a broken expansion valve.
Step 3: Safe Refrigerant Dispensing Process
Screw the trigger assembly firmly onto the top of the refrigerant canister. Briefly loosen the hose connection slightly near the trigger for one half-second to let a hiss of gas escape. This purges normal atmospheric air and moisture out of the rubber hose so you do not push water into your vehicle. Retighten the hose.
Hold the canister perfectly upright at all times. Inverting the can forces raw liquid refrigerant into the compressor. Compressors are designed to compress gas. Attempting to compress a liquid will instantly shatter the internal metal pistons. Squeeze the dispensing trigger for exactly five to ten seconds at a time. While squeezing, gently agitate the can by rocking it between a 12 o’clock and 3 o’clock position.
Release the trigger and watch the needle stabilize on the gauge. Wait for the compressor to cycle on, take the reading, and compare it to the target pressure in Table 3. Repeat this burst process until the needle reaches the lower end of the acceptable target zone.
Step 4: Disconnection and Verification
Once you reach the target pressure range, stop adding gas entirely. Pull the metal collar on the quick-connect tool backward and lift the hose cleanly off the service valve. Reinstall the plastic “L” cap tightly by hand to protect the valve core from road debris.
Insert a digital meat thermometer directly into the center air vent inside the passenger cabin. Leave the doors closed and let the engine idle for five minutes. The thermometer should eventually drop into the temperature range specified in the far right column of Table 3. You will know it worked when the air output feels consistently crisp and cold, even when the vehicle sits stationary at idle.
What Are the Costs of DIY Versus Professional Service?
A DIY top-off saves significant money but carries distinct mechanical limitations. Over-the-counter kits only measure pressure on the low side of the system, leaving you blind to potentially dangerous high-side blockages.
Professional facilities do not simply add gas to a system. The Environmental Protection Agency (EPA) Section 609 guidelines published in 2021 mandate strict recovery protocols for certified mechanics. A professional shop connects an automated recovery machine to both the high and low ports. The machine extracts all remaining gas, pulls the entire system into a deep vacuum to boil off internal moisture, performs an electronic leak test, and then refills the system by precise fluid weight rather than simple pressure.
Table 4: Financial Outlook and Service Timeframes (2026 Metrics)
| Service Method | R-134a Cost | R-1234yf Cost | Total Time Required | Moisture Removal |
|---|---|---|---|---|
| DIY Canister (At Home) | $40 – $70 | $80 – $130 | 15 – 20 Minutes | None |
| Professional Shop Evacuation | $100 – $220 | $250 – $550 | 45 – 60 Minutes | 100% Removed |
| Dealership Certified Service | $180 – $300 | $350 – $650 | 60 – 90 Minutes | 100% Removed |
Common Mistakes and How to Fix Them
Adding refrigerant is a precise chemical procedure. Small errors lead to expensive component failures. The Society of Automotive Engineers notes that a system off by just two ounces of fluid weight will suffer a 20 percent drop in total cooling efficiency.
System Overcharging
Blindly holding the trigger down puts too much gas into the closed loop. Overcharging raises internal operating pressures exponentially. Once the pressure crosses a specific safety threshold (usually around 350 PSI on the high side), the vehicle computer cuts power to the compressor clutch to prevent a catastrophic hose explosion. The system will immediately begin blowing hot air.
- How to Fix It: You cannot legally vent the excess gas into the atmosphere. You must drive to a professional shop and pay for a complete recovery and evacuation service.
Ignoring a Bad Compressor Clutch
If your pressure gauge shoots straight to the maximum red zone the instant you connect the hose, your compressor clutch has likely failed to engage. The system pressure equalizes when the compressor sits idle.
- How to Fix It: Turn the AC on and look down at the front of the compressor pulley. If the outer belt is spinning but the center hub of the pulley remains completely stationary, the magnetic clutch is dead. Do not add refrigerant. Replace the compressor or the clutch assembly.
Treating a Wide-Open Leak Like a Low Charge
If you hook up your gauge and the needle reads absolute zero, your system has suffered a massive structural failure. A rock has likely punctured the front condenser core, or a rubber O-ring has completely blown out.
- How to Fix It: Stop adding gas immediately. Any chemical you dispense will vent straight out into the engine bay through the rupture. The system requires physical part replacement and a deep vacuum before receiving new gas.
Why You Should Never Recharge a Hybrid or EV Yourself
Many hybrid and fully battery-electric vehicles feature high-voltage electric AC compressors. These units operate independently of the gas engine belt and require specialized insulation to protect the vehicle frame from high-voltage electrical currents.
Conventional AC systems use polyalkylene glycol (PAG) oil to lubricate the compressor. Standard DIY recharge cans come pre-mixed with PAG oil. High-voltage electric compressors require highly specific polyolester (POE) oil.
PAG oil conducts electricity. If you empty a standard DIY recharge kit into a hybrid vehicle, the PAG oil will strip the electrical insulation inside the compressor. High voltage will track through the oil directly into the metal chassis of the car. This creates a lethal shock hazard for anyone touching the vehicle and immediately triggers the main vehicle computer to disable the entire drivable electrical system. Never attempt a DIY recharge on a hybrid or electric vehicle.
Frequently Asked Questions (FAQ)
Can I mix R-134a and R-1234yf in my car?
You cannot mix these two refrigerants under any circumstances. Mixing the chemicals creates an unstable, corrosive compound that degrades rubber system seals. The physical service ports use different thread sizes precisely to prevent mechanics from accidentally combining the two gases.
Why is my car AC blowing warm air but the pressure is high?
High pressure combined with warm air indicates a mechanical system failure rather than a low refrigerant level. You likely have a blocked expansion valve restricting fluid flow, a clogged condenser core failing to shed heat, or dual cooling fans failing to activate in front of the radiator.
How often should a car AC system need to be recharged?
A healthy automotive air conditioning system operates as a sealed, closed loop and never consumes refrigerant. You only need to add gas if a physical leak develops in a hose, O-ring, or metal core. You should never need an annual top-off.
What happens if I connect the AC recharge hose to the high-pressure port?
The high-pressure side of an AC system operates between 150 and 250 PSI. The thin metal canister of a DIY recharge kit cannot withstand that internal force. If you manage to force a connection, the backpressure will cause the canister to rupture violently in your hands.
Can I fix a car AC leak with stop-leak products?
Stop-leak chemicals temporarily swell rubber O-rings to seal minor pinhole leaks. However, these sealants often harden upon contact with ambient moisture, clogging the microscopic passages inside the expansion valve and condenser core. Professional shops often refuse to service systems contaminated with stop-leak products.
Understanding exactly where to put refrigerant in your car ensures you avoid catastrophic compressor damage. Always locate the thicker low-pressure line, confirm your ambient temperature targets, and leave high-voltage hybrid systems to the professionals.


