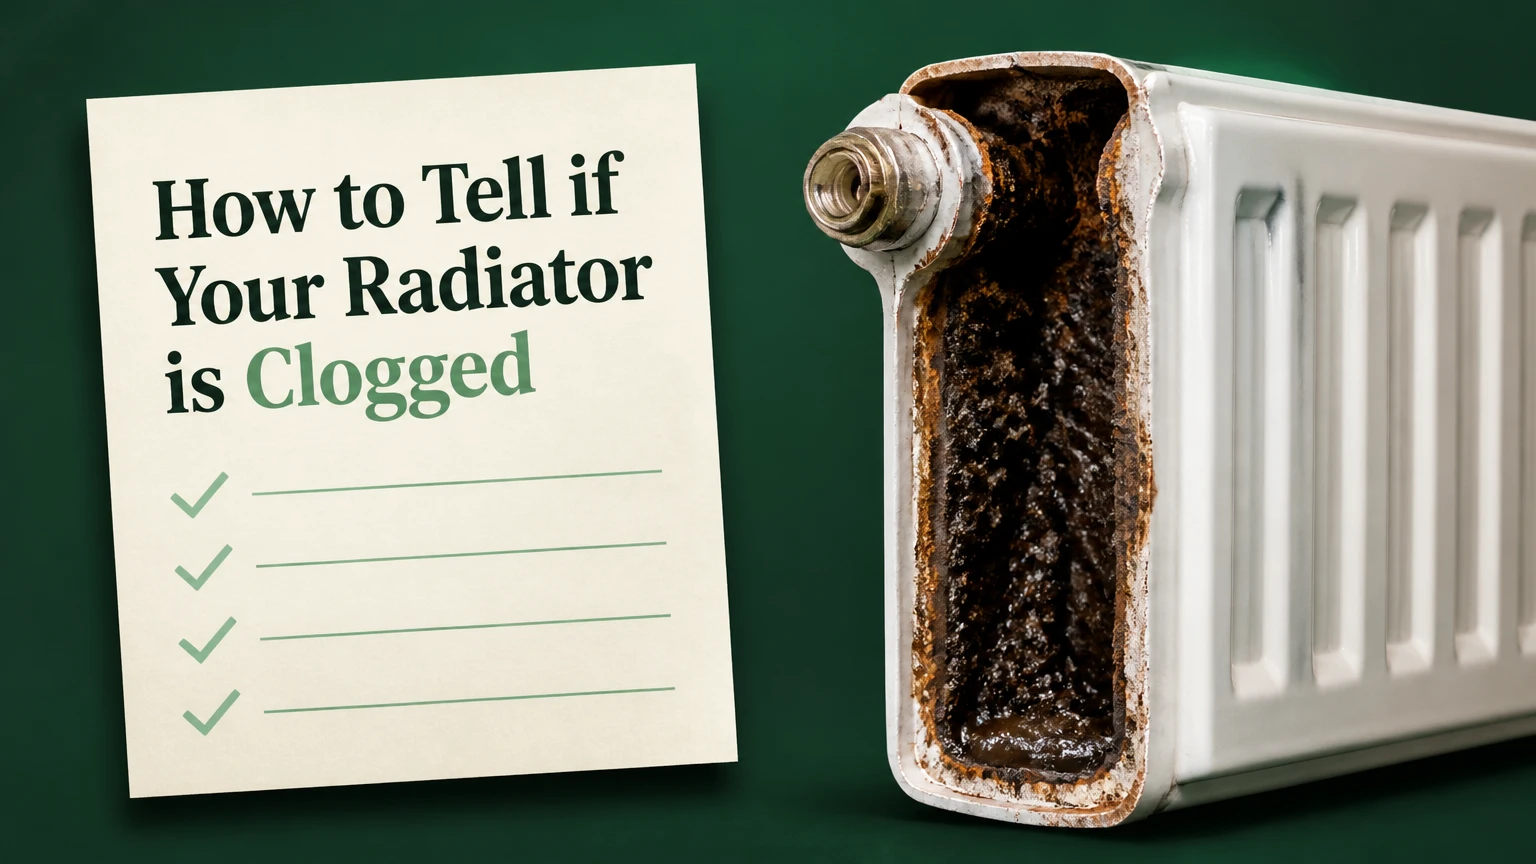
A clogged radiator blocks your engine coolant cycle, causing rapid overheating and potential engine failure. You can tell if your radiator is clogged by mapping cold zones across the core with an infrared thermometer, squeezing the lower radiator hose to check for pressure loss, and inspecting the fluid for a muddy consistency.
Key Facts / At a Glance
- Healthy radiators exhibit a smooth, progressive temperature drop from the inlet tank to the outlet tank.
- Internal clogs create isolated cold spots measuring 10-20 degrees Celsius lower than surrounding healthy tubes.
- Mixing incompatible coolant types creates a chemical sludge that permanently solidifies inside narrow aluminum core tubes.
- A collapsed lower radiator hose indicates the water pump is starving for fluid due to a severe core restriction.
- Fixing an internal blockage requires a chemical flush, a professional high-pressure machine flush, or complete component replacement.
How Does a Car Radiator Cool the Engine?
A car radiator is a heat exchanger designed to transfer thermal energy from the engine coolant into the ambient air. Understanding this cycle helps you pinpoint exactly where a blockage disrupts the system.
The core consists of a network of thin aluminum or copper tubes intertwined with folders of folded metallic fins. The vehicle water pump forces hot coolant from the engine block directly into the radiator inlet tank. As this hot fluid travels through the internal micro-tubes, ram air from driving and electric cooling fans passes through the external fins. The fins absorb and dissipate the heat into the atmosphere. The newly cooled fluid then exits the opposite tank and flows back into the engine to repeat the process.
Internal clogging occurs when rust, mineral scale, or degraded coolant sludge physically blocks these micro-tubes. This restricts fluid velocity and traps extreme heat inside the engine block. According to the Society of Automotive Engineers 2022 thermal management data, restricted coolant flow drops overall cooling efficiency by up to 60% before dashboard gauge symptoms even appear.
What Are the Top Signs of a Clogged Radiator?
A restricted cooling system presents specific mechanical and visual symptoms. Identifying these signs early prevents catastrophic engine block warping.
Temperature Gauge Spikes at Low Speeds
The dashboard temperature needle consistently creeps into the red zone when airflow decreases. A partially clogged radiator might survive highway speeds due to massive ram air volume, but it fails to dissipate heat during low-speed driving or when climbing steep inclines under load.
Cabin Heater Blows Cold Air
The vehicle heater core operates as a miniature secondary radiator inside your dashboard. When the main radiator clogs, the entire cooling system loses fluid velocity. The heater blows cold or lukewarm air because hot coolant cannot flow through the restricted heater core loop.
Coolant Turns Muddy or Brown
Healthy engine coolant is translucent and typically bright green, orange, pink, or blue. A clogged system reveals a muddy, brown, or sludgy consistency under the radiator cap. This thick gel indicates total chemical breakdown and advanced internal oxidation.
External Coolant Leaks Erupt
Fluids cannot compress. Internal blockages cause massive hydrostatic pressure spikes inside the cooling system. This pressure forces coolant out of the weakest structural points. You will find fluid puddling under hose connections, cracked plastic tank seams, or escaping from the water pump weep hole.
External Fin Obstruction Appears
Radiators require massive airflow to function. Visible structural debris like leaves, bugs, mud, and road salt can pack tightly into the exterior core face. Bent fins from road debris impacts choke off necessary airflow, causing the system to overheat even if the internal tubes are perfectly clean.
Before You Start the Diagnostic Process
Diagnosing a radiator requires handling components that reach 105 degrees Celsius under normal operating conditions. You must secure the right tools and allow the vehicle to cool down before opening the system.
- Total Time Required: 30-45 minutes.
- Difficulty Level: Beginner.
- Estimated Cost: $25-$50 for testing tools.
- Required Tools: Infrared thermometer gun, heavy leather mechanic gloves, safety glasses, high-lumen flashlight.
- Crucial Prerequisite: The engine must sit parked with the engine off for at least 6 hours to cool completely before you remove the pressure cap.
How to Test for an Internal Radiator Restriction
Follow this chronological troubleshooting sequence to confirm an internal restriction without removing the component from the vehicle.
Step 1: Perform a Visual Cold Inspection
Wait for the engine to cool completely overnight. Put on your safety glasses, pop the hood, and slowly twist the radiator cap counterclockwise to release any residual pressure. Remove the cap and shine your flashlight into the filler neck. Check the fluid texture and color. You are looking for floating rust flakes, thick gel layers, or a milky substance.
You will know this step yielded a positive result for a clog if you see thick brown sludge blocking the visible top tubes. The most common mistake at this stage is opening the cap while the upper hose still feels warm, which causes boiling coolant to erupt and cause severe burns.
Step 2: Execute an Infrared Thermal Scan
Replace the radiator cap securely. Start the vehicle and let it idle until it reaches full operating temperature (usually 195-220 degrees Fahrenheit, or 90-105 degrees Celsius). Turn on the air conditioning to force the electric cooling fans to engage. Aim your infrared thermometer gun directly at the metal radiator core, holding it roughly six inches away from the fins. Scan the entire surface slowly, moving from top to bottom and left to right.
You will know you are executing this correctly when the thermometer registers a live temperature reading that changes slightly as you pan across the metal. A common mistake here is aiming the laser at the plastic fan shroud instead of the actual metal radiator fins, which returns a falsely cool reading.
Step 3: Map the Temperature Drops Across the Core
Evaluate the temperature data you just collected. A healthy radiator exhibits a smooth, gradual temperature drop from the hot inlet side to the cooler outlet side. A clogged radiator will show distinct cold spots. You are looking for abrupt temperature drops of 10-20 degrees Celsius across localized sections of the core.
You will know the radiator is internally clogged if the center of the core reads 95 degrees Celsius, but the bottom corner suddenly drops to 70 degrees Celsius. This proves hot fluid cannot circulate through that specific quadrant. Misinterpreting the normal 10-degree differential between the inlet and outlet tanks as a failure is the most common diagnostic error at this stage.
Step 4: Inspect Hose Pressure Differences
Leave the engine running at operating temperature. Put on your heavy leather mechanic gloves. Carefully squeeze the upper inlet radiator hose, then reach down and squeeze the lower outlet radiator hose. The upper hose should feel firm, pressurized, and hot. The lower hose should feel warm and slightly less pressurized, but still structurally full of fluid.
You will know a massive restriction exists if the upper hose is rock-hard and burning hot, while the lower hose is completely collapsed, soft, or significantly cooler. This means fluid is trapped by an internal block, and the water pump is sucking the lower hose flat. The primary mistake is attempting this barehanded, which will result in immediate thermal contact burns.
Which Radiator Testing Method Should You Choose?
Different testing methods offer varying levels of accuracy and require different investments. Choose your diagnostic path based on your available tools and immediate situation.
| Diagnostic Method | Primary Advantage | Major Limitation | Target Accuracy |
| Visual Cap Inspection | Fast, free, and requires zero tools. | Only shows surface-level contamination. | 40% |
| Infrared Temperature Test | Non-invasive, highly accurate, isolates exact cold spots. | Requires buying or owning a specialized thermal tool. | 90% |
| Hose Temperature and Pressure Feel | No tools required, fast roadside check during emergencies. | Highly subjective, carries extreme risk of thermal burns. | 65% |
| Coolant Hydrometer Test | Detects underlying rust and fluid chemical degradation early. | Does not prove a physical physical blockage exists yet. | 50% |
What Causes a Car Radiator to Clog?
Radiators do not clog spontaneously. Internal restrictions develop over years of chemical degradation, poor maintenance habits, and environmental exposure.
Chemical Scale and Sludge Buildup
Sludge forms from chemical additive fallout. Mixing incompatible coolants, such as older green Inorganic Additive Technology (IAT) with modern orange Organic Acid Technology (OAT), causes a severe chemical reaction. The conflicting corrosion inhibitors bind together and precipitate out of the liquid, forming a thick jelly that completely locks up the water pump and radiator core tubes.
Internal Engine Block Corrosion
Engines with cast-iron blocks are highly susceptible to internal rust. When the coolant corrosion inhibitors deplete over time, the water inside the system oxidizes the bare iron coolant jackets. Rust scale breaks off the engine block and travels with the fluid stream. These heavy flakes lodge directly into the narrow entry points of the aluminum radiator tubes, slowly sealing them shut.
External Fin Obstruction from Road Debris
External clogs stop heat dissipation entirely, even if the internal fluid is pristine. Dirt, road salt, leaves, and insects physically impact the exterior face of the radiator behind the front grille. Over years of driving, this debris forms an impenetrable mat that blocks incoming ram air. Pressure washing the fins from the engine bay outward is required to clear this specific blockage.
Common Diagnostic Mistakes and How to Fix Them
Misdiagnosing a cooling system often leads to unnecessary parts replacement. Avoid these four critical errors when evaluating your vehicle.
Opening a Hot Radiator Cap: Never twist the cooling cap while the engine is warm. The cooling system operates under 15-20 PSI of pressure. Removing the cap drops the boiling point instantly, causing escaping fluid to flash-boil and spray outward. Always wait at least six hours for the metal to become cool to the touch.
Using Tap Water to Flush or Top Off: Domestic tap water contains heavy concentrations of calcium and magnesium. These dissolved minerals precipitate rapidly under extreme engine heat. They create a hard white scale that permanently plugs radiator tubes. Always use 100% distilled water when flushing or mixing coolant.
Ignoring the Thermostat First: Misdiagnosing a stuck-closed thermostat as a clogged radiator leads to expensive, unnecessary component swaps. A closed thermostat blocks fluid from reaching the radiator entirely, mimicking a massive clog. Automotive Service Excellence guidelines suggest mechanics always perform a boiling water test on the thermostat before condemning a radiator.
Skipping the Coolant Bleed Procedure: If you open the system to inspect it, you will introduce air. Failing to bleed this air out creates an airlock that stops fluid circulation completely. Always use a spill-free funnel to burp the system until bubbles stop appearing in the filler neck.
Situational Overheating: Is It the Radiator or Something Else?
Not all overheating events stem from a clogged radiator. The specific driving conditions that trigger the temperature spike often point directly to the failed component.
| Overheating Symptom | Probable Root Cause | Primary Component to Test |
| Engine overheats only at highway speeds | Mild internal fluid restriction | Radiator core capacity |
| Engine overheats only while idling | Lack of active cooling airflow | Electric cooling fan or fan clutch |
| Heater blows cold while engine runs hot | Massive blockage or severe air pocket | Radiator and heater core loop |
| Temperature fluctuates wildly while driving | Trapped air boiling in the system | Coolant system bleeder valve |
How Much Does It Cost to Fix a Clogged Radiator?
Cooling system repair costs vary widely based on your mechanical ability and the severity of the blockage. Chemical flushes work for soft sludge, but hardened scale requires total component replacement.
| Repair Solution | Parts & Materials Cost | Average Labor Cost | Total Time Required |
| DIY Chemical Flush | $18 – $48 (₹1,500 – ₹4,000) | $0 | 1.5 – 3.0 hours |
| Professional Machine Flush | $25 – $50 (₹2,000 – ₹4,000) | $95 – $240 (₹8,000 – ₹20,000) | 1.0 – 2.0 hours |
| Standard Radiator Replacement | $120 – $350 (₹10,000 – ₹30,000) | $180 – $420 (₹15,000 – ₹35,000) | 2.0 – 4.0 hours |
| Heavy-Duty Aluminum Upgrade | $350 – $800 (₹29,000 – ₹65,000) | $200 – $500 (₹16,000 – ₹41,000) | 3.0 – 5.0 hours |
The Budget DIYer Approach
If you catch the symptoms early, invest in an inexpensive infrared thermometer gun. Conduct a physical flush at home using a premium chemical cleaner. Drain the radiator, fill the system with distilled water and the cleaner, run the engine for 20 minutes, drain completely, and refill with a 50/50 mix of distilled water and the correct OEM coolant specification.
The Everyday Daily Driver Approach
If your vehicle shows thick mud-like sludge under the cap, skip the retail store bottle fixes. Take the car to an independent service center for an intensive, high-pressure machine back-flush. This specialized machine hooks directly to your hoses and forces fluid backward through the core to sweep out deep sediment that gravity draining cannot remove.
The Heavy-Duty Towing Owner Approach
If you haul heavy loads and your radiator shows localized cold spots or high mileage degradation, skip the chemical flushes entirely. Your transmission relies on a heat exchanger built directly into the main radiator tank. Order a heavy-duty all-aluminum replacement radiator to guarantee thermal stability and protect your transmission fluid loop from overheating.
Frequently Asked Questions
Can you unclog a radiator without removing it?
Yes, you can unclog a radiator while it remains in the vehicle by using a chemical cooling system flush. You pour the solvent into the filler neck, run the engine to circulate the chemicals, and drain the dissolved sludge out through the bottom petcock valve. This only works for soft chemical buildup, never for hardened mineral scale.
Will a clogged radiator damage the water pump?
A severe radiator clog will eventually destroy the water pump. When fluid cannot pass through the core, the pump creates a vacuum in the lower hose. This immense pressure differential destroys the internal water pump impeller bearings and blows out the mechanical seals, leading to total pump failure and external weeping.
How long can you drive with a restricted cooling system?
You cannot safely drive a vehicle with a severely restricted cooling system for more than 10-15 minutes. Once the temperature gauge enters the red zone, you risk warping the aluminum cylinder head and blowing the head gasket. Pull over immediately and allow the engine to cool to prevent catastrophic mechanical damage.
Does a clogged radiator affect transmission performance?
Yes, a clogged radiator directly degrades automatic transmission performance. Most automatic vehicles run hot transmission fluid through a secondary heat exchanger located inside the bottom tank of the main radiator. If the radiator cannot cool the engine coolant, it also fails to cool the transmission fluid, causing the transmission to slip or overheat.
Can a bad radiator cap mimic a clogged core?
A failed radiator cap mimics a clogged system by allowing the engine to overheat prematurely. The cap pressurizes the system to raise the boiling point of the coolant. If the internal spring fails, the system loses pressure, and the coolant boils away into vapor at normal operating temperatures. Always pressure-test the cap during diagnostics.


