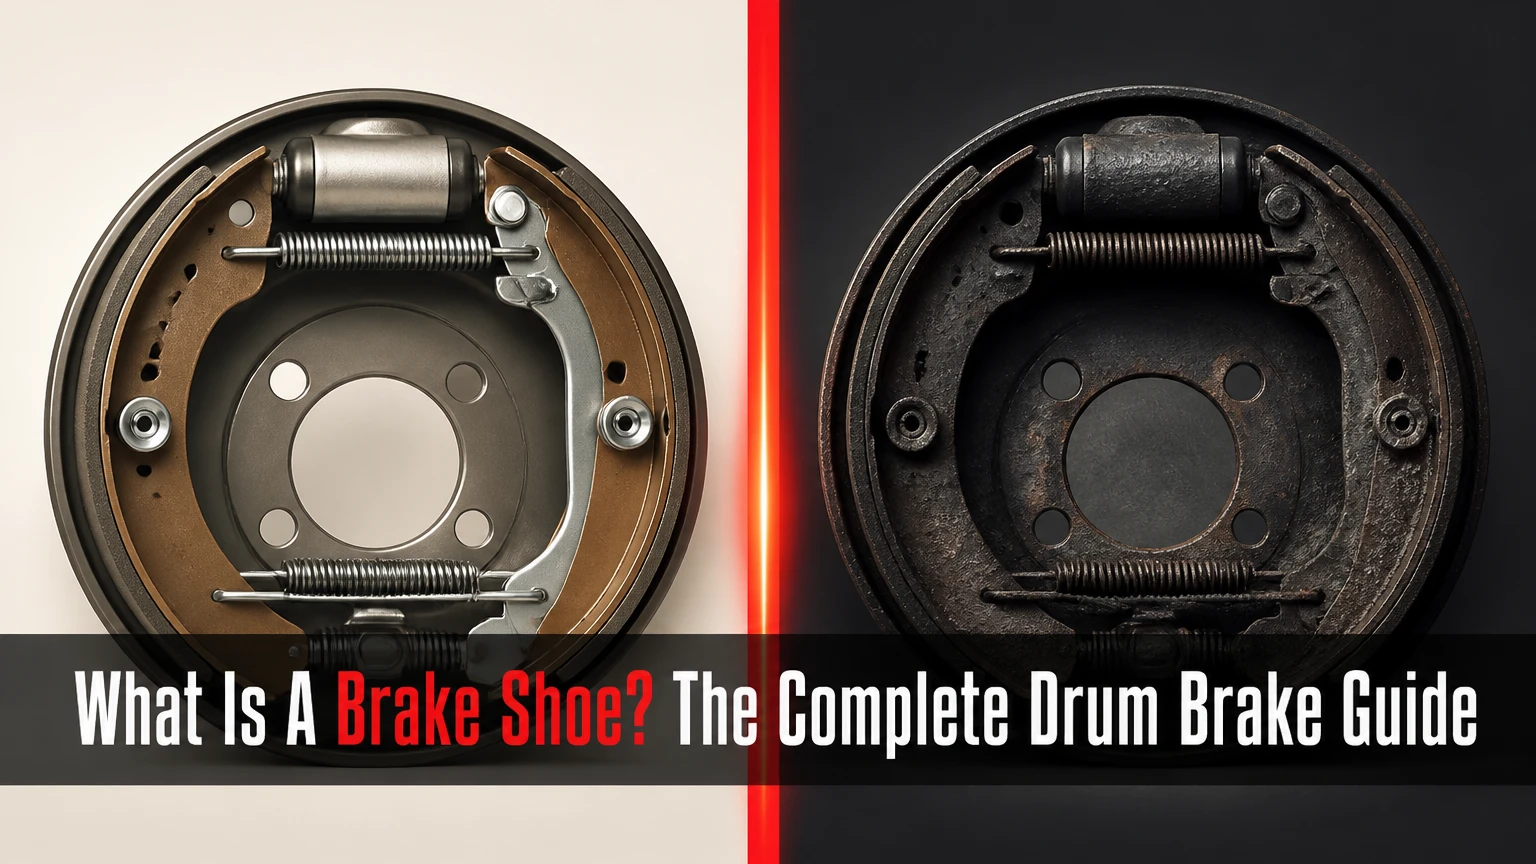
A brake shoe is a curved, crescent-shaped steel bracket lined with high-friction material that sits inside a vehicle’s drum brake system. When the driver applies the brake pedal, hydraulic cylinders push these shoes outward against the inner walls of a spinning metal drum. This massive mechanical friction converts the vehicle’s kinetic energy into heat, safely halting the wheels.
Key Facts / At a Glance:
- Primary Location: Mounted almost exclusively on the rear axles of standard passenger cars, light trucks, and commercial trailers.
- Service Lifespan: Rear brake shoes typically endure 40,000 to 80,000 miles of standard driving.
- Minimum Thickness: Friction material must be replaced immediately when it wears down to 1.5 millimeters (1/16 of an inch).
- Braking Load: These rear-mounted components handle approximately 30 percent of a standard passenger vehicle’s total stopping force.
- Component Cost: A complete set of replacement shoes generally costs between $30 and $60 for standard commuter vehicles.
How Do Brake Shoes Work Inside the Drum?
Brake shoes operate through a precise sequence of hydraulic pressure and mechanical expansion. The entire system is sealed inside a heavy cast-iron or aluminum drum that rotates concurrently with the vehicle’s wheel. Because the components remain enclosed, the system relies on physical contact between the static shoes and the moving drum to generate stopping friction.
The standard operation sequence follows five distinct mechanical stages:
- Fluid Pressurization: Pressing the brake pedal forces brake fluid out of the master cylinder and down the rigid brake lines.
- Cylinder Expansion: The pressurized fluid enters the wheel cylinder located at the top of the internal brake assembly, forcing two internal pistons outward in opposite directions.
- Friction Engagement: These pistons push directly against the steel upper frames of the brake shoes, forcing the friction linings outward against the spinning drum walls.
- Servo Action: The physical rotation of the drum naturally drags the forward-facing shoe harder into the metal surface. This phenomenon mechanically multiplies the stopping force without requiring additional pedal pressure.
- Spring Retraction: Releasing the pedal removes hydraulic pressure, allowing heavy-duty steel return springs to immediately snap the shoes back to their resting position away from the drum.
Engineers design these systems in two distinct configurations. A leading/trailing setup uses a fixed bottom pivot anchor, meaning only the front shoe benefits from the self-energizing servo action. A duo-servo setup leaves the bottom unanchored, allowing the primary shoe to push physically against the secondary shoe. This transfers the rotational momentum and multiplies the braking force across both components, making duo-servo designs common on heavier trucks.
What Are the Main Types of Brake Shoes?
Manufacturers categorize brake shoes entirely by the friction material bonded or riveted to the underlying steel core. The automotive industry utilizes the SAE J661 standard to grade these materials based on their friction coefficients at various operating temperatures. Choosing the correct compound dictates how the vehicle handles heat, noise, and component wear.
Organic Friction Materials
Organic shoes consist of non-asbestos materials like rubber, carbon, Kevlar, and fiberglass held together by high-temperature binding resins. These compounds represent the softest friction option available. They provide exceptionally quiet stops and gentle engagement, making them highly comfortable for daily city commuting. The primary limitation of organic material involves rapid wear. Because the compound is soft, it degrades quickly under heavy use and generates significant amounts of dark brake dust. Organic linings also suffer from thermal fade at lower temperatures than metallic alternatives.
Semi-Metallic Compounds
Semi-metallic shoes blend iron, steel wire, copper, and graphite into a highly durable friction block. This metallic density gives them exceptional heat transfer capabilities, allowing the brake drum to shed thermal energy quickly during repeated stops. Semi-metallic parts represent the standard factory equipment for most modern passenger vehicles and light trucks. They withstand extreme temperatures without glazing over or losing physical grip. The trade-off comes through increased operating noise and a slightly harsher pedal feel. The aggressive metallic compound also accelerates wear on the inner drum walls over time.
Ceramic Fiber Applications
Ceramic brake shoes integrate dense ceramic clays fired in kilns and interwoven with fine copper threads for thermal conductivity. These premium components offer the longest service life of any friction material on the consumer market. They produce almost zero visible dust, keeping vehicle wheels perfectly clean. Furthermore, their acoustic properties naturally operate outside the range of human hearing, eliminating brake squeal. The main limitation is their high initial purchase cost and poor cold-bite characteristics. Ceramic shoes require a few stops to warm up before they provide their maximum stopping power.
Material Performance Comparison Matrix
| Friction Material Type | Typical SAE Friction Code | Thermal Fade Limit (Typical) | Best Driver Persona |
|---|---|---|---|
| Organic (NAO) | EE or EF | 400 degrees Fahrenheit | City commuters prioritizing silent operation. |
| Semi-Metallic | FF or FG | 650 degrees Fahrenheit | General drivers and light towing applications. |
| Ceramic Fiber | GG | 750 degrees Fahrenheit | Luxury vehicle owners seeking clean wheels. |
| Commercial Heavy-Duty | GH or HH | 900+ degrees Fahrenheit | Fleet trucks carrying maximum payload capacities. |
Brake Shoes vs. Brake Pads: What Is the Difference?
Brake shoes expand outward against an enclosed drum, whereas brake pads clamp inward onto an exposed flat rotor. Almost all modern passenger vehicles use disc brakes and brake pads on the front axle, reserving drum brakes and brake shoes for the rear axle.
The primary difference lies in heat management. Disc brakes leave the rotor exposed to open airflow, allowing them to cool rapidly during aggressive driving. Drum brakes seal the heat inside a metal housing. If a driver rides the brakes down a steep mountain pass, the trapped heat inside the drum causes the brake shoes to outgas. This gas creates a microscopic barrier between the shoe and the drum, resulting in severe brake fade.
Despite the thermal limitations, brake shoes maintain distinct advantages. The enclosed drum protects the friction surfaces from rain, corrosive road salt, and deep mud. Furthermore, the geometric design of a drum brake easily incorporates a mechanical parking brake lever. Expanding a pair of shoes requires significantly less physical leverage than clamping a set of disc brake pads, making drum systems exceptionally efficient for emergency brake applications.
Structural Comparison Matrix
| Component Characteristic | Brake Shoes (Drum Brakes) | Brake Pads (Disc Brakes) |
|---|---|---|
| Application Direction | Expands outward from a central cylinder. | Clamps inward via an external caliper. |
| Environmental Exposure | Sealed inside a cast-iron drum housing. | Fully exposed to water, dirt, and airflow. |
| Primary Advantage | Built-in servo action multiplies braking force. | Rapid thermal cooling prevents brake fade. |
| Primary Drawback | Complex network of springs and adjusters. | Wears out 50 percent faster than shoes. |
What Is the Typical Cost and Lifespan?
Brake shoes consistently outlast front brake pads due to the physics of vehicular weight transfer. When a car decelerates, the vehicle’s mass pitches forward. This forces the front disc brakes to handle roughly 70 percent of the stopping workload. Because the rear brake shoes only manage the remaining 30 percent, they typically last between 40,000 and 80,000 miles.
Replacement costs divide sharply between raw parts and professional labor. The shoes themselves remain inexpensive to manufacture. A standard set of premium aftermarket shoes costs between $30 and $60 per axle. However, drum brake assemblies contain dozens of small, tension-loaded springs, retainer clips, and threaded adjusters. A professional technician must disassemble, clean, lubricate, and reassemble this complex web of hardware.
Typical practitioner estimates place the labor time at 1.0 to 1.5 hours per axle. Consequently, paying a professional service shop to replace brake shoes generally ranges from $150 to $400, depending heavily on local labor rates and the condition of the internal hardware.
Service Cost Breakdown
| Service Strategy | Parts Cost Estimate | Labor Cost Estimate | Total Expected Range |
|---|---|---|---|
| DIY Home Garage | $30 to $60 | $0 | $30 to $60 |
| Independent Local Shop | $40 to $80 | $100 to $150 | $140 to $230 |
| Dealership Service Center | $60 to $120 | $150 to $280 | $210 to $400 |
| Commercial Truck Axle | $120 to $250 | $200 to $350 | $320 to $600 |
Recognizing Symptoms of Worn Friction Material
Worn brake shoes exhibit specific mechanical, acoustic, and hydraulic symptoms long before total failure occurs. Ignoring these warning signs results in the steel shoe core grinding directly into the brake drum, transforming a simple friction replacement into a costly structural repair.
Scraping or Screaming Noises
The most common symptom of failure is a harsh metallic scraping from the rear of the vehicle. When the high-friction lining wears past its 1.5-millimeter minimum limit, the steel rivets holding the material to the core become exposed. These steel rivets drag against the spinning cast-iron drum, scoring deep grooves into the metal and producing a loud grinding noise that worsens with vehicle speed.
Drooping or Weak Parking Brake
Because the parking brake utilizes a mechanical steel cable to manually pull the brake shoes against the drum, worn friction linings require the cable to travel further. If you pull the handbrake lever completely to the top of its travel arc and the vehicle still rolls on a slight incline, the brake shoes are excessively worn. This symptom can also indicate that the automatic star-wheel adjuster mechanism has seized due to rust.
Low or Spongy Brake Pedal
A healthy brake pedal feels firm and engages high in the travel arc. If the pedal sinks toward the floorboard, the brake shoes are resting too far away from the internal drum walls. The wheel cylinder must push maximum fluid volume just to bridge the gap. Additionally, a spongy pedal often points to a blown seal inside the wheel cylinder, which allows hydraulic fluid to leak directly onto the brake shoes.
Rear Wheel Lockup Under Light Braking
Brake shoes operate based on dry friction. If a failing rear axle seal or a blown wheel cylinder leaks oil or brake fluid onto the organic lining, the material swells and degrades. Contaminated brake shoes become incredibly “grabby.” Even a light touch on the brake pedal will cause the affected rear wheel to lock up completely, inducing severe vehicle shuddering and tire skidding.
Diagnostic Troubleshooting Matrix
| Observed Symptom | Mechanical Root Cause | Required Action or Measurement |
|---|---|---|
| Rhythmic clicking while driving. | Broken or detached return spring. | Remove drum and inspect spring tension. |
| Harsh metallic grinding noise. | Friction lining worn to bare metal. | Measure lining thickness (Replace if under 1.5mm). |
| Handbrake fails to hold vehicle. | Shoes worn or adjuster mechanism seized. | Clean star-wheel threads and reset shoe clearance. |
| Sudden rear wheel lockup. | Axle grease or fluid on the friction pad. | Replace shoes and repair leaking hydraulic seal. |
Common Installation Mistakes to Avoid
Replacing brake shoes involves high-tension springs and precise mechanical tolerances. The layout confuses many novice mechanics, leading to errors that compromise vehicle safety and destroy new components rapidly.
Reversing Primary and Secondary Shoes
Drum brake systems use two distinct shoes per wheel. The primary (leading) shoe always features a slightly shorter strip of friction material and must face the front of the vehicle. The secondary (trailing) shoe has a longer friction strip and faces the rear. Installing these backward forces the servo-action physics to work against the system. The brakes will feel exceptionally weak, and the vehicle will pull violently to one side during hard stops.
Reusing Fatigued Hardware
The high-tension return springs endure extreme heat cycles over years of driving. While a rusty spring might still look intact, the steel loses its tensile memory. Reusing old springs prevents the brake shoes from pulling completely away from the drum when you release the pedal. This creates constant, light friction that overheats the new brake shoes, glazes the friction material, and ruins vehicle fuel economy. Always purchase a new spring hardware kit when installing new shoes.
Dry Backing Plate Contact Points
The steel core of the brake shoe physically slides against raised metal bosses on the stationary backing plate. Failing to clean these contact points and apply high-temperature synthetic brake grease causes the metal surfaces to bind. The shoes will stick in the applied position, causing a loud popping or clicking noise every time the driver releases the brake pedal. Never use standard petroleum grease here, as the extreme drum heat will melt it onto the friction linings.
Expert Recommendations by Driving Situation
Choosing the correct brake shoe requires matching the friction compound to the exact operating environment of the vehicle. Purchasing the most expensive option rarely yields the best results if the material does not match the driver’s habits.
- For Budget-Conscious Daily Commuters: Standard aftermarket semi-metallic shoes offer the most logical balance. They provide 50,000 miles of reliable stopping power in stop-and-go traffic for the lowest upfront cost.
- For Luxury Vehicles and Show Cars: Upgrading to ceramic brake shoes prevents black ferrous dust from permanently staining expensive alloy wheels. The silent operation matches the refinement expected in premium cabins.
- For Heavy Towing and Fleet Hauling: Select severe-duty, fleet-grade semi-metallic compounds featuring high-heat resins. Standard organic shoes will melt and fade under the extreme thermal load of towing a heavy trailer down a grade.
- For Classic Cars and Antiques: Older vehicles designed before power brakes require high-friction organic shoes. Modern ceramic compounds require too much pedal pressure for non-assisted manual master cylinders to clamp effectively.
Frequently Asked Questions
Can you mix brake shoes and brake pads on the same car?
Yes, this represents the standard engineering configuration for millions of vehicles. Automakers install disc brakes (pads) on the front axle to handle the heavy thermal loads of stopping, while mounting drum brakes (shoes) on the rear axle to handle parking brake duties and lighter dynamic loads.
Do modern brake shoes contain dangerous asbestos?
Modern automotive friction components do not contain asbestos. The industry phased out the toxic mineral in the 1990s due to severe health hazards associated with inhaling brake dust. Today, manufacturers use safe aramid fibers, Kevlar, and metallic strands to achieve the necessary heat resistance.
What exactly is the self-adjuster mechanism?
The self-adjuster is a threaded steel rod topped with a toothed star wheel located between the bottom of the two brake shoes. As the friction material gradually wears away, an internal metal lever catches the teeth of the star wheel. When you brake while reversing the vehicle, the lever turns the wheel, lengthening the rod and pushing the shoes closer to the drum to maintain a tight pedal feel.
Can I replace the brake shoes on just one side of the vehicle?
No, you must always replace brake friction components in axle pairs. Replacing the left shoes while leaving worn right shoes creates an severe imbalance in friction coefficients. The vehicle will pull dangerously into adjacent lanes of traffic during panic stops.
How do you properly bed in new brake shoes?
Bedding transfers an even microscopic layer of friction material onto the bare metal drum. To bed new shoes, accelerate to 35 miles per hour and apply moderate, steady brake pressure to bring the vehicle down to 5 miles per hour. Repeat this cycle six to eight times without coming to a complete stop, allowing the drums to cool fully afterward.


