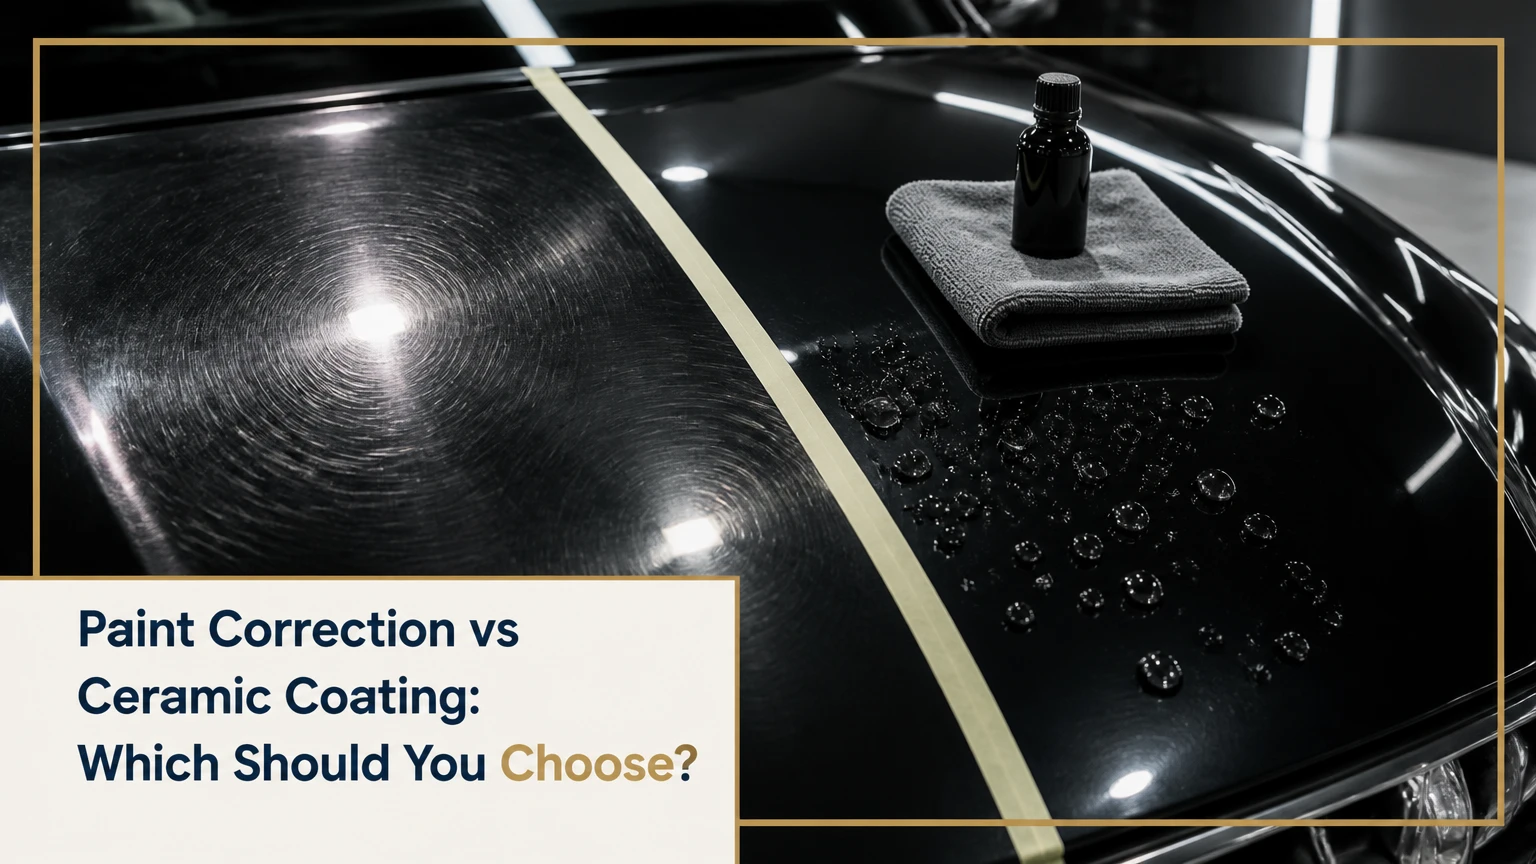
Paint correction removes or reduces visible paint defects by mechanically refining the clear coat, while ceramic coating adds a chemical-resistant, hydrophobic protective layer. Paint correction improves the finish; ceramic coating preserves that finish and simplifies washing. For most vehicles, the correct sequence is decontamination, paint correction, then ceramic coating.
Key Facts at a Glance
Paint correction removes defects; ceramic coating does not remove scratches or oxidation.
A ceramic coating should be applied only after the paint is clean, polished, and oil-free.
Paint correction permanently removes some clear coat, while coating adds a thin sacrificial film.
A one-step correction typically takes 6-12 hours; a professional coating commonly adds 4-8 hours.
Typical professional pricing is $400-$2,500 for correction and $500-$2,000 for coating.
Paint protection film is better than ceramic coating against stone chips and physical impact.
What Is the Difference Between Paint Correction and Ceramic Coating?
Paint correction is a restorative polishing process, and ceramic coating is a protective finishing process. Correction uses abrasive compounds, pads, and a machine polisher to level the uppermost paint surface; coating uses a liquid resin, commonly based on silica chemistry, that cures over the prepared surface.
The difference matters because the services solve opposite problems. A black vehicle with wash swirls needs optical refinement before protection can look uniform. A freshly corrected vehicle parked outdoors needs resistance to ultraviolet exposure, road film, bird droppings, and repeated washing.
Ceramic coating cannot turn a damaged finish into a flawless one. The coating may change gloss and water behavior, but scratches, etched spots, and sanding marks remain visible beneath it. Paint correction can improve gloss without adding meaningful long-term protection, so the newly refined clear coat remains vulnerable to future washing damage.
Master Comparison Table
| Criterion | Paint correction | Ceramic coating |
|---|---|---|
| Primary purpose | Reduce surface defects | Protect prepared paint |
| Main action | Abrasive clear-coat refinement | Chemical film formation |
| Existing scratches | Removes or softens suitable defects | Leaves existing defects in place |
| Clear-coat effect | Removes a measurable microscopic layer | Adds a thin protective layer |
| Typical service time | 6-40+ hours | 4-8 hours plus curing |
| Typical professional price | $400-$2,500+ | $500-$2,000+ |
| Typical service life | Permanent until new damage appears | About 1-9 years, product dependent |
| Best protection type | Visual correction | Chemical and maintenance protection |
How Does Paint Correction Work?
Paint correction uses controlled abrasion to level the clear coat around a defect until light reflects more evenly. A detailer begins with the least aggressive pad and polish combination that can achieve the requested improvement, because removing clear coat cannot be reversed through washing or waxing.
A typical process includes a pre-wash, contact wash, iron-removing chemical, clay treatment, masking, a test spot, machine polishing, and an inspection wipe. The test spot determines whether a finishing polish is sufficient or whether the panel requires compounding followed by refinement.
Clear-coat thickness varies by manufacturer, repaint history, panel location, and previous polishing. A typical factory clear coat may measure roughly 30-50 microns, but that range is not a safe universal allowance. Edges, ridges, and previously repaired panels can have substantially less material.
Professional inspection uses bright, color-corrected lighting and, when appropriate, a paint-thickness gauge. A gauge measures the entire paint stack, not clear coat alone, so readings identify risk rather than providing a precise removal limit.
Which Defects Can Paint Correction Handle?
Paint correction handles surface-level swirls, holograms, oxidation, light water etching, wash marring, and some random isolated scratches. It cannot safely remove every scratch, especially when damage penetrates the clear coat into the color layer, primer, or metal.
| Defect | Likely correction result | Main test or limitation |
|---|---|---|
| Light wash swirls | 60%-90% reduction with suitable polish | Requires controlled lighting |
| Rotary holograms | 90%-100% reduction with finishing polish | May need a softer pad |
| Mild oxidation | Strong gloss recovery | Faded single-stage paint needs testing |
| Bird-dropping etching | Often reduced substantially | Deep acid damage may remain |
| Fingernail-catching scratch | Partial improvement only | Full removal may create a thin spot |
| Stone chip | No true repair | Requires touch-up or refinishing |
| Orange peel | Limited improvement or wet sanding | Removes more material and increases risk |
The fingernail test is useful but not definitive. If a fingernail catches in a scratch, the defect may extend below the clear coat, and chasing complete disappearance can create a visible low spot or expose the color coat.
How Much Paint Correction Does a Car Need?
Most daily drivers need a one-step correction rather than maximum defect removal. The correct service level depends on lighting expectations, paint condition, remaining clear-coat thickness, vehicle value, and the owner’s willingness to accept some defects.
“Stage 1,” “Stage 2,” and “Stage 3” are industry shorthand, not standardized technical grades. One shop’s one-step service may remove more or fewer defects than another shop’s package, so ask for a test-spot photograph or a stated improvement target rather than relying on the stage label.
| Correction level | Typical process | Typical defect reduction | Typical time and price |
|---|---|---|---|
| One-step polish | Medium polish and foam or microfiber pad | 40%-70% | 6-12 hours, $400-$900 |
| Two-step correction | Compound, then finishing polish | 70%-90% | 12-24 hours, $800-$1,800 |
| Multi-step correction | Targeted sanding, compounding, refinement | 85%-95% in suitable areas | 20-40+ hours, $1,500-$2,500+ |
| Spot correction | Localized polish or sanding | Defect-specific | 1-4 hours, $100-$400 |
A high-gloss result does not require removing every mark. Experienced detailers often preserve paint by stopping when the remaining defects are deeper than the safe correction target, particularly on thin edges, aluminum panels, and older repaints.
How Does Ceramic Coating Protect Paint?
Ceramic coating bonds or cross-links with the prepared surface to create a thin, low-energy film that makes water and oily road contamination less likely to spread. Silica-based coatings commonly use SiO2-related chemistry, while some formulas use silicon carbide or modified resin systems.
Hydrophobic behavior improves rinsing and reduces the effort needed to remove loose dirt, but water beading is not the same as complete protection. A coating can resist many environmental contaminants and ultraviolet exposure while still suffering from mineral deposits, bird-dropping etching, scratches, and stone impacts.
Professional products and consumer products differ in formulation, solids content, application tolerance, warranty terms, and required curing conditions. A spray sealant marketed with ceramic language may last weeks or months, while a professionally installed coating may have a stated service life of several years under required maintenance.
Graphene additives do not automatically make a coating harder or longer lasting. Performance depends on the complete formulation, film behavior, preparation, curing, and maintenance. Ask for the product technical data sheet and warranty requirements instead of choosing solely from the word “graphene.”
What Ceramic Coating Does Not Protect Against
Ceramic coating is not paint protection film. A coating cannot reliably stop rock chips, shopping-cart impacts, key scratches, deep wash scratches, or parking-lot dents because its cured film is far thinner and less elastic than a urethane protection film.
Ceramic coating also does not eliminate water spots. When hard water dries on a coated panel, dissolved minerals can remain on the surface and create deposits that require an acidic maintenance cleaner or, in advanced cases, machine polishing.
A ceramic coating is a poor substitute for physical impact protection on a highway-driven vehicle. PPF on the hood, bumper, mirrors, and front fenders offers a better solution for stone-chip exposure, while ceramic coating can be added over PPF to improve cleaning.
Which Should Come First, Paint Correction or Ceramic Coating?
Paint correction should come first because ceramic coating preserves the surface underneath it. Applying a coating before polishing traps existing swirls, polishing residue, oxidation, and high spots beneath the cured film, creating extra removal work later.
What Happens Before Ceramic Coating?
Preparation starts with removing road film and bonded contamination, then refining the paint and confirming that no polishing oils remain. The final panel-wipe stage should leave a clean, residue-free surface that allows the coating to spread evenly and bond consistently.
A typical professional workflow is:
- Inspect the vehicle under direct and angled lighting.
- Wash wheels, tires, jambs, and bodywork with separate tools.
- Remove iron particles with a pH-appropriate iron remover.
- Remove bonded contamination with a clay media if testing confirms it is needed.
- Dry the vehicle without dragging contamination across the paint.
- Mask trim, textured plastic, badges, and vulnerable edges.
- Perform a test spot before selecting the correction system.
- Polish or compound the panels in overlapping passes.
- Remove polishing oils with a compatible panel-preparation product.
- Apply coating in small sections and level each section within its flash window.
A high-pH pre-wash can remove old wax and traffic film, but strong chemistry is not automatically better. Product instructions, paint condition, and wastewater controls determine the appropriate cleaner.
How Is Ceramic Coating Applied?
Ceramic coating is applied in small sections under controlled temperature, humidity, lighting, and airflow. The installer places a measured amount on an applicator, spreads it in cross-hatch passes, watches for the product’s flash behavior, then levels and performs a final buff before residue cures.
Flash timing varies significantly by formula and environment. A 30-second-to-3-minute window is common for some products, but the manufacturer’s technical instructions control because panel temperature, humidity, coat thickness, and ventilation can change the timing.
A coating application checklist includes:
- Clean, oil-free microfiber towels in sufficient quantity
- Dedicated coating applicator blocks or suede cloth
- Bright inspection lighting
- Temperature and humidity monitoring
- Product-specific panel preparation
- A dry, enclosed curing area
- Instructions for water exposure and maintenance
The installer should inspect every panel from multiple angles before leaving the vehicle to cure. High spots appear as darker, oily, or rainbow-like patches and become harder to remove as cross-linking progresses.
What Does a Coating High Spot Mean?
A coating high spot is excess uncured or partially cured product that was not leveled evenly. Early correction may require reactivating the area according to the product instructions and gently leveling it; a fully cured high spot may require machine polishing and reapplication.
Trapped moisture can produce cloudiness or uneven curing, especially when the vehicle is coated in high humidity or exposed to dew before the product permits water contact. A controlled indoor environment reduces, but does not eliminate, application risk.
Which Criterion Matters Most in the Comparison?
Paint correction wins for immediate visual improvement, while ceramic coating wins for chemical resistance, easier maintenance, and preservation of a corrected finish. Neither service wins every category because one removes defects and the other protects the resulting surface.
| Decision factor | Better choice | Why | Important condition |
|---|---|---|---|
| Existing swirls | Paint correction | Abrasion reduces visible marring | Deep defects may remain |
| Gloss and clarity | Paint correction first | Levels optical distortion | Requires safe paint removal |
| Water behavior | Ceramic coating | Lowers surface energy | Beading requires maintenance |
| Stone-chip resistance | PPF | Absorbs physical impact better | Higher cost and visible edges |
| Easy washing | Ceramic coating | Reduces contamination adhesion | Does not replace washing |
| Lowest initial cost | One-step correction or sealant | Fewer labor hours | Shorter protection life |
| Reversibility | Paint sealant | Easy to strip and renew | Lasts less than a coating |
| Long-term appearance | Correction plus coating | Restores and protects | Requires proper prep |
Paint Correction Versus Wax or Sealant
Wax and paint sealants add temporary protection without the preparation demands or expected longevity of a professional ceramic coating. A synthetic sealant commonly lasts several months, while a quality wax may last roughly 4-12 weeks depending on washing, climate, and product.
A sealant can be the better choice for a leased vehicle, a low-mileage seasonal car, or an owner who prefers to refresh protection twice yearly. Correction remains useful before either product because cleaner paint produces more uniform gloss and more predictable bonding.
Paint Correction Versus Paint Protection Film
Paint protection film provides superior impact resistance because its polyurethane layer is much thicker and more flexible than a ceramic coating. Ceramic coating provides better water behavior and easier cleaning, but it cannot absorb the energy of a gravel strike.
Many owners use both products in different locations. PPF protects high-impact front panels, while ceramic coating protects exposed paint and the film itself from contamination.
What Does Paint Correction and Ceramic Coating Cost?
Typical professional pricing ranges from $400-$2,500 or more for paint correction and $500-$2,000 or more for ceramic coating. Vehicle size, paint hardness, defect severity, repaint history, coating warranty, preparation quality, and regional labor rates create most of the price variation.
| Vehicle and service | Typical labor time | Typical professional price | Main cost driver |
|---|---|---|---|
| Compact, one-step correction | 6-10 hours | $400-$700 | Swirl severity |
| SUV, one-step correction | 8-14 hours | $600-$1,000 | Panel count and size |
| Compact, 3-year coating | 4-8 hours plus cure | $700-$1,300 | Product and prep |
| SUV, 5-year coating | 6-10 hours plus cure | $1,000-$2,000+ | Coating tier and labor |
| Two-step correction plus coating | 18-32 hours | $1,500-$3,500+ | Correction complexity |
A quote that combines coating and correction for an unusually low price may omit decontamination, paint inspection, curing space, or meaningful correction work. Ask whether the price includes wheels, glass, trim, interior drying, warranty registration, and post-cure inspection.
Paint correction is a labor expense with a permanent material trade-off. Ceramic coating is a protection expense with recurring maintenance requirements and a finite service life.
How Long Do the Services Last?
Paint correction remains effective until new scratches, oxidation, etching, or contamination damage appears. Ceramic coating commonly lasts 1-3 years for entry products, 3-5 years for many professional systems, and up to 7-9 years for selected products when the owner follows warranty maintenance.
Manufacturers’ durability claims are conditional, not guarantees of identical performance in every climate. Frequent automatic-brush washing, neglected water spots, strong detergents, uncovered outdoor parking, and abrasive drying can shorten useful life.
| Use pattern | Sensible service plan | Expected protection focus |
|---|---|---|
| Daily commuter, outdoor parking | One-step correction plus 1-3-year coating | Contamination and wash efficiency |
| Highway commuter | Correction plus coating and front PPF | Stone chips and road film |
| Collector, climate-controlled garage | Two-step correction plus 3-7-year coating | Clarity and preservation |
| Leased vehicle | Light polish plus sealant | Low commitment and easy renewal |
| Matte or satin finish | Manufacturer-approved coating only | Preserve factory sheen |
Which Owners Benefit Most From Each Option?
The best choice depends on the vehicle’s present condition and how the owner uses it. A scratched car benefits from correction first, while a clean newer car may need only light preparation before protection.
Daily Driver With Visible Swirls
Choose a one-step paint correction followed by a 1-3-year ceramic coating when the vehicle has moderate wash marring and the owner wants easier maintenance. This pairing usually delivers a visible improvement without pursuing risky perfection.
New Vehicle With Clean Paint
Choose an inspection, decontamination, light polish if needed, and ceramic coating. New vehicles can arrive with transport film residue, dealer-installed swirls, or water spots, so “new” does not prove that coating can be applied immediately.
Luxury or Collector Vehicle
Choose a measured two-step correction only where the paint condition and thickness justify it, then consider ceramic coating and PPF on impact zones. The correct goal is preserved original paint, not an arbitrary 100% defect-removal percentage.
Lease Vehicle
Choose a mild polish and a synthetic sealant unless the lease term and resale benefit justify a coating. Permanent clear-coat removal has little value if the vehicle will be returned soon and its paint already meets inspection standards.
DIY Beginner
Use a dual-action polisher, a mild one-step polish, and a user-friendly spray coating or sealant. Avoid rotary polishing, aggressive wet sanding, sharp body lines, and multi-year professional coatings until paint inspection and leveling technique are reliable.
What Are the Most Common Risks and Mistakes?
The largest correction risk is removing too much clear coat in pursuit of a defect that extends below the safe polishing depth. The largest coating risk is applying product over residue or failing to level it before curing.
- Burning through an edge: Keep the pad moving, reduce pressure near ridges, and tape vulnerable edges. A burn-through usually requires refinishing.
- Chasing a fingernail-catching scratch: Improve its appearance rather than removing the entire defect when depth is uncertain.
- Leaving compound haze: Follow aggressive correction with a finer polish and inspect under direct lighting.
- Applying coating over oils: Use the product-approved panel preparation step and verify a uniform wipe.
- Missing high spots: Work in smaller sections and use inspection lights before the coating hardens.
- Washing too early: Follow the product’s water-exposure and cure schedule, which commonly requires 12-24 hours of dryness.
One practitioner rule matters more than stage labels: always choose the least aggressive process that meets the owner’s visual target. More correction is not automatically more professional.
Another counterintuitive fact is that a coating can make neglected paint spotting more obvious. High water contact angles concentrate minerals into smaller, more visible deposits when the vehicle dries without a final rinse or prompt towel drying.
A third practical rule is to judge a coating by maintenance behavior after preparation, not by water beads during its first week. Beading can persist while contamination resistance, film uniformity, or actual durability has declined.
How Should You Maintain the Finished Paint?
Maintain coated paint with pH-balanced shampoo, clean microfiber media, and prompt removal of bird droppings, insects, and mineral deposits. Avoid automatic brush tunnels because friction and trapped grit can reintroduce the same marring that paint correction removed.
Use a two-bucket or controlled rinse method, wash from the cleanest upper panels toward lower panels, and dry with low-friction towels or filtered air. Do not allow wash water to bake onto warm panels in direct sun.
| Maintenance task | Typical interval | Suitable approach | Avoid |
|---|---|---|---|
| Gentle exterior wash | Every 1-3 weeks | pH-balanced shampoo | Brush tunnel |
| Coating inspection | Every 3-6 months | Check behavior and deposits | Assuming beads prove health |
| Iron decontamination | Every 6-12 months | Product-approved remover | Aggressive dry scrubbing |
| Bird-dropping removal | As soon as practical | Soak and lift gently | Wiping dry residue |
| Manufacturer booster | 6-12 months if required | Approved maintenance product | Unverified solvent products |
A coating does not make a vehicle maintenance-free. It makes appropriate maintenance more efficient and can reduce the frequency with which heavy contamination bonds to the surface.
Frequently Asked Questions
Does ceramic coating hide swirl marks?
Ceramic coating does not reliably hide or remove swirl marks. Some products alter gloss enough to make very fine defects less noticeable, but the defects remain in the paint beneath the film. For a clean appearance, decontaminate and polish the vehicle before coating application.
Can I apply ceramic coating without paint correction?
You can apply ceramic coating without a full correction when inspection shows clean paint or when the owner accepts existing defects. At minimum, wash, chemically and mechanically decontaminate as needed, remove residue, and perform a light polish if contamination or transport marks interfere with a uniform bond.
Is paint correction bad for factory paint?
Paint correction is not inherently harmful when a trained installer uses a measured, least-aggressive process. The service removes some clear coat, so repeated aggressive polishing, thin edges, previous repaints, and deep-scratch removal create risk. Paint preservation should take priority over complete defect removal.
Is ceramic coating worth it on a black car?
Ceramic coating can be worthwhile on a black car because dark paint reveals water marks and wash marring quickly, while improved cleaning can reduce future friction damage. Black paint still requires careful washing, and coating cannot prevent scratches caused by dirty towels, brushes, or automatic car washes.
Should I choose ceramic coating or PPF?
Choose PPF for stone-chip and impact protection, ceramic coating for chemical resistance and easier cleaning, or both when budget permits. PPF is most valuable on the front bumper, hood, mirrors, and front fenders; ceramic coating can protect the remaining paint and the PPF surface.
Can a ceramic coating be removed?
A fully cured ceramic coating is generally removed by machine polishing rather than ordinary shampoo or solvent. Removal may also eliminate some paint imperfections and requires care around edges. This reversibility limitation makes accurate preparation and a test application important before coating an entire vehicle.
The Bottom Line
Paint correction vs ceramic coating is not a choice between two interchangeable services. Paint correction restores the appearance by reducing suitable defects, while ceramic coating protects the corrected surface against contamination, ultraviolet exposure, and washing-related wear.
For most daily drivers, the strongest value is a safe one-step correction followed by a properly installed 1-3-year coating. Choose more aggressive correction only when the paint, budget, and visual expectations justify clear-coat removal, and choose PPF when physical impact protection matters most.


