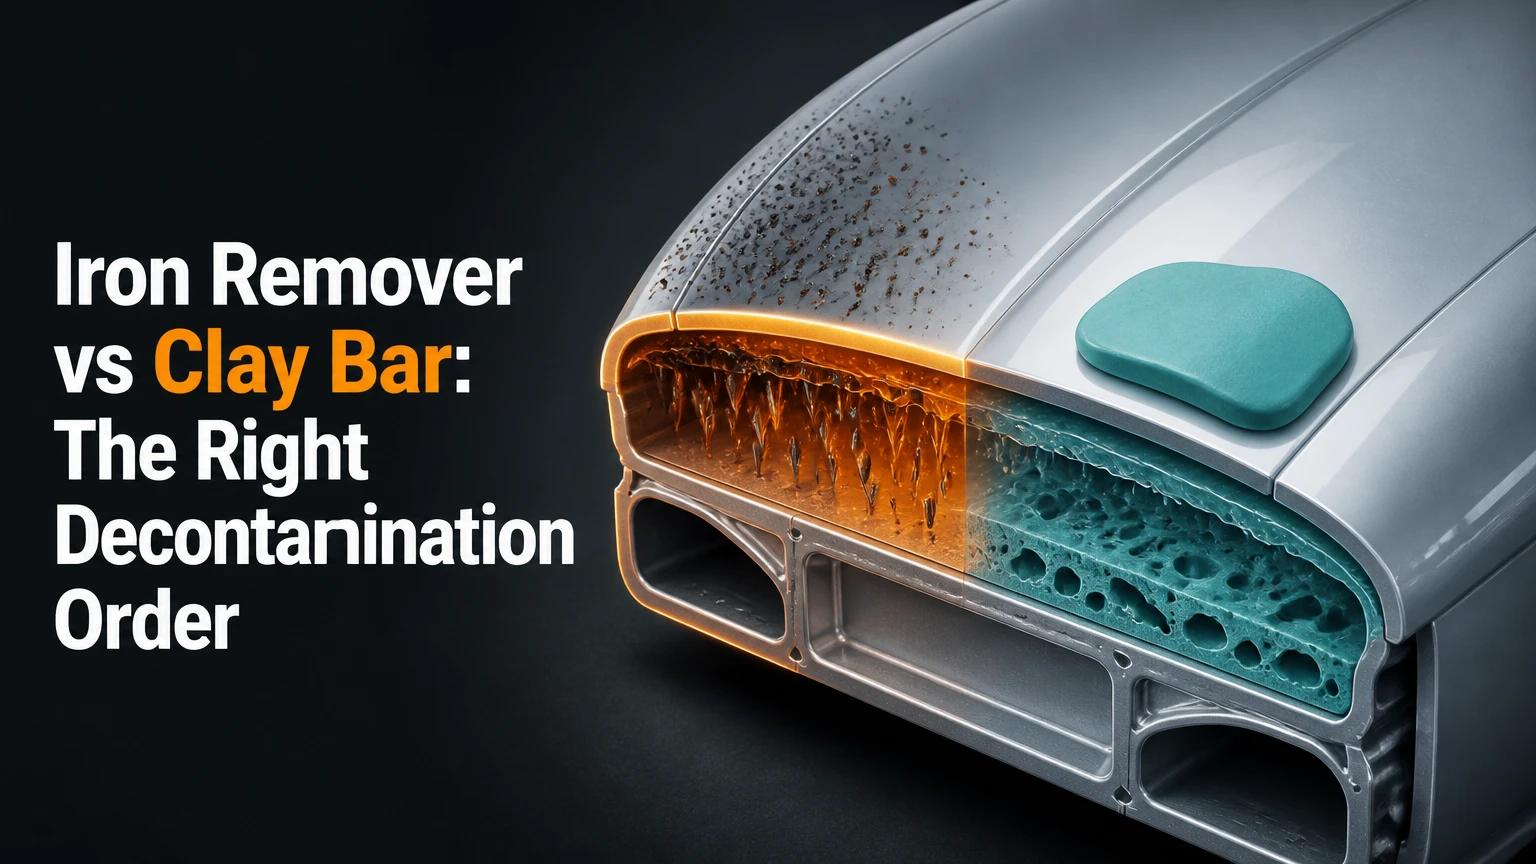
An iron remover chemically reacts with ferrous particles, while a clay bar mechanically removes bonded material from the paint surface. For the most complete decontamination, use an iron remover first, rinse it thoroughly, then clay only where the paint still feels rough. Neither product replaces the other in every situation.
Key Facts at a Glance
- Iron remover targets ferrous fallout from brake dust, rail dust, and industrial emissions.
- Clay removes bonded contaminants that remain attached after washing and chemical treatment.
- Iron remover typically dwells for 2-5 minutes and must not dry on the panel.
- A clay bar or clay mitt can create micro-marring, especially on soft paint or with heavy pressure.
- Chemical decontamination usually takes 10-20 minutes for a vehicle; claying commonly takes 30-60 minutes.
- The safest complete sequence is wash, iron remover, rinse, clay if needed, then inspect and protect.
Which Comes First, Iron Remover or Clay Bar?
Iron remover comes first because chemical treatment loosens or dissolves ferrous contamination before mechanical contact occurs. Clay then removes the remaining bonded residue, such as overspray, tar traces, sap film, and mineral deposits. Using clay first can increase drag and marring when iron particles remain embedded in the contamination layer.
A practical detailer does not automatically clay every panel. After rinsing the iron remover, wash or dry a small test area and feel the paint through a thin plastic bag. If the surface feels smooth, stop there. Mechanical decontamination adds risk and labor, so the correct workflow uses clay only where chemical treatment and washing have not produced a clean surface.
The sequence changes slightly for a routine maintenance wash. A lightly contaminated daily driver may need neither product, while a vehicle receiving paint correction or ceramic coating usually needs both chemical and mechanical inspection.
How Do Iron Remover and Clay Work?
Iron remover uses a chemical reaction to alter ferrous contamination so water can carry it away. Clay uses controlled friction and a lubricating film to grab contamination protruding from the paint surface. One method is largely touchless; the other requires direct contact and therefore has a higher chance of marring.
How Does an Iron Remover Work?
Automotive iron removers commonly use thioglycolate-based chemistry, often involving ammonium or sodium thioglycolate, although formulas differ by manufacturer. The active chemistry reacts with iron-containing particles and produces a soluble or more easily rinsed compound. The purple or red “bleeding” color indicates that the product is reacting with ferrous material.
Color intensity does not quantify contamination. A strong reaction can occur on a heavily contaminated wheel, while a faint reaction may still represent useful treatment on clean-looking paint. Product instructions control dwell time, dilution, agitation, and compatible surfaces.
Iron fallout often comes from brake components, railway lines, fabrication facilities, and industrial traffic. Some particles lodge into microscopic surface irregularities, but they are not literally roots growing beneath the clear coat. Iron remover addresses the particle chemically; it does not extract corrosion from deep paint failure or repair rust beneath damaged coating.
How Does a Clay Bar Work?
A traditional clay bar contains a tacky elastomer or resin matrix that captures particles when it moves across well-lubricated paint. A synthetic clay mitt, towel, or pad uses a rubberized polymer surface to perform a similar mechanical task. The tool does not dissolve contamination; it shears or transfers bonded material from the surface.
Clay removes material that remains attached after washing, including paint overspray, industrial film, tree sap residue, tar traces, and some mineral deposits. Clay can also remove residual iron contamination, but it does so by friction rather than chemical conversion. That distinction explains why claying can mark paint when an iron remover would have reduced the contamination without contact.
The “roughness” felt by hand is not a reliable identification method. A contaminated panel may feel rough because of iron, tar, overspray, or mineral deposits, and the hand cannot identify the composition accurately. Use a chemical test, visual inspection, and a small clay test section instead.
Iron Remover vs Clay Bar: Which Wins?
Neither product wins across every criterion. Iron remover is the better first choice for suspected brake dust or rail dust, while clay is the better finishing method for non-ferrous bonded contamination that remains after washing. For coating preparation, the combined process usually produces the most consistent surface.
| Decision criterion | Iron remover | Traditional clay bar | Synthetic clay mitt or towel |
|---|---|---|---|
| Main action | Chemical reaction | Mechanical shearing | Mechanical shearing |
| Primary target | Ferrous fallout | Mixed bonded residue | Mixed bonded residue |
| Typical vehicle time | 10-20 minutes | 30-60 minutes | 20-45 minutes |
| Typical product cost | $15-$35 per 500 ml | $15-$40 per kit | $25-$50 per tool |
| Paint contact | Optional light agitation | Continuous contact | Continuous contact |
| Marring likelihood | Low when used correctly | Moderate, especially aggressive grades | Low to moderate |
| Wheel access | Excellent for spokes and barrels | Poor in narrow cavities | Poor in narrow cavities |
| Follow-up | Rinse and dry | Inspect, possibly polish | Inspect, possibly polish |
What Does Each Product Remove?
Iron remover is specialized for ferrous particles. Clay is broader but less selective, because its mechanical surface can pick up many contaminants that remain bonded to the paint. Neither method is a complete substitute for dedicated tar remover, adhesive remover, bug remover, or a water-spot treatment.
| Contaminant | Iron remover result | Clay result | More suitable first choice |
|---|---|---|---|
| Brake dust particles | Reacts and loosens | Removes by friction | Iron remover |
| Rail dust | Reacts with ferrous content | Removes residual particles | Iron remover |
| Paint overspray | Little direct effect | Mechanically removes | Clay |
| Tree sap film | Limited effect | May remove dried residue | Tar or sap remover |
| Road tar | Little direct effect | Can drag or smear tar | Tar remover |
| Mineral water spots | Usually ineffective | Usually incomplete | Mineral deposit remover |
| Embedded bug residue | Limited effect | Can remove remaining film | Bug remover, then clay |
| Fine industrial film | Partial effect | Removes bonded residue | Iron remover, then test clay |
Tar deserves special attention. A clay bar can pull at soft asphalt contamination, but the sticky material may spread across the panel and increase friction. A dedicated citrus or solvent-based tar remover, used according to its label, generally reduces the amount of mechanical work.
Which Is Safer for Clear Coat?
Iron remover is usually safer for clear coat because it can work without rubbing, but chemical safety depends on surface compatibility, concentration, temperature, and whether the product dries. Clay has a greater marring risk because abrasive particles can sit between the tool and paint during movement.
Clear coat hardness varies by manufacturer, model year, repair history, and panel. Dark colors reveal haze more readily than white or silver paint, but light paint is not immune to scratches. A fine-grade clay used with generous lubrication and light pressure can be safe, while an aggressive clay used dry can leave visible marks within seconds.
A synthetic clay tool is easier to clean after a drop, but “rinsable” does not mean scratch-proof. If grit remains in the rubberized face, the next pass can create linear defects. Rinse, inspect, and test the tool before returning it to the paint.
Which Iron Remover Type Fits the Job?
Liquid spray is the most versatile format for exposed paint and wheels, gel formulas are useful on vertical surfaces, and iron-removing shampoos suit mild maintenance cleaning. Product labels differ, so the listed format does not guarantee equal strength or equal dwell time.
| Formula type | Typical use | Typical dwell | Limitation |
|---|---|---|---|
| Liquid spray | Full paint and wheel treatment | 2-5 minutes | Dries faster on hot panels |
| Gel spray | Vertical doors, wheels, lower panels | 3-7 minutes | Needs thorough rinsing from seams |
| Iron-removing shampoo | Maintenance wash | 1-3 minutes during wash | Usually milder than dedicated spray |
| Concentrate | Professional or high-volume work | Label-defined | Incorrect dilution can damage surfaces |
Examples of recognized product categories include CarPro IronX, Gtechniq W6, Bilt Hamber Korrosol, and iron-removing shampoos such as CarPro IronX Snow Soap. Examples are not interchangeable instructions. Read the label for dilution, painted-plastic compatibility, aluminum restrictions, and maximum dwell time.
Can You Use Iron Remover on Wheels?
Iron remover is particularly useful on painted or clear-coated wheels because brake dust can collect in spokes, lug recesses, and barrel areas that clay cannot reach efficiently. Agitation with a wheel-safe brush may help, but the chemical should remain wet and must be rinsed from calipers, badges, seams, and nearby trim.
Uncoated or damaged aluminum requires caution. Some products can stain sensitive metal, anodized finishes, polished surfaces, or deteriorated clear coat. A hidden test area is mandatory when the wheel finish is unknown, and a neutral wheel cleaner may be a safer initial choice.
Which Clay Format Should You Use?
A fine traditional clay bar offers the most tactile control, while a synthetic mitt or towel processes large panels faster and survives an accidental drop after thorough cleaning. Medium or aggressive clay is appropriate mainly when polishing will follow, because heavier mechanical decontamination can leave haze or marring.
| Clay format | Typical coverage | Drop response | Best use |
|---|---|---|---|
| Fine traditional bar, 100 g | 2-4 vehicles | Discard after ground contact | Delicate paint and spot treatment |
| Medium traditional bar, 100 g | 1-3 vehicles | Discard after ground contact | Heavy contamination before polishing |
| Synthetic mitt | 20-50 vehicles, condition-dependent | Rinse and inspect | Fast whole-vehicle work |
| Synthetic towel | 15-40 vehicles, condition-dependent | Rinse and inspect | Large flat panels |
| Machine clay pad | 1-3 vehicles per pad, condition-dependent | Clean immediately | Professional correction workflows |
The lifespan figures are typical practitioner ranges, not guarantees. A single dirty lower rocker can contaminate a clay face quickly, and a tool used on neglected wheels should not return to delicate paint.
How Should You Apply Iron Remover?
Apply iron remover after washing, on cool paint in shade, one section at a time. Use enough product to wet the panel evenly, allow the label-specified 2-5 minute dwell, prevent drying, and rinse with high pressure or a strong water stream.
- Wash and rinse the vehicle. Remove loose grit before applying chemical decontamination.
Checkpoint: Water runs over a visibly clean panel without loose mud.
Common mistake: Spraying iron remover over heavy road dirt, which hides contamination and wastes product. - Cool the surface. Work below direct sunlight when possible, especially on dark paint or hot wheels.
Checkpoint: The panel feels cool to the back of your hand.
Common mistake: Starting on a hot hood, where the product can dry before reacting. - Apply one panel at a time. A typical sedan consumes about 150-250 ml, depending on spray pattern and contamination.
Checkpoint: The surface has an even wet film, not isolated droplets.
Common mistake: Stretching a small amount so far that dry areas receive no treatment. - Allow controlled dwell. Wait 2-5 minutes, or follow the product label when it specifies a different interval.
Checkpoint: Purple or red reaction spots appear where ferrous particles are present.
Common mistake: Treating the color as a timer and allowing the product to dry. - Agitate only when directed. Use a clean, damp microfiber mitt for stubborn contamination, with almost no pressure.
Checkpoint: The liquid remains wet while the panel receives light contact.
Common mistake: Scrubbing aggressively, which defeats the low-contact advantage. - Rinse completely. Flush panel gaps, emblems, wheel spokes, tire edges, and lower trim.
Checkpoint: No chemical film, odor, or colored residue remains.
Common mistake: Wiping a partially rinsed panel dry, which can spread residue.
How Should You Clay a Vehicle Without Marring?
Clay a vehicle only after washing and, when needed, iron removal. Divide the panel into sections of about 0.5-1 square metre, flood each section with lubricant, use light pressure, and stop when the tool glides smoothly rather than continuing for a cosmetic sense of perfection.
- Choose a fine clay grade first. Reserve medium clay for severe contamination followed by polishing.
- Prepare the tool. Knead a traditional bar into a flat patty, or inspect a synthetic face for embedded grit.
- Lubricate generously. Use dedicated clay lubricant or a compatible slick wash solution. Dry spots create drag.
- Move in straight, overlapping passes. Use fingertip pressure only. Curved panels need shorter passes and more lubricant.
- Check progress by touch. A thin plastic bag over the hand reveals remaining roughness better than bare fingertips.
- Fold or clean frequently. Fold a traditional bar to expose a clean face; rinse a synthetic tool whenever it picks up visible dirt.
- Wipe and inspect. A clean microfiber towel should remove residue without smearing. Check dark paint under strong lighting.
A dropped traditional clay bar must be discarded. Ground grit can embed in the tacky matrix even when the bar looks clean. A dropped synthetic tool may be recoverable only after thorough rinsing and inspection, followed by a test on an inconspicuous area.
What Does Each Method Cost and How Long Does It Take?
Typical consumer costs range from $15-$35 for 500 ml of iron remover and $15-$50 for a clay product or synthetic tool. Iron treatment alone often takes 10-20 minutes for a sedan, while clay adds roughly 20-60 minutes depending on contamination and panel size.
| Project scope | Iron remover quantity | Clay lubricant | Typical labor time |
|---|---|---|---|
| Small hatchback | 100-180 ml | 350-600 ml | 15-45 minutes |
| Average sedan | 150-250 ml | 475-950 ml | 20-70 minutes |
| Large SUV | 250-400 ml | 700-1,200 ml | 30-90 minutes |
| Wheels only | 50-150 ml | 0-150 ml | 10-30 minutes |
The total price rises when decontamination precedes polishing or coating installation. Add microfiber towels, panel preparation, polish, and protection to the project budget. A cheap clay bar can become expensive if it causes marring that requires machine correction.
Which Should You Choose?
Choose Iron Remover for Brake Dust and Fast Maintenance
Choose an iron remover when the vehicle has visible purple reaction points, frequent brake dust, rail exposure, or wheel contamination in narrow cavities. The chemical spray gives the broadest benefit with minimal contact and is often sufficient for a maintenance wash when the paint feels smooth afterward.
Choose Clay for Overspray and Remaining Roughness
Choose clay when the paint still feels rough after washing and chemical treatment, especially when overspray, industrial film, or sap residue is present. Use the mildest grade that works, because clay removes contamination through contact and can create defects even with proper lubrication.
Use Both Before Paint Correction
Use both methods before machine polishing when the vehicle has mixed contamination. Iron remover reduces ferrous particles first, and clay addresses residue that remains. The polishing stage can correct light clay marring, but polishing should not be treated as permission to use excessive pressure or an unnecessarily aggressive tool.
Use a Minimal Workflow on Protected Paint
A ceramic coating, sealant, or wax does not make contamination impossible. Start with a wash and inspect the surface before using chemicals or clay. Some iron removers can reduce the apparent water behavior of a coating temporarily, while aggressive clay can thin or disturb sacrificial protection.
What Can Go Wrong?
Iron Remover Dries on the Paint
Dried iron remover can leave residue or staining, especially on hot surfaces, porous trim, and neglected finishes. Re-wet the area with fresh product or clean water, allow a short controlled reaction, and rinse thoroughly rather than rubbing a dry chemical film.
The Paint Feels Rough After Iron Removal
Roughness after iron removal means other bonded contaminants remain, not that the iron remover failed. Test a small lubricated section with fine clay, and use a dedicated tar or mineral-deposit remover when the residue does not respond to clay.
Clay Leaves Haze or Scratches
Clay marring usually results from embedded grit, insufficient lubricant, excessive pressure, an aggressive grade, or soft paint. Stop immediately, wash the panel, inspect under direct lighting, and plan a test polish before repeating decontamination across the vehicle.
Purple Color Appears on Clean-Looking Paint
A clean-looking panel can still contain microscopic ferrous particles from traffic or industrial fallout. The reaction confirms contact with iron-containing contamination, but the absence of purple color does not prove that every other contaminant has been removed.
The Product Affects Trim or Metal
Unsealed aluminum, anodized parts, faded plastic, and damaged paint can react differently from modern clear-coated panels. Test an inconspicuous spot, keep the surface wet, follow the label, and rinse immediately when discoloration or unusual residue appears.
Expert Rules for Better Results
Rule one: decontaminate by need, not by calendar. A car garaged away from rail lines may need chemical iron treatment once or twice yearly, while a vehicle parked beside a rail corridor can require more frequent inspection. Touch and visual testing should determine the service.
Rule two: reduce contamination before increasing clay aggressiveness. A medium clay bar may save ten minutes on neglected paint, but it can create an hour of polishing work. Chemical treatment, tar removal, and washing usually lower the mechanical force required.
Rule three: a smooth panel is not automatically correction-ready. Decontamination removes bonded material, but it does not remove oxidation, scratches, etching, or swirl marks. Paint correction remains a separate abrasive process that changes the clear coat.
FAQ
Can an Iron Remover Remove Tree Sap?
Iron remover is not designed to dissolve tree sap. Sap can soften or smear under chemical fallout remover, but a dedicated sap or tar remover is more appropriate, followed by washing and a small clay test for remaining bonded residue.
Can a Clay Bar Replace Iron Remover?
A clay bar can remove some iron particles mechanically, but it cannot provide the low-contact chemical treatment that makes iron remover useful on wheels and widespread fallout. Clay may also drag hard particles across paint, so it is a substitute only for light, localized contamination when marring risk is acceptable.
Should You Use Iron Remover on Glass?
Many automotive iron removers can be used on exterior glass, but compatibility depends on the product label and surrounding trim. Glass contamination may also require a dedicated glass polish or clay treatment, and the surface must remain wet until the chemical is fully rinsed.
How Often Should You Clay a Car?
Clay a car when washing and chemical treatment leave measurable roughness, not automatically at every wash. Many normally driven vehicles need mechanical decontamination once or twice yearly, while freshly painted, industrially exposed, or heavily neglected vehicles may require it sooner.
Is a Clay Mitt Better Than a Traditional Clay Bar?
A clay mitt is faster and easier to rinse after accidental ground contact, while a traditional clay bar offers better control for small areas and delicate paint. A fine traditional bar is the safer starting choice for a first-time user working without a planned polishing step.
Conclusion: The Practical Answer
Iron remover vs clay bar is not a choice between identical products. Iron remover chemically targets ferrous fallout with low contact, while a clay bar or synthetic clay tool mechanically removes bonded contamination that remains above the paint. Use iron remover first, rinse it fully, and clay only the sections that still feel rough. That sequence delivers cleaner paint with less unnecessary friction and lower marring risk.


