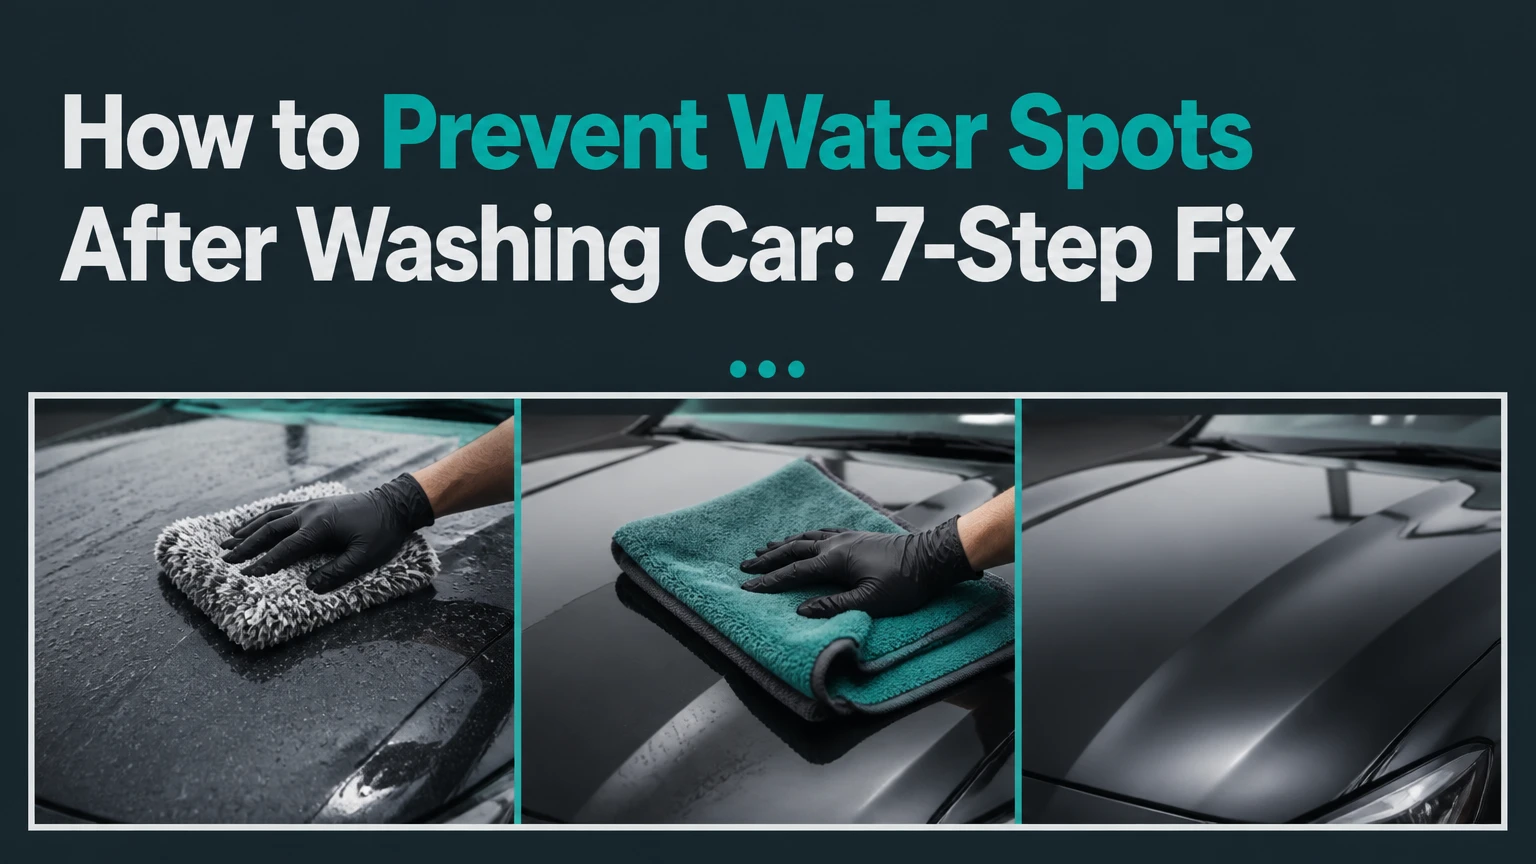
Water spots after washing a car are prevented by keeping the paint cool, washing small sections, rinsing with low-mineral water when possible, and drying every panel before evaporation. The most important factor is speed between the final rinse and drying: mineral-rich water becomes more concentrated as droplets shrink, especially on hot horizontal surfaces.
Key Facts at a Glance
- Calcium and magnesium are the principal hardness minerals that remain after water evaporates.
- A gentle hose sheeting rinse removes more water than a spray nozzle, reducing towel work.
- Deionized water with a near-zero TDS reading can dry without visible mineral deposits.
- Ceramic coatings reduce adhesion and cleaning effort, but they do not make paint immune to water spots.
- Fresh surface deposits usually respond to a dedicated acidic water-spot remover; etched spots require paint correction.
- A dry microfiber towel should absorb water without being dragged repeatedly across contaminated paint.
Why Do Water Spots Form on Car Paint?
Water spots form when dissolved minerals remain on the clear coat after a droplet evaporates. Tap water, well water, and some reclaimed car-wash water can contain calcium, magnesium, silica, sodium, and other dissolved solids; the water vaporizes, but those solids remain as rings, specks, or cloudy patches.
Hardness specifically describes calcium and magnesium concentration. TDS, or total dissolved solids, measures a broader group of dissolved substances, so a TDS meter is useful for spotting risk but cannot identify every mineral present. The U.S. Geological Survey describes hard water as water containing substantial dissolved calcium and magnesium, a useful distinction when diagnosing household rinse water.
Heat accelerates evaporation. A droplet on a black hood in direct sun shrinks rapidly, concentrating minerals at its edge. If the residue remains, alkaline deposits and contaminants can bond to or chemically attack the clear coat. The result changes from removable residue to an indentation in the paint surface.
Water chemistry is only one part of the problem. A car washed in shade with moderately hard water can avoid spots if the vehicle is dried promptly, while a car rinsed with relatively clean water can spot when droplets sit on hot paint for several minutes.
How Can You Identify the Type of Spot?
Water-spot severity is identified by surface feel, appearance, and whether cleaning removes the mark. A deposit sitting above the clear coat feels rough and may disappear after safe chemical treatment, while an etched spot remains visible after the surface is clean and may require polishing.
| Spot condition | Visible or tactile sign | First treatment | Escalation point |
|---|---|---|---|
| Fresh mineral deposit | Rough ring, white dot, no crater | Rewash and use pH-appropriate spot remover | Escalate if residue remains after two applications |
| Bonded deposit | Hazy circle, gritty edge, visible after normal wash | Acidic water-spot remover on cool paint | Test polishing if chemical treatment fails |
| Light etching | Clean but dull crater, visible from one angle | Fine polish on a test area | Professional correction if depth is uncertain |
| Severe etching | Sharp crater, discoloration, clear-coat failure | Paint correction assessment | Refinish panel if clear coat is compromised |
Do not use a fingernail as a hardness test. Pressing into a contaminated panel can drag abrasive mineral particles across the clear coat and create scratches. Clean a small test area first, inspect it under bright indirect light, and only then decide whether the defect is above or below the surface.
What Should You Prepare Before Washing?
Prepare the wash area, water, towels, and drying method before opening the hose. A complete home setup typically costs $35-$180, depending on whether you already own buckets and whether you add a filter, blower, or drying aid.
Before You Start
| Requirement | Typical specification | Why it matters |
|---|---|---|
| Washing location | Shade, 10-27°C panel temperature | Slows evaporation and reduces chemical drying |
| Wash solution | 30-60 mL car shampoo in 15-20 L water | Provides lubrication without household detergent |
| Wash media | 1 clean microfiber or wool mitt | Holds dirt away from paint |
| Rinse system | 2 buckets, hose, or pressure washer | Separates soap from rinse water |
| Drying towels | 2-4 twisted-loop towels, 800-1,200 GSM | Removes residual water with fewer passes |
| Drying aid | 5-15 mL per panel, product dependent | Adds lubrication and reduces water retention |
| Optional water test | TDS meter, approximately $10-$25 | Indicates dissolved-solids risk |
Use separate towels for paint, glass, wheels, and door jambs. Wheel dust contains metallic and abrasive particles that should never migrate onto the painted bodywork. Keep at least one unused dry towel available for the final inspection.
A pressure washer can improve cleaning when used with a wide fan pattern, but pressure does not solve mineral content. A standard hose can produce an equally spot-free result when the operator uses a sheeting rinse and dries promptly.
Step 1: Choose Shade and Cool the Panels
Park the car in complete shade and wait until the hood, roof, and glass feel cool before applying shampoo. A shaded wash area reduces evaporation, but shade alone is insufficient if the panel still retains heat from earlier sunlight.
Avoid washing during the hottest part of the day. A practical target is a dry, calm period with at least 30 minutes available after the final rinse. Wind increases evaporation and can deposit dust on wet paint, so a breezy driveway may be worse than a cooler enclosed area.
Check sprinklers, roof runoff, and nearby trees before starting. Sprinkler water often contains concentrated minerals, while bird droppings and tree sap can react with water and leave marks more severe than ordinary hardness spots.
You will know this step worked when: water remains wet on the first panel for several minutes instead of disappearing in seconds.
Common mistake: beginning with a warm hood because the air feels cool. Surface temperature matters more than air temperature.
Step 2: Remove Loose Dirt Before Contact Washing
Rinse the entire vehicle from top to bottom, concentrating on wheel arches, lower doors, bumpers, and the rear hatch. The pre-rinse should remove loose grit before a mitt touches the paint.
A foam pre-wash can loosen traffic film, but dwell time must follow the product label. Do not allow pre-wash chemicals to dry. If the vehicle is heavily soiled, repeat the rinse rather than increasing mitt pressure.
Use a dedicated wheel cleaner and wheel mitt before washing body panels, or wash wheels last with separate equipment. Brake dust can contain iron particles, and embedded grit increases the risk of circular scratches during drying.
You will know this step worked when: the rinse removes loose dirt and the paint no longer carries visible sand or mud in the lower sections.
Common mistake: using one bucket and one mitt for wheels and paint. This transfers the most abrasive contamination to the most visible surfaces.
Step 3: Wash Small Sections With Lubrication
Wash one section at a time, starting at the roof and glass before moving to the hood, upper sides, lower sides, and rear surfaces. Use straight, light passes with a lubricated mitt, then rinse the mitt in a separate bucket after each section.
A useful section is approximately one-half of a roof, one hood, one door, or one quarter of a large SUV. Smaller sections are safer in warm weather because soap and rinse water have less time to dry.
Do not scrub a spot aggressively. A mineral mark can be harder than the clear coat, and pressure may create marring without removing the deposit. Rinse the panel immediately if the shampoo begins to dry or forms a tacky film.
| Vehicle area | Suggested section size | Maximum wet-work interval |
|---|---|---|
| Roof | Half the roof | 2-4 minutes |
| Hood | One complete hood | 2-3 minutes |
| Side doors | One door at a time | 1-3 minutes |
| Large SUV side | One upper or lower section | 1-2 minutes |
| Rear hatch | Half the hatch | 1-2 minutes |
You will know this step worked when: the mitt glides with light pressure and the shampoo remains uniformly wet until rinsing.
Common mistake: washing the entire car before rinsing. Dried shampoo can leave a film that resembles mineral spotting.
Step 4: Keep Completed Panels Wet
Rinse each completed section or mist it with clean water while washing the next section. Keeping the vehicle wet prevents isolated droplets from drying before the final rinse, especially on horizontal panels.
Use a clean hose stream rather than a fine mist when possible. Fine spray creates many small droplets with a high surface-area-to-volume ratio, so those droplets evaporate quickly and leave concentrated residue.
If the car becomes partially dry, stop washing and rinse the whole vehicle. Do not continue adding soap to a panel that already contains drying mineral water. The correction is more clean water and faster drying, not more pressure.
You will know this step worked when: no panel develops dry edges, white rings, or patchy shampoo residue during the wash.
Common mistake: assuming a humid day eliminates spotting. Humidity slows evaporation but does not remove dissolved minerals from rinse water.
Step 5: Use a Sheeting Rinse
Remove the hose nozzle and let a low-pressure stream flow across the roof, glass, hood, and upper panels from top to bottom. A sheeting rinse causes water to join into larger streams, carrying much of the remaining water off the vehicle before towel drying.
Start at the highest surface and work downward. Do not blast the panel with a narrow jet, because a jet breaks water into droplets and leaves more isolated beads behind. A pressure washer can perform the same job only when its spray is broad and controlled.
Sheeting does not remove minerals. It reduces the number of droplets that can evaporate, which lowers drying time and towel contact. The remaining film still needs to be removed, especially on mirrors, trim, emblems, door handles, and panel gaps.
You will know this step worked when: water leaves the roof and hood in broad streams, with only scattered beads remaining.
Common mistake: treating beading as proof of cleanliness. A hydrophobic surface can retain mineral-rich beads that later create clearly defined spots.
Step 6: Dry Immediately With a Safe Method
Dry the car immediately after the final rinse, beginning with glass and the highest panels. Use a clean, absorbent twisted-loop microfiber towel, lay it flat, and pull it gently or blot it with minimal pressure.
A typical large drying towel measures about 60 x 90 cm and weighs 800-1,200 GSM. One towel may dry a compact car if the sheeting rinse is effective, but two or more towels are safer because a saturated towel loses absorption and requires extra passes.
Spray a compatible drying aid onto the wet panel or towel according to the label. Drying aids improve lubrication and water movement, but excessive product can leave a film that looks like spotting. Product compatibility matters on matte paint, vinyl wraps, ceramic coatings, and freshly applied sealants.
A blower is useful for mirrors, badges, grilles, roof rails, seams, and door jambs. Filtered or deionized air reduces the chance of blowing dust onto wet paint, although ordinary clean compressed air can work when its moisture separator is maintained.
You will know this step worked when: the panel is visually dry and shows no beads around trim, emblems, fuel doors, or mirrors.
Common mistake: rubbing a dry towel over a dry-looking panel that still contains grit. Rinse again if contamination appears during drying.
Step 7: Inspect Jambs, Trim, and Hidden Water
Open the doors, hatch, trunk, and fuel door, then dry the jambs and seals before moving the car. Water trapped behind mirrors, handles, badges, roof rails, and weather stripping often escapes during the first drive and creates fresh spots on otherwise dry panels.
Use a separate low-pile microfiber towel for jambs and rubber seals. A blower can force trapped water out of seams without dragging dirt across paint. Finish with a short inspection under indirect daylight or a bright inspection lamp.
Do not apply a high-gloss dressing to areas where it can migrate onto brake components, pedals, steering-wheel controls, or glass. Keep tire dressing on the sidewall and wipe excess product before driving.
You will know this step worked when: no water drips from seams after opening and closing each door or hatch.
Common mistake: drying only visible painted surfaces. Hidden water is a common reason spots appear several minutes after washing.
Which Water-Spot Prevention Method Works Best?
The best method depends on water quality, washing frequency, available shade, and tolerance for physical drying work. A careful towel routine costs the least, while deionized water offers the lowest mineral risk; ceramic coating reduces maintenance effort but does not replace drying.
| Method | Typical cost | Water or time requirement | Main limitation |
|---|---|---|---|
| Microfiber and drying aid | $20-$70 | 10-20 minutes per wash | Requires careful contact drying |
| Rinseless wash | $15-$45 setup | 4-8 L solution per wash | Unsuitable for heavy mud without pre-rinse |
| Inline DI tank | $180-$600 | 0-5 minutes drying | Resin capacity and replacement cost |
| Ceramic coating | $500-$2,000 professional | 1-2 days installation | Water spots can still form on coating |
| Water softener | $700-$2,500 installed | Continuous household supply | Reduces hardness, not all dissolved solids |
| Professional spot-free wash | $25-$80 per visit | 20-45 minutes | Recurring cost and variable technique |
Is Deionized Water Worth the Cost?
Deionized water is worth considering when local rinse water leaves spots consistently or when the owner wants touch-free drying. A DI system removes ionized minerals and is commonly used for spot-free vehicle and window cleaning, but resin eventually exhausts and must be replaced.
A TDS reading near 0-10 parts per million is a practical target for a spot-free final rinse. The exact threshold depends on paint color, sunlight, droplet size, and the minerals present. A low reading does not excuse dirty equipment or dried shampoo.
DI water is less attractive for an occasional washer who can work in shade and dry within minutes. For a weekly detailer, mobile operator, or dark-car owner in a hard-water area, reduced towel contact may justify the operating cost.
Does a Ceramic Coating Prevent Water Spots?
A ceramic coating does not prevent water spots completely. The coating changes surface energy, improves chemical resistance, and can make water sheet or blow away more easily, but mineral-rich droplets can still dry on top of the coating.
Ceramic coatings are valuable when they reduce washing effort and protect the underlying clear coat from some contamination. They are not a substitute for shade, prompt drying, or periodic maintenance washing. A coating may also make spotting more visible because tight, uniform beads remain on the surface.
A professionally installed coating commonly costs $500-$2,000 in the United States, depending on correction work, vehicle size, product warranty, and installer. Product claims such as “five-year protection” describe expected coating durability under maintenance conditions, not five years without washing or water spots.
How Does Water Quality Change the Routine?
Water quality determines how urgently the vehicle must be dried. Hard municipal water, private well water, recycled wash water, and sprinkler water can have different mineral loads, so a simple TDS test and observation of dried household fixtures provide useful first clues.
| Water source | Typical risk | Recommended response | Useful check |
|---|---|---|---|
| Municipal tap water | Medium to high | Shade, sheet, dry immediately | TDS and hardness strip |
| Private well water | High and variable | Use DI final rinse if possible | TDS, hardness, iron test |
| Rainwater tank | Low to medium | Filter sediment, dry promptly | TDS and contamination check |
| Recycled car-wash water | Variable | Prefer final spot-free rinse | Ask facility about final rinse |
| Sprinkler overspray | High local risk | Avoid source and rinse promptly | Inspect white residue on glass |
| DI or reverse-osmosis water | Low mineral risk | Still remove dirt and shampoo | Confirm TDS at the nozzle |
A water softener exchanges calcium and magnesium for other ions, usually sodium or potassium. Softened water can reduce scale, but it does not necessarily produce spot-free water because total dissolved solids remain. DI or reverse-osmosis treatment is more appropriate when the goal is minimal residue.
What Should You Do in Difficult Washing Conditions?
Washing in Direct Sun
Do not wash the whole car in direct sun if a cooler location or professional wash is available. If no alternative exists, wash before sunrise or near sunset, cool each panel with a brief rinse, work one small area at a time, and dry immediately.
A portable canopy can create shade, but airflow and panel temperature still matter. Never place a canopy where wind can make it unstable or cause it to contact the vehicle.
Washing a Black or Dark-Colored Car
Dark paint does not create more mineral residue, but it makes light deposits easier to see. Use smaller sections, inspect under indirect light, and reserve the cleanest towels for the hood, roof, and trunk.
Washing a Ceramic-Coated Car
Use the coating manufacturer’s recommended shampoo and drying aid. Avoid strong acidic or alkaline chemicals unless the product label permits them, because repeated chemical exposure can reduce maintenance performance even when the coating remains physically present.
Washing After a Long Drive
Allow hot brakes and panels to cool before washing. Road film, salt, and insects should be pre-rinsed thoroughly, because rubbing them into warm paint increases both scratching and chemical staining risk.
Using a Rinseless Wash
Rinseless washing can reduce spotting because it uses a small volume of controlled solution and leaves fewer free-water droplets. It is appropriate for lightly dirty vehicles when each towel face is rotated frequently, but it is a poor choice for thick mud, sand, or heavy salt without a careful pre-rinse.
What Mistakes Cause Water Spots After Washing?
The most damaging mistakes combine mineral-rich water, heat, and delay. Correcting the process requires removing the cause, not applying more wax over residue.
- Letting the car air-dry: Air drying is safe only with genuinely low-mineral water and clean surfaces. With ordinary tap water, dry immediately.
- Using bath towels: Bath towels may contain coarse loops, lint, detergent residue, or fabric softener. Use automotive microfiber towels washed without fabric softener.
- Overusing a detail spray: Too much product creates streaks and attracts dust. Follow the label’s panel coverage instead of continually adding lubricant.
- Reusing a saturated towel: A saturated towel pushes water rather than absorbing it. Replace or wring it according to the manufacturer’s instructions.
- Polishing before removing deposits: Abrasive polishing can grind mineral particles into the clear coat. Chemically clean and rinse the surface first.
- Ignoring glass: Mineral deposits on glass can impair visibility and may require a dedicated glass polish if acidic treatment fails.
- Using vinegar without testing: Household vinegar can help with some light mineral residue, but concentration, dwell time, trim compatibility, and rinsing are uncontrolled. A dedicated automotive product provides clearer instructions.
Expert Insight: Beading Can Increase Spot Risk
Hydrophobic protection improves runoff but can leave many small, concentrated beads after a rinse. A coated panel therefore may need more active drying than an unprotected panel when the water contains minerals.
Expert Insight: The Towel Is Not the First Line of Defense
The safest drying towel cannot compensate for a dirty pre-rinse or dried mineral deposits. Reducing contamination before contact prevents more marring than buying an even thicker towel.
Expert Insight: Horizontal Panels Deserve Priority
Roof, hood, trunk, and spoiler surfaces hold larger droplets under gravity and receive more solar heat. Dry those panels first, then handle vertical doors and bumpers.
How Do You Remove Water Spots That Already Formed?
Fresh mineral deposits should be chemically dissolved on cool, clean paint before any abrasive correction is attempted. Etched spots cannot be wiped away because the clear coat surface has been chemically altered; polishing levels the surrounding clear coat to reduce the visible crater.
| Condition | Safe first response | Dwell or working time | Likely outcome |
|---|---|---|---|
| Fresh residue | Dedicated acidic spot remover | 15-60 seconds | Often removed completely |
| Older bonded residue | Repeat chemical treatment | 1-2 applications | May require light polishing |
| Light etching | Fine polish and soft pad | 5-10 minutes test area | Often reduced substantially |
| Deep etching | Professional paint correction | 1-2 correction stages | Improvement, not guaranteed removal |
| Clear-coat failure | Refinish evaluation | Several days typical | Polishing is inappropriate |
- Wash and dry the affected panel.
- Test the remover on a hidden or small area.
- Apply the product to the towel or panel as directed.
- Keep the surface wet for the labeled dwell time.
- Wipe gently, rinse thoroughly, and inspect.
- Stop if the finish becomes hazy, sticky, discolored, or unusually soft.
Do not combine acidic spot remover with bleach, ammonia, wheel cleaner, or other chemicals. Wear gloves and eye protection, avoid hot panels, and keep the product away from unprotected aluminum, sensitive trim, and damaged clear coat unless the label confirms compatibility.
Clay bars remove bonded surface contamination through mechanical shearing. Clay is not a reliable solution for mineral etching and can add marring, so it belongs after chemical cleaning and only when a surface deposit remains.
How Much Does Prevention Cost?
A practical home routine costs about $20-$70 when buckets and a hose already exist, while a DI system usually costs $180-$600 and professional coating installation commonly costs $500-$2,000. Recurring professional washes typically cost $25-$80 per visit.
| Setup | Initial cost | Ongoing cost | Best fit |
|---|---|---|---|
| Basic shade and towels | $20-$70 | $5-$15 per wash | Occasional home washer |
| Two-bucket setup | $45-$120 | $5-$15 per wash | Weekly maintenance |
| Rinseless setup | $35-$100 | $2-$8 per wash | Apartment or water-restricted user |
| DI rinse system | $180-$600 | $0.10-$1.00 per gallon, typical | Hard-water enthusiast |
| Ceramic coating | $500-$2,000 | $50-$200 yearly maintenance | Convenience-focused owner |
| Professional detailing | $25-$80 per wash | $25-$80 per visit | No suitable wash area |
Prices vary by country, vehicle size, labor, resin capacity, and paint condition. A towel-based routine usually has the lowest total cost, but a DI system can be economical when repeated polishing or professional spot removal would otherwise be necessary.
Which Routine Should You Choose?
Choose the towel-and-drying-aid routine if you have shade, 15-20 minutes, and moderately hard water. It provides the best balance of cost and control.
Choose a DI final rinse if your water leaves white residue on faucets, your TDS reading is high, or you maintain multiple vehicles. DI water reduces mineral risk and touch contact, but resin management becomes part of the routine.
Choose rinseless washing if the vehicle is lightly dirty and outdoor water use is restricted. Pre-rinse heavily contaminated areas and use multiple towels.
Choose professional washing if you lack shade, safe drainage, or drying space. Ask whether the facility uses a spot-free final rinse and whether staff dry mirrors and jambs.
Choose ceramic coating for easier maintenance and chemical resistance, not as a guarantee against spotting. Coating still requires regular washing and prompt removal of dried minerals.
FAQ
Does cold water stop water spots?
Cold water does not stop water spots because dissolved minerals remain after evaporation at any normal washing temperature. Cold panels slow evaporation, giving more time to rinse and dry, but mineral-rich water can still leave residue if droplets remain on the paint.
Is filtered water enough for a spot-free car wash?
Filtered water may remove sediment, chlorine, or odors without removing enough dissolved minerals to prevent spotting. Reverse osmosis and deionization are more effective for low-residue rinsing, and a TDS meter can confirm whether the final water is suitable for air drying.
Can I prevent spots without drying the car?
You can usually avoid visible spots without towel drying only by using very low-mineral water, such as properly maintained DI water, and allowing it to drain cleanly. Ordinary tap water should not be left to air-dry, especially on hot horizontal panels.
Why does my car spot after rain but not after washing?
Rainwater can collect dust, industrial fallout, pollen, and minerals while it sits on paint, while a careful wash removes those contaminants and dries the surface. Rain can also evaporate slowly, leaving concentrated residue around droplets and dirty panel edges.
Is vinegar safe for car paint?
Diluted vinegar may dissolve some light mineral residue, but household concentration, dwell time, and trim compatibility vary. Test first, keep the panel cool, never let the solution dry, rinse thoroughly, and use a dedicated automotive water-spot remover when the deposit is stubborn.
How often should water spots be removed?
Remove fresh deposits during the next wash, ideally within 24-48 hours. Longer exposure to heat, sunlight, and contamination increases the chance of etching, after which chemical cleaners may no longer restore the original clear-coat surface.
The Bottom Line
To prevent water spots after washing car surfaces, wash in shade, keep each section wet, use a sheeting rinse, and dry immediately with clean microfiber. Test your water if spotting persists, then choose towels, rinseless washing, DI water, or professional service according to mineral risk and available time. Ceramic coating helps maintenance, but no coating replaces prompt drying.


