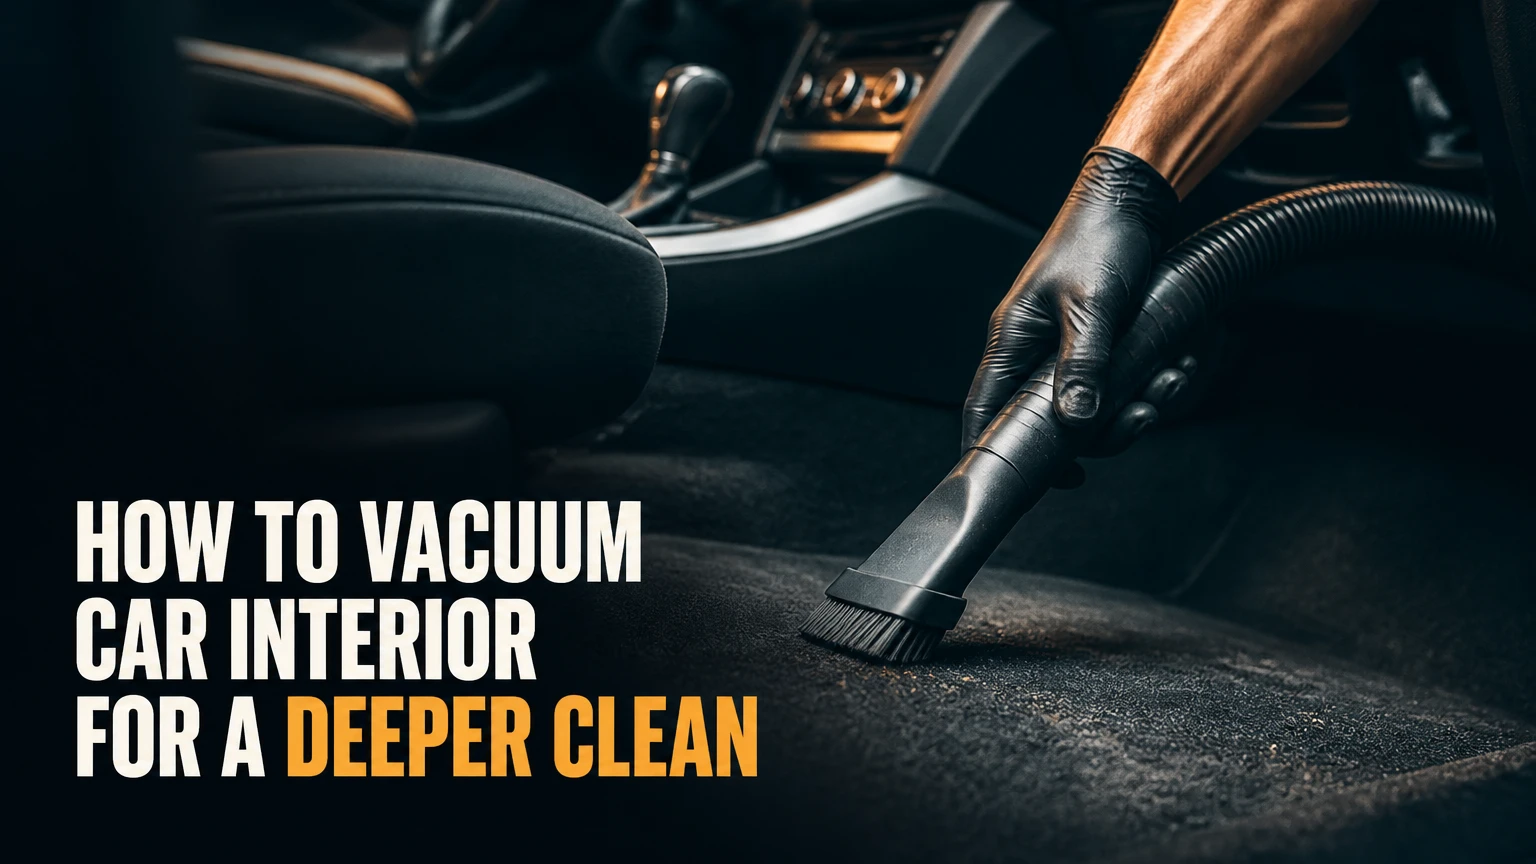
To vacuum a car interior, remove loose trash, take out and shake the floor mats, vacuum from high surfaces downward, and finish carpets with slow overlapping passes. Use a crevice tool for seams and seat rails, a brush for vents and dashboards, and a powered or rubber tool for embedded pet hair. A maintenance clean takes 10-15 minutes; a deep clean takes 45-90 minutes.
Key Facts at a Glance
A top-down cleaning order prevents dust from settling on surfaces you already cleaned.
A crevice nozzle reaches seat rails, belt anchors, console gaps, and the edges of floor carpeting.
Typical car-vacuum sessions take 10-15 minutes for maintenance cleaning and 45-90 minutes for detailing.
A HEPA filter is useful for fine airborne particles, but it does not remove stains, odors, or contaminated moisture.
A 12V vacuum is convenient but typically produces less airflow than a shop vacuum or high-voltage cordless model.
Never vacuum liquid with a dry-only vacuum because moisture can damage the motor and spread contamination.
What Does Vacuuming a Car Interior Remove?
Vacuuming a car interior removes loose and partially embedded debris through suction, including dust, crumbs, sand, hair, pollen, textile fibers, and small particles trapped in carpet. The vacuum motor spins a fan, lowers pressure inside the hose, and draws cabin air and debris toward the collection bin or bag.
Suction alone is strongest when the nozzle seals against a surface, but a perfectly sealed nozzle can also restrict airflow around bulky debris. Detailers therefore combine a wide floor head for open carpet, a crevice tool for narrow gaps, and a soft brush for fragile trim.
Vacuuming is a dry-debris process. It will not dissolve drink stains, remove grease, disinfect mold, or extract liquid from seat foam unless the machine is specifically rated for wet pickup. The U.S. Environmental Protection Agency describes HEPA filters as designed to remove at least 99.97% of particles measuring 0.3 microns under test conditions, but a HEPA filter does not make a dirty vehicle hygienically clean by itself.
What Do You Need Before You Start?
A successful car-interior vacuum requires a suitable vacuum, three useful attachments, an open-air work area, and enough time to expose hidden debris. Typical preparation costs $0 if you already own equipment, $2-$5 at a self-service wash station, or $20-$250 for a suitable household or car vacuum.
Park in shade or moderate temperatures when possible. Extreme heat makes dashboards uncomfortable and can soften some plastics, while direct sunlight makes fine dust harder to see. Open all doors, lower the front windows slightly if safe, and remove personal belongings before connecting power.
Before You Start
| Requirement | Typical specification | Why it matters |
|---|---|---|
| Maintenance time | 10-15 minutes | Covers visible debris and exposed carpet |
| Deep-clean time | 45-90 minutes | Allows seats, rails, mats, seams, and cargo area |
| Basic equipment | 1 vacuum, 1 hose, 3 attachments | Handles broad, narrow, and delicate surfaces |
| Collection capacity | 0.5-5 gallons | Reduces emptying during a full-size vehicle |
| Power source | 12V, 18-20V battery, or 120V outlet | Determines mobility and available airflow |
| Work location | 1 shaded, ventilated area | Improves visibility and limits recontamination |
Keep a small trash bag, microfiber towels, a stiff carpet brush, a soft detailing brush, and disposable gloves nearby. A rubber pet-hair tool or silicone squeegee helps release fur before suction. Do not use compressed air inside the cabin unless you plan to vacuum the displaced dust immediately, because blowing debris into vents and seat mechanisms spreads rather than removes it.
Which Vacuum Is Best for a Car Interior?
The best vacuum depends on access to electricity, the size of the vehicle, and the debris being removed. A corded shop vacuum is the strongest practical home option, a high-voltage cordless model is the most convenient, and a 12V unit is adequate for light maintenance when portability matters more than extraction power.
Published airflow figures vary because manufacturers measure CFM under different restrictions. Treat CFM, sealed suction, hose diameter, brush design, and filter condition as a system rather than choosing a machine from peak horsepower alone. The common recommendation of a 3-5 peak horsepower shop vacuum is reasonable for heavy carpet work, but peak horsepower is a marketing rating and does not directly equal nozzle suction.
| Vacuum type | Typical airflow or runtime | Typical cost | Best use | Main limitation |
|---|---|---|---|---|
| Corded shop vacuum | 100-150 CFM; continuous runtime | $60-$250 | Deep carpet and wet/dry pickup | Needs a 120V outlet and storage |
| 18-20V cordless handheld | 30-60 CFM; 15-30 minutes | $50-$150 | Apartments and quick cabin cleaning | Small bin and battery limit |
| 12V auxiliary vacuum | 15-25 CFM; vehicle-powered | $20-$40 | Crumbs and light dust | Weak extraction on dense carpet |
| Commercial wash vacuum | 200+ CFM; continuous station use | $2-$5 per session | Occasional deep cleaning | Fixed location and paid runtime |
A motorized brush head matters more for embedded hair than a higher advertised airflow number. For sand, a narrow nozzle and repeated lifting passes usually outperform a large open nozzle because the narrower opening increases local air velocity at the carpet.
Which Attachments Should You Use?
Use a wide floor head for open carpet, a crevice tool for gaps, and a soft-bristle brush for dashboards, vents, and switches. A powered brush or rubber scraper is the preferred attachment for pet hair because hair often wraps around carpet fibers instead of remaining loose on the surface.
Avoid dragging a hard plastic nozzle across piano-black trim, clear instrument lenses, leather, or soft-touch coatings. Wrap the end of a crevice tool with a thin microfiber sleeve if the vehicle has easily scratched plastic, but keep the opening clear enough to maintain suction.
How to Vacuum Car Interior: Eight Steps
Vacuuming a car interior correctly takes eight ordered steps: prepare the cabin, remove waste, clean mats outside, brush loose debris, vacuum high surfaces, clean seats and gaps, extract floors, and perform a final inspection. Slow passes and correct attachment choice determine more of the result than maximum motor power.
Step 1: Empty and Open the Vehicle
Remove bottles, wrappers, child toys, charging cables, floor organizers, and cargo-area items before starting. Move both front seats fully forward and then fully backward during the process so the carpet underneath becomes accessible.
Check seat pockets, door bins, cupholders, the spare-tire compartment, and the area beneath removable cargo panels. Keep coins, screws, and hard objects out of the vacuum hose because they can damage impellers or puncture collection bags.
You will know this step worked when every compartment can be inspected without moving debris around. A common mistake is leaving objects under seats and vacuuming around them, which hides dirt and prevents the nozzle from reaching the carpet.
Step 2: Remove Floor Mats and Shake Them Outside
Take out rubber, carpet, and all-weather mats before vacuuming the cabin. Shake carpet mats outside, tap their undersides against a solid surface, and brush stubborn sand from the backing before using suction.
Do not shake mats inside the car. Fine dust can settle onto seats, consoles, and dashboard vents, forcing you to repeat earlier work. For rubber mats, a dry brush removes grit from grooves before any washing; if you rinse them, dry both sides completely before reinstalling.
You will know the mats are ready when no loose grit falls during a firm flex. A common mistake is placing damp mats back over carpet, where trapped moisture can create mildew odor and prolong drying.
Step 3: Brush Loose Debris Toward the Floor
Use a soft detailing brush on dashboard seams, air-vent louvers, seat stitching, cupholders, and door pockets while holding the vacuum nozzle nearby. The nozzle should capture loosened dust immediately rather than allowing it to circulate through the cabin.
For fabric seats, use short brushing motions along seams and perforations. Do not aggressively brush leather, Alcantara, loose headliner fabric, or damaged trim, because friction can enlarge tears or pull fibers from the surface.
You will know the method worked when visible dust moves directly into the nozzle instead of landing on another panel. A common mistake is using compressed air first, which pushes debris into seat tracks, vents, and control gaps.
Step 4: Vacuum the Dashboard and Upper Trim
Attach the soft brush and clean the dashboard, instrument hood, center stack, door tops, steering-wheel spokes, and upper door panels. Keep suction low enough to avoid pulling loose buttons, thin vent vanes, or hanging trim seals into the nozzle.
Do not press a hard nozzle against an airbag cover. In the steering wheel, dash, and seat sides, vacuum around the cover’s seams rather than forcing the tool into them. Avoid catching wiring, seat-belt webbing, or electronic connectors.
You will know the upper cabin is clean when a microfiber towel passes over the surface without collecting visible dust. A common mistake is cleaning the dashboard last, allowing its dust to fall onto already vacuumed seats and carpeting.
Step 5: Vacuum Seats and Seat Creases
Use the upholstery tool on cloth seats and a soft brush on leather or synthetic leather. Open each seat crease with one hand and make two slow passes with the other, especially along the front edge, backrest junction, and buckle area.
For heated or ventilated seats, do not insert a pointed nozzle deeply into perforations. Surface vacuuming is safe, but excessive pressure can deform small holes or pull foam particles into the hose. Inspect child-seat contact zones closely because crushed snacks and grit collect beneath restraints.
You will know the seats are finished when no crumbs remain along seams after the cushion is flexed lightly. A common mistake is vacuuming only the center of each cushion while ignoring the side bolsters, where hair and clothing fibers accumulate.
Step 6: Detail Seat Rails, Console Gaps, and Door Pockets
Switch to the crevice tool and clean seat rails, belt anchors, console hinges, parking-brake recesses, door pockets, and the gap between the seat and center console. Move the seat through its full safe travel range, stopping if the vacuum hose approaches wiring or a power-seat mechanism.
Use a brush attachment around switches and a narrow nozzle at the bottom of cupholders. Remove trapped coins and stones manually rather than forcing them through a restricted opening.
You will know this step worked when the nozzle reaches the carpet edge without scraping trim. A common mistake is skipping seat rails because they are visually dark; those rails commonly hold grit that migrates back onto clean carpet during driving.
Step 7: Vacuum Carpet in a Grid
Use the widest suitable floor head on footwells, rear flooring, and the cargo area. Divide each section into strips about 6-8 inches wide, overlap each pass by roughly one-third, and move the nozzle slowly against the carpet’s nap before making a final pass with the fibers.
Dense automotive carpet often needs two directions of cleaning. For sand or fine grit, hold the nozzle slightly above the surface for the first pass to loosen particles, then seal it against the carpet for extraction. A rubber brush can release pet hair before the final suction passes.
You will know the carpet is clean when the pile looks even and no grit appears after rubbing the area with a dry palm. A common mistake is moving quickly; fast passes reduce contact time and leave embedded debris beneath the visible surface.
Step 8: Clean Mats, Reinstall Them, and Inspect
Vacuum both sides of each dry mat, including grooves, edges, retaining holes, and the area beneath the driver’s heel. Reinstall mats only in their original positions, and confirm that the driver’s mat locks into its retaining clips.
After installation, vacuum the exposed carpet around each mat edge and inspect under the front seats with a flashlight. Confirm that no hose, cord, or loose tool remains near pedals, seat tracks, or sliding mechanisms.
You will know the job is complete when the floor mats lie flat, the driver’s pedal area is unobstructed, and no debris appears during a final door-pocket and seat-crease check. A common mistake is installing a mat upside down or without its anchors, which can interfere with pedal movement.
How Long and How Much Does Car Vacuuming Take?
A light maintenance vacuum typically takes 10-15 minutes and costs $0 at home or $2-$5 at a commercial wash station. A thorough sedan cleaning takes 30-45 minutes, while a neglected SUV, pet-hair cleanup, or three-row vehicle can require 60-90 minutes.
| Cleaning level | Typical time | Typical cost | Areas included |
|---|---|---|---|
| Quick maintenance | 10-15 minutes | $0-$5 | Mats, visible floor debris, seats |
| Standard cabin | 25-45 minutes | $0-$10 | Dash brush, seats, rails, carpet, mats |
| Pet-hair detail | 45-90 minutes | $0-$25 | Rubber agitation, repeated passes, cargo area |
| Wet-spill recovery | 30-120 minutes | $0-$40 | Wet/dry extraction and drying time |
| Professional interior detail | 2-5 hours | $100-$300 | Vacuuming, shampoo, stain and odor treatment |
The largest time variable is agitation, not vacuuming. A vehicle with embedded dog hair may need 10 minutes of brushing for every 15 minutes of suction, while loose crumbs can disappear in one slow pass.
How Do You Remove Pet Hair, Sand, and Fine Dust?
Pet hair needs mechanical separation before vacuuming, while sand responds best to agitation, narrow-nozzle passes, and repeated changes in direction. Fine dust requires controlled brushing and filtration so the debris enters the collection system instead of becoming airborne inside the cabin.
For dog or cat hair, run a rubber glove, silicone squeegee, or rubber pet-hair brush across fabric in short strokes. Gather the rolled hair by hand, then vacuum the remaining strands with a motorized brush. Do not saturate upholstery merely to loosen hair unless you have an extraction and drying plan.
For beach sand, remove mats first, vacuum the cabin dry, and use a stiff carpet brush across footwells. Sand settles below carpet loops, so alternate forward, sideways, and backward passes. For allergy-sensitive occupants, use a sealed vacuum with a correctly seated HEPA filter and empty the bin outdoors while wearing a mask.
Can You Vacuum Wet Spills or Mold?
Only a vacuum labeled for wet pickup should handle liquid spills, and moldy or heavily contaminated interiors need source removal rather than ordinary dry vacuuming. A dry household or handheld vacuum can suffer motor damage when liquid reaches its electrical components.
Blot milk, coffee, or water with absorbent towels first, then use a wet/dry vacuum if the manufacturer permits liquid pickup. Extract as much moisture as possible from carpet and seat foam, leave doors open in a dry ventilated area, and verify that the padding is dry before closing the vehicle.
Do not dry-vacuum visible mold colonies. Vacuuming can distribute spores through exhaust, while the underlying moisture remains. For recurring dampness, inspect door seals, sunroof drains, windshield seals, and air-conditioning condensation pathways; professional remediation may be safer than repeated surface cleaning.
What Should You Not Vacuum in a Car?
Do not vacuum loose liquids with a dry-only machine, exposed electrical connectors, hot ash, sharp glass, or active airbag openings. A car vacuum is also unsuitable for engine-bay fluids, fuel residues, and hazardous powders because the motor and filter may spread contamination or create an ignition risk.
Remove large screws, coins, stones, and broken glass manually when possible. If glass is present, wear gloves, use a stiff brush and suitable collection method, and inspect seams afterward. Keep the nozzle away from seat-belt retractors and avoid pulling on wiring beneath powered seats.
Vacuuming also cannot correct a chemical odor, mold growth, a soaked seat cushion, or a stained carpet. Those problems require cleaning chemistry, extraction, drying, or repair after loose debris has been removed.
What Are Common Vacuuming Mistakes?
The most common vacuuming failures are incorrect order, rushed passes, wrong attachments, clogged filters, and unsafe handling of moisture. Each failure has a practical recovery: restore the sequence, agitate the debris, change the tool, service the vacuum, or stop and dry the affected material.
- Cleaning the floor first: Dust from the dashboard and seats falls downward. Reclean the floor after all upper surfaces are finished.
- Using one wide nozzle everywhere: A floor head cannot reach rails, seams, or pockets. Use the crevice tool and upholstery brush.
- Moving too quickly: Fast strokes leave sand and crumbs behind. Slow down and overlap each pass by one-third.
- Ignoring the filter: A full bin or clogged filter restricts airflow and may reduce suction substantially. Empty the bin and clean or replace the filter according to the manual.
- Vacuuming damp carpet with a dry machine: Moisture can damage the motor and create odor. Stop, blot, and use a wet/dry machine only when approved.
- Reinstalling unsecured mats: A loose driver’s mat can move toward the pedals. Engage every retaining clip before driving.
A practitioner rule is to check the exhaust after the first minute. If fine dust is visibly blowing back into the cabin, stop immediately and inspect the filter seal, filter damage, and collection-bin fit.
Why Has the Vacuum Lost Suction?
Low suction usually comes from a full bin, blocked hose, restricted attachment, clogged filter, or poor nozzle contact with the carpet. A high-pitched whine can indicate airflow starvation, so turn off the vacuum before checking the hose or collection system.
Use this order:
| Symptom | Likely cause | Corrective action | Expected result |
|---|---|---|---|
| Weak suction everywhere | Full bin or bag | Empty or replace collection media | Airflow returns across tools |
| Weak suction at one tool | Blocked nozzle | Remove packed hair or grit | Tool regains local airflow |
| High-pitched whine | Hose or filter restriction | Switch off, clear blockage, service filter | Pitch returns to normal |
| Dust at exhaust | Loose or damaged filter | Reseat or replace filter | Exhaust becomes visibly clean |
| Cordless shutdown | Low battery or thermal protection | Recharge and allow cooling | Runtime and motor operation recover |
| Shop vac water pickup failure | Wrong filter or full tank | Follow wet-pickup setup instructions | Liquid collection resumes safely |
Do not wash a filter unless the manufacturer marks it washable. Paper and some pleated filters lose structure when wet, and reinstalling a damp filter can encourage microbial growth.
Which Car Vacuum Setup Fits Your Situation?
A suburban homeowner with an outlet should choose a 3-5 peak horsepower wet/dry shop vacuum, while an apartment dweller usually benefits from an 18-20V cordless model with a crevice tool. Occasional users can spend $2-$5 at a commercial station instead of storing equipment.
Apartment or Street Parking
Choose a cordless vacuum with a removable battery, at least 15 minutes of rated runtime, and a brush or crevice attachment. Charge it indoors, empty the bin outdoors, and avoid models that require a wall outlet or produce only a very short five-minute run.
Suburban Homeowner
Choose a corded wet/dry shop vacuum with a 1.25-2.5-inch hose, a 10- to 12-foot hose length, and a collection capacity of at least 3 gallons. The extra capacity reduces interruptions during SUV or family-vehicle cleaning, and wet pickup adds protection against accidental drink spills.
Pet Owner
Prioritize a motorized upholstery head or rubber agitation tool over a larger collection bin. A 30-minute cordless runtime may be sufficient for a sedan, but a three-row SUV with fabric seats often benefits from a corded machine because hair removal requires repeated passes.
Budget or Occasional User
Use the commercial wash vacuum when cleaning less than once monthly. Inspect the hose and nozzle before use, keep the nozzle off delicate trim, and bring a small brush because station vacuums commonly lack upholstery-specific tools.
How Do You Finish After Vacuuming?
After vacuuming, inspect the cabin with a flashlight, wipe hard surfaces with a compatible microfiber product, and confirm that all mats, seat belts, and pedals move safely. Vacuuming should be the dry-debris stage, followed by spot cleaning only where stains or residue remain.
Check under seats, behind pedals, around child-seat anchors, in door pockets, and inside the cargo well. If odor remains after visible debris is gone, identify the source instead of masking it with fragrance. Common causes include damp carpet padding, spilled dairy, HVAC moisture, or organic debris beneath a seat.
A clean vacuum job has three visible outcomes: no loose debris on surfaces, no grit under normal hand contact, and no unsecured floor covering near the driver’s controls. If one of those conditions is missing, repeat the appropriate attachment or pass rather than recleaning the entire vehicle.
Frequently Asked Questions
Should You Vacuum or Wash Car Mats First?
Vacuum carpet mats before washing them because dry removal takes out loose sand and prevents muddy slurry from forming. After washing, rinse thoroughly and dry both sides completely. Rubber mats often need only brushing and vacuuming unless they contain sticky residue, salt, or liquid contamination.
Is a 12V Car Vacuum Strong Enough?
A 12V car vacuum is strong enough for crumbs, light dust, and routine maintenance, but it is usually inadequate for deeply embedded sand, dense carpet, or substantial pet hair. Typical 12V models produce about 15-25 CFM, below many cordless and corded shop-vacuum systems.
How Often Should You Vacuum a Car Interior?
Vacuum weekly for heavy use, children, pets, or sandy environments, and every two to four weeks for a lightly used vehicle. A short 10-minute maintenance session prevents debris from being pressed into carpet fibers, reducing the need for a later 45-90-minute deep clean.
Can Vacuuming Remove Bad Car Odors?
Vacuuming removes odor-causing crumbs, hair, and loose organic debris, but it cannot remove odors from wet padding, mold, spilled milk, or HVAC contamination. Find and dry the source first, then use an appropriate upholstery or carpet treatment rather than relying on fragrance.
Should You Vacuum a Car With the Engine Running?
Run the engine only when the vacuum manufacturer or power setup requires it, and never operate the vehicle in an enclosed garage. A 12V vacuum can draw down the battery with the engine off, while a corded vacuum should use a properly rated outdoor outlet and extension cord.
What Is the Best Way to Vacuum Between Car Seats?
Move the seats through their full adjustment range, remove large objects by hand, and use a crevice tool followed by a soft brush. Vacuum the console edge, seat rail, buckle recess, and carpet seam separately because a single pass across the open floor cannot reach those narrow channels.
The Bottom Line
To vacuum car interior surfaces effectively, work outside-in and top-down: empty the vehicle, remove and clean mats, brush loose debris into the nozzle, vacuum seats and trim, detail gaps, then finish the carpet in overlapping grid passes. Use a shop vacuum for maximum extraction, a cordless model for access, or a 12V unit for light maintenance. The correct attachment, slow movement, dry materials, and a serviced filter matter more than a large horsepower claim. A complete how to vacuum car interior routine takes 10-15 minutes for maintenance and 45-90 minutes when pet hair, sand, or neglected carpet requires agitation.


