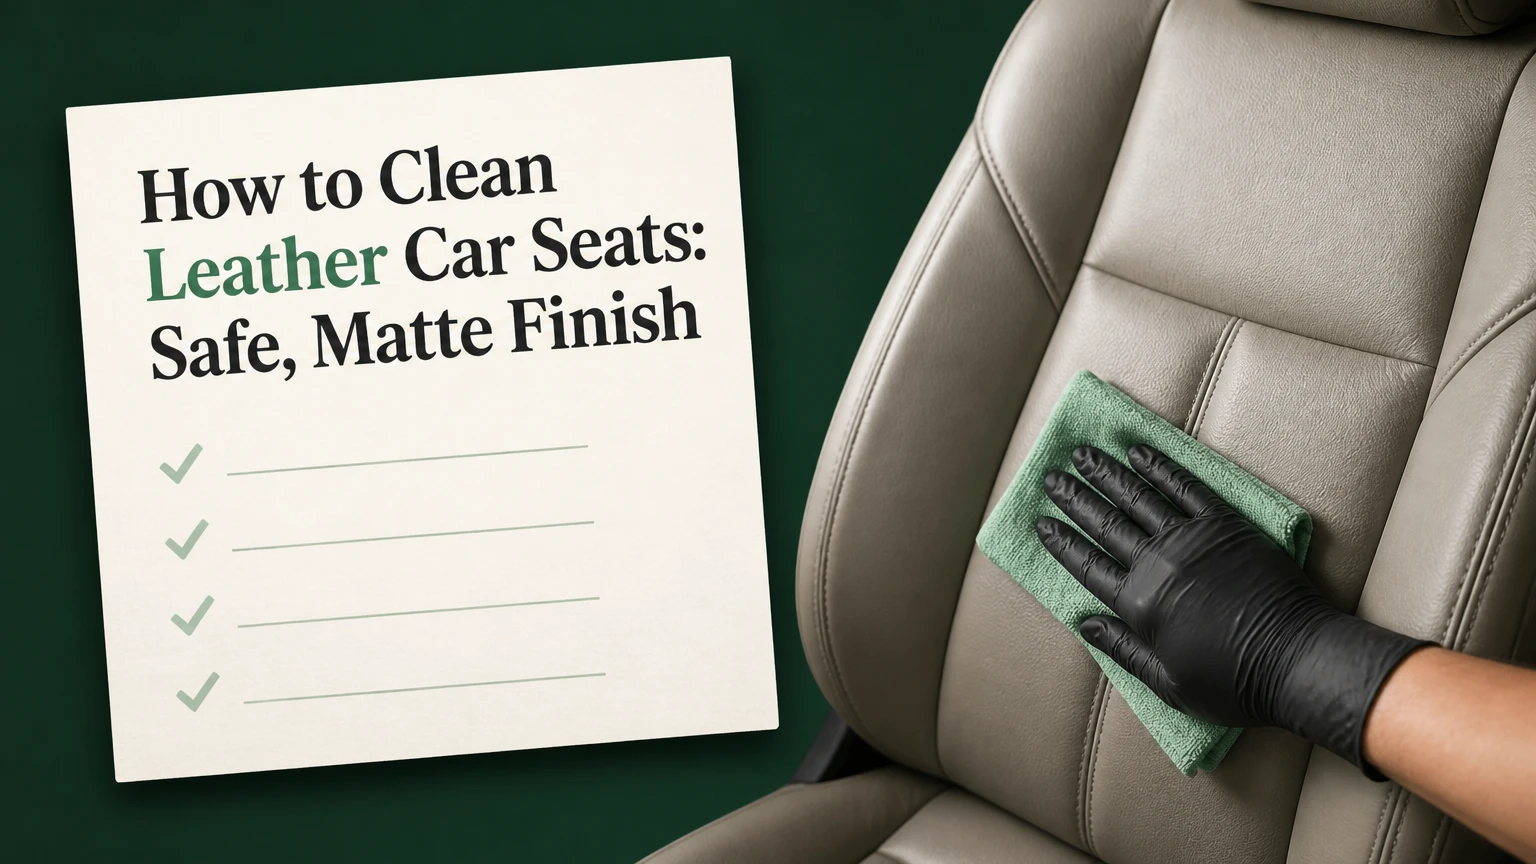
To clean leather car seats, vacuum loose debris, apply a small amount of automotive leather cleaner to a cloth or soft brush, agitate one section at a time, wipe away suspended soil, and dry the surface completely. Finish with a thin protectant only when the manufacturer permits it, especially on perforated or heavily coated seats.
Key facts at a glance
A complete front-seat cleaning typically takes 30-45 minutes, while a full cabin usually takes 45-90 minutes.
Automotive leather is usually pigmented leather protected by a clear polyurethane topcoat, not exposed untreated hide.
Spray cleaner onto the towel or brush, not directly onto perforations, switches, stitching, or seat controls.
A natural clean seat normally looks matte or softly satin, rather than glossy, greasy, or slippery.
Clean leather seats every 2-4 weeks when visibly soiled, and deep-clean approximately every 3-6 months.
A typical DIY supply cost is $20-$50; professional interior detailing commonly costs $100-$300.
Before You Start: Identify the Seat and Gather Supplies
Automotive leather seats should be identified before cleaning because coated leather, vinyl, synthetic leather, suede-like Alcantara, and exposed or damaged hide tolerate different products. Check the owner’s manual, seat label, and material description, then test every cleaner on a hidden area for color change, tackiness, gloss, or surface transfer.
Most modern vehicle seats use coated, pigmented leather on the seating surfaces and vinyl or polyurethane synthetic material on adjacent panels. A “leather interior” may therefore contain several materials. Do not use a leather brush or conditioner on Alcantara, microsuede, or unsealed trim unless the vehicle manufacturer specifies that treatment.
Required tools and quantities
| Supply | Typical quantity | Specification | Purpose |
|---|---|---|---|
| Automotive leather cleaner | 100-250 mL | Mild, water-based, manufacturer-approved | Loosen body oil and dirt |
| Microfiber towels | 6-10 | Short or medium pile, clean and colorfast | Apply, wipe, and buff |
| Soft detailing brush | 1 | Horsehair or soft synthetic bristles | Clean seams and grain |
| Vacuum | 1 | Crevice attachment with plastic tip | Remove grit before wiping |
| Leather protectant | 30-60 mL | Thin, non-greasy, compatible with topcoat | Optional surface protection |
| Distilled or clean water | 250-500 mL | Room-temperature | Lightly dampen cloth |
| Nitrile gloves | 1 pair | Powder-free | Protect hands from cleaner |
Park in shade with the doors open. A surface temperature above roughly 32°C can make cleaner evaporate too quickly, while direct sun can produce streaks and uneven drying. Move the seat backward and forward to expose the rails, front edge, rear folds, and lower side panels.
Before-you-start checklist
| Item | Typical requirement | Why it matters |
|---|---|---|
| Working time | 45-90 minutes | Prevents rushed wiping and missed sections |
| Drying time | 1-2 hours | Allows seams and perforations to release moisture |
| DIY budget | $20-$50 | Covers cleaner, cloths, brush, and protectant |
| Room temperature | 15-30°C | Gives the product predictable dwell time |
| Test area | 5 x 5 cm | Detects dye bleeding or finish damage |
| Seat position | Three positions | Exposes hidden dirt along cushions and bolsters |
Do not begin if the seat has peeling coating, exposed foam, a torn seam, or an electrical fault. Cleaning cannot repair missing pigment, cracked topcoat, or damaged heating elements.
How to Clean Leather Car Seats Safely
The safest method uses seven controlled steps: vacuuming, inspection, testing, section cleaning, seam cleaning, residue removal, and optional protection. Work on one seat at a time, keep each section near 30 x 30 cm, and use enough product to lubricate the soil without saturating the upholstery.
Step 1: Remove loose dirt and debris
Vacuum the seat cushion, backrest, bolsters, seams, belt buckles, and gap between the cushion and backrest. Use a plastic crevice tool or hold the metal nozzle several centimeters away so the attachment does not scratch the coating.
Brush crumbs out of stitching while the vacuum collects them. Do not wipe first, because grit dragged across a leather topcoat can create fine scratches that later appear as dull patches.
You will know it worked when no sand, crumbs, pet hair, or visible dust remains in the seams.
Common mistake: Pressing a hard vacuum nozzle into perforations can deform the holes or pull loose thread. Keep suction controlled and use a soft brush around vulnerable areas.
Step 2: Inspect perforations, stitching, and damage
Look for ventilation holes, heated-seat elements, loose stitching, abrasions, discoloration, and lifted coating. Ventilated seats require the least liquid because cleaner can travel through the holes into the foam and fan channels.
Switch off the ignition before working near seat controls, airbags, wiring, and electrical connectors. Avoid spraying around seat-mounted airbag seams, belt pretensioners, and control panels.
You will know it worked when you have identified every perforated panel and isolated damaged areas from the wet-cleaning process.
Common mistake: Treating a perforated center panel like a solid bolster allows excess cleaner to reach the cushion foam.
Step 3: Test the cleaner on a hidden area
Apply a small amount of the intended cleaner to an inconspicuous lower edge. Wait several minutes, wipe it dry, and inspect the color, gloss, texture, and towel for dye transfer.
A clean white or light-colored microfiber towel makes transfer easier to see. Slight brown or gray soil on the towel is normal; the vehicle’s pigment coming off in repeated color streaks is not.
You will know it worked when the test area remains uniform in color and texture after drying.
Common mistake: Testing only while the product is wet can hide a cloudy film or darkened finish that appears after evaporation.
Step 4: Apply cleaner to the cloth or brush
Mist the cleaner onto a microfiber towel or soft brush. For a 30 x 30 cm section, begin with approximately 1-3 sprays, or the amount specified by the product label.
Use a foam-producing cleaner sparingly. Foam indicates air incorporation and can help control application, but foam is not proof that a formula is safe or that more scrubbing will improve the result.
You will know it worked when the section is evenly damp and lubricated, with no liquid running toward seams or holes.
Common mistake: Spraying the seat directly can place concentrated product beside switches, create tide marks, and flood perforations.
Step 5: Agitate one small section at a time
Clean the least dirty area first, then the cushion, backrest, and high-contact bolsters. Use light pressure and overlapping strokes with the brush or towel, spending about 20-40 seconds on ordinary soil and up to 60 seconds on oily buildup.
Concentrate on steering-side bolsters, the front edge of the cushion, headrest sides, and areas touched by hands or children. Do not grind the brush into the coating. Automotive leather grain is embossed into the finished surface, so aggressive circular scrubbing can flatten texture or polish the topcoat.
You will know it worked when the surface looks evenly damp and the brush lifts gray or brown soil without exposing a different base color.
Common mistake: Continuing to scrub after the soil has lifted increases finish wear without removing more contamination.
Step 6: Wipe, inspect, and repeat selectively
Immediately wipe the section with a clean, dry microfiber towel. Turn the towel frequently so removed soil does not return to the surface, then inspect the panel under indirect light.
A second pass is appropriate for persistent body oil, sunscreen, or darkened bolsters. Use a fresh towel and cleaner rather than increasing pressure. Leave no visible foam, streak, or wet edge.
You will know it worked when the cleaned section feels dry and smooth, with a consistent matte or low-satin appearance.
Common mistake: Allowing cleaner to dry on the seat can leave a film that looks like grease. Re-wipe with a barely damp cloth, then dry immediately.
Step 7: Dry completely and apply optional protection
Leave the doors open in a shaded, ventilated location for 30-60 minutes, or longer if the seat contains perforations. Blot holes and seams with a dry towel instead of forcing liquid deeper with pressure.
Conditioner is optional for many modern coated seats. The polyurethane topcoat limits contact between a conditioner and the leather fibers, so excessive product often creates slipperiness and attracts dust rather than restoring “lost oils.”
If the manufacturer permits protection, apply a very thin layer to a fresh applicator, cover one section, wait according to the label, and buff off all residue. Keep products away from steering wheels, pedals, seat belts, and airbag seams.
You will know it worked when the seat is dry, non-sticky, odor-free, and no product transfers to clothing.
Common mistake: Leaving conditioner wet produces a glossy film and may reduce driving stability on the cushion.
Which Cleaner and Method Should You Use?
A dedicated automotive leather cleaner is the safest default for coated seats because it combines mild surfactants with controlled moisture. Leather wipes suit immediate spills, while diluted all-purpose cleaner and steam belong to narrower situations where the label, material, and operator technique support their use.
| Method | Typical cost | Working time | Main risk | Best use |
|---|---|---|---|---|
| Dedicated leather cleaner and brush | $15-$35 | 30-60 minutes | Over-wetting or abrasion | Routine deep cleaning |
| Leather-care wipes | $5-$15 | 5-10 minutes | Residue and uneven coverage | Fresh fingerprints or small spills |
| Diluted automotive APC | $8-$20 | 20-45 minutes | Finish dulling or drying | Heavy grime on compatible coated vinyl |
| Low-moisture steam | $80-$250 equipment | 30-60 minutes | Heat damage and moisture intrusion | Trained operator treating seams |
| Professional interior detail | $100-$300 | 2-5 hours | Cost and variable workmanship | Severe soil or damaged interiors |
When are leather wipes appropriate?
Leather wipes are appropriate for fresh fingerprints, light dust, and small food or drink spills when the product label specifically includes automotive leather or synthetic leather. Wipes are not a substitute for periodic cleaning because their limited moisture and contact area rarely remove soil from stitching, grain texture, or heavily used bolsters.
Use one wipe on a small area, then buff with a dry microfiber towel. Avoid storing an opened container in a hot glovebox, where wipes can dry out or become overly concentrated.
Can diluted all-purpose cleaner clean leather seats?
Diluted all-purpose cleaner can clean some coated automotive surfaces, but it is a higher-risk alternative than a dedicated leather formula. A product label may specify a dilution such as 1:10 or 1:20, but the correct ratio depends on concentration, soil load, and material; never copy a ratio from an unrelated brand.
Use APC only after a hidden-area test and never on exposed, cracked, aniline, or unknown leather. If the surface becomes pale, tacky, rough, or unusually matte after drying, stop and rinse the residue with a barely damp cloth.
Is steam cleaning safe for leather upholstery?
Low-moisture steam can help a trained detailer loosen contamination, but steam is not automatically safer than a water-based cleaner. Heat concentrated on one location can soften coatings, distort vinyl, loosen adhesive, or drive moisture through perforations.
If steam is used, keep the nozzle moving, work through a towel, use short passes, and dry each section immediately. Steam is especially unsuitable for peeling coatings, fragile dye, open seams, and seats with known electrical problems.
How Should You Handle Specific Stains?
Fresh liquid stains should be blotted immediately with an absorbent towel, while dried or oily stains need controlled cleaner application and repeated light passes. Do not introduce a stronger chemical merely because a stain is visible, because pigment damage can become permanent while the original stain remains treatable.
| Stain | First response | Safe next step | Avoid |
|---|---|---|---|
| Coffee or soda | Blot within 1-2 minutes | Mild cleaner on cloth, two passes | Flooding cushion foam |
| Grease or sunscreen | Lift excess with dry towel | Cleaner on brush, 20-40 seconds | Solvent or dish detergent |
| Blue-jean dye | Blot and isolate transfer | Leather cleaner, then professional assessment | Alcohol and abrasive foam |
| Ballpoint ink | Do not rub | Professional leather technician | Acetone or hairspray |
| Pet accident | Blot and ventilate | Surface cleaner, then odor treatment for upholstery | Saturating the seat |
| Mud | Let dry, vacuum first | Mild cleaner after debris removal | Smearing wet grit |
How do you clean white leather car seats?
White leather seats need frequent light cleaning rather than aggressive occasional scrubbing. Vacuum first, clean 30 x 30 cm sections, and use a white or colorfast microfiber towel so denim dye and finish transfer remain visible.
Dark marks on white seats may be dye transfer, surface soil, or coating wear. If two gentle passes do not improve the mark, stop. More pressure can remove the white pigment and create a larger repair area.
How do you remove blue-jean dye transfer?
Treat blue-jean dye transfer as a surface-contamination problem first, not as proof that the leather needs a harsh solvent. Use a compatible leather cleaner on a soft brush for 20-30 seconds, wipe immediately, and repeat once after drying.
Persistent transfer may have penetrated microtexture or altered the clear coat. A leather repair specialist can test pigment stability and use a controlled color-treatment system, while alcohol, acetone, bleach, and melamine foam can strip the finish faster than they remove the dye.
What Maintenance Schedule Prevents Repeated Buildup?
A practical maintenance schedule combines a quick wipe every 2-4 weeks with deeper cleaning every 3-6 months, adjusted for use rather than calendar dates alone. Daily drivers, children, pets, sunscreen, hot climates, and light-colored upholstery justify shorter intervals.
| Vehicle situation | Quick maintenance | Deeper cleaning | Protection review |
|---|---|---|---|
| Light-use second car | Every 6-8 weeks | Every 6 months | Every 6-12 months |
| Daily commuter | Every 2-4 weeks | Every 3-4 months | Every 6 months |
| Family SUV with children | Weekly spot check | Every 2 months | Every 3-6 months |
| Pet-use vehicle | After visible shedding | Every 1-2 months | Every 3 months |
| Hot, sunny climate | Every 2-3 weeks | Every 2-3 months | Every 3-6 months |
| White or cream interior | Weekly inspection | Every 1-2 months | Every 3-6 months |
The driver-side bolster deserves special attention because repeated entry and exit transfers body oil, clothing dye, grit, and friction to one narrow area. Clean that panel before it becomes glossy, since a shiny appearance often signals accumulated oil or polished coating rather than healthy leather.
Sun protection also matters. Parking in shade, using a windshield sunshade, and keeping windows closed during dusty conditions reduce ultraviolet exposure and abrasive contamination. A protectant cannot reverse faded pigment or repair cracking.
Common Mistakes and How to Fix Them
Most leather-seat damage comes from excess liquid, excess friction, incompatible chemistry, or misdiagnosed coating failure. The recovery method depends on whether the problem is removable residue, trapped moisture, or actual loss of pigment.
| Mistake or symptom | Likely cause | Recovery action | Escalation point |
|---|---|---|---|
| Glossy surface after cleaning | Oil or product film | Re-clean lightly and buff dry | Gloss remains after two passes |
| Sticky finish | Conditioner or APC residue | Barely damp cloth, then dry towel | Tackiness persists for 24 hours |
| Color on towel | Failed pigment or dye transfer | Stop rubbing and photograph area | Any repeated pigment loss |
| Wet perforations | Direct spray or flooding | Blot, ventilate, avoid heat concentration | Dampness or odor persists |
| Pale or rough patch | Chemical or abrasion damage | Stop all chemicals | Professional recoloring |
| Cracking or peeling | Topcoat and pigment failure | Do not condition heavily | Leather repair service |
| Musty smell | Trapped moisture or foam contamination | Dry cabin and inspect beneath seat | Odor returns after drying |
Why should you avoid household cleaners?
Dish soap, laundry detergent, bleach, strong alcohol, solvent-based stain removers, and disinfectants may remove oil by attacking more than the contamination. Their surfactants, solvents, fragrances, or alkalinity can leave residue, swell finishes, strip pigment, or accelerate visible deterioration.
A mild automotive cleaner is not “stronger” because it produces more foam. Cleaning power comes from appropriate surfactant chemistry, dwell time, mechanical action, and removal of the soil. The least aggressive process that achieves a clean result is the safer process.
Why is a Magic Eraser unsafe on leather seats?
A melamine foam eraser is an abrasive cleaning tool, not a leather conditioner or stain-safe treatment. Its fine abrasive structure can abrade the clear topcoat and colored pigment, leaving a lighter, duller, or permanently rough patch.
The damage often becomes apparent only after the area dries. Use a soft brush and compatible cleaner instead, particularly on white leather where over-cleaning can be mistaken for stain removal.
What should you do if liquid enters perforations?
Press a dry towel over the perforated area without rubbing, then repeat with fresh dry sections until no more moisture transfers. Leave the vehicle ventilated and avoid operating seat heaters at maximum temperature, because concentrated heat can damage materials or create uneven drying.
Do not use a wet/dry vacuum directly on electrical controls or aggressively seal the holes with suction. If the foam remains damp, the seat develops odor, or a heated or ventilated function behaves unusually, stop using that function and arrange professional inspection.
When Should You Hire a Professional Detailer?
Professional detailing is usually justified when soil has entered the cushion, a stain survives two gentle cleaning passes, the coating is peeling, or the seat contains fragile perforations and integrated ventilation. Typical professional interior detailing costs $100-$300, with higher prices for leather repair, recoloring, odor treatment, or disassembly.
| Condition | DIY suitability | Typical professional need | Likely service scope |
|---|---|---|---|
| Dust and fingerprints | High | Not required | Vacuum and wipe |
| Moderate body-oil buildup | High | Optional | Deep clean and protect |
| Coffee on surface | Moderate | Useful if dried | Extraction and stain treatment |
| Ink or heavy dye transfer | Low | Recommended | Solvent-controlled repair |
| Peeling pigment | Very low | Required | Refinish or recolor |
| Foam odor after flooding | Low | Recommended | Drying, extraction, inspection |
| Torn seam or exposed foam | None | Required | Upholstery repair |
A professional detailer cannot guarantee removal of dye that has chemically altered the coating, and a cleaner cannot restore missing pigment. Ask whether the quoted service includes stain treatment, extraction, leather repair, and drying, because “interior cleaning” can describe very different scopes.
How Do You Know the Seat Is Actually Clean?
A properly cleaned leather seat has an even color, a dry and smooth touch, clean seams, and a matte or softly satin appearance consistent with adjacent unused areas. The seat should not feel oily, slippery, sticky, or noticeably darker after the product has dried.
Use four checks:
- Wipe a hidden edge with a clean white towel. No fresh greasy residue should appear.
- Inspect the driver bolster from several angles. Gloss should not form a narrow oily band.
- Press a dry towel into seams and perforations. It should remain dry after several seconds.
- Sit briefly in clean clothing. The surface should not transfer conditioner or dye.
A change in appearance is not always a cleaning success. If the cleaned area becomes lighter than surrounding panels, the original dark appearance may have been worn pigment or a polished topcoat rather than removable dirt.
The Bottom Line
How to clean leather car seats safely depends on controlling moisture, friction, and product strength. Vacuum first, test the cleaner, work in small sections, wipe immediately, protect only when appropriate, and give perforated seats extra drying time. Use a professional detailer for ink, persistent dye transfer, peeling coating, electrical concerns, or damp foam.
A two-front-seat job typically costs $20-$50 in supplies and takes 30-45 minutes, while a full cabin usually takes 45-90 minutes plus 1-2 hours of drying. Repeat light maintenance every 2-4 weeks and deep cleaning every 3-6 months, shortening the interval for children, pets, white upholstery, and intense sun exposure.
Frequently Asked Questions
Can I clean leather car seats with a damp microfiber cloth?
A damp microfiber cloth is suitable for light dust, fresh fingerprints, and a quick maintenance wipe. It is less effective against sunscreen, body oil, denim dye, and embedded grit. Use clean water sparingly, wring the cloth thoroughly, and dry the panel immediately, especially when the seat has perforations.
Should I clean or condition leather seats first?
Clean leather seats first and remove all cleaner residue before applying any protectant. Conditioning over body oil traps contamination beneath a film and can create gloss or tackiness. Many modern coated seats need little or no traditional conditioner, so follow the vehicle or product manufacturer’s instructions.
Can I use baby wipes on leather car seats?
Baby wipes are not a reliable leather-care product because formulations vary and may contain fragrances, moisturizers, preservatives, or surfactants that leave residue. One emergency wipe on a fresh spill is unlikely to determine the outcome, but an automotive leather cleaner and microfiber towel are safer for repeated use.
How long should leather seats dry before driving?
Allow leather seats to dry for at least 30-60 minutes after a light cleaning and 1-2 hours after deeper cleaning or work around perforations. The seat is ready when seams and holes feel dry, no cleaner transfers to a towel, and the surface is neither cool-damp nor sticky.
Can leather cleaner remove cracking?
Leather cleaner can remove dirt that makes shallow cracks appear darker, but it cannot rebuild cracked fibers, replace missing pigment, or reattach peeling coating. Stop cleaning when the crack edges expose a lighter base or continue shedding color, then seek a leather repair or recoloring assessment.
Is automotive leather the same as sofa leather?
Automotive leather is often more heavily pigmented and top-coated than household sofa leather, and vehicle upholstery may combine leather with vinyl or polyurethane panels. A product labeled for sofas is not automatically suitable for car seats, particularly perforated, heated, ventilated, or coated automotive interiors.


