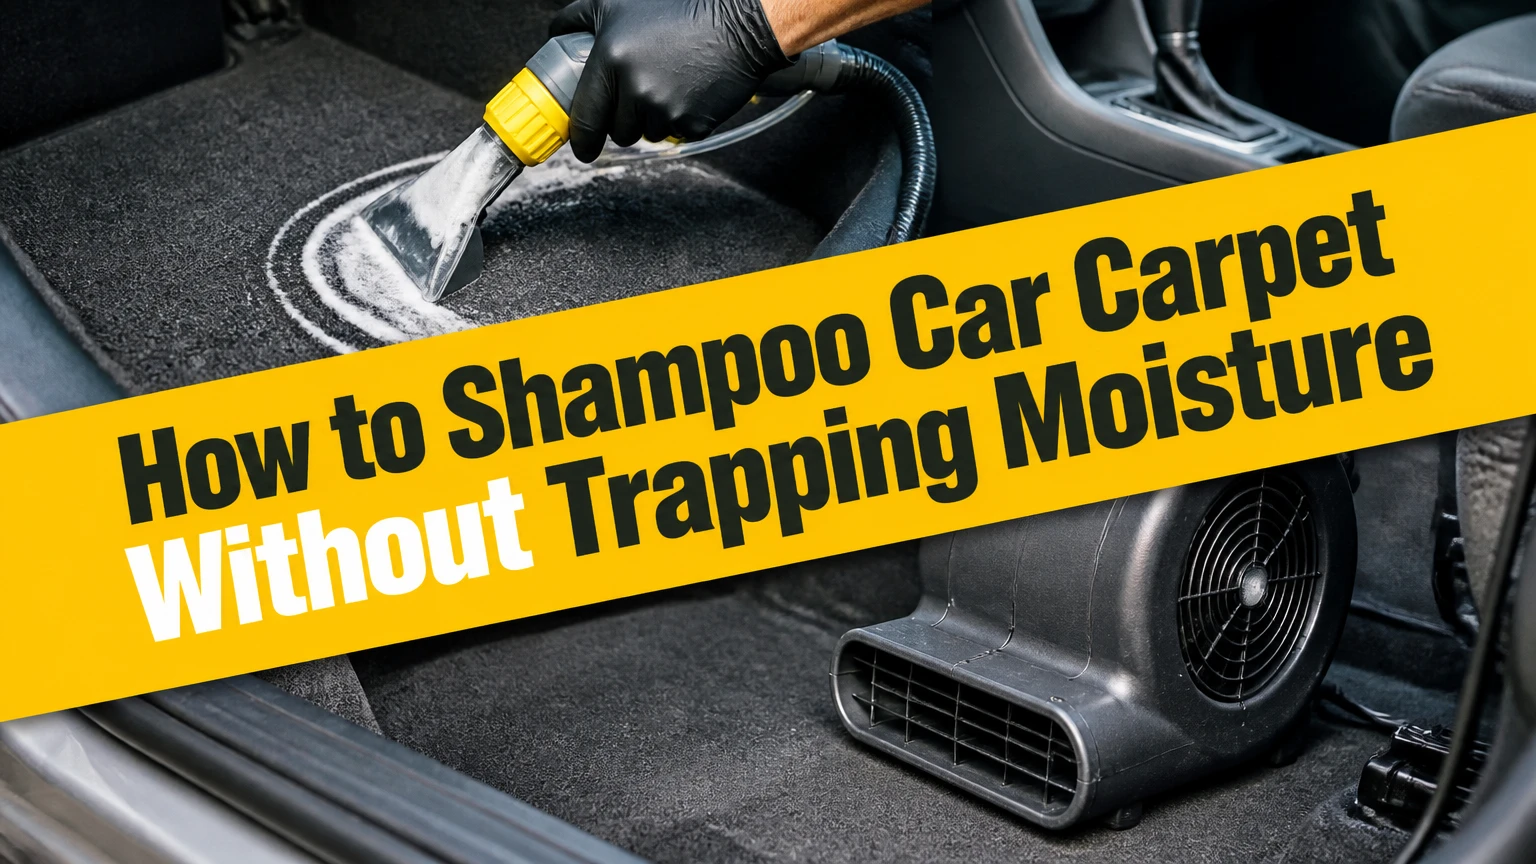
To shampoo car carpet, remove loose debris, pre-treat stains, apply a diluted automotive carpet cleaner, agitate the fibers, extract or blot the slurry, and dry the underlay completely. The safest process takes about 1.5-3 hours of work, followed by 4-12 hours of drying, with low moisture and thorough extraction determining the result.
Key Facts at a Glance
- Automotive carpet shampooing combines chemical cleaning, mechanical agitation, and moisture removal.
- Dry vacuuming before liquid cleaner prevents loose sand and grit from becoming muddy residue.
- A portable extractor usually cleans more deeply than towels, but excessive water can soak the foam underlay.
- Use the product manufacturer’s dilution ratio rather than assuming a universal 1:10 or 1:20 ratio.
- Typical DIY supplies cost $15-$50, while professional interior cleaning commonly costs $80-$200.
- Do not replace mats or close the vehicle after cleaning until the carpet and padding feel fully dry and smell neutral.
What Car Carpet Shampooing Does
Car carpet shampooing removes embedded soil, oily film, food residue, stains, and odor sources from fabric floor coverings. Automotive cleaners contain surfactants that loosen soil from fibers, while encapsulating formulas surround suspended particles so a later vacuuming pass can remove them.
Shampooing is different from vacuuming because vacuuming removes loose particles without dissolving or suspending oily contamination. Shampooing is also different from steam cleaning: many “steam” machines primarily use heated water extraction, and neither method guarantees sterilization or mold removal.
Vehicle carpet normally includes a synthetic fiber face, a backing, and foam or felt underlay. That lower layer can retain water long after the visible fibers appear dry. The underlay is the main reason controlled application and extraction matter more than producing thick foam.
The Environmental Protection Agency states, “The best way to control mold growth is to control moisture.” That principle applies directly to vehicle interiors. Shampoo removes soil, but drying determines whether the cleaning process leaves a musty odor or encourages microbial growth.
What shampoo cannot fix
Shampoo cannot reliably remove rust, permanent dye transfer, sun bleaching, melted plastic, or carpet fibers damaged by abrasion. It also cannot make floodwater contamination safe through ordinary cleaning. A vehicle exposed to sewage, chemical spills, or prolonged standing water needs professional assessment and possible carpet removal.
Before You Start: Tools, Quantity, and Safety
Prepare the vehicle in shade or indirect sunlight, with the doors open and weather suitable for several hours of ventilation. The following setup covers one typical sedan or small SUV and avoids unnecessary saturation.
| Item | Typical quantity or specification | Purpose |
|---|---|---|
| Automotive carpet cleaner | 250-500 mL ready-to-use solution | Loosens soil and oily residue |
| Low-foaming concentrate | Product-label dilution, often 30-100 mL per litre | Reduces residue in extractors |
| Wet/dry vacuum or extractor | 1 machine with upholstery nozzle | Removes liquid and suspended soil |
| Nylon detail brushes | 1 soft and 1 medium brush | Agitates fibers without excessive abrasion |
| Microfiber towels | 6-12 clean towels | Blots moisture and stain transfer |
| Crevice tool | 1 vacuum attachment | Cleans seat rails and carpet edges |
| Nitrile gloves | 1 pair | Protects skin from cleaner and contamination |
| Air mover or household fan | 1 fan, 500-1,500 CFM typical | Speeds evaporation through airflow |
Check the cleaner’s label for fabric compatibility, dilution, dwell time, and extraction instructions. Test a hidden carpet edge first. The test must remain colorfast after drying, not merely while wet.
Protect seat controls, exposed wiring, door speakers, seat rails, and center-console electronics with towels or plastic sheeting. Do not spray directly toward seat tracks. Factory grease on rails can be displaced, and moisture near connectors can create electrical faults.
Before-you-start box
- Active time: 1.5-3 hours for a moderately dirty interior
- Drying time: 4-12 hours in typical conditions
- Difficulty: Moderate
- Typical DIY cost: $15-$50
- Best temperature: Above 15°C, with low to moderate humidity
- Main success factor: Remove as much moisture as possible before closing the vehicle
How to Shampoo Car Carpet Safely
The safest process uses seven controlled steps: remove objects, vacuum dry soil, treat stains, apply a small amount of cleaner, agitate, extract or blot, and dry with airflow. Work in sections of approximately 0.25-0.5 square metres so cleaner does not dry before agitation.
Step 1: Remove Mats, Objects, and Loose Contamination
Take out floor mats, rubbish, child-seat accessories, cargo items, and removable trim that blocks the carpet. Shake or vacuum the mats separately instead of cleaning them over the installed carpet.
Inspect the floor for coins, glass, needles, pet waste, and damp patches. Wear gloves when handling biological contamination. If water is already trapped beneath the carpet, postpone shampooing and investigate the leak first.
Success checkpoint: Every carpet section is visible, and no loose object can obstruct the vacuum nozzle.
Common mistake: Cleaning around mats and seats without removing them leaves the dirtiest edges untreated.
Step 2: Vacuum the Carpet Twice
Use a strong vacuum with a crevice tool around seat rails, door sills, pedal areas, and the gap beneath the front seats. Vacuum in several directions, then use a dry medium nylon brush to lift sand and embedded hair before vacuuming again.
Do not skip this step because the carpet looks clean. Dry grit becomes abrasive paste when mixed with liquid cleaner, and sand trapped against the backing can remain after surface shampooing.
For pet hair, use a rubber pet-hair tool or slightly damp rubber glove before the final vacuum pass. Avoid soaking the carpet merely to collect hair.
Success checkpoint: The vacuum collects little additional dry debris after the second pass.
Common mistake: Starting with spray cleaner pushes dry soil deeper into the backing and makes extraction harder.
Step 3: Identify and Pre-Treat Stains
Treat the stain according to its source rather than applying the strongest available chemical. Spray a small amount onto a towel or directly onto the spot, allow the label-specified dwell time, and blot from the outside toward the center.
A typical dwell time is 3-5 minutes, but enzyme products may require longer. Never let a pre-treatment dry on the carpet unless the label specifically instructs you to do so.
| Contamination | First treatment | Dwell and removal |
|---|---|---|
| Coffee or tea | Neutral automotive fabric cleaner | 3-5 minutes, then blot and rinse-extract |
| Road salt | Warm water mist followed by fabric cleaner | 2-3 minutes, then extract white residue |
| Grease or oil | Automotive degreaser rated for fabric | 3-5 minutes, then rinse-extract twice |
| Milk or vomit | Enzyme cleaner for upholstery | Label time, then extract and ventilate |
| Pet urine odor | Enzyme treatment applied to affected depth | Label time, repeat only after drying assessment |
| Mud | Allow mud to dry, vacuum, then shampoo | No wet pre-treatment while mud is loose |
Blotting transfers dissolved material into the towel. Aggressive scrubbing can spread liquid, fuzz the fiber tips, or force pigment into the backing.
Success checkpoint: The stain looks lighter on the towel, and no colored dye transfers from the carpet during a hidden-area test.
Common mistake: Using chlorine bleach, undiluted peroxide, or household bathroom cleaner can discolor synthetic carpet and damage backing.
Step 4: Dilute and Apply Carpet Cleaner
Mix concentrated cleaner only according to its label. A 1:10 ratio means one part concentrate to ten parts water, but many products require a different dilution, and ready-to-use formulas should not be diluted again.
Apply approximately 10-20 millilitres of solution per 0.25 square metres for a maintenance clean. Heavier soil may need more, but the carpet should become evenly damp rather than wet enough to feel saturated beneath the fibers.
Use a trigger sprayer or the extractor’s controlled spray. Spray the brush or towel for delicate areas. Keep the nozzle away from seat rails, speaker grilles, wiring, and carpet edges where liquid can run beneath trim.
Success checkpoint: The cleaner wets the fiber surface evenly, with no visible pooling or liquid running toward the sill.
Common mistake: More foam does not mean more cleaning. Excess product increases residue and extends drying time.
Step 5: Agitate the Fibers
Work the cleaner into one section using a soft or medium-stiff nylon brush. Use short overlapping strokes in two directions, then finish with the carpet’s natural nap. Apply greater pressure only in high-traffic footwells.
A drill brush can reduce labor, but use low speed, light pressure, and a soft or medium nylon head. Keep the brush moving. A stationary rotating brush can fray carpet, expose backing, or create a visibly different nap.
Brush delicately near carpet seams and plastic transitions. Those areas often have less support beneath the fibers and can lift when scrubbed forcefully.
Success checkpoint: Soil visibly rises into the foam or slurry, while fibers remain intact and the backing is not exposed.
Common mistake: Repeatedly scrubbing a permanent discoloration cannot restore lost dye and may enlarge the damaged area.
Step 6: Extract or Blot the Dirty Slurry
An extractor is the preferred option because it sprays a controlled amount of water and immediately recovers liquid and suspended soil. Make one slow wet pass, followed by two or three slower vacuum-only passes. The vacuum-only passes are the drying step.
Use clean water for the rinse tank unless the machine manufacturer specifies a compatible rinse solution. Excessive detergent in the recovery process can leave a sticky film that attracts new soil.
Without an extractor, press folded dry microfiber towels firmly into the carpet, lift them vertically, and replace them as soon as they become damp. Repeat with clean towels until transfer decreases. A wet/dry vacuum can improve this manual method if its nozzle does not leave the surface too wet.
There is no universal 100-inch water-lift minimum for car carpet extraction. Water lift, airflow, nozzle design, hose length, spray volume, and recovery technique all affect performance, so the machine’s usable recovery and the operator’s passes matter more than one isolated specification.
Success checkpoint: The carpet feels damp, not wet, and a firmly pressed white towel picks up little moisture or soil.
Common mistake: Holding the spray trigger continuously floods the foam underlay faster than the machine can recover it.
Step 7: Dry the Carpet and Underlay Completely
Open the doors or windows and position a fan so air crosses the carpet rather than merely blowing downward into one spot. Remove floor mats during drying. Reposition seats to expose shaded sections beneath the rails.
Typical drying takes 4-12 hours. Low humidity, warm air, airflow, and light application shorten the range; cold weather, thick underlay, and high humidity extend it. A heater may help in a ventilated, attended space, but do not run a fuel-burning heater inside a closed vehicle because of carbon monoxide and fire risks.
Do not close the car overnight if the carpet still feels cool and clammy. Do not reinstall damp mats, since they slow evaporation and can hold moisture against the carpet.
Success checkpoint: The carpet feels dry at the surface and under firm fingertip pressure, has no cool damp spots, and smells neutral after the vehicle remains closed for 30 minutes.
Common mistake: Judging dryness by the top fibers alone misses water retained in the foam backing.
Which Cleaning Method Fits the Carpet?
The best method depends on contamination depth, available drying time, and carpet sensitivity. Low-moisture encapsulation suits routine maintenance, while extraction suits embedded soil and soluble stains; neither method is appropriate for every contaminated or water-damaged interior.
| Method | Typical moisture | Active time for sedan | Best use | Main limitation |
|---|---|---|---|---|
| Manual spray and towel | 100-300 mL per section | 2-3 hours | Small stains and light soil | Slow, incomplete deep recovery |
| Low-moisture foam | 50-150 mL per section | 1-2 hours | Routine cleaning and quick drying | Limited heavy-soil removal |
| Encapsulation powder | Under 50 mL water | 1-2 hours | Maintenance and delicate areas | Poor performance on grease and mud |
| Portable extractor | 200-600 mL sprayed per section | 1.5-2.5 hours | Deep soil and drink spills | Can oversaturate underlay |
| Professional extraction | Operator-controlled | 1-3 hours | Large, heavily soiled interiors | Typical cost of $80-$200 |
Encapsulation products dry around suspended soil and are vacuumed away, which reduces residual moisture. They are not a substitute for rinsing milk, urine, vomit, or heavily salted carpet because dissolved contamination may remain below the surface.
Professional extraction is preferable when carpet must be removed, contamination reached the padding, or odor returns after a correctly dried cleaning. A detailer can inspect the underlay and use stronger recovery equipment, but professional service cannot reverse dye loss or fiber damage.
How Much Time and Money Does It Take?
A typical DIY car carpet shampoo costs $15-$50 and requires 1.5-3 hours of active work, followed by 4-12 hours of drying. A professional interior cleaning typically costs $80-$200, with price increasing for vehicle size, pet contamination, severe stains, carpet removal, and odor treatment.
| Vehicle or condition | DIY supplies | Active cleaning time | Typical drying time |
|---|---|---|---|
| Small hatchback, light soil | $15-$25 | 1-1.5 hours | 3-6 hours |
| Sedan, moderate soil | $20-$40 | 1.5-2.5 hours | 4-8 hours |
| SUV, heavy footwell soil | $30-$60 | 2-3.5 hours | 6-12 hours |
| Professional deep clean | $80-$200 | 1-3 hours | 4-12 hours |
Rental extractor charges can add approximately $25-$60 per day, depending on location and equipment. A drill brush may cost $10-$25, but it is unnecessary for a lightly soiled carpet and increases fiber-damage risk.
How Should You Clean Different Carpet Situations?
Stain type determines the cleaner, dwell time, and number of rinse passes. The most reliable sequence is dry removal first, targeted chemistry second, mechanical agitation third, and extraction last.
Mud and sand
Allow wet mud to dry when practical, then vacuum it thoroughly. Shampooing wet mud immediately converts loose mineral soil into slurry and can spread the mark into a larger area.
Coffee and sugary drinks
Blot fresh liquid immediately, then use an automotive fabric cleaner. Sugars can remain tacky after the visible stain disappears, so rinse-extract the area with clean water and make extra vacuum-only passes.
Oil and grease
Use a fabric-safe automotive degreaser sparingly. Degreaser residue requires a clean-water extraction; otherwise, the remaining surfactant can attract dirt around the original spot.
Pet urine, milk, and vomit
Use an enzyme cleaner that is labeled for automotive upholstery. Enzymes require adequate dwell time and access to the contaminated depth, so a surface mist may not remove odor from soaked foam.
Road salt
Dissolve salt with a light warm-water application and recover it rather than scrubbing dry crystals into the fibers. Repeat with clean water if white residue reappears during drying.
Common Mistakes and How to Fix Them
The carpet feels crunchy after drying
Crunchy texture usually indicates dried detergent or mineral residue. Vacuum thoroughly, then perform a light clean-water rinse and extraction rather than adding vinegar automatically. A 1:1 vinegar-water mixture is not a universal residue treatment and can create a new odor or affect sensitive materials.
A musty odor appears after cleaning
A musty smell usually indicates retained moisture, contaminated padding, or an unresolved leak. Remove mats, increase cross-ventilation, and use an air mover; if the odor remains after 24 hours of fully dry conditions, inspect beneath the carpet instead of repeatedly shampooing the surface.
The stain returns while drying
Wicking occurs when dissolved contamination moves upward as moisture evaporates. Re-treat the spot with the smallest effective amount, blot from the perimeter inward, and extract it thoroughly. Avoid flooding the entire footwell to chase one returning mark.
Carpet color looks uneven
Uneven color can result from nap direction, incomplete soil removal, or permanent fading. Once dry, vacuum and brush the fibers in one consistent direction before deciding whether discoloration remains.
The carpet stays wet for more than 12 hours
Stop adding cleaner. Remove mats, open the doors, direct airflow across the floor, and use a wet/dry vacuum or extractor for additional vacuum-only passes. Persistent dampness suggests excessive application, blocked airflow, or saturated underlay.
An odor remains after correct cleaning
Odor can originate in seat foam, HVAC ducts, a leak, or padding beneath the carpet. Surface shampoo is not effective when the source is outside the visible fiber layer.
When Should You Avoid Shampooing?
Avoid ordinary shampooing when the vehicle has floodwater, sewage, coolant, fuel, strong solvent, or extensive mold contamination. These conditions can affect padding, insulation, wiring, and corrosion-prone metal beneath the carpet.
Mold also requires moisture control and removal of affected porous materials. Spraying fragrance or carpet shampoo over visible mold does not solve the source. Dry the vehicle, identify the water entry point, and obtain professional remediation advice when growth is extensive or the padding is affected.
Do not shampoo a carpet with loose backing, exposed wiring, disconnected electrical components, or a known airbag harness beneath the seat unless the cleaning method protects those parts. If a seat must be removed, follow the vehicle manufacturer’s airbag and battery-disconnection procedure.
How Often Should You Shampoo Car Carpet?
Most vehicles need thorough carpet cleaning every 6-12 months, while cars carrying pets, children, work equipment, or muddy footwear may need spot treatment monthly and deep cleaning every 3-6 months. Frequent full shampooing is unnecessary when regular vacuuming removes abrasive grit.
Vacuum high-traffic areas every 2-4 weeks. Treat spills immediately. Clean removable mats separately because they receive most of the contamination and can often be washed without wetting the vehicle’s fixed underlay.
FAQ
Can you shampoo car carpet without an extractor?
Yes, you can shampoo car carpet without an extractor by applying a light amount of cleaner, agitating one small section, and pressing clean microfiber towels into the carpet to recover moisture. A wet/dry vacuum improves recovery. Manual cleaning is suitable for light soil and small stains, but extraction is more reliable for deep contamination.
Can you use dish soap on automotive carpet?
Dish soap is a poor choice for automotive carpet because its high-foaming formula can leave surfactant residue in the fibers and underlay. Use a fabric-safe automotive cleaner instead. If dish soap has already been used, perform a light clean-water rinse and several vacuum-only extraction passes.
Should you steam clean or shampoo car carpet?
Use low-moisture shampoo for routine soil and controlled extraction for embedded dirt or liquid spills. Steam equipment can loosen contamination, but heated vapor does not automatically sanitize or remove the slurry. The better choice is the method that controls water, recovers residue, and dries the underlay completely.
How do you remove a bad smell from car carpet?
Remove the odor source first, then clean and dry the affected carpet. Enzyme cleaner is appropriate for many protein-based odors such as milk, vomit, and urine when the product is labeled for fabric. Persistent odor after drying indicates contaminated padding, HVAC contamination, or a water leak.
Can car carpet grow mold after shampooing?
Car carpet can develop a musty or mold-related problem after shampooing if water remains in the backing or foam underlay. Prevent the risk by applying limited solution, extracting thoroughly, ventilating with moving air, and verifying dryness before closing the vehicle or replacing mats.
How do you clean removable car floor mats?
Vacuum removable mats first, apply fabric cleaner according to the label, agitate with a nylon brush, rinse or extract, and dry them vertically or on a clean surface. Do not reinstall mats until the backing is dry, because damp rubber or felt can trap moisture against the vehicle carpet.
The Bottom Line
To shampoo car carpet successfully, vacuum twice before using liquid, match treatment to the stain, apply cleaner sparingly, agitate without damaging the fibers, and extract more water than you add. The exact cleaner matters less than moisture control and drying. Follow these steps for how to shampoo car carpet without leaving residue, returning stains, or trapping dampness beneath the floor covering.


