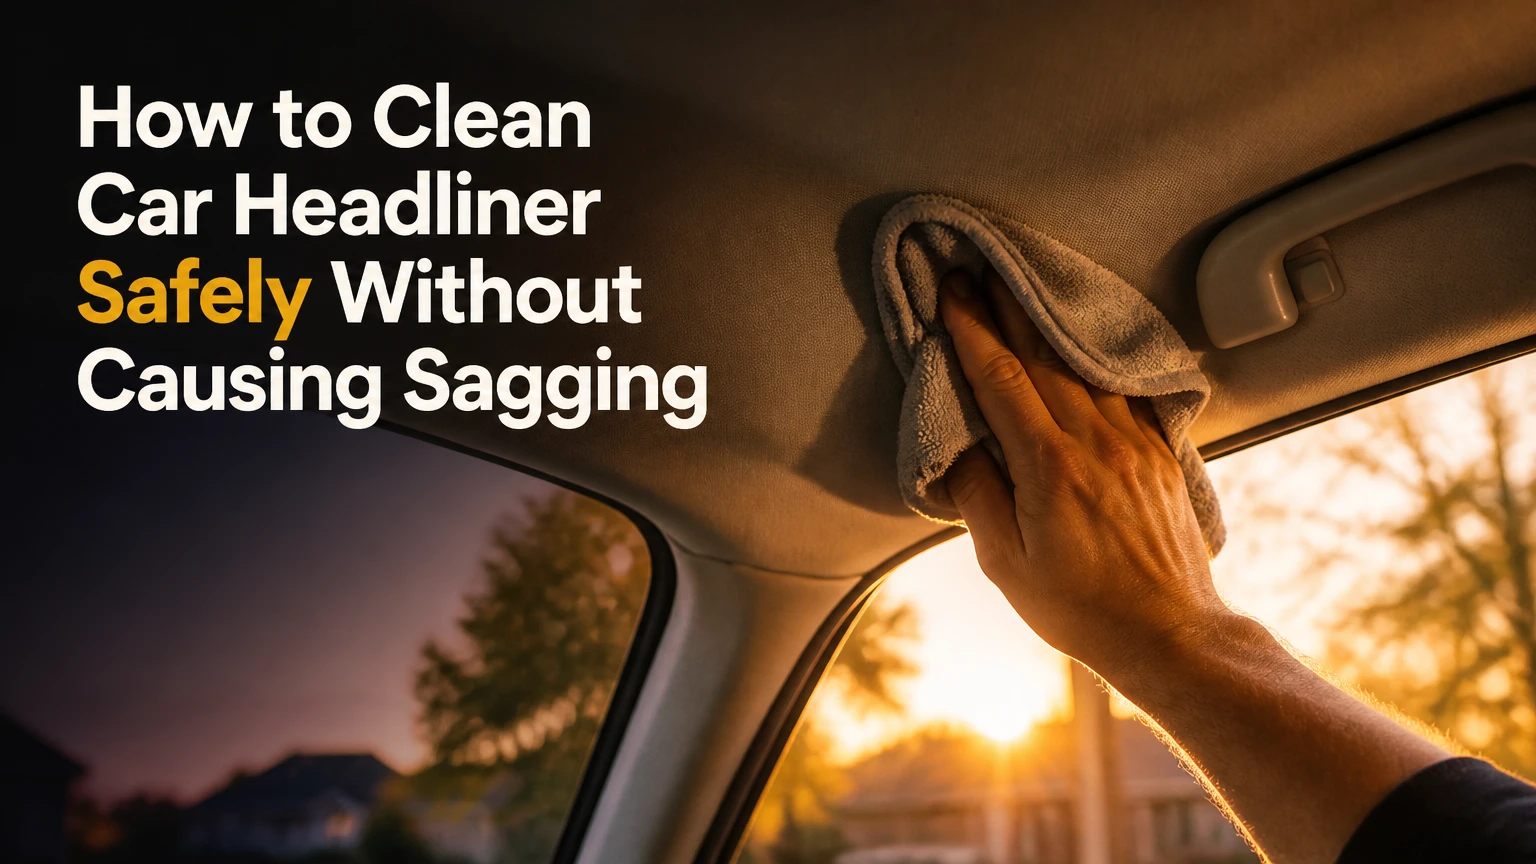
A car headliner is cleaned safely with a dry vacuum pass, a small amount of cleaner applied to a microfiber towel or soft brush, gentle blotting, and rapid air drying. The key is surface-only cleaning: keep liquid in the fabric’s upper fibers and away from the foam backing and water-soluble adhesive beneath it.
Key Facts at a Glance
- A typical automotive headliner contains fabric bonded to thin foam and a molded or fiberboard substrate.
- Direct spraying is unsafe because liquid can travel through the fabric and weaken the adhesive.
- A soft brush, two microfiber towels, and a pH-neutral interior cleaner are sufficient for most light soil.
- A small isolated mark usually takes 10-20 minutes to clean and 1-3 hours to dry.
- Existing sagging means the adhesive or foam has already failed, so cleaning can make separation worse.
- Steam cleaning and full wet extraction carry more risk than low-moisture spot cleaning.
What Is a Car Headliner?
A car headliner is the fabric-covered interior roof panel that finishes the vehicle’s ceiling. The assembly commonly includes a thin polyester or nylon face fabric, a polyurethane foam layer, adhesive, and a shaped backing board, although exact materials vary by vehicle manufacturer and model year.
The headliner reduces reflected cabin noise and moderates heat transfer through the roof. It also surrounds components such as dome lights, grab handles, sunroof trim, microphones, wiring, and curtain-airbag areas. Those components make aggressive scrubbing or removal unsuitable for routine cleaning.
The visible fabric is usually only a few millimeters thick as part of the complete assembly. Fabric thickness alone does not determine safety, because the adhesive interface is the vulnerable layer. Once cleaner reaches that interface, drying can leave bubbles, loose edges, or permanent sagging.
Why Does a Headliner Sag After Cleaning?
Headliner sagging occurs when moisture, heat, age, or contamination weakens the bond between the fabric and foam. Water-based cleaners can soften adhesive, while steam can add both heat and moisture; neither method reliably restores an aged bond after the fabric separates.
A headliner that already hangs down, forms bubbles, or feels loose around an edge should not receive ordinary wet cleaning. Pressing it flat may temporarily change its appearance, but the underlying foam and glue remain compromised. Repair generally requires removing the panel, replacing deteriorated foam, and applying new headliner adhesive.
What Should You Prepare Before Cleaning?
Prepare 2-3 clean, low-lint microfiber towels, a vacuum with a soft brush attachment, a soft horsehair or interior brush, and a dedicated automotive upholstery or headliner cleaner. A small spray bottle is useful only for applying product to the towel, never for spraying the roof directly.
Before You Start
| Requirement | Typical specification | Why it matters |
|---|---|---|
| Cleaning time | 20-40 minutes | Covers vacuuming, testing, cleaning, and final wiping |
| Drying time | 1-3 hours for light work | Prevents trapped moisture at the adhesive layer |
| DIY material cost | $10-$30 | Covers cleaner, towels, and a soft brush |
| Microfiber towels | 2-3, 300-500 GSM | One damp application towel and two dry backups |
| Cleaner quantity | 5-15 mL per small area | Limits moisture transfer through the fabric |
| Brush type | Soft horsehair or interior brush | Reduces fraying and surface fuzzing |
| Work condition | 15-30°C, low to moderate humidity | Shortens drying and reduces condensation |
Use the vehicle owner’s manual before removing trim or disconnecting electrical components. Keep cleaner away from dome-light openings, headliner-mounted microphones, seat-belt mounts, and curtain-airbag seams.
Inspect the Roof Before Applying Product
Look for sagging, foam dust, bubbles, loose perimeter fabric, water-intrusion marks, and brittle trim. Photograph existing defects so a later change is not mistaken for cleaning damage. If the roof has a fresh leak, repair the leak first, because cleaning cannot prevent a new water stain.
Test the cleaner in a hidden location, such as behind a removable visor edge or near an upper pillar where the material is not visible. Wait until the test spot dries. Check for color transfer, lightening, stiffness, a visible ring, or changed texture before proceeding.
How to Clean Car Headliner Without Saturating It
The safest process has six actions: remove loose soil, identify the stain, test the product, apply cleaner to a tool, blot or lightly agitate, and dry immediately. Work in small sections of approximately 15 by 15 centimeters, because large wet areas are harder to control and more likely to produce drying rings.
Step 1: Vacuum Loose Dust and Hair
Set the vacuum to a normal suction setting and attach a clean, soft-bristle tool. Hold the attachment just above the fabric or let the bristles make feather-light contact while moving in one direction.
Vacuum seams, visor edges, grab-handle recesses, and the area around the dome light separately. Do not drag a hard plastic nozzle across the roof. Pet hair can be lifted with a clean rubber glove or a dry, soft upholstery brush before vacuuming, rather than with adhesive rollers that may pull fibers.
You will know it worked when: loose dust and hair disappear without raised fuzz or a change in nap direction.
Common mistake: pressing the nozzle into the headliner, which can leave a shiny track or loosen aged fabric.
Step 2: Identify the Soil and Select the Least-Wet Method
Use dry foam for light overall discoloration, a damp microfiber towel for an isolated water-based mark, and a small amount of solvent-compatible product for localized grease only after testing. Heavy smoke residue, severe soot, and biological contamination require professional assessment rather than repeated DIY wet passes.
| Soil or stain | First-choice method | Typical contact time | Main warning |
|---|---|---|---|
| Dust and light gray soil | Dry foam on soft brush | 30-60 seconds | Avoid repeated passes over one spot |
| Coffee or soft drink | Damp towel blotting | 10-20 seconds | Sugars can leave sticky residue |
| Finger grease or sunscreen | Tested upholstery cleaner | 20-30 seconds | Solvent can alter dye or foam |
| Ink transfer | Professional spot treatment | 5-15 seconds | Alcohol may spread dye or ink |
| Smoke film and odor | Low-moisture professional cleaning | 1-3 hours drying | Odor source may be inside seats and carpet |
| Mold or biohazard | Professional remediation | Case-specific | Do not brush contaminated material |
Stain categories overlap. A “water stain” often contains dissolved dirt from the roof or adhesive, so adding water alone may spread the visible edge rather than remove the contamination.
Step 3: Test and Load the Cleaning Tool
Read the product label and choose a cleaner marked for automotive fabric, upholstery, or headliners. Spray one or two short bursts onto a folded microfiber towel or the tip of a soft brush, then distribute the product across the tool before touching the ceiling.
A towel should feel cool and slightly damp, not wet enough to release drops when squeezed. For a small stain, begin with approximately 1-2 mL of product. Add another small amount only when the first pass fails and the fabric remains stable.
A diluted all-purpose cleaner is not automatically safe because concentration, alkalinity, dye, and adhesive vary. If a product label permits interior fabric use, follow its dilution instructions; a generic 10:1 dilution is a starting point, not a universal specification.
You will know it worked when: the tool transfers a controlled, thin film without a wet perimeter.
Common mistake: spraying the product directly overhead, which creates a concentrated wet patch that can reach the glue.
Step 4: Blot the Stain From the Outside Toward the Center
Place the treated portion of the towel over the mark and press vertically for 2-3 seconds. Lift the towel, rotate to a clean section, and repeat rather than rubbing back and forth. For a ring, begin several centimeters outside the visible edge and move gradually inward.
Blotting transfers dissolved soil into the towel. Rubbing pushes contamination sideways through the fibers and can raise the nap, making the repaired area look different even when the stain has faded.
Use a second dry microfiber towel immediately after each small pass. Press, lift, and inspect under several viewing angles. Stop after two or three controlled passes if the stain is not improving, because additional moisture usually increases damage faster than it increases cleaning power.
Step 5: Lightly Agitate Only When Blotting Is Insufficient
Use a soft horsehair brush with almost no downward pressure. Make 2-4 short strokes in the fabric’s existing direction, then stop and blot. A cross-hatch pattern can help with uniform cleaning across a broad area, but it should never become vigorous scrubbing.
Brush only enough to move cleaner through the surface fibers. Stiff nylon bristles can create fuzz balls, visible tracks, or a permanently rough patch. A brush also cannot repair discoloration caused by foam breakdown, nicotine penetration, or adhesive failure.
You will know it worked when: the cleaned area matches the surrounding texture after drying, with no halo or flattened strip.
Common mistake: continuing to brush because the wet fabric still appears darker than the dry fabric.
Step 6: Dry the Headliner Quickly and Evenly
Open the doors or windows and position a household fan so air moves across the roof rather than blasting one small point. Leave the fan operating for at least 60 minutes after a light spot treatment, and extend drying to 2-3 hours in cool or humid conditions.
Do not use a hair dryer on its hot setting. Concentrated heat can soften adhesive, distort synthetic fabric, or create a dry edge around a still-wet center. A cool fan gives more uniform drying and makes rings less likely.
You will know it worked when: the fabric returns to its normal shade and feels dry across the entire cleaned section.
Common mistake: closing the car immediately, which traps humidity against the roof panel.
Which Headliner Cleaning Method Is Safest?
Spot cleaning is safest for isolated stains, while dry foam is the practical choice for light, uniform soil across a larger area. Low-moisture extraction can remove more embedded contamination, but it requires controlled equipment and an operator who understands headliner construction.
| Method | Best use | Moisture exposure | Typical DIY cost | Typical drying time |
|---|---|---|---|---|
| Dry vacuuming | Dust, hair, loose debris | None | $0 if vacuum owned | 0 minutes |
| Damp microfiber blot | One to three small marks | Low | $5-$15 | 1-2 hours |
| Automotive dry foam | Light overall soil | Low | $10-$25 | 1-3 hours |
| Low-moisture extractor | Severe widespread soil | Moderate | $50-$150 professional | 4-12 hours |
| Full wet extraction | Removed headliner panel | High | $100-$250 professional | 12-24 hours |
When Is Dry Foam Better Than a Liquid Cleaner?
Dry foam is better when the headliner has broad, light discoloration and no active sagging. The foam places less free liquid on the fabric than a conventional spray, which helps protect the adhesive while allowing a soft brush to lift surface soil.
Dry foam is not a deep-cleaning solution for thick grease, nicotine residue, or contamination inside the foam. Applying repeated coats to compensate for limited cleaning power defeats the method’s moisture advantage. In that situation, a professional should determine whether cleaning, panel removal, or replacement is appropriate.
Should You Use an Extractor?
Use an extractor only when a professional can control the spray volume, vacuum recovery, and drying process. A household carpet extractor is poorly suited to an overhead panel because its liquid delivery may exceed what the adhesive can tolerate.
A professional low-moisture system can outperform hand cleaning on severe, widespread soil. The trade-off is a higher failure cost: replacement of a damaged headliner commonly costs approximately $200-$500 for many mainstream vehicles, with luxury, panoramic-roof, and specialty-trim vehicles often costing more.
How Do You Remove Specific Headliner Stains?
Stain removal depends on the contaminant, dye stability, and age of the mark. Always start with dry removal and the least aggressive tested product, because a faded stain is usually preferable to a clean-looking patch with damaged fabric or loosened foam.
Water Marks and Rings
Water marks are best treated by cleaning a slightly larger, controlled area instead of wetting only the dark outline. Lightly dampen a towel with approved upholstery cleaner, blot from outside the ring toward the center, then use a dry towel to remove residue.
If the mark returns after drying, inspect the roof seal, sunroof drain, antenna gasket, and windshield perimeter. A recurring stain indicates water intrusion, not a cleaning failure. Resolve the leak before attempting another treatment.
Coffee, Soft Drinks, and Milk
Blot fresh liquid with a dry towel first. Apply a small amount of fabric-safe cleaner to a second towel, press for a few seconds, and follow with a dry towel until no sticky residue transfers.
Milk and sugary drinks can leave odor even after the color disappears. Do not flood the panel to chase the smell. A professional interior treatment may be necessary if liquid reached the foam layer.
Grease, Makeup, and Sunscreen
Remove surface residue with the edge of a dry microfiber towel, then test a pH-neutral upholstery cleaner on an inconspicuous area. For a persistent oily mark, a tiny amount of 70% isopropyl alcohol on a towel may work on some synthetic fabrics, but it can remove dye, spread makeup, or affect printed trim.
Never pour alcohol onto the headliner. Use one light dab, inspect the towel for color transfer, and stop if the fabric changes. Solvent treatment is a targeted exception, not a general headliner-cleaning method.
Ink and Dye Transfer
Ink is difficult because the solvent that dissolves the ink may also dissolve or move the headliner’s dye. Blot from the perimeter inward with a tested product, changing towel sections frequently, and limit each contact period to a few seconds.
Professional cleaning is preferable when the mark is larger than a coin, located on a contrasting light fabric, or close to an electronic opening. Do not scrub ink, because mechanical spreading can enlarge the repair area.
Smoke Odor
Smoke odor usually exists beyond the visible roof fabric, including carpet, seat foam, belts, vents, and cabin filters. Cleaning only the headliner may improve the smell temporarily but cannot remove the full source.
Ventilate the vehicle, replace a contaminated cabin filter where appropriate, and clean hard surfaces separately. Ozone treatment should not be used in an occupied vehicle and requires strict manufacturer and safety guidance; it is not a substitute for source removal.
What Should You Never Use on a Headliner?
Avoid direct spraying, steam, household bleach, strong degreasers, dish soap, stiff brushes, abrasive sponges, and high-heat dryers. These products or tools can leave residue, alter color, raise fibers, soften adhesive, or force liquid into the foam backing.
| Product or tool | Failure mechanism | Safer alternative |
|---|---|---|
| Steam cleaner | Heat and moisture soften adhesive | Cool airflow and low-moisture cleaner |
| Direct aerosol spray | Concentrated liquid penetrates backing | Spray onto towel or brush |
| Bleach | Uneven whitening and fiber damage | Tested upholstery cleaner |
| Dish soap | Difficult-to-remove surfactant residue | Automotive fabric cleaner |
| Stiff nylon brush | Fraying and texture change | Soft horsehair brush |
| Hard vacuum nozzle | Pressure marks and loosened fabric | Soft brush attachment |
| Hot hair dryer | Local adhesive and color damage | Fan or cool air |
A common professional mistake is treating the headliner like carpet. Carpet can often tolerate substantial agitation and flushing because it rests on a floor substrate. A roof liner depends on a thin adhesive bond, so the same cleaning volume can cause permanent separation overhead.
Another counterintuitive mistake is cleaning only the visible stain. A narrow wet patch often dries with a halo because dissolved dirt migrates toward the edge. Cleaning a slightly wider area with controlled moisture can produce a more uniform result than repeatedly wetting the center.
How Do You Fix Common Cleaning Problems?
Most headliner cleaning problems result from excess moisture, excessive friction, or incomplete drying. Stop adding product when the fabric changes texture, becomes loose, or develops a spreading ring.
| Problem | Likely cause | Immediate response | When to stop DIY |
|---|---|---|---|
| Dark ring after drying | Soil migration or uneven moisture | Blot outer edge inward, then dry | Ring remains after one correction |
| Fuzzy patch | Brush or vacuum abrasion | Stop brushing; flatten gently by hand | Texture remains visibly different |
| Slight fabric looseness | Adhesive softening | Blot dry and increase airflow | Any sag grows or forms bubbles |
| Cleaner residue | Excess product or soap | Use a barely damp towel, then dry | Residue persists after one pass |
| Stain spreads | Rubbing or excess solvent | Use clean towel sections and blot | Area becomes larger than original |
| Persistent odor | Contamination in foam or cabin | Address source and ventilate | Odor returns after drying |
If slight sagging appears during cleaning, stop immediately and remove surface moisture with a dry towel. Do not press aggressively, apply glue through the fabric, or use heat to force the panel flat. A trim specialist should assess the bond once the vehicle is fully dry.
A headliner that has already separated generally needs repair, not more cleaning. Temporary pins, staples, and spray adhesive applied from the cabin can damage the board, interfere with airbags, and leave a poor repair pattern.
How Much Does Headliner Cleaning Cost?
Typical DIY headliner cleaning costs $10-$30, while professional low-moisture cleaning commonly costs $50-$150. Replacement commonly costs $200-$500 for many ordinary vehicles, so conservative cleaning is financially sensible when the panel is structurally sound.
| Service or purchase | Typical price | Typical duration | Appropriate situation |
|---|---|---|---|
| Microfiber and soft brush | $5-$15 | 10-20 minutes setup | One vehicle, light soil |
| Dedicated dry-foam cleaner | $10-$25 | 20-40 minutes | Broad light discoloration |
| Professional spot cleaning | $30-$75 | 30-60 minutes | Visible isolated stain |
| Professional headliner cleaning | $50-$150 | 1-3 hours plus drying | Smoke or widespread soil |
| Headliner repair | $150-$400 | 3-8 labor hours | Local separation or sag |
| Headliner replacement | $200-$500 typical | 4-10 labor hours | Failed foam or extensive sag |
Prices vary by region, vehicle size, roof complexity, and whether trim must be removed. Panoramic sunroofs, integrated lighting, microphones, and curtain-airbag hardware increase labor and inspection requirements.
When Should You Hire a Professional?
Hire a professional for existing sagging, widespread nicotine residue, mold, biohazard contamination, repeated water damage, or a headliner that contains delicate suede, Alcantara, perforations, or integrated electronics. Professional help is also appropriate when a stain covers more than roughly 25% of the roof or has penetrated the foam.
DIY cleaning is reasonable for light dust, small food marks, and a few localized spots on intact synthetic fabric. It is not good for rebuilding failed adhesive or removing contamination that has soaked through multiple layers.
Ask the detailer which method will be used, how much liquid is delivered, how the cabin will be dried, and whether the operator has worked around curtain airbags and roof electronics. A vague promise of “deep shampooing” is less reassuring than a specific low-moisture process.
Variations for Common Situations
Cleaning a Light-Colored Headliner
Use smaller sections and inspect under natural light before moving on. Light fabric reveals rings and cleaner residue easily, so change towel surfaces more often and avoid a dark, heavily dyed cloth that could transfer color.
Cleaning an Older Vehicle
Age increases adhesive and foam failure risk. Reduce the cleaner quantity, avoid all brushing unless necessary, and test a larger hidden area. If the fabric feels brittle or produces orange foam dust, stop and seek trim advice.
Removing Pet Hair
Lift hair dry with a soft rubber glove or rubberized brush, then vacuum with a soft attachment. Wetting hair before removal creates a sticky mat that requires more agitation and increases the chance of fabric damage.
FAQ
Can I use vinegar to clean a car headliner?
Vinegar is not the preferred first-line cleaner for a car headliner because its acidity does not address every stain and its water content still presents saturation risk. A tested automotive upholstery cleaner applied to a towel gives better control. Never mix vinegar with bleach or other household chemicals.
Can I use a Magic Eraser on the roof liner?
A Magic Eraser is an abrasive melamine sponge and can permanently flatten or remove headliner fibers. The sponge may make a mark appear lighter while leaving a visible texture change. Use a soft microfiber towel and a fabric-safe cleaner instead, with minimal pressure.
How long should a car headliner take to dry?
A lightly treated headliner typically dries in 1-3 hours with open windows and moving air. Cool temperatures, high humidity, and larger cleaned areas can extend drying beyond that range. Do not close the vehicle or judge the final color until the fabric and surrounding foam are fully dry.
Can I clean a sagging headliner?
Do not wet-clean a sagging headliner. Sagging indicates a failed or failing adhesive bond, and additional moisture can enlarge the separation. Keep the panel dry and have an automotive trim specialist inspect whether the fabric can be rebonded or requires replacement.
Is an upholstery cleaner safe for every vehicle roof liner?
No upholstery cleaner is automatically safe for every headliner. Vehicle fabrics, dyes, foam, adhesives, and previous repairs differ. Check the label, test in a hidden area, apply cleaner to the tool rather than the roof, and stop if color or texture changes.
How often should I clean my car headliner?
Vacuum a headliner during routine interior cleaning and perform damp spot cleaning only when marks appear. A light vacuum every 1-3 months is usually sufficient for a normally used vehicle. Frequent wet cleaning adds adhesive risk without improving a roof that is already visually clean.
The Bottom Line
To clean a car headliner safely, vacuum first, test the product, apply a small amount to a towel or soft brush, blot in small sections, and dry with moving air. Keep the process surface-only, avoid steam and direct spraying, and stop immediately if the fabric loosens, bubbles, or changes texture.


