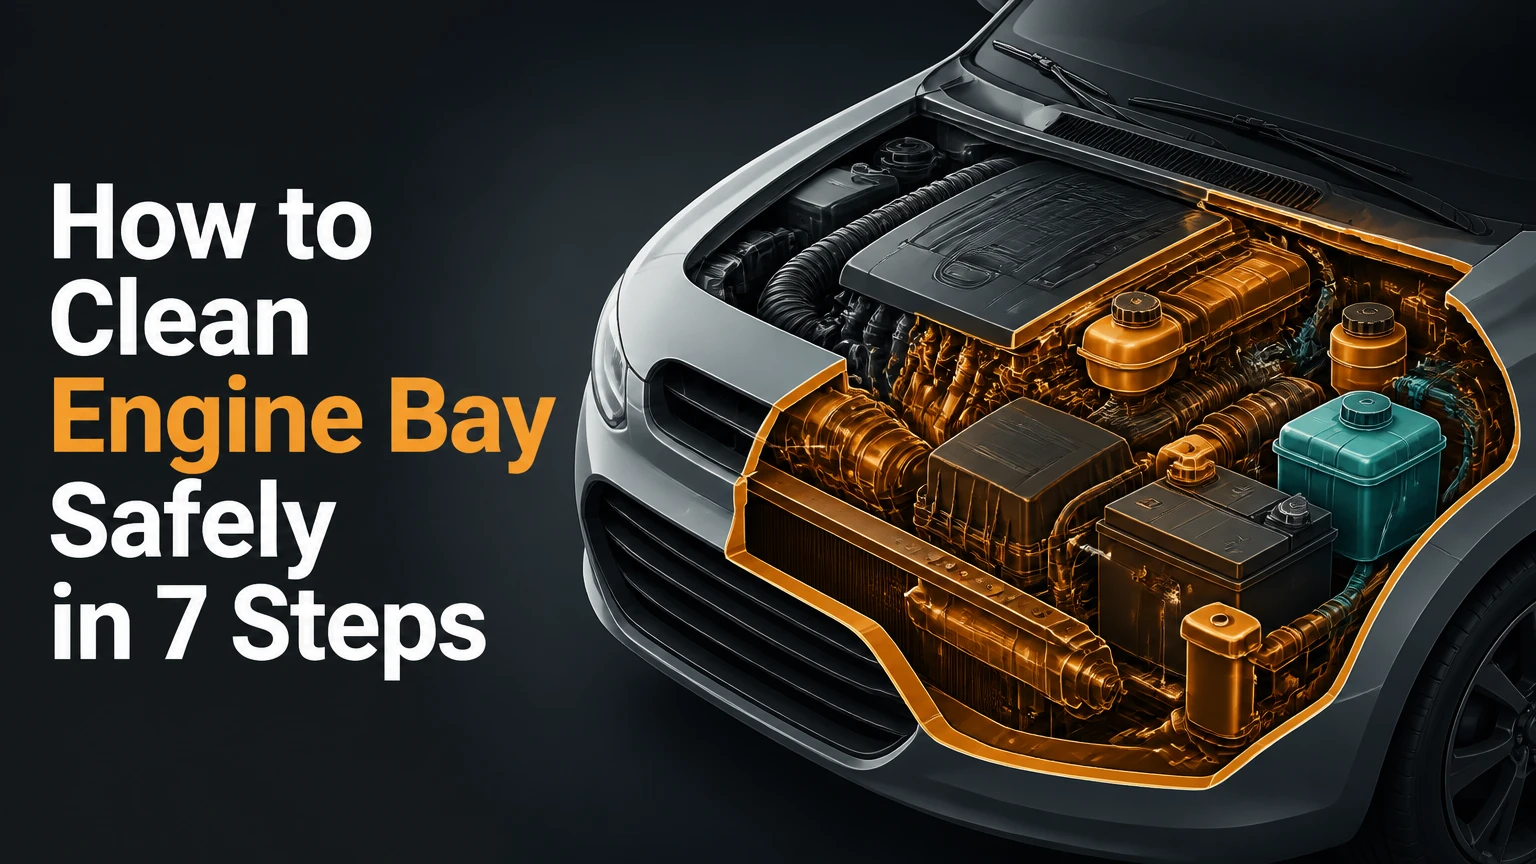
To clean an engine bay safely, work on a cool engine, remove dry debris, cover vulnerable electrical components, apply diluted automotive degreaser, agitate with soft brushes, rinse with controlled low-pressure water, and dry thoroughly. A typical DIY cleaning takes 60-120 minutes and succeeds when water never enters an intake, connector, fuse box, or ignition opening.
Key Facts
A cool, warm-to-touch engine is safer to clean than a hot engine or a completely cold engine covered in condensation.
A garden hose with a gentle fan pattern is safer for most beginners than a close-range pressure washer.
Typical DIY cost is $15-$40 for cleaner, brushes, towels, and water-based dressing.
Degreaser should dwell for about 3-5 minutes and must not dry on painted, plastic, or aluminum surfaces.
Drying electrical connectors, spark-plug wells, belts, and intake openings matters more than achieving a glossy finish.
Clean an engine compartment about once or twice yearly, or after winter salt, off-road driving, or a major oil spill.
What Engine Bay Cleaning Actually Does
Engine bay cleaning removes loose dirt, road salt, oil residue, grease, leaves, and dust from the visible engine compartment. The target is the exterior of the engine and surrounding components, not the inside of the engine, air intake, fuel system, or electrical housings.
A clean compartment creates a more useful inspection baseline. Freshly removed grime can reveal a valve-cover seep, coolant crust, power-steering leak, loose hose, damaged wiring, or rodent nesting that was previously hidden. Cleaning does not repair those defects, and heavy oil deposits should be treated as a maintenance issue rather than cosmetic dirt.
Thermal benefits are limited. Thick sludge can insulate some exposed surfaces, but engine-bay cleaning is not a substitute for a working cooling system, correct coolant, clean radiator fins, or proper oil level. The strongest practical benefits are leak visibility, corrosion control around salt deposits, easier service work, and reduced debris near hot components.
Is Engine Bay Cleaning Safe?
Engine bay cleaning is generally safe when water exposure is controlled and the vehicle is dry before operation. Modern vehicles are designed to encounter rain and splash, but weather resistance does not make every connector, sensor, alternator, or aftermarket installation safe against concentrated spray.
Vehicle design varies by year, engine, and market. The owner’s manual should take priority over generic detailing advice, especially for hybrids, plug-in vehicles, high-voltage systems, modified cars, and older vehicles with exposed distributors or brittle wiring.
Which Cleaning Method Is Safest?
The safest method for most beginners is hand cleaning followed by a small amount of low-pressure rinsing. Waterless wiping has the lowest intrusion risk, while steam offers excellent control for trained users; close-range pressure washing has the highest chance of forcing water past seals.
| Method | Typical time | Typical cost | Best use | Main risk |
|---|---|---|---|---|
| Hand wipe-down | 90-150 minutes | $10-$30 | Classics, light dust, sensitive wiring | Missed grime in tight gaps |
| Garden hose rinse | 60-120 minutes | $15-$40 | Modern daily drivers, moderate dirt | Water pooling in connectors |
| Low-pressure pressure washer | 45-90 minutes | $25-$80 rental | Heavy sludge on robust vehicles | Seal and electrical intrusion |
| Steam cleaning | 45-90 minutes | $75-$250 professional | Show cars, concentrated grease | Burns, softened labels, heat damage |
A pressure washer’s advertised PSI does not determine safety by itself. Nozzle angle, distance, flow, and how long the spray remains on one connector matter just as much. A wide fan held 18 inches away can be less aggressive than a narrow nozzle used at 1,500 PSI from three inches away.
Can You Use Water on an Engine?
You can use a controlled amount of water on many modern engine bays, but you should never treat the compartment like an exterior body panel. Use a light fan or mist, avoid direct spray on electrical parts, and prevent water from entering open ducts, coils, fuse boxes, and belt-driven components.
Hand cleaning is preferable when the vehicle has cracked loom, exposed wiring, an aftermarket intake, a distributor, missing covers, or known electrical faults. Waterless cleaning also makes sense when temperatures are near freezing, the car cannot be driven afterward, or runoff cannot be contained.
Before You Start
Prepare 60-120 minutes, $15-$40, and a shaded work area with drainage or a way to collect runoff. The most important prerequisite is a mechanically intact vehicle with no open intake tube, missing fuse-box cover, visibly damaged wiring, or high-voltage component exposed.
| Item | Recommended amount or specification | Purpose |
|---|---|---|
| Automotive degreaser or APC | 500-750 ml | Break down oil and road film |
| Water dilution | 4:1 cleaner to water only if label permits | Reduce chemical strength |
| Microfiber towels | 6-10 towels | Wiping and drying |
| Detailing brushes | 2-4 soft and medium brushes | Agitation in gaps |
| Garden hose nozzle | Fan or mist pattern | Controlled rinse |
| Plastic bags and tape | 4-6 bags | Temporary component protection |
| Leaf blower or compressed air | 50-100 PSI compressed air | Drying connectors and recesses |
| Water-based dressing | 100-200 ml | Optional plastic and rubber finish |
Wear nitrile gloves and eye protection. Degreasers can irritate skin, damage polished aluminum, stain paint, and attack some rubber or electrical labels when left wet for too long. Keep a separate towel for greasy surfaces; using that towel on painted bodywork can transfer oil and grit.
Do not clean over storm drains unless local rules permit it and runoff is controlled. Oil-contaminated wash water can enter waterways, so absorb a spill, collect dirty runoff where practical, and follow local disposal requirements.
Step 1: Cool the Engine and Inspect the Bay
Park on level ground, switch off the engine, open the hood, and wait until the engine is cool to the touch. A typical wait is 30-60 minutes after normal driving, although a turbocharged engine, exhaust manifold, or high ambient temperature may require longer.
Do not spray cold water onto a hot exhaust manifold, turbocharger housing, cylinder head, or engine block. Thermal shock is a real risk for hot components, and rapid cooling can also create steam that pushes moisture into places you cannot see.
Before wet cleaning, inspect the bay for loose caps, cracked hoses, exposed conductors, missing covers, and active leaks. Tighten only components intended for owner service, and photograph the layout if you expect to remove covers.
You will know Step 1 worked when: every visible metal surface is cool enough to touch briefly, all fluid caps are closed, and no open intake or damaged electrical part remains unaddressed.
Common mistake: cleaning immediately after driving because warm grime seems easier to dissolve. Warm is acceptable; hot is not.
Step 2: Protect Electrical and Air-Intake Components
Cover the alternator, exposed battery terminals, fuse and relay boxes, ignition coils, spark-plug wells, open air-filter housings, aftermarket wiring, and sensitive aftermarket electronics. Use plastic bags secured loosely with tape or zip ties, never adhesive directly on hot paint, hoses, or wiring.
A cover reduces splash but does not make a component waterproof. Do not aim a hose at a covered alternator or connector. Disconnecting the negative battery terminal can reduce short-circuit risk, but it may reset windows, clocks, radios, steering-angle data, or learned settings; consult the owner’s manual before disconnecting power.
| Component | Water sensitivity | Protection method | After-cleaning check |
|---|---|---|---|
| Alternator | High at direct spray | Bag or foil shield | No pooling, normal charging |
| Fuse box | High if cover is loose | Confirm cover, shield exterior | Dry lid and seams |
| Ignition coils | High in plug wells | Cover coils and openings | Remove moisture with air |
| Air intake opening | Very high | Seal opening completely | No liquid inside duct |
| Battery terminals | Moderate to high | Shield positive terminal | Dry, tight connections |
| Aftermarket wiring | Variable | Wrap exposed sections | Inspect damaged insulation |
Aluminum foil can conform around a component but should not be left loose near belts or fans. Keep all temporary protection clear of the serpentine belt, pulleys, cooling fan, and exhaust.
You will know Step 2 worked when: an accidental side splash would not reach an open intake or exposed electrical opening, while moving parts remain completely unobstructed.
Common mistake: covering the battery and forgetting an open cone air filter. The intake opening deserves the strongest protection.
Step 3: Remove Dry Debris Before Applying Cleaner
Use a vacuum, soft brush, or leaf blower to remove leaves, sand, insects, and loose dust from the cowl, radiator support, inner fenders, and corners. Work from the back of the compartment toward the front so debris does not fall into cleaned areas.
Pay special attention to cowl drains below the windshield. Leaves can block drainage and hold moisture against wiring or body seams. Do not blast debris toward the open intake, alternator, or cabin-air intake.
A vacuum is usually safer than compressed air for rodent nesting, brake dust, and heavily contaminated debris. If you find droppings, wear respiratory protection, avoid dry sweeping, and follow local public-health guidance for wet cleanup.
You will know Step 3 worked when: loose material no longer falls when you tap plastic covers or brush the cowl.
Common mistake: using water to move dry leaves. Water turns organic debris into sludge and pushes it into drains.
Step 4: Apply the Correct Degreaser
Choose a pH-balanced automotive engine cleaner or an all-purpose cleaner whose label permits engine-bay use. Dilute the product exactly as directed; a 4:1 water-to-cleaner mixture is a common starting point for light grime, but product concentration varies, so the label controls.
Apply cleaner to a small section at a time, generally from lower areas upward to reduce premature streaking. Keep the spray off belts, open connectors, air intakes, hot surfaces, and polished or uncoated aluminum unless the product specifically permits those materials.
Allow approximately 3-5 minutes of dwell time, then agitate before the product dries. Heavy baked-on oil may need a second application rather than a stronger, untested chemical. Strong alkaline degreasers can discolor aluminum and weaken some finishes.
You will know Step 4 worked when: oily film looks emulsified or cloudy, but the product remains visibly wet and has not formed dry white or chalky patches.
Common mistake: spraying the entire engine bay at once. Large sections dry before you can rinse them, increasing spotting and surface damage.
Step 5: Agitate Without Damaging Parts
Use a soft detailing brush for plastic covers, a medium nylon brush for textured metal, and a small toothbrush-style brush for seams. Agitate with short strokes, keeping the brush loaded with cleaner rather than grinding dry grit into painted surfaces.
Avoid scrubbing electrical connector seals, labels, braided wiring, serpentine belts, and fragile heat shields. A brush can remove grime from a hose while also lifting an already damaged outer layer, so inspect rather than assume every dirty part needs aggressive treatment.
For baked-on deposits, repeat the cleaner and agitation cycle. A plastic scraper can help on thick residue around a removable cover, but never use a metal tool against aluminum housings, wiring insulation, or painted brackets.
You will know Step 5 worked when: the surface beneath the foam has its original texture and color, with no lifted labels, frayed loom, or brush marks.
Common mistake: using a wheel brush or stiff bristles everywhere. Engine compartments contain soft plastics and wiring that need different brush pressure.
Step 6: Rinse With Controlled Water
Rinse one small section at a time with a garden hose on a gentle fan pattern. Keep the nozzle at least 12-18 inches away, avoid direct streams on connectors and seals, and use the least water that removes the loosened residue.
If using a pressure washer, select a wide 25-degree or 40-degree fan, keep it farther away than you would on wheels, and never hold the trigger stationary over one component. A pressure setting below 1,500 PSI is a commonly cited upper limit for cautious detailing, but a lower setting can still cause damage at close range.
Rinse from high areas toward low areas, then inspect pockets below the intake, around the battery tray, and beside the transmission. Do not rinse an open intake, alternator vents, fuse-box seam, or spark-plug well.
You will know Step 6 worked when: cleaner residue is gone, runoff is no longer greasy, and no compartment recess contains standing water.
Common mistake: using a narrow “jet” setting because it removes grime faster. Concentrated force is the primary problem, not cleaning speed.
Step 7: Dry, Reassemble, and Inspect
Remove every plastic bag, foil shield, and piece of tape before starting the vehicle. Use a blower or compressed air around connectors, coil packs, plug wells, fuse-box edges, battery trays, radiator supports, and belt areas, then wipe accessible surfaces with clean microfiber towels.
Compressed air should move water out of recesses rather than drive it deeper. Use brief bursts at an angle, especially around weather-packed connectors. Let the hood remain open for 15-30 minutes in dry weather if moisture remains.
Apply a small amount of water-based dressing to plastic covers and exterior rubber only. Silicone-heavy products can leave a greasy surface that attracts dust, and dressing should never touch the serpentine belt, pulley faces, brake components, or electrical contacts.
Start the engine only after the intake is confirmed dry and all protection is removed. Let the vehicle idle for 5-10 minutes, then check for warning lights, abnormal belt noise, fluid leaks, and signs of steam.
You will know Step 7 worked when: the engine starts normally, the belt runs quietly, electrical warnings remain off, and no water gathers after the first heat cycle.
Common mistake: assuming heat will fix every wet connector. Engine heat may evaporate surface moisture but cannot reliably dry sealed cavities or water trapped in spark-plug wells.
How Much Time and Money Does It Take?
A typical DIY engine-bay clean costs $15-$40 and takes 60-120 minutes, including preparation and drying. Professional detailing commonly costs $75-$250 or more, while steam cleaning usually costs more because it requires specialized equipment and trained handling.
| Job condition | DIY time | DIY cost | Professional time | Typical professional cost |
|---|---|---|---|---|
| Light dust | 30-60 minutes | $10-$20 | 30-45 minutes | $50-$100 |
| Moderate road film | 60-120 minutes | $15-$40 | 45-75 minutes | $75-$150 |
| Heavy oil residue | 2-4 hours | $25-$60 | 60-120 minutes | $125-$250 |
| Classic or fragile wiring | 90-180 minutes | $20-$50 | 60-120 minutes | $150-$300 |
Clean the compartment once or twice per year for a normal road car. Increase inspections after salted winter roads, flooding, off-road driving, construction-site exposure, or an oil leak. Cleaning too often can create unnecessary water and chemical exposure without improving mechanical condition.
Variations for Special Situations
How Do You Clean a Greasy Engine Bay?
For heavy grease, remove the source of the leak before cosmetic cleaning. Photograph the deposit, check oil and coolant levels, and look for fresh wetness after the engine runs; otherwise, a clean compartment will quickly become dirty again.
Use absorbent pads for pooled oil, scrape thick sludge into a suitable container, and apply degreaser in several small cycles. Do not flush a large oil deposit into a drain or onto soil. A professional is appropriate when oil has reached belts, electrical modules, hot exhaust parts, or the underside of the vehicle.
How Do You Clean a Classic Car Engine Bay?
Use a waterless wipe-down on a classic car with exposed carburetors, mechanical distributors, brittle loom, fabric-covered wiring, or unsealed connectors. Apply cleaner to a towel or brush rather than flooding the compartment, and dry each area immediately.
Classic vehicles vary widely. Some restorations use modern sealed components, while original vehicles may have corrosion-sensitive fasteners and porous finishes that water can stain.
How Do You Clean a Hybrid or Electric Vehicle Bay?
Follow the manufacturer’s instructions and avoid high-voltage cables, orange conduits, inverter housings, charging hardware, and sealed battery components. A damp microfiber wipe and localized cleaner are safer than broad rinsing when the vehicle’s service layout is unfamiliar.
Never remove high-voltage covers or disconnect orange cables for detailing. Cleaning the visible engine compartment does not authorize work on the traction battery or high-voltage system.
Common Mistakes and How to Fix Them
| Symptom after cleaning | Likely cause | Immediate action | Escalate when |
|---|---|---|---|
| Engine clicks or will not start | Wet ignition, battery connection, or fuse area | Stop cranking, inspect and dry | No start continues after drying |
| Check-engine light appears | Moisture in a sensor or ignition connector | Scan code, dry connector | Light flashes or engine misfires |
| Squealing belt | Water or cleaner on serpentine belt | Shut off, inspect belt and pulleys | Noise persists or belt is damaged |
| White aluminum spotting | Cleaner dried on metal | Rinse or neutralize per label | Etching remains |
| Rough idle | Wet plug wells or intake tract | Stop, inspect ignition and intake | Misfire remains after drying |
| Burning smell or smoke | Residue on exhaust or chemical reaction | Shut off and inspect hot surfaces | Smoke continues or wiring melts |
Do not spray belt dressing to hide squealing. Belt dressing can mask contamination, attract grit, and make diagnosis harder. If a belt slips, frays, cracks, or walks off a pulley, switch off the engine and arrange inspection.
If the engine will not start, disconnect the battery only if the owner’s manual permits it, then inspect spark-plug wells, coil boots, distributor components, intake ducts, and fuse-box areas. Use compressed air carefully, allow time to dry, and avoid repeated starting attempts that can drain the battery or worsen a misfire.
A check-engine light requires code retrieval rather than guesswork. An OBD-II scanner can identify a wet sensor circuit, ignition misfire, or unrelated fault. Electronic contact cleaner may be suitable for a disconnected connector if its label permits use on that material, but never spray household lubricant into a connector.
When Should You Use a Professional?
Use a professional detailer or technician when the engine is heavily oil-soaked, wiring is exposed, the vehicle has a high-voltage system you cannot identify, the compartment contains rodent contamination, or the car has a persistent electrical fault. Professional cleaning is also sensible when the vehicle must be sold and the leak source needs documentation.
Steam is useful for localized grease because it applies less liquid than a hose, but steam is not automatically safer. High heat can soften adhesives, damage labels, discolor finishes, and force moisture into connectors. The operator’s control and component knowledge determine the result.
Engine-bay cleaning is not appropriate for repairing an oil leak, removing corrosion from internal engine parts, cleaning the air intake interior, or restoring a flooded electrical system. Cosmetic work should stop when it becomes diagnosis or repair.
How Often Should You Clean the Engine Bay?
Clean a normal daily-driver engine bay once or twice yearly, then inspect it during routine oil changes. Salt-belt vehicles benefit from more frequent visual rinsing of accessible exterior areas, while off-road vehicles may need cleaning after each muddy trip.
A maintenance schedule should follow contamination, not a rigid calendar. Fresh oil, coolant crust, leaf buildup, or salt residue justifies attention; a clean, dry compartment does not need repeated chemical treatment.
FAQ
Can I Clean the Engine Bay With a Hose?
Yes, many modern vehicles can tolerate a gentle hose rinse when the engine is cool and vulnerable openings are protected. Use a wide fan pattern, keep the nozzle at least 12-18 inches away, and avoid direct spray on the alternator, fuse box, connectors, ignition components, and intake.
Should I Disconnect the Battery Before Cleaning?
Disconnecting the negative terminal can reduce short-circuit risk, but it is not mandatory for every vehicle and may reset vehicle electronics. Check the owner’s manual first, and never disconnect power as a substitute for covering an open intake or controlling rinse water.
Can I Use Dish Soap to Wash an Engine Bay?
Dish soap can remove oil, but automotive degreaser or labeled APC is usually easier to dilute and control on engine-bay materials. Dish soap may strip existing protection and leave residue, while an unsuitable solvent can stain aluminum, attack rubber, or damage painted surfaces.
Can I Clean an Engine Bay While the Engine Is Warm?
A mildly warm engine can help dissolve oily film, but every surface must be safe to touch and free from intense exhaust or turbocharger heat. Never rinse a hot engine with cold water, because rapid temperature change and steam increase component and intrusion risks.
Will Cleaning the Engine Bay Improve Performance?
Cleaning the engine bay usually does not produce a measurable power increase. Its practical benefits are easier leak detection, removal of corrosive salt and debris, improved service access, and a clearer view of hoses, belts, wiring, and fluid reservoirs.
What Should I Do if Water Enters the Air Intake?
Do not start the engine if water may have passed the filter into the intake tract. Disconnect the intake path if you can do so safely, inspect the filter and duct, and have a technician assess possible cylinder water before cranking, because liquid in a cylinder can cause severe mechanical damage.
The Bottom Line
The safest way to clean an engine bay is a controlled seven-step process: cool and inspect the vehicle, protect electrical and intake openings, remove dry debris, apply compatible degreaser, agitate gently, rinse with low-pressure water, and dry every recess before startup. Use hand cleaning for fragile vehicles, steam for trained operators, and professional help for leaks, high-voltage systems, or damaged wiring. Include how to clean engine bay in your maintenance routine once or twice each year, but treat any newly exposed leak as a repair finding, not a cosmetic imperfection.


