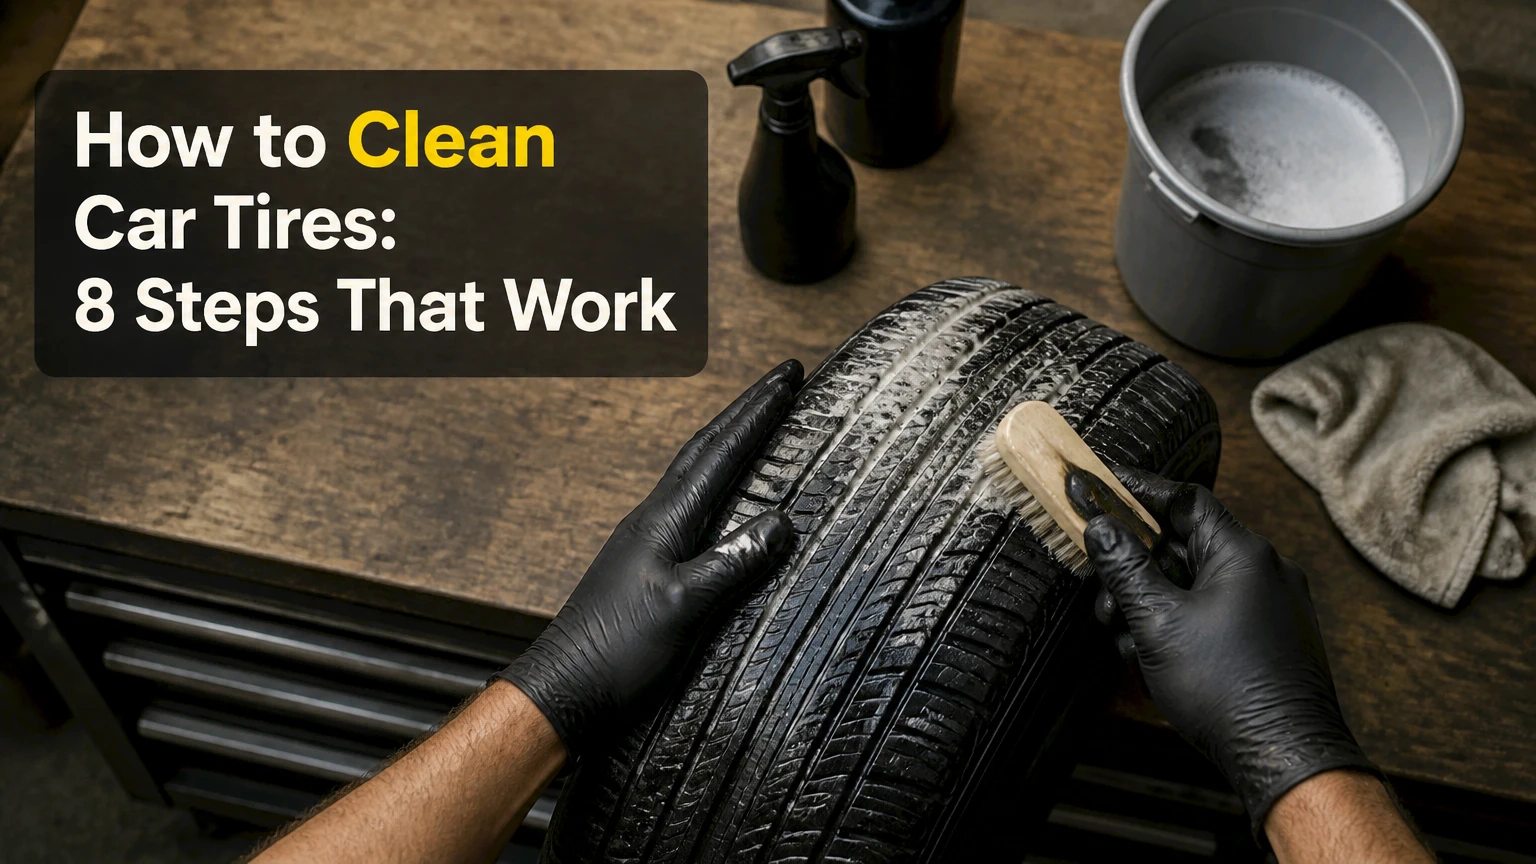
Car tire cleaning removes road film, brake-dust residue, oil, mud, and oxidized anti-ozonants from tire rubber. The safest method is to work on cool tires, rinse first, use a tire-safe cleaner for 30-60 seconds, scrub with a nylon brush, rinse completely, dry the sidewalls, and apply a light water-based dressing only if desired.
Key Facts at a Glance
Clean one cool tire at a time, and never allow tire cleaner to dry on rubber or wheels.
Brown runoff usually indicates oxidized anti-ozonant residue, commonly called tire blooming.
A medium-stiff nylon tire brush cleans sidewalls effectively without the cutting action of metal bristles.
Typical driveway cleaning takes 25-40 minutes for four tires and uses 250-500 milliliters of diluted cleaner.
Tire dressing improves appearance but does not repair cracked, aged, bulged, or structurally damaged rubber.
Water-based dressing generally creates less sling and leaves a less oily surface than solvent-heavy shine products.
What Do You Need Before Cleaning Car Tires?
Cleaning car tires requires a hose or pressure washer, a tire-safe cleaner, a dedicated nylon brush, two buckets or a rinse container, microfiber towels, and optional tire dressing. A hose is sufficient for normal dirt; a pressure washer saves time but requires controlled distance and avoids direct contact with valve stems or damaged rubber.
Before You Start
| Item | Typical specification | Practical quantity or setting |
|---|---|---|
| Tire cleaner | Alkaline, non-acid tire formula | 60-120 ml per tire when ready to use |
| All-purpose cleaner | Water-based APC concentrate | 1:4 to 1:10 cleaner-to-water dilution |
| Tire brush | Medium-stiff nylon bristles, 25-40 mm face | 1 dedicated brush |
| Water supply | Garden hose or pressure washer | 1,000-1,500 PSI, 25-40 degree nozzle |
| Drying materials | Microfiber towel or air blower | 1 towel per axle or 1 blower |
| Tire dressing | Water-based polymer or silicone emulsion | 10-20 ml per tire |
| Working conditions | Shade and cool surfaces | 10-30°C preferred |
| Typical total time | Four tires, moderate contamination | 25-40 minutes |
Park on a level surface, engage the parking brake, and turn the steering wheel only when necessary to expose the front sidewalls. Do not clean immediately after driving because hot rubber and wheels can dry chemicals unevenly. If the sidewall has cuts, exposed cords, a bulge, deep cracking, or a puncture, cleaning is not a remedy; have the tire inspected before driving.
Why Do Car Tires Turn Brown?
Car tires turn brown when anti-ozonant compounds migrate through the rubber, oxidize at the surface, and mix with accumulated road contamination. The process, known as blooming, is a normal consequence of tire chemistry and flexing, although heavy staining can also include mud, petroleum residue, and brake dust.
Tire manufacturers add antiozonants to slow ozone-related cracking. Ozone attacks exposed rubber, while antiozonants move toward the surface and react before ozone can damage the underlying compound. That protective migration can create a brown or tan film, especially on tires exposed to sunlight, heat, and frequent flexing.
A black sidewall is therefore not always a cleaner sidewall. A tire may look brown again several days after washing because more antiozonant has reached the surface. Repeated cleaning can reduce visible residue, but it cannot permanently stop blooming without removing the protective compounds that the rubber needs.
Blooming Versus Tire Damage
| Appearance | Likely cause | Cleaning response | Safety response |
|---|---|---|---|
| Uniform brown film | Anti-ozonant blooming | Clean and repeat once if needed | Normal appearance if rubber is intact |
| Brown splashes near wheel | Road oil or mud | Use cleaner and nylon agitation | Inspect for petroleum saturation |
| White or gray haze | Dried cleaner, oxidation, or old dressing | Re-clean lightly and rinse | Inspect for cracking |
| Fine sidewall cracks | Aging, ozone, or underinflation | Cleaning will not repair it | Ask a tire professional to assess |
| Bulge or localized swelling | Internal structural failure | Do not scrub or dress it | Replace or inspect immediately |
| Black residue on brush | Old dressing and road film | Repeat cleaning until runoff lightens | No direct safety conclusion |
The practical rule is simple: brown suds are a cleaning issue, while cracks, bulges, exposed cords, or missing rubber are tire-service issues.
How Do You Clean Car Tires Step by Step?
The complete car tire cleaning process has eight steps and normally takes 6-10 minutes per tire. Cleaning success depends more on keeping the surface wet and matching the chemical strength to the contamination than on using maximum pressure or excessive scrubbing.
Step 1: Cool the Tires and Inspect the Sidewalls
Move the vehicle into shade and wait until the tires feel cool to the back of your hand. Inspect each sidewall for cuts, bulges, exposed cords, bead damage, severe cracking, and objects lodged in the tread.
Keep cleaner away from tire-pressure monitoring hardware when it is accessible, and avoid spraying directly into valve cores. A tire with structural damage should not receive dressing because shine can conceal defects during a casual inspection.
You will know this step worked when: all four tires are cool, visible defects are noted, and no damaged tire is being treated as a cosmetic project.
Common mistake: beginning immediately after highway driving, when cleaner flashes off before it can loosen grime.
Step 2: Pre-Rinse the Tire and Wheel
Rinse from the top of the tire downward for 20-30 seconds, using a hose nozzle or a pressure washer held at least 30-45 centimeters away. Remove loose grit from the tread shoulders, lettering, and sidewall before touching the rubber with a brush.
Pre-rinsing reduces the amount of abrasive material dragged across the wheel finish and rubber. Rinse the wheel at the same time, but remember that a wheel cleaner must be compatible with the wheel’s finish.
You will know this step worked when: loose mud and dust have left the surface, but bonded brown film remains visible.
Common mistake: starting with a dry brush, which turns loose sand into a polishing abrasive.
Step 3: Apply a Tire-Safe Cleaner
Spray enough ready-to-use cleaner to wet the complete sidewall, shoulder, and bead area without flooding the wheel. Typical usage is 60-120 milliliters per tire, depending on tire size, sprayer output, and contamination.
Use a dedicated alkaline tire cleaner for heavy blooming or a diluted APC for light-to-moderate grime. Avoid acid wheel cleaners on rubber unless the product label specifically approves tire use. Apply the product to one tire at a time so exposure remains controlled.
You will know this step worked when: the rubber is evenly wet and the cleaner begins carrying brown or gray residue downward.
Common mistake: choosing a strong dilution by guesswork. Stronger is not automatically safer or faster.
Step 4: Allow a Short, Wet Dwell
Let the cleaner dwell for approximately 30-60 seconds while the sidewall stays visibly wet. On a hot, windy day, shorten the dwell and re-wet lightly rather than allowing the chemical to dry.
The dwell period gives surfactants and alkaline builders time to loosen oily road film and oxidized residue. Product labels take priority because formulas differ in concentration, pH, solvent content, and approved surfaces.
You will know this step worked when: contamination looks softened and the surface has not developed dry patches.
Common mistake: leaving cleaner for five or ten minutes because the tire appears heavily stained. Extended dwell increases the chance of residue, spotting, and uneven drying.
Step 5: Agitate With a Nylon Tire Brush
Scrub the sidewall in overlapping arcs, working from the bead toward the shoulder and rotating the wheel as needed. Use moderate pressure for 15-30 seconds per section, then rinse the brush frequently so removed grit does not return to the rubber.
A medium-stiff nylon brush is the default choice. A softer brush suits delicate raised lettering, while a stiffer short-bristle brush handles textured all-terrain sidewalls. Brass or steel bristles are poor general-purpose choices because they can mark lettering, painted wheel surfaces, and exposed rubber edges.
You will know this step worked when: the foam changes from brown or gray toward pale gray, and the rubber texture becomes visibly uniform.
Common mistake: applying bodywork technique to tires with a soft microfiber mitt. A mitt can spread cleaner, but it rarely reaches the textured pores and lettering recesses where grime remains.
Step 6: Rinse the Rubber and Wheel Thoroughly
Rinse until runoff is clear and no foam remains in lettering, grooves, bead edges, or behind the wheel spokes. With a pressure washer, use a wide fan pattern and keep the nozzle moving; do not concentrate high pressure on a cut, damaged area, valve stem, or wheel bearing seal.
If the runoff remains brown after one pass, repeat the cleaner and agitation cycle once. Two controlled cycles are preferable to one aggressive cycle because excessive pressure can damage surfaces without removing chemically bonded residue.
You will know this step worked when: clear water leaves the sidewall without producing fresh brown foam.
Common mistake: rinsing only the outward-facing sidewall. Cleaner trapped near the bead or behind raised lettering can later dry into pale residue.
Step 7: Dry the Sidewalls Completely
Blow water from the bead, lettering, tread shoulder, and wheel-lip area, or wipe the sidewall with a clean microfiber towel. Allow a few minutes of air drying before applying any dressing.
Drying prevents diluted dressing from running onto the wheel and reduces sling onto doors, fenders, and rocker panels. Tire dressing applied to wet rubber also becomes difficult to spread evenly, creating glossy patches and streaks.
You will know this step worked when: the sidewall feels dry and no water beads emerge from lettering or the bead area when the tire is moved.
Common mistake: driving immediately after washing. Centrifugal force can distribute uncured dressing and residual water across the vehicle.
Step 8: Apply a Thin, Water-Based Dressing
Apply 10-20 milliliters of water-based dressing per tire with a foam applicator, keeping the product below the tread blocks and away from brake components. Allow the dressing to cure for 5-15 minutes, then wipe excess product from the sidewall.
A satin finish normally looks more uniform and attracts less dust than a high-gloss wet look. Dressing is optional for tire cleaning. It changes appearance and may reduce surface contamination, but it does not restore rubber strength or reverse aging.
You will know this step worked when: the sidewall has an even sheen with no wet pools, and a dry towel picks up little or no product.
Common mistake: applying a thick coat to achieve extra gloss. Excess product is the main cause of sling.
Which Tire Cleaner and Brush Should You Use?
The best tire cleaner depends on contamination, wheel proximity, water access, and dilution control. A dedicated non-acid tire cleaner is the simplest choice for brown blooming, while diluted APC is economical for routine washing when the user follows the product’s dilution and surface warnings.
| Product approach | Typical dilution or use | Best contamination target | Typical cost per wash |
|---|---|---|---|
| Ready-to-use tire cleaner | Undiluted, 60-120 ml per tire | Brown blooming and road film | $2-$6 per vehicle |
| Concentrated alkaline tire cleaner | 1:3 to 1:10, label dependent | Heavy sidewall residue | $0.75-$3 per vehicle |
| Diluted APC | 1:4 for heavy grime, 1:10 for maintenance | Light mud and mixed road film | $0.50-$2 per vehicle |
| Non-acid wheel-and-tire cleaner | Ready-to-use or 1:5 dilution | Combined wheel dust and tire grime | $2-$7 per vehicle |
| Mild car shampoo solution | Approximately 10-20 ml in 5 liters | Loose dirt only | Under $1 per vehicle |
| Solvent-heavy tire dressing | Product-specific, thin coat | Appearance correction only | $1-$5 per vehicle |
Use the least aggressive product that removes the contamination in one or two wet cycles. Car shampoo is acceptable for loose dirt and maintenance washing, but it is not a substitute for a tire cleaner when the sidewall has embedded blooming or oily residue.
The common claim that dish soap strips “essential oils” from tire rubber is inaccurate because tire compounds do not rely on essential oils. Dish soap can still be a poor routine choice because household formulas may contain strong detergents, fragrances, salts, or degreasers, and they provide no tire-specific compatibility guidance.
Choose the Right Brush
| Brush type | Bristle or head detail | Suitable use | Avoid when |
|---|---|---|---|
| Medium nylon tire brush | 25-40 mm short bristles | Textured black sidewalls | Rubber has loose or exposed material |
| Soft nylon detailing brush | 10-20 mm fine bristles | Raised white letters | Heavy mud covers the complete tire |
| Long-handle wheel brush | 40-60 cm handle, flagged nylon | Inner wheel barrels | Bristles can contact delicate finishes |
| Microfiber applicator | Foam or microfiber face | Tire dressing | Deep cleaning is required |
| Brass brush | Fine metal bristles | Limited lettering restoration | Routine black sidewall cleaning |
| Steel wire brush | Metal wire head | No normal tire-care use | All finished rubber and lettering |
What Are the Main Tire-Cleaning Alternatives?
Dedicated tire cleaner provides the most predictable result on blooming, diluted APC offers the lowest recurring cost, and car shampoo is safest for light maintenance soil. Wheel-and-tire products save time when both surfaces need attention, but users must verify compatibility with chrome, bare aluminum, painted, powder-coated, or ceramic-coated wheels.
| Method | Typical time per tire | Strength | Main limitation |
|---|---|---|---|
| Dedicated alkaline cleaner | 2-4 minutes | Removes brown film efficiently | Costs more than shampoo |
| Diluted APC | 3-6 minutes | Flexible and inexpensive | Incorrect dilution can leave residue |
| Car shampoo solution | 2-3 minutes | Gentle for loose dirt | Weak against blooming and oil |
| Wheel-and-tire cleaner | 3-5 minutes | Handles wheel dust and rubber grime | One formula may not suit every finish |
| Steam cleaning | 4-8 minutes | Low chemical use | Heat can dry rubber and needs skill |
| Water-only pressure rinse | 1-3 minutes | Fast preliminary cleaning | Does not dissolve bonded contamination |
Dedicated alkaline products are not universally harmless. High-pH cleaners can dull sensitive wheel finishes, stain unsealed metal, or leave chalky deposits if they dry. Product instructions and a small hidden-area test matter more than the label category alone.
How Often Should You Clean and Dress Tires?
Most daily-driven vehicles need tire cleaning every 2-4 weeks, while a light shampoo wash can occur weekly during wet or dusty seasons. Tire dressing usually lasts 1-3 weeks, depending on rain, detergent exposure, road salt, tire texture, and the amount applied.
| Driving and weather pattern | Cleaning interval | Dressing interval | Practical method |
|---|---|---|---|
| Dry urban commuting | Every 3-4 weeks | Every 3-4 weeks | Diluted APC or tire cleaner |
| Wet climate | Every 1-2 weeks | Every 2-3 weeks | Rinse mud before chemical cleaning |
| Winter road salt | Weekly rinse, clean every 2 weeks | Optional | Rinse wheel wells and bead areas |
| Off-road use | After each trail outing | Every 2-4 weeks | Remove clay before it dries |
| Show-car storage | Before storage and display | Before display | Thin satin water-based dressing |
| Fleet or commercial use | Weekly or as required | Weekly or optional | Use a labeled concentrate and rinse system |
Overcleaning is counterproductive when each wash uses a highly caustic chemical or aggressive brush. The goal is to remove contamination while preserving the surface condition, not to force every tire into a perfectly glossy appearance.
What If the Tire Still Looks Brown or Chalky?
A tire that remains brown after washing usually contains additional blooming, old dressing, or petroleum-based contamination, while a white chalky film more often indicates dried cleaner, incompatible dressing, or residue trapped in the sidewall texture. Re-clean gently, rinse more completely, and stop escalating when the remaining color is part of the rubber compound rather than removable soil.
Brown Sidewalls After Cleaning
Repeat the wet cleaner and brush cycle once, using fresh solution and a clean brush. If the foam becomes pale but the tire remains tan, the remaining color may be persistent oxidation or the tire’s compound color rather than removable grime.
Do not keep increasing chemical strength indefinitely. A tire that needs three or four harsh cycles may be showing age, solvent staining, or material discoloration that cleaning cannot reverse.
White Letters Look Gray
Use a soft nylon brush and a mild cleaner on raised lettering, then rinse immediately. A melamine foam pad can remove marks, but it is mildly abrasive and can thin printed graphics or alter the finish, so it should not be the default method.
White Chalky Residue Appears
Rinse the tire again with clean water and wipe it while wet with a microfiber towel. If residue remains, use a weak APC dilution such as 1:10, agitate briefly, and rinse immediately; avoid adding dressing until the surface is completely residue-free.
Dressing Slings Onto the Paint
Remove excess dressing with a dry microfiber towel, then drive slowly for a short distance and inspect the lower doors. Future applications should use half the product, keep the applicator below the tread, and allow at least 10 minutes of curing.
The Tire Looks Dry After Washing
A dry appearance is not proof that the rubber has been damaged. Inspect for cracking and texture changes, then choose a thin water-based dressing if cosmetic satin finish is wanted; do not use oily solvent products to mask aged rubber.
How Should You Clean Special Tire and Wheel Situations?
Special situations require changing the chemical strength, water pressure, or brush rather than repeating the standard method more aggressively. Whitewalls, low-water cleaning, ceramic-coated wheels, winter salt, and all-terrain tires each retain contamination in different locations.
Whitewalls and Raised White Letters
Clean white rubber first with a dedicated whitewall-safe cleaner and a soft nylon brush. Keep black-sidewall dressing off the white section because many dressings can yellow, darken, or create uneven transfer.
Work in small areas and rinse before the cleaner dries. For printed lettering, avoid brass and abrasive pads unless the tire or lettering manufacturer approves them.
Ceramic-Coated or Painted Wheels
Use a pH-neutral or explicitly wheel-safe product on the wheel and a separate tire cleaner on the rubber. Tire cleaner can overspray onto coated wheels, so spray the brush or a small applicator instead of saturating the entire wheel.
Ceramic coatings reduce soil adhesion but do not make a wheel immune to chemical staining. Clear water and a soft wheel brush are usually enough for maintenance contamination.
No Pressure Washer Available
A garden hose, pump sprayer, two microfiber towels, and a nylon brush can clean normal passenger-car tires effectively. Pre-rinse longer, use smaller sections, and rinse the brush in a separate container to avoid spreading grit.
Winter Salt and Road Slush
Rinse the wheel wells, tread shoulders, bead area, and valve-stem region with cool water before applying cleaner. Salt residue is water-soluble, so a thorough rinse often removes more contamination than stronger chemistry.
All-Terrain and Mud-Terrain Tires
Use a short, stiff nylon brush on the deep sidewall texture and shoulder lugs. Rotate the tire manually only when the vehicle is safely secured; never place hands near a moving wheel or rely on the parking brake alone while working underneath the vehicle.
What Tire-Cleaning Mistakes Cause Damage?
The most damaging tire-care mistakes are using an unapproved solvent, allowing cleaner to dry, directing concentrated pressure at damaged rubber, and applying dressing over contamination. Excessive scrubbing can also remove lettering or roughen a surface without improving the tire’s condition.
- Using tire shine as a cleaner: Dressing traps or visually masks dirt and can make later cleaning harder.
- Spraying acid wheel cleaner on rubber: Acid formulas may be intended for specific metals, not tire compounds.
- Letting alkaline cleaner dry: Dried residue can create pale stains and uneven wheel spotting.
- Using a wire brush routinely: Metal bristles can damage lettering and finished surfaces.
- Applying dressing to wet tires: Water dilutes the product and promotes streaking and sling.
- Ignoring damaged rubber: Cosmetic cleaning cannot correct cracking, bulges, cuts, or exposed cords.
A useful professional rule is to clean the tire before cleaning the wheel’s final visible face. Tire brushes sling dirty water, and completing the rubber first prevents a clean wheel from being contaminated again.
Another counterintuitive rule is that a lower-pressure rinse with better chemical dwell often outperforms a high-pressure blast. Pressure removes loose material; chemistry and controlled agitation remove bonded film.
A third rule concerns appearance: satin tires usually remain cleaner-looking longer than extremely glossy tires because thick oily dressing attracts dust and visibly slings onto adjacent paint.
How Much Does Tire Cleaning Cost and How Long Does It Take?
A typical do-it-yourself tire cleaning costs $0.50-$7 per vehicle in consumables and takes 25-40 minutes for four moderately dirty tires. Professional service commonly costs more because the price includes labor, wheel cleaning, drying, dressing, equipment, and local business overhead.
| Workflow | Typical consumable cost | Typical time | Best setting |
|---|---|---|---|
| Shampoo maintenance wash | $0.50-$1.50 | 15-25 minutes | Weekly driveway washing |
| Diluted APC cleaning | $1-$3 | 25-35 minutes | Budget routine cleaning |
| Dedicated tire cleaner | $2-$6 | 25-40 minutes | Brown blooming and heavy film |
| Wheel-and-tire service | $3-$10 | 30-45 minutes | Wheels and tires together |
| Professional detail add-on | $10-$30 | 15-30 minutes | Full vehicle appointment |
| Fleet cleaning process | $1-$4 per vehicle | 10-20 minutes | Repeated commercial work |
These are typical consumer ranges, not fixed market prices. Bottle size, concentrate strength, vehicle size, local labor rates, water access, and the condition of the tires can change the final figure substantially.
FAQ
Can I Clean Tires With Dish Soap?
Dish soap can remove loose surface dirt in an emergency, but it is not the best routine tire cleaner. Dish detergents are formulated for food grease and may contain additives that leave residue or dry unevenly on rubber. Use a tire-safe cleaner or mild car shampoo for regular maintenance, then rinse thoroughly.
Can I Use WD-40 to Make Tires Shine?
WD-40 is not a suitable tire dressing for normal road use. Its solvent and oil components can create an inconsistent finish, attract dust, and sling onto painted panels. Use a product labeled for tire dressing, apply a thin coat, and keep all shine products away from the tread and brakes.
Should I Clean Tires Before or After Washing the Car?
Clean tires and wheels before washing the vehicle’s painted panels. Tire brushes and wheel cleaners release dirty water that can splash onto doors and fenders. After the tire service, wash the body from top to bottom, then dry the vehicle and inspect for remaining dressing sling.
Can Tire Cleaner Remove Brake Dust?
Tire cleaner removes grime on rubber, but brake dust bonded to metal wheels may require a separate wheel-safe iron remover or wheel cleaner. Brake dust contains ferrous and nonferrous particles, and a tire product may not dissolve it effectively. Select the wheel chemical according to the wheel finish.
Does Tire Dressing Protect Against Cracking?
Tire dressing can improve appearance and may reduce surface contamination, but it cannot stop all ozone aging or repair existing cracks. Proper inflation, reasonable storage conditions, manufacturer-approved products, and regular inspection matter more for tire service life. Replace or professionally assess damaged rubber rather than covering it with shine.
The Bottom Line
To clean car tires safely, work on cool rubber, pre-rinse, apply a tire-safe cleaner for 30-60 seconds, scrub with a nylon brush, rinse until clear, dry completely, and apply only a thin optional dressing. Repeat once for persistent blooming, but treat cracks, bulges, cuts, or exposed cords as safety defects rather than cleaning problems.


