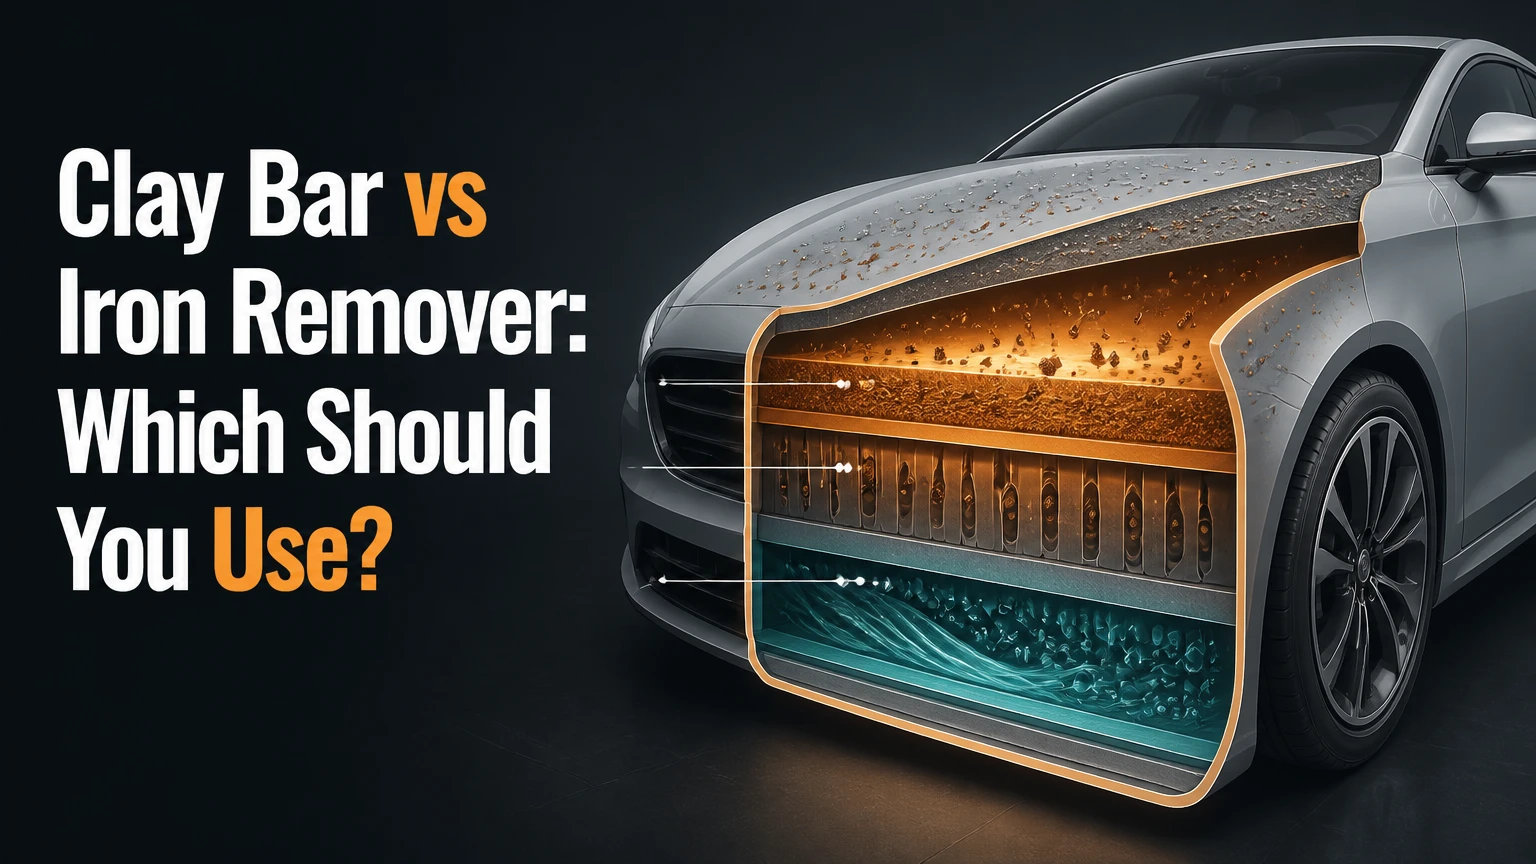
A clay bar removes bonded contamination by physically shearing particles from the surface, while an iron remover chemically dissolves ferrous particles such as brake dust and rail dust. Use iron remover first for orange specks and industrial fallout; use a clay bar for remaining roughness, overspray, sap residue, and other non-iron contaminants. Most complete decontamination jobs use both.
Key Facts at a Glance
- Iron remover targets ferrous contamination, including brake dust, rail dust, and iron fallout; the purple reaction indicates chemical activity, not complete decontamination.
- A clay bar removes a broader range of bonded debris, but friction can create micro-marring, especially on soft clear coats.
- Chemical decontamination should precede claying when iron fallout is present because dissolved particles reduce abrasive drag.
- Neither product removes every contaminant: tar needs a solvent, mineral deposits need an appropriate water-spot treatment, and loose dirt needs washing.
- Typical full-car timing is 10-20 minutes for iron remover and 45-90 minutes for claying, excluding wash, drying, and polishing.
- A coated vehicle usually benefits from iron remover before mechanical decontamination, because unnecessary claying can shorten the useful life of a coating.
What Is the Difference Between a Clay Bar and Iron Remover?
A clay bar is a mechanical decontamination tool, whereas iron remover is a chemical decontamination product. The clay bar uses lubricated contact to capture and shear bonded debris; iron remover uses a thioglycolate-based reaction to loosen iron particles so water can rinse them away.
The two methods overlap in purpose but not in chemistry or coverage. A clay bar can remove many contaminants that iron remover cannot affect, while iron remover can dissolve embedded ferrous particles without rubbing the paint. That difference determines the safest order of use.
What Does a Clay Bar Remove?
A clay bar removes bonded particles sitting on or protruding from the paint surface. Common examples include paint overspray, industrial residue, tree sap fragments, road film deposits, and some embedded mineral or metallic debris.
Clay does not dissolve contamination. The bar must contact the surface through a liquid lubricant, and the polymer compound traps particles in its working face. Traditional clay requires frequent folding and kneading; synthetic clay towels, mitts, and pads use a rubberized polymer surface that can usually be rinsed.
Clay grades change the risk profile. Fine clay is the normal starting point, while medium and aggressive grades are intended for severe contamination and commonly require polishing afterward.
What Does Iron Remover Dissolve?
An iron remover reacts with exposed ferrous particles embedded in paint, wheels, and other approved hard surfaces. Typical active chemistries use thioglycolate compounds, which form a colored complex with iron and create the familiar purple or red bleeding effect.
The color reaction confirms that some iron is present. It does not prove that every contaminant has been removed, and a weak visible reaction does not necessarily mean the product failed because particle size, concentration, oxidation, and lighting affect what you see.
Iron remover will not remove cured paint overspray, tree sap, petroleum tar, or ordinary road grime by itself. Product labels from CarPro IronX and Gtechniq W6 also direct users to avoid letting the chemical dry and to rinse thoroughly.
Which Method Wins for Each Decontamination Criterion?
Iron remover wins for ferrous fallout and low-friction cleaning, while a clay bar wins for broad contamination removal and the final tactile smoothness. The correct choice depends on the contaminant, paint condition, surface type, and whether polishing or coating application follows.
| Decision criterion | Clay bar | Iron remover |
|---|---|---|
| Primary target | Overspray, sap residue, bonded road debris | Brake dust, rail dust, iron fallout |
| Main action | Mechanical capture and shearing | Chemical reaction and rinsing |
| Typical vehicle time | 45-90 minutes | 10-20 minutes |
| Typical retail cost | $15-$40 per kit | $15-$30 per 500 ml |
| Paint risk | Low to high marring risk by grade and lubrication | Low friction risk, chemical staining if misused |
| Surface finish | Smoothest tactile result | Removes iron while non-iron texture remains |
| Required follow-up | Polishing may be needed | Usually rinse, dry, and protect |
| Reuse profile | Traditional clay: 3-5 cars; synthetic: often 20-50 | Liquid is consumed during applications |
Which Method Is Safer for Clear Coat?
Iron remover is generally safer for clear coat because the process does not require rubbing. A clay bar can still be safe when the paint is lubricated, the pressure is light, and the least aggressive grade removes the contamination, but visible micro-marring remains possible.
Soft clear coats amplify the difference. Dark Honda, Subaru, and Tesla paint can reveal haze from fine clay even when the operator uses correct technique. A test spot on the least visible panel should determine whether claying requires a planned polish.
Iron remover has a different hazard. Dried product can stain trim, leave residue in panel gaps, or mark sensitive wheel finishes. Chemical safety is not the same as universal surface compatibility.
Which Method Leaves Paint Smoother?
A clay bar usually leaves paint smoother to the touch because it removes both metallic fallout and non-iron bonded debris. Iron remover can eliminate orange specks while leaving overspray, tar, and other texture behind.
Use the plastic-bag test after washing and chemical treatment. Place a clean sandwich bag over your fingertips and lightly glide across the paint. Persistent grainy or gritty texture indicates remaining bonded contamination, although the test cannot identify its chemical composition.
A smooth tactile finish does not prove that the paint is optically perfect. Claying can leave a smooth but hazy surface, particularly on soft black paint, so inspect under direct or high-intensity lighting before applying protection.
Which Method Works on Wheels and Glass?
Iron remover is usually the better first choice for alloy wheels with brake dust, while clay is useful for stubborn bonded residue on approved glass or painted surfaces. Always follow the product label because wheel coatings, anodized aluminum, plastic trim, and aftermarket finishes vary.
| Surface | Iron remover guidance | Clay guidance |
|---|---|---|
| Factory clear-coated alloy | Usually suitable after cool-surface test | Suitable for bonded residue with lubricant |
| Chrome-plated wheel | Label approval required | Use only after wash and lubrication |
| Anodized aluminum | High staining risk, test first | Avoid aggressive grade and excessive pressure |
| Exterior glass | Often suitable if label permits | Fine clay can remove bonded glass debris |
| Black textured plastic | Avoid drying; staining possible | Clay may leave residue or alter appearance |
| Matte paint or vinyl | Use only manufacturer-approved chemistry | Mechanical rubbing can change sheen |
| Paint-protection film | Use PPF-approved product | Test synthetic clay and avoid pressure |
| Ceramic coating | Chemical decon preferred | Use only when contamination remains and coating maker permits |
How Does Each Product Work?
A clay bar grips contamination through lubricated mechanical contact, while iron remover breaks the bond between iron particles and the substrate through a chemical reaction. Neither process repairs clear-coat defects, removes scratches, or replaces polishing.
How Clay Creates a Smooth Surface
A clay compound contains a deformable polymer matrix that conforms to small surface irregularities. As the lubricated bar moves, protruding contaminants become embedded in the compound or are displaced from the paint.
The bar does not act like a literal razor, and the “microscopic razor blade” description can mislead beginners. Clay removes contamination through contact, shear, and some friction, so pressure, lubrication, contamination load, and clay grade all affect marring.
Traditional clay must be folded when its working face becomes dirty. A dropped traditional bar should be discarded because floor grit can become permanently embedded. A synthetic mitt can usually be rinsed, but inspect it carefully before returning it to paint.
How Iron Remover Creates the Purple Reaction
Iron remover contains a reactive ingredient that bonds with accessible iron compounds and produces a colored complex. The reaction loosens particles sufficiently for rinsing, but dwell time and temperature control the usable working window.
Typical dwell time is 2-5 minutes on a cool, shaded panel. A product must remain wet, and the operator should rinse before the formula dries. More dwell time is not automatically better because dried residues create a separate cleanup problem.
The reaction may be stronger on wheels than paint because wheels often carry a heavier brake-dust load. A purple panel does not mean the paint has been harmed, and a clean-looking panel does not mean all non-ferrous contamination is gone.
Which Tool Type Fits the Job?
Fine traditional clay offers precise contamination removal but has a short contamination tolerance, while synthetic clay offers easier handling and rinsing. Iron removers differ mainly by concentration, cling, surfactant content, and surface approvals rather than by color alone.
| Tool or formula | Typical working life | Best application | Main limitation |
|---|---|---|---|
| Fine traditional clay, 100 g | 3-5 vehicles | Light contamination and sensitive paint | Must discard if dropped |
| Medium traditional clay | 2-4 vehicles | Moderate overspray after test spot | Often needs polishing |
| Synthetic clay mitt | 20-50 vehicles | Large vehicles and repeat DIY work | Can mar if used dry or dirty |
| Synthetic clay towel | 15-40 vehicles | Flat panels and fast coverage | Edges can catch on trim |
| Dedicated iron spray, 500 ml | 1-2 full cars | Paint and general fallout | Strong odor and rapid drying |
| Gel wheel iron cleaner, 500 ml | 2-4 wheel services | Vertical wheels with brake dust | May contain stronger cleaners |
| Iron-infused shampoo | 10-30 washes | Maintenance-level fallout control | Too weak for severe contamination |
Manufacturers do not use identical grading systems for clay or identical concentrations for iron removers. “Fine,” “medium,” “pH neutral,” and “coating safe” are useful descriptors, but the label’s approved surfaces and instructions control the decision.
How Much Time and Money Should You Expect?
A typical DIY chemical decontamination costs $15-$30 and takes 10-20 minutes of product dwell and rinsing. A clay treatment costs about $15-$40 and takes 45-90 minutes, while a complete iron-plus-clay process commonly takes 75-135 minutes before polishing or protection.
| Job scope | Products needed | Typical consumable cost | Typical working time |
|---|---|---|---|
| Light iron fallout | 500 ml iron remover | $15-$30 | 10-20 minutes |
| Fine clay treatment | Clay kit plus lubricant | $20-$45 | 45-90 minutes |
| Iron plus synthetic clay | Iron remover and mitt | $40-$75 | 60-110 minutes |
| Full decon before coating | Wash, iron remover, clay, panel prep | $60-$130 | 2-4 hours |
| Severe overspray correction | Aggressive clay plus polish | $80-$250 in DIY supplies | 4-8 hours |
These are typical retail ranges, not fixed product prices. Vehicle size, contamination severity, water access, panel temperature, and the amount of product wasted during rinsing produce larger differences than brand selection.
Should You Use Iron Remover Before a Clay Bar?
Use iron remover before a clay bar when the vehicle has visible orange specks, rail dust, heavy wheel fallout, or an unknown contamination history. Chemical-first sequencing reduces the number of hard metallic particles that the clay must drag across the clear coat.
Step 1: Wash and Inspect the Vehicle
Wash the vehicle thoroughly with a pH-appropriate automotive shampoo, rinse away loose grit, and dry or drain the panels according to the iron-remover label. Work on cool paint in shade, and inspect paint, wheels, trim, glass, PPF, and coatings before applying chemicals.
Check for orange pinpoints behind the wheels, on lower doors, and around the rear hatch. A plastic-bag test identifies texture, while visual inspection identifies fallout and overspray. Do not confuse clear-coat failure, rust bubbles, or paint defects with removable surface contamination.
Step 2: Apply Iron Remover
Apply enough iron remover to wet the approved surface evenly without creating unnecessary runoff. A 500 ml bottle may cover one large vehicle or two lightly contaminated compact cars, depending on spray pattern and application rate.
Allow the product to dwell for approximately 2-5 minutes, watching for a purple reaction. Do not scrub aggressively, and do not let the product dry. If a panel begins drying, rinse it immediately rather than extending dwell time.
Step 3: Rinse Every Gap
Pressure-rinse from top to bottom, then flush badges, mirror bases, door seams, wheel spokes, lug recesses, fuel-filler areas, and hatch gaps. Chemical residue trapped in these locations can produce odor and later streaking.
You will know the rinse is adequate when no slippery residue or colored runoff remains and the panel feels chemically clean. A short rinse is a common failure because the visible paint looks clean while residue remains around trim.
Step 4: Test for Remaining Texture
After drying, repeat the plastic-bag test on the hood, roof, horizontal trunk surface, and lower doors. If the surface is smooth, stop; mechanical decontamination is unnecessary and avoiding it preserves paint and coating thickness.
If roughness remains, inspect the clay face after a small test section. Texture that disappears with clay is bonded contamination. Texture that remains after careful claying may be etching, paint failure, mineral scale, or a defect requiring a different process.
Step 5: Clay Only the Remaining Areas
Use fine clay or a clean synthetic clay tool with dedicated lubricant, working a 2-by-2-foot section at a time. Move in straight, overlapping passes with light pressure, then wipe the section and inspect it before continuing.
You will know the section is clean when the clay glides quietly and the baggie test feels smooth. Stop immediately if the clay drags, sticks, or leaves visible haze. Add lubricant, reduce pressure, or change the clay surface before creating unnecessary marring.
What Can Go Wrong During Decontamination?
Most failures come from using the wrong chemistry, allowing products to dry, or adding friction before identifying the contaminant. Recovery depends on the substrate and product, but immediate rinsing and a small test area prevent many permanent marks.
| Failure mode | Likely cause | Immediate correction | Possible follow-up |
|---|---|---|---|
| Clay leaves gray haze | Dry surface, dirty clay, soft paint | Add lubricant and stop rubbing | Fine polish or finishing polish |
| Clay sticks to paint | Insufficient lubrication or hot panel | Re-wet and gently lift | Wash residue before inspection |
| White iron-remover stain | Product dried on trim or paint | Rinse, then use label-approved cleaner | Light polish if staining persists |
| Purple odor in panel gaps | Incomplete rinsing | Flush seams and badges repeatedly | Remove trim residue if needed |
| Roughness remains after clay | Tar, mineral scale, or etching | Identify contaminant before repeating | Tar solvent or spot treatment |
| Wheel discoloration | Sensitive anodized or aftermarket finish | Rinse immediately and stop use | Manufacturer or wheel specialist inspection |
Can You Clay a Car Without Iron Remover?
Yes, you can clay a car without iron remover when contamination is light and no meaningful iron fallout is present. Clay alone is reasonable for isolated overspray, a recently repainted panel, or a vehicle that passes a visual and tactile inspection after washing.
Clay-first becomes a poor choice when sharp iron particles are widespread. The operator may remove them mechanically, but the extra friction increases the chance of marring without providing any benefit over chemical dissolution.
Can Iron Remover Replace Clay?
Iron remover cannot replace clay when non-ferrous bonded contamination remains. A vehicle may show little purple reaction yet feel rough because the remaining contamination is overspray, tar, tree sap, mineral residue, or industrial film.
Iron remover is enough when the surface becomes smooth after washing and chemical treatment. The stopping rule is surface condition, not a mandatory product sequence.
Is Clay Safe on Ceramic Coatings?
Clay is not automatically safe for ceramic coatings because mechanical contact can abrade or reduce the coating’s top layer. A coating manufacturer may approve a fine synthetic clay tool for isolated contamination, but a pH-neutral iron remover is the lower-friction first option.
A coated vehicle that loses water behavior may need cleaning rather than replacement. Iron fallout, traffic film, and mineral deposits can mask coating performance, so decontaminate a small area and compare water behavior before deciding that the coating has failed.
Which Method Should You Choose?
Choose iron remover for ferrous fallout, choose clay for remaining bonded texture, and choose both when the vehicle needs full decontamination before polishing or coating. The following situations make the decision more specific.
For a First-Time DIY Detailer
Start with a labeled iron remover and a fine synthetic clay mitt only if the post-rinse inspection shows remaining texture. This approach limits mechanical contact and allows the user to rinse the synthetic tool if it touches the ground.
Avoid starting with aggressive clay. A beginner can create haze in minutes, while a chemical product gives a wider margin for correcting technique through rinsing.
For Soft or Dark Paint
Use iron remover first and perform a test spot before claying the rest of the vehicle. If fine clay creates haze, either polish the affected area or limit mechanical decontamination to contaminated sections.
Soft clear coat is not a reason to accept rough paint permanently. It is a reason to use a smaller treatment area, less pressure, more lubrication, and a realistic polishing plan.
For Fresh Overspray
Use a clay bar, but identify the overspray source and test the least aggressive grade first. Iron remover generally cannot dissolve cured paint particles, so chemical decontamination alone will leave the primary problem intact.
Heavy overspray may require professional correction, a stronger clay grade, solvent evaluation, or wet sanding. Aggressive clay can remove texture while creating widespread marring that costs more to correct.
For a Ceramic-Coated Vehicle
Use iron remover when fallout is the visible problem and follow the coating manufacturer’s surface instructions. Avoid routine full-car claying because the coating, rather than the clear coat, is the layer being mechanically contacted.
If bonded tar or overspray remains, spot-treat only the affected areas. Reapplying coating to a section may be necessary after polishing or chemical preparation.
Which Alternatives Handle Contaminants Better?
Tar remover, water-spot treatment, and polishing outperform both clay and iron remover for specific problems. Choosing the correct category prevents repeated passes with a product that cannot address the contamination.
| Contaminant | Best first treatment | Why clay or iron remover may fail | Inspection clue |
|---|---|---|---|
| Brake dust or rail dust | Iron remover | Clay adds avoidable friction | Orange or purple reaction |
| Paint overspray | Fine clay or professional correction | Iron chemistry does not dissolve cured paint | Sandpaper-like texture |
| Asphalt tar | Tar-safe solvent | Clay smears petroleum residue | Dark brown or black spots |
| Tree sap | Sap remover and dwell time | Clay can spread softened sap | Amber, glossy deposits |
| Mineral water spots | Water-spot treatment | Iron remover does not dissolve all minerals | Ring-shaped white marks |
| Clear-coat etching | Polishing or correction | Decon removes residue, not damage | Smooth but visibly etched area |
| Loose road dirt | Proper wash | Both methods drag loose grit | Grit visible before contact |
How Often Should You Decontaminate Paint?
Most daily-driven vehicles need an inspection every six months and full decontamination once or twice yearly, while garage-kept vehicles with durable protection may need less frequent treatment. Industrial areas, rail corridors, salted roads, and high-mileage use can shorten that interval.
Do not schedule clay by calendar alone. Schedule it when washing no longer restores a smooth surface, when fallout appears, or before polishing and applying a new protective layer.
A ceramic coating does not make contamination impossible. It usually makes removal easier, but aggressive claying, dried chemicals, and unapproved wheel cleaners can still damage adjacent surfaces or shorten coating performance.
FAQ
Does the Purple Color Mean Iron Remover Is Working?
Purple or red bleeding indicates that the product has reacted with accessible iron compounds. The color does not measure total contamination, prove complete removal, or identify non-iron debris. Rinse thoroughly, then use tactile inspection to determine whether clay or another treatment remains necessary.
Should I Iron Remove the Wheels or Paint First?
Treat the paint or wheels first according to the product’s approved-surface instructions, but keep dirty wheel tools separate from paint tools. Wheel cleaning often carries heavier grit and brake dust, so using the same mitt or towel on paint can introduce scratches even after chemical treatment.
Can I Use Dish Soap as Clay Lubricant?
Dish soap can remove protection and may provide inadequate lubrication compared with a dedicated clay lubricant. Some detailing products allow a specified shampoo dilution, but the product maker’s instructions should control. If clay drags or sticks, stop immediately and increase lubrication rather than adding pressure.
Will Iron Remover Remove Rust Spots?
Iron remover can remove removable iron fallout that appears as orange specks on the paint surface. It will not repair rust bubbling beneath paint, corrosion that has penetrated the substrate, or clear-coat damage caused by neglected contamination. Persistent spots need closer inspection after washing and chemical treatment.
How Do I Know Whether I Need to Polish After Claying?
Inspect the paint under direct sunlight or a high-intensity detailing light after wiping away lubricant. If fine haze, micro-scratches, or reduced clarity are visible, polish before applying protection. If the finish remains clear, apply protection without polishing, because unnecessary correction removes measurable clear-coat thickness.
The Bottom Line
Iron remover is the better first choice for brake dust, rail dust, and iron fallout because it removes ferrous particles with minimal friction. A clay bar is the better choice for remaining overspray, sap residue, and bonded texture. For a full decontamination, use iron remover first, clay only where the surface remains rough, then polish if marring appears. That is the practical answer to clay bar vs iron remover: identify the contaminant, minimize friction, and stop when the surface is clean.
Title tag: clay bar vs iron remover: Which Wins for Paint?
Meta description: Compare 10-20 minute iron removal with 45-90 minute claying, then choose the safer process for fallout, overspray, coatings, and soft paint.


