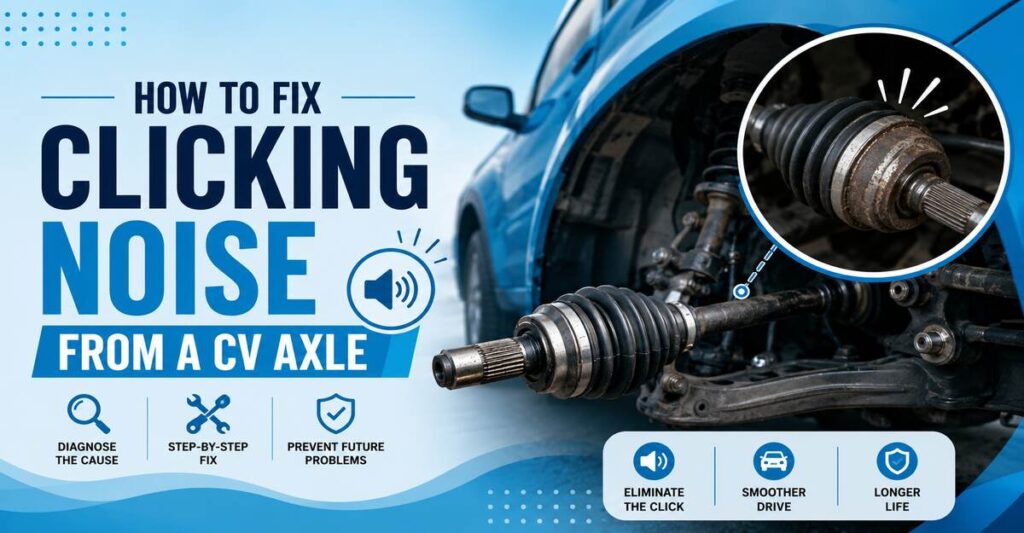
A rhythmic clicking noise from your CV axle while turning means the outer joint’s internal bearings are severely damaged, and a complete axle replacement is your only permanent solution. By following these 10 distinct steps, you can safely remove the torn assembly, seat the new C-clip, and restore factory drivability in under three hours. The single factor that most determines success is perfectly aligning the inner splines before applying force.
Before You Start
- Time Required: 1.5 to 3 hours per side.
- Difficulty Level: Intermediate (Requires heavy lifting and exact torques).
- Cost: $60 – $250 for parts; $15 – $50 for fluid; $90 – $150 for a post-repair alignment.
- Tools Required:
- Floor jack and 2 heavy-duty jack stands
- 1/2-inch breaker bar and metric socket set
- Axle nut socket (30mm to 36mm)
- Torque wrench capable of 250 ft-lbs
- Pry bar or CV axle removal fork
- Ball joint separator (pickle fork) and brass hammer
- Flat-nosed metal punch (for staking)
- Materials Required: 1 new complete CV axle assembly (with new nut/cotter pin), 1 quart of OEM-specified transmission or differential fluid, 1 tube of anti-seize compound, and a catch pan.
- Prerequisite Condition: Vehicle parked on a perfectly flat, solid concrete surface.
Phase 1: Diagnosis and Preparation
Understanding the mechanics of a half-shaft explains why rebuilding is futile once the noise starts. An intact outer CV joint relies on specialized grease sealed by a rubber boot.
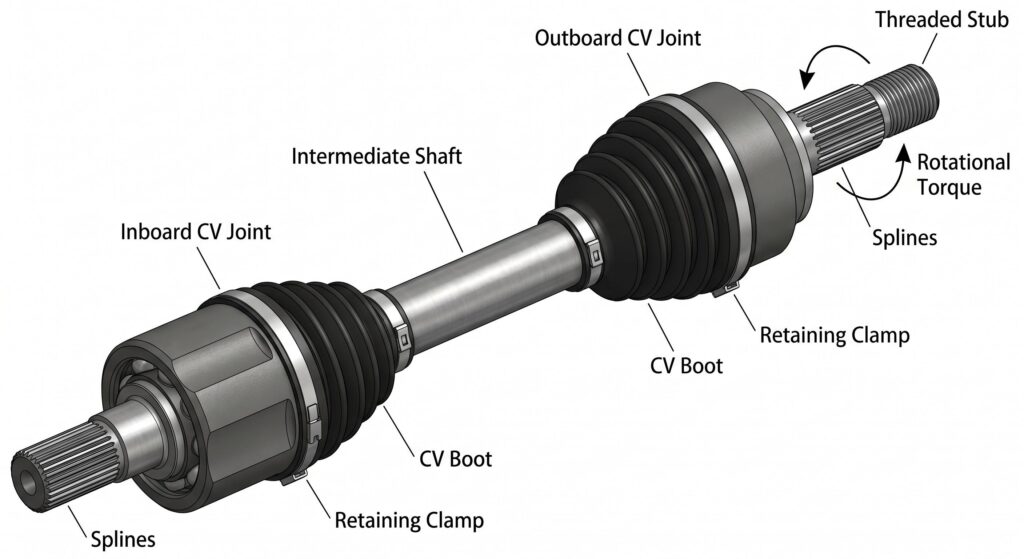
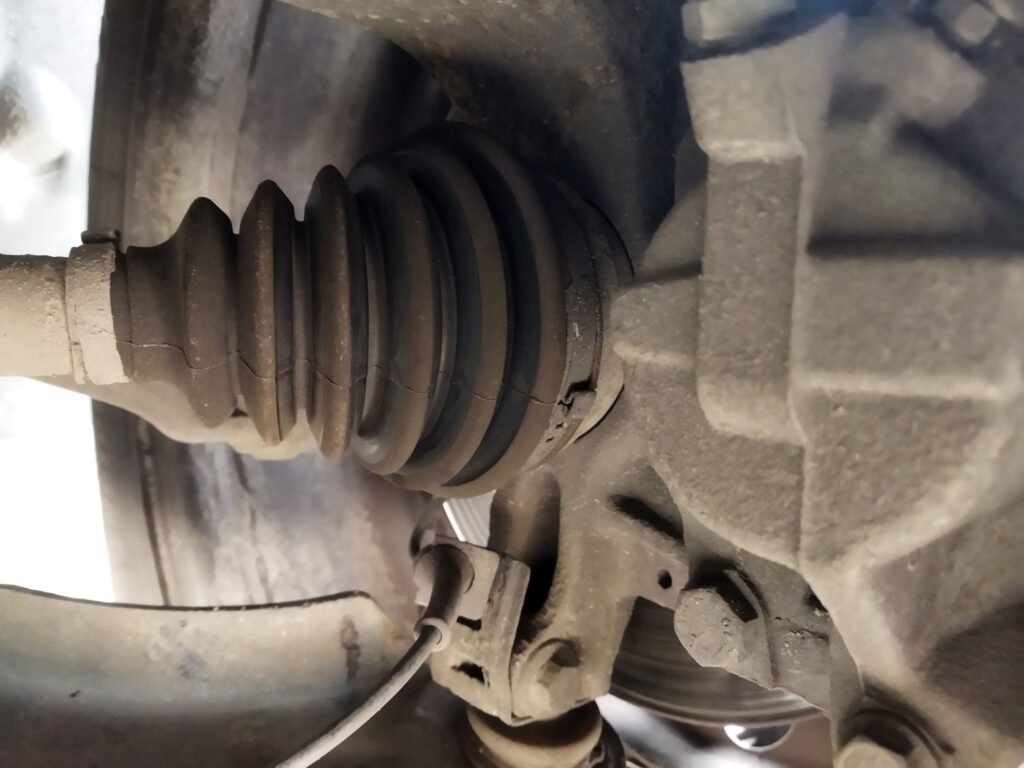
Once that boot tears, centrifugal force ejects the grease, allowing road grit to grind deep pockets into the steel housing.
Step 1: Perform the Figure-8 Isolation Test
Drive your vehicle slowly in tight circles in an empty parking lot to isolate which axle has failed.
Roll down both front windows, turn the steering wheel completely to full lock, and apply light throttle while driving in a circle, then repeat in the opposite direction.
- Success Checkpoint: You’ll know it worked when you identify the source: clicking while turning left means the passenger-side (right) axle is bad; clicking while turning right means the driver-side (left) axle is bad.
- Common Mistake: Replacing the axle on the side you are turning toward. The noise always originates from the outside wheel, which is bearing the highest load and the sharpest steering angle.
Phase 2: Wheel Hub Disassembly
Step 2: Break the Main Axle Nut Loose
Loosen the large central axle nut while the full weight of the vehicle is still resting on the front tires.
Remove the wheel’s center cap, fit your 30mm–36mm axle nut socket onto a heavy-duty 1/2-inch breaker bar, and turn it counterclockwise roughly one half-rotation to break the factory torque.
- Success Checkpoint: You’ll know it worked when the massive nut easily spins with a standard socket wrench.
- Common Mistake: Attempting to loosen this nut after the car is in the air. Without an industrial impact gun, the wheel will simply spin freely in the air, making it impossible to break the 150-250 ft-lbs of holding force.
Step 3: Lift the Vehicle and Free the Steering Knuckle
Disconnect the lower suspension geometry so the heavy steering knuckle can swing outward and release the axle.
Jack up the vehicle, secure it on jack stands, remove the wheel, pull the cotter pin out of the lower ball joint, unthread the castle nut, and use a ball joint separator or strike the side of the cast-iron knuckle with a brass hammer to pop the joint loose.
- Success Checkpoint: You’ll know it worked when the lower control arm drops down, allowing the brake rotor and knuckle assembly to pivot freely on the upper strut mount.
- Common Mistake: Forgetting to unclip the ABS wheel speed sensor wire from its bracket. When you pull the knuckle outward, the wire will snap, costing you an additional $100 and triggering dashboard warning lights.
Step 4: Extract the Outer Splines
Push the old outer CV joint backward out of the wheel hub assembly.
Fully remove the axle nut, place a brass punch against the center dimple of the threaded axle stub, strike it sharply with a hammer to break the spline friction, and pull the steering knuckle toward your body while guiding the axle out of the back of the hub.
- Success Checkpoint: You’ll know it worked when the outer half of the axle is completely dangling free of the wheel assembly.
- Common Mistake: Hitting the axle directly with a steel hammer without a brass punch. This easily mushrooms the threads, wedging the axle permanently inside the wheel bearing.
Phase 3: Axle Extraction
Step 5: Pop the Inner Joint from the Transmission
Apply sudden outward leverage to compress the internal metal C-clip holding the axle inside the transmission.
Place a fluid catch pan directly underneath the transmission seal, wedge a pry bar between the transmission housing and the thick metal cup of the inner CV joint, and give the bar a sharp, quick thrust outward.
- Success Checkpoint: You’ll know it worked when you feel a distinct pop and the inner joint slides smoothly out of the transmission casing, likely followed by a small trickle of gear oil.
- Common Mistake: Pulling directly on the long central shaft of the axle. This will rip the inner tripod joint apart, leaving the steel cup hopelessly stuck flush against the transmission housing.
Step 6: Inspect and Prep the Transmission Seal
Verify the integrity of the rubber output shaft seal before the new parts block your access.
Wipe the housing clean with a rag, inspect the circular rubber lip for tears, flattening, or dry rot, and lightly coat the splines of the new CV axle with fresh transmission fluid to ensure smooth entry.
- Success Checkpoint: You’ll know it worked when the seal’s inner lip looks perfectly round with a pliable edge, ready to accept the new shaft.
- Common Mistake: Shoving the sharp, splined end of the new axle directly through a dry seal. The splines act like a saw blade and will slice the rubber, guaranteeing a massive fluid leak the moment you drive away.
Phase 4: New Axle Installation
Step 7: Seat the Inner Splines and Lock the C-Clip
Engage the new axle into the differential gears until the retaining ring fully expands into its groove.
Support the weight of the axle with both hands, slide the inner splines perfectly straight into the transmission seal, and once aligned, use the heel of your hand to firmly push the outer end of the shaft inward.
- Success Checkpoint: You’ll know it worked when you hear a definitive “click,” and giving the inner green/black housing a firm tug outward results in zero movement.
- Common Mistake: Driving the car without fully seating the C-clip. The axle will vibrate its way out of the transmission within the first mile, dumping all your fluid and leaving you stranded without propulsion.
Step 8: Reassemble the Outer Hub Geometry
Reconnect the steering knuckle to the lower control arm while housing the new outer joint.
Apply a light dab of anti-seize compound to the new axle’s outer splines, feed the threaded end through the back of the wheel bearing, push the lower ball joint stud back through the knuckle, and torque the castle nut to your manufacturer’s specification (usually 40–65 ft-lbs).
- Success Checkpoint: You’ll know it worked when the new axle stub protrudes fully through the center of the hub and the suspension is rigidly bolted back together.
- Common Mistake: Reusing the old cotter pins on the ball joint. Metal fatigue makes old pins brittle; always use the fresh hardware supplied in the new kit.
Step 9: Torque and Stake the New Axle Nut
Apply precise clamping force to the wheel bearing to prevent premature bearing failure.
Thread the new axle nut on by hand, reinstall the wheel, lower the vehicle to the ground, use your torque wrench to tighten the nut to the exact factory spec (e.g., 150 ft-lbs), and use a flat punch to dent the thin metal collar of the nut into the groove on the axle shaft.
- Success Checkpoint: You’ll know it worked when the nut is visibly indented into the keyway, physically locking it from unthreading.
- Common Mistake: Using an air impact gun to blast the nut tight. Over-torquing crushes the internal rollers of the wheel bearing, guaranteeing a humming noise and a $300 bearing replacement within a month.
Step 10: Top Off Fluid and Road Test
Restore the driveline’s fluid capacity and verify the mechanical repair.
Locate your transmission or differential fill plug, pump in the exact OEM-specified gear oil or ATF until it drips from the fill hole, and perform the figure-8 test again in a parking lot.
- Success Checkpoint: You’ll know it worked when the rhythmic clicking is entirely gone during sharp turns under acceleration.
- Common Mistake: Assuming no fluid was lost during extraction. Even half a quart of missing fluid can overheat a differential on the highway.
Common Mistakes and How to Fix Them
- The axle is stuck inside the wheel hub: Over years of heat cycling, the outer splines can rust-weld to the wheel bearing. How to fix it: Rent an “axle puller” (a flange that bolts to your wheel studs with a large central threaded rod). Wrenching down on the rod physically forces the axle out of the hub without damaging the knuckle.
- The inner joint is seized in the transmission: If the pry bar isn’t generating enough force, the C-clip has likely galled. How to fix it: Loop a thick piece of nylon webbing or a tie-down strap tightly around the inner CV cup. Attach the other end to a slide hammer and use the sliding weight to shock the joint straight out.
- Ripped the new CV boot during installation: Nicking the fresh rubber against a sharp suspension bolt ruins the entire replacement. How to fix it: Stop the installation. You cannot patch a CV boot with tape or silicone. You must utilize a boot replacement kit (or warranty the axle if the store allows it) before driving.
- Steering wheel is crooked after the test drive: Disconnecting the strut bolts or ball joints slightly shifts your camber and toe alignment. How to fix it: Drive directly to an alignment shop. This is a normal side effect of invasive suspension work; delaying the alignment will destroy the inner edge of your front tires within 2,000 miles.
Process Variations
- Replacing Axles on Lifted Trucks: The aggressive suspension angles of a 3-inch or higher lift kit will destroy standard factory-replacement CV joints in weeks. You must purchase specialized “extended travel” axles (which feature deep-cut ball tracks capable of 47-degree articulation) to handle the geometry.
- Using Strut Bolts Instead of the Ball Joint: On many MacPherson strut systems (like Subarus), separating the lower ball joint is notoriously difficult due to rust. Instead, you can remove the two large 19mm bolts connecting the strut to the top of the knuckle. This allows the knuckle to swing outward easily, but it absolutely guarantees you will need a professional alignment immediately afterward.
How Long Does It Take and What Does It Cost?
A professional commonly needs about 1–1.5 hours per side when the axle releases normally and no related components are seized. Complex suspension designs, corrosion, damaged splines, intermediate shafts, or leaking seals can extend the job.
An experienced DIY repair may take 2–4 hours per side, although lifting and suspension work should not be attempted without proper training and equipment.
Typical source-based cost ranges are:
| Repair expense | Typical range |
|---|---|
| Replacement axle assembly | $60–$250 per side |
| Independent repair shop | $350–$700 per side |
| Dealership or luxury vehicle | $800–$1,800+ per side |
| Fluid replacement or top-off | $15–$50 |
| Alignment when required | $90–$150 |
Actual pricing depends on axle quality, labor rate, drivetrain design, corrosion, vehicle brand, seal condition, and whether related suspension or hub parts require replacement.
An alignment is most likely to be required when alignment-sensitive strut, control-arm, or subframe positions were disturbed. Separating a ball-joint taper without changing an
Repair Options Compared
| Repair option | Best use | Main limitation |
|---|---|---|
| New complete axle | Most clicking-joint repairs | Quality varies among aftermarket brands |
| Rebuilt OEM axle | Rare, expensive, or vibration-sensitive applications | Rebuilder quality must be verified |
| New OEM axle | Vehicles sensitive to aftermarket fit or balance | Highest purchase price |
| Boot and grease service | Torn boot caught before noise or contamination | Does not reliably fix an axle already clicking |
Frequently Asked Questions
Can I just replace the torn boot instead of the whole axle?
Boot replacement only works if you catch the tear immediately, before any clicking occurs. Once you hear the rhythmic click, the internal metal surfaces are permanently scored. Repacking it with grease will be incredibly messy and completely fail to stop the noise.
Is it safe to drive with a clicking CV axle?
It is highly dangerous to drive for extended periods. The clicking indicates structural weakness. Under heavy load, the joint can shatter entirely, detaching the wheel from the drivetrain. This results in an instant loss of acceleration and severe steering instability.
Do I need to replace both axles at the same time?
No, CV axles do not need to be replaced in pairs unless both boots are torn or both are clicking. They operate independently. However, if one factory axle failed at 120,000 miles due to age, the opposite side is likely nearing the end of its life cycle.
Why does my new axle look slightly thinner than the original?
Aftermarket replacement axles often use solid, high-strength steel shafts, whereas some OEM axles utilize thicker, hollow steel tubes to reduce rotational mass and vibration. As long as the spline count, overall length, and ABS tone rings match, the thinner solid shaft is structurally sound.