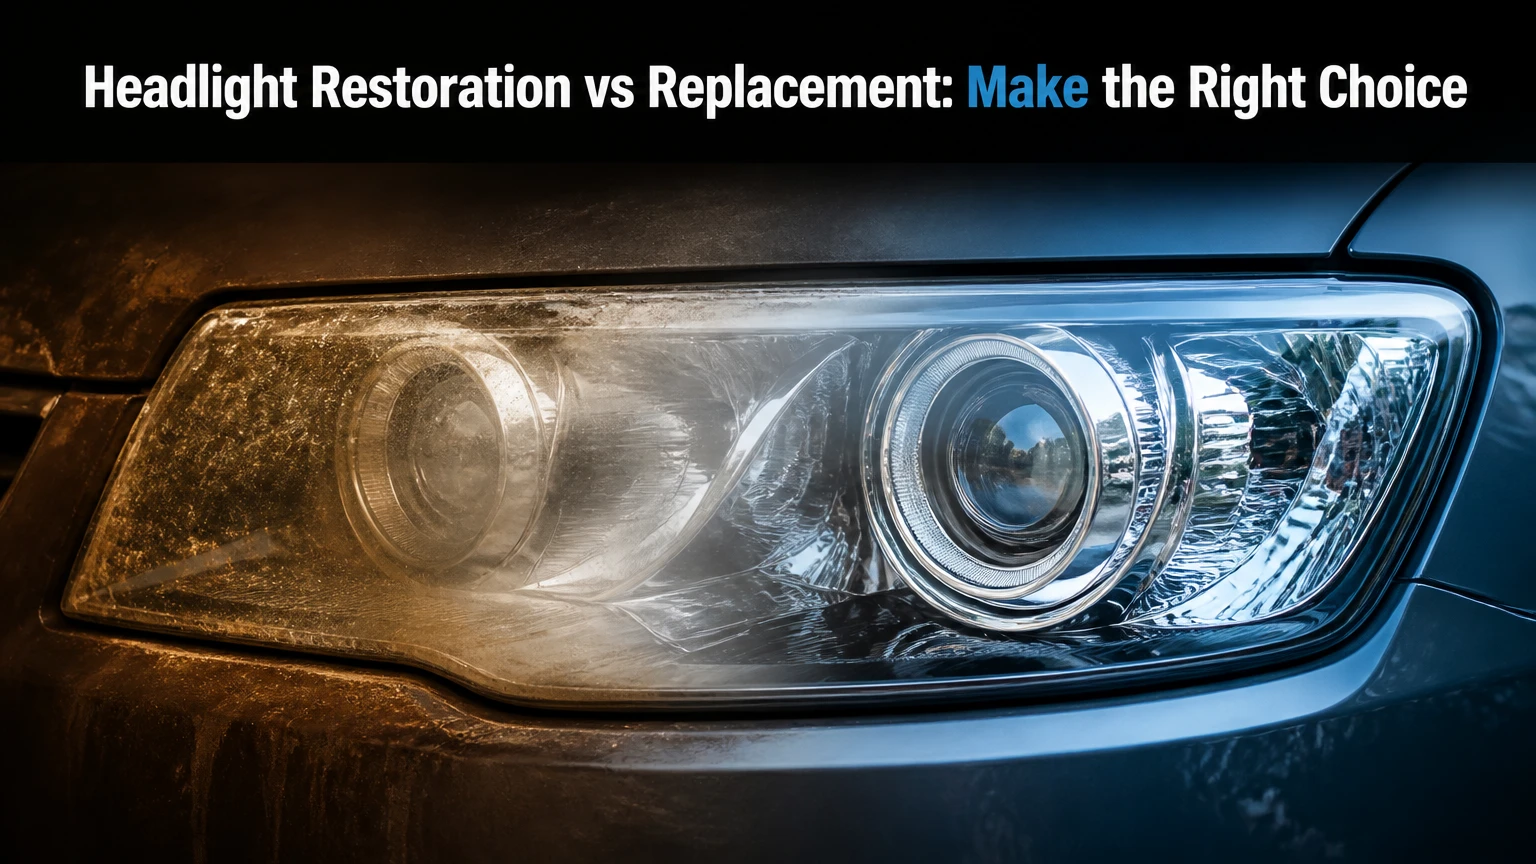
Headlight restoration is usually the best choice when yellowing, haze, and fine surface scratches are limited to the outer lens. Headlight replacement is the correct choice for cracks, broken mounts, persistent internal moisture, failed electronics, or damage that restoration cannot remove. The safest decision depends on damage location, beam quality, lighting technology, and ownership horizon.
Key Facts at a Glance
- External oxidation on an intact polycarbonate lens can usually be restored without replacing the headlight assembly.
- A typical DIY restoration costs $15-$30 and takes 45-120 minutes for both lamps.
- Professional restoration typically costs $75-$150 for both lamps and lasts about 1-3 years when the UV protection is properly applied.
- Headlight replacement typically costs $200-$2,500 or more per side, including common parts and labor.
- Water droplets, cracked lenses, broken mounting tabs, and failed LED or HID components usually require replacement or specialized repair.
- Any headlight repair should end with a beam-pattern and aim check, because clarity alone does not prove safe illumination.
What Is Headlight Restoration?
Headlight restoration removes damaged material from the outside of a plastic lens, then polishes and protects the exposed surface. Most modern lenses use polycarbonate, a strong transparent plastic covered by a factory UV-resistant coating that eventually degrades under sunlight, pollution, road grit, and cleaning chemicals.
A restorer normally wet-sands the lens until the yellow or cloudy layer disappears, refines the sanding marks with finer abrasives, compounds the surface, and applies a UV-resistant coating. The process does not rebuild missing plastic, repair wiring, reseal a separated housing, or replace a failed projector, ballast, LED driver, or adaptive-lighting module.
The visible symptom can mislead owners. A yellow lens is often a surface-coating problem, but severe pitting may reduce transparency even after the yellow color disappears. A lens that looks clear while the beam remains weak may have an internal reflector, projector, bulb, wiring, or control-module fault.
How Does Restoration Work?
Headlight restoration works through controlled surface removal, optical refinement, and UV protection. The abrasive stage removes oxidation and damaged coating; the polishing stage reduces the scratches left by sanding; the final coating prevents rapid ultraviolet degradation.
A typical hand or drill-assisted sequence is:
- Wash and dry the lens, then inspect both sides.
- Mask paint, trim, rubber seals, and nearby sensors with automotive masking tape.
- Wet-sand with approximately 800 grit until the surface has an even, dull appearance.
- Progress through 1,500 and 2,000-3,000 grit until the previous scratch pattern is gone.
- Compound and polish with a microfiber pad or suitable machine-polishing pad.
- Degrease with panel wipe or isopropyl alcohol, following the coating manufacturer’s instructions.
- Apply a UV-blocking clear coat, dedicated sealant, ceramic coating, or replacement film.
- Allow the protection layer to cure for the stated period before washing the vehicle.
You will know the sanding is consistent when no yellow islands, glossy patches, or deep isolated scratches remain. A common mistake is stopping when the lens looks cleaner while the old coating remains in uneven patches. Polishing cannot hide inconsistent sanding for long.
Restoration and Replacement Compared
The better repair changes with the failure being corrected. Restoration wins on cost and preserves a sound OEM housing, while replacement wins when the assembly has structural, sealing, optical, or electronic damage.
| Decision criterion | Headlight restoration | Headlight replacement |
|---|---|---|
| Primary defect | Outer haze, yellowing, light scuffs | Cracks, leaks, broken housing, failed components |
| Typical DIY cost | $15-$30 for both lamps | $100-$500 per assembly before labor |
| Typical professional cost | $75-$150 for both lamps | $200-$2,500 or more per side installed |
| Typical working time | 45-120 minutes | 1-3 hours, sometimes longer with bumper removal |
| Expected service interval | About 1-3 years | Often 8-15 years for a quality assembly |
| Internal condensation | Does not repair it | Replaces the affected housing |
| Mounting damage | Does not repair it | Repairs the problem if the new housing fits correctly |
| Beam alignment | Preserves existing geometry if undisturbed | Requires aiming after installation |
| Electronics | Does not repair bulbs, ballasts, drivers, or modules | Can replace compatible failed components |
| Best ownership case | Low-cost improvement or short-term ownership | Long-term ownership and recurring defects |
The price ranges are typical North American consumer and repair-market figures, not guaranteed quotes. Vehicle access, adaptive headlights, regional labor rates, part availability, and whether one or both sides need work can change the final invoice substantially.
Which Option Restores More Light?
Restoration can recover much of the light lost through an opaque outer lens, but no responsible technician should guarantee a fixed percentage such as 80% or 90% without measuring the beam. Replacement returns the assembly to its designed condition only when the bulb, projector, reflector, wiring, and aim are also correct.
The United States National Highway Traffic Safety Administration emphasizes correct headlamp aim as a safety requirement because misaligned lamps can reduce the driver’s view or glare into oncoming traffic. Lens appearance is therefore an incomplete test. Compare the beam cutoff, hot spot, spread, and road reach before and after repair.
Winner: Restoration for surface-only loss; replacement when the assembly or its optical and electrical parts are defective.
Which Option Lasts Longer?
A quality replacement assembly commonly offers an 8-15 year service life, although bulbs, LEDs, seals, and electronics may fail sooner. Professional restoration commonly lasts 1-3 years, while an inexpensive DIY polish without durable UV protection can deteriorate within weeks or months.
Sun exposure, climate, automatic car washes, road salt, coating quality, and how thoroughly the original oxidation was removed determine restoration durability. A UV-resistant coating is not optional. Bare polished polycarbonate has little long-term resistance to ultraviolet radiation.
Winner: Replacement for maximum service interval; restoration for the lowest initial cost.
Which Option Is Safer for Modern LED and HID Headlights?
Professional diagnosis is safer for LED, HID, adaptive, matrix, and projector headlights because these systems can contain high-voltage ignition components, control modules, leveling motors, and calibration requirements. A cloudy outer lens may be restorable, but a dark segment or uneven beam may originate inside the assembly.
HID systems can require a ballast and igniter diagnosis rather than a housing replacement. LED units often integrate the light source and driver into the assembly, making a complete replacement more common. Matrix and adaptive systems may need calibration with manufacturer-specific diagnostic equipment after installation or impact.
Winner: Restoration for external haze on a functioning system; specialist diagnosis or replacement for electronic or adaptive faults.
When Is Headlight Replacement Necessary?
Headlight replacement is necessary when the lens, housing, mount, seal, optical system, or electronics have failed beyond a surface repair. Restoration cannot make a cracked lens watertight, recreate a broken mounting tab, remove water from a sealed reflector, or correct a distorted projector.
Replace or professionally diagnose the assembly when any of these conditions applies:
- A crack extends through the lens or housing, especially near a mounting point.
- Water droplets, standing water, or repeated heavy condensation appear inside.
- The housing is separated at the lens seam or has a damaged rear cover.
- Mounting tabs are broken and the lamp moves or cannot hold aim.
- The reflector is burned, peeling, discolored, or visibly deteriorated.
- A projector lens or internal shield is damaged.
- An LED segment, ballast, leveling motor, or control module has failed.
- The beam remains weak or scattered after a clear lens and correct bulb installation.
- The lens is deeply pitted or scratched through a large area after proper sanding.
- A safety inspection, collision estimate, or manufacturer procedure requires assembly replacement.
Internal fogging needs careful interpretation. Thin mist that disappears after the lamp warms can occur through normal housing ventilation, while beads, pooling, staining, or fog that returns after drying indicate water intrusion or a seal problem.
When Is Restoration the Better Repair?
Restoration is the better repair when both lenses are structurally intact, the exterior is uniformly yellow or cloudy, and the light output improves when the lens is temporarily cleaned or wetted. The original housing may also have better fit, sealing, projector alignment, and optical quality than a cheap replacement.
Restoration makes particular sense when:
- The vehicle is older but mechanically sound.
- The owner expects to sell or trade it within one to three years.
- A replacement assembly costs hundreds or thousands of dollars.
- The damage is cosmetic and evenly distributed across the outer surface.
- The original OEM lamp has no moisture or electronic fault.
- The vehicle uses a complex LED or adaptive assembly that is expensive to replace.
- Both lamps need matching cosmetic improvement.
Restoration is not a substitute for a failing bulb, dirty internal reflector, damaged wiring, or incorrectly aimed headlight. A technician should test the lighting system before sanding if the complaint is poor nighttime visibility rather than appearance.
Which Restoration Method Fits?
A dedicated restoration kit is the most predictable DIY option because it combines abrasives, polish, applicators, and a protective finish designed for transparent plastic. Professional restoration is preferable when the lens has heavy pitting, the car has expensive paint or sensors near the lamp, or the owner lacks a controlled place to wet-sand and cure the coating.
| Method | Typical cost | Typical time | Expected result | Main limitation |
|---|---|---|---|---|
| Toothpaste or baking soda | $2-$8 | 15-30 minutes | Temporary surface brightening | No durable UV protection |
| Consumer kit | $15-$30 | 45-120 minutes | Good surface correction | Technique controls final quality |
| Hand sanding and polish | $10-$25 | 90-180 minutes | Variable optical clarity | Requires consistent scratch removal |
| Professional machine service | $75-$150 | 45-120 minutes | More uniform correction | Coating quality varies by provider |
| Professional sprayed clear coat | $100-$250 | 2-4 hours including cure | Durable finish when applied correctly | Overspray and curing errors are possible |
Household methods are acceptable for a short visual improvement, not for a durable repair. Toothpaste may remove very light surface residue, but it usually lacks the controlled abrasion and UV-resistant topcoat needed for lasting optical clarity.
What Supplies Does a DIY Restoration Need?
A practical kit needs automotive masking tape, car shampoo, clean water, wet-sanding sheets around 800, 1,500, 2,000, and 3,000 grit, a plastic compound, microfiber towels, degreaser, and a UV-resistant finishing product. A dual-action polisher can shorten polishing time, but aggressive rotary use can overheat or distort plastic.
Do not sand dry. Dry abrasive particles clog quickly and create uneven scratches. Keep the lens and paper wet, use light pressure, and inspect under bright angled light between grit changes.
What Does Headlight Replacement Involve?
Headlight replacement removes the old assembly, transfers compatible components, installs the new lamp, verifies seals and connectors, and aims the beam. Many vehicles require removal or partial loosening of the front bumper cover, wheel-liner fasteners, grille, or upper support trim before hidden bolts become accessible.
A typical replacement sequence includes:
- Confirm the exact year, trim, side, bulb type, connector, and lighting package.
- Disconnect the battery when the manufacturer procedure requires it, especially for HID systems.
- Remove access panels, trim, bumper fasteners, and assembly bolts.
- Disconnect the wiring harness without pulling on wires or locking tabs.
- Transfer bulbs, ballasts, modules, brackets, or dust caps only when the part design permits it.
- Install the housing without forcing the mounting points.
- Reconnect wiring and test low beam, high beam, turn signal, daytime running lamp, leveling, and indicators.
- Reinstall body panels, then aim the headlights on level ground.
A replacement housing that fits the bolt holes can still have a poor beam pattern. Compare the cutoff against the opposite lamp and perform a formal aim check after the vehicle sits at normal ride height.
Which Replacement Part Should You Buy?
An OEM assembly offers the most predictable fit, seal, optical pattern, and electronics compatibility, but it often carries the highest price. A CAPA-certified aftermarket part can reduce cost, while a used assembly may be sensible for an older vehicle if its lens, tabs, vents, and rear seals pass inspection.
| Replacement type | Typical part cost per side | Best use case | Inspection priority |
|---|---|---|---|
| New OEM halogen assembly | $250-$900 | Long-term ownership and exact fit | Manufacturer part number |
| New OEM LED or matrix assembly | $800-$2,500+ | Modern vehicles with integrated electronics | Calibration and module compatibility |
| CAPA-certified aftermarket | $150-$600 | Lower cost with documented fit standards | CAPA label and warranty |
| Budget aftermarket | $100-$350 | Temporary or low-value vehicle repair | Beam pattern and seal quality |
| Salvage or used OEM | $75-$400 | Older vehicle with available donor parts | Cracks, haze, tabs, moisture, electronics |
Verify whether the quoted price includes bulbs, ballasts, LED drivers, leveling motors, brackets, and programming. A low-priced “headlight” may be only an empty shell, while a modern adaptive lamp can require a separate module and calibration procedure.
What Does Each Option Cost Over Time?
Restoration usually minimizes immediate spending, while replacement can cost less over a longer ownership period if restoration must be repeated. A $100 professional restoration repeated every two years can approach $300 over six years, before considering the owner’s time and any decline in coating quality.
| Ownership scenario | Restoration pattern | Replacement pattern | Usually favored |
|---|---|---|---|
| Sell in 6-12 months | $15-$150 once | $200-$2,500 once | Restoration |
| Keep 2-3 years | $15-$150 once or twice | $200-$2,500 once | Depends on damage |
| Keep 5+ years | $75-$450 across repeat services | $200-$2,500 once | Replacement if structurally damaged |
| Luxury LED vehicle | $75-$150 professional service | $800-$2,500+ per side | Restoration if lens-only damage |
| Older low-value vehicle | $15-$30 DIY service | Used part $75-$400 | Cheapest sound option |
Labor varies by location and vehicle. Bumper removal, calibration, corrosion, seized fasteners, and a second technician for aim verification can raise replacement labor beyond a basic one-hour estimate.
Common Failure Modes and Their Fixes
Most poor results come from misdiagnosis, incomplete surface preparation, or failure to protect the repaired plastic. The following problems have distinct causes and recovery steps.
- The lens remains cloudy after polishing: Return to the coarsest required grit and sand until the surface is uniformly dull. Cloudy islands usually indicate remaining oxidized coating, not a need for more polish.
- Yellowing returns quickly: The UV topcoat was skipped, applied too thinly, contaminated, or allowed to cure in poor conditions. Remove unstable material and apply a compatible protective coating according to its instructions.
- Sanding marks remain visible: The previous grit was not fully removed. Repeat the next finer grit with cross-hatch passes and inspect under direct light.
- Paint or trim is scratched: Stop machine work, clean the area, and assess the damage before continuing. Proper masking and a smaller pad reduce edge contact.
- Replacement lamp fogs internally: Check the rear dust caps, bulb seals, vents, and perimeter seam. Persistent droplets or pooling justify a warranty claim or professional resealing diagnosis.
- Beam points too high or low: Adjust the lamp using the vehicle’s specified procedure and a level surface. Do not compensate for a bent mount by forcing the housing.
- A new lamp has a different color or pattern: Confirm bulb type, color temperature, projector design, and part number. Mixing a new LED or HID unit with a mismatched lamp can create unequal illumination.
One practitioner rule matters more than polish speed: never judge a headlight repair only by daylight appearance. Test the nighttime beam, because a clear lens with a defective projector remains an unsafe headlight.
Which Should You Choose?
Choose Restoration for Surface Oxidation
Choose restoration when the lens is yellow, hazy, or lightly scratched only on the outside, and the lamp has dry internals, intact mounts, and a normal beam pattern. DIY restoration offers the lowest cost, while professional work improves consistency and coating durability.
Choose Replacement for Structural or Internal Damage
Choose replacement when cracks, broken tabs, recurring moisture, failed electronics, damaged reflectors, or severe pitting remain. A quality used OEM or CAPA-certified assembly may be a better value than a budget housing with an incorrect beam pattern.
Choose Professional Diagnosis for LED, HID, or Matrix Systems
Choose diagnosis before purchasing parts when an LED segment, HID lamp, leveling system, or adaptive function fails. The visible lens may be innocent, and replacing a complete assembly without testing can waste hundreds of dollars.
Choose the Lowest Sound Cost for an Older Vehicle
For an older vehicle with limited resale value, compare a $20 kit, a $100 professional restoration, and a $150-$400 used OEM assembly. Select the least expensive option that preserves a dry housing, correct aim, and a stable beam pattern.
FAQ
Can I restore headlights without sanding?
You can improve very light residue with plastic polish, but durable restoration normally requires controlled abrasion when the UV coating has oxidized. Toothpaste and baking soda may brighten a lens briefly, yet they do not reliably remove deep oxidation or provide a protective UV layer.
Is a cloudy headlight an automatic replacement issue?
No. Exterior cloudiness usually supports restoration when the lens and housing remain intact. Replacement becomes appropriate when cloudiness comes from internal moisture, damaged optics, a separated seam, deep pitting, or a crack that restoration cannot safely remove.
Should both headlights be restored or replaced?
Restore or replace both sides when their condition and age are similar, because matching optical clarity and color improves beam balance. If one lamp has collision damage and the other has minor oxidation, repair each according to its actual failure rather than replacing both automatically.
Can insurance pay for headlight replacement?
Insurance may cover replacement when a covered collision or other insured event caused the damage, subject to the policy deductible and claim terms. Progressive yellowing, UV oxidation, and ordinary wear are generally maintenance issues rather than collision losses, but the policy and adjuster determine coverage.
How can I protect restored headlights?
Use a dedicated UV-resistant coating, avoid harsh solvent exposure, wash with automotive shampoo, and inspect the finish periodically. A clear protective film can add another barrier, provided the film is compatible with the lens and does not alter the beam or violate local requirements.
Does headlight restoration pass a vehicle inspection?
A restored headlight can pass when the lens is clear, the lamp functions correctly, the beam is properly aimed, and local inspection rules are satisfied. Inspection standards vary by jurisdiction, so restoration should not be used to conceal cracks, moisture, missing equipment, or an unsafe beam pattern.
The Bottom Line
Headlight restoration vs replacement is primarily a damage-location decision. Restore intact lenses with external oxidation when the original lamp still produces a sound beam; replace assemblies with cracks, water intrusion, broken mounts, failed optics, or electronic faults. Compare the repair cost with expected ownership, verify the part or coating, and always finish with a functional and beam-aim check.


