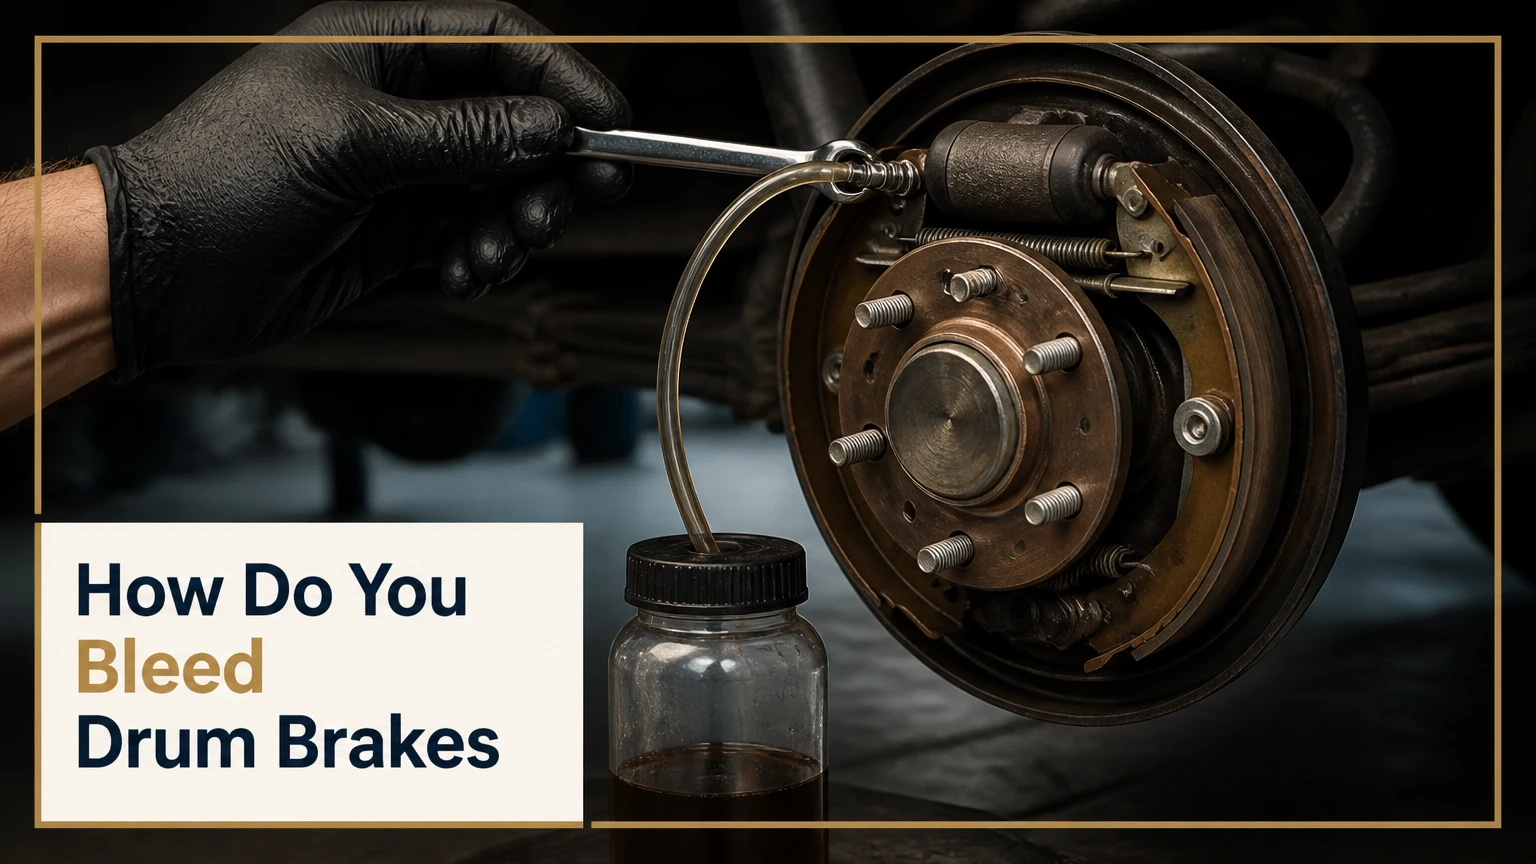
Bleeding drum brakes is the process of purging trapped air bubbles and contaminated fluid from the hydraulic wheel cylinders using a bleeder valve, fresh brake fluid, and controlled pressure. Eliminating trapped air restores non-compressible hydraulic force, allowing the wheel cylinder pistons to expand the brake shoes firmly against the brake drum for maximum stopping power.
At a Glance
- Standard Bleeding Order: Right Rear $\rightarrow$ Left Rear $\rightarrow$ Right Front $\rightarrow$ Left Front (for standard left-hand drive vehicles).
- Bleeder Valve Torque: Tighten drum brake bleeder screws to 7 to 9 lb-ft (10 to 12 Nm) to avoid snapping the fitting.
- Fluid Volume Needed: Keep 1 to 2 quarts of fresh, unopened DOT 3 or DOT 4 brake fluid on hand.
- Tubing Requirement: Use a 3/16-inch or 1/4-inch inner diameter clear vinyl tube submerged in fluid.
- Critical Rule: Never let the master cylinder reservoir drop below 25% capacity during the bleeding process.
What Tools and Supplies Are Required Before Bleeding Drum Brakes?
Bleeding drum brakes requires a set of basic hand tools and hydraulic supplies to safely elevate the vehicle, open fittings, and contain chemical waste. Assembling these items before opening any hydraulic lines prevents air from re-entering the system during delays.
- Brake Fluid: 1 to 2 quarts of fresh, unopened DOT 3 or DOT 4 brake fluid (matching the master cylinder cap specification).
- Clear Tubing: 2 to 3 feet of 3/16-inch or 1/4-inch inner diameter clear vinyl tubing.
- Catch Vessel: A clean plastic bottle or container filled with 2 inches of fresh brake fluid.
- Wrenches: A 6-point box wrench or line wrench (typically 8 mm, 10 mm, or 3/8-inch) fitting the bleeder screw.
- Safety Gear: Safety glasses and nitrile gloves to protect against corrosive hydraulic fluid.
- Lift Equipment: Floor jack, jack stands, and wheel chocks to secure the elevated vehicle.
- Penetrating Oil: Rust penetrant to loosen corroded bleeder nipples prior to turning.
What Is the Standard Wheel Sequence for Bleeding Drum Brakes?
The standard sequence for bleeding drum brakes begins at the wheel located furthest from the master cylinder and moves progressively closer. On standard left-hand drive vehicles where the master cylinder sits on the driver side front firewall, hydraulic line lengths dictate a strict four-step order.
- Right Rear (Passenger Side): Longest hydraulic line run from the master cylinder.
- Left Rear (Driver Side): Second longest hydraulic line run.
- Right Front (Passenger Side): Third longest hydraulic line run.
- Left Front (Driver Side): Shortest hydraulic line run closest to the master cylinder.
Following this sequence prevents air bubbles pushed out of long rear lines from migrating back into shorter front lines. If a vehicle uses a right-hand drive layout or diagonal hydraulic split, this sequence must be adjusted to match the longest physical fluid path first.
How Do You Bleed Drum Brakes Step-by-Step Using the Two-Person Method?
Bleeding drum brakes using the two-person manual method requires one technician (the Flusher) positioned at the wheel cylinder and a second technician (the Pumper) in the driver seat operating the brake pedal. This collaborative technique creates directional hydraulic pressure that forces air bubbles down the brake lines and out through the bleeder nipple.
1.Elevate and Secure the Vehicle:Safety prerequisite.
Park the vehicle on a level surface, chock the front wheels, and loosen the rear lug nuts slightly. Jack up the rear axle or frame, lower the vehicle onto jack stands, remove the road wheels, and gain clear access to the backing plates and bleeder valves.
2.Clean and Top Off the Master Cylinder:Prevents contamination.
Wipe dirt away from the master cylinder reservoir cap to prevent debris from entering the hydraulic system. Remove the cap, top off the reservoir with fresh DOT 3 or DOT 4 fluid to the “Max” line, and rest the cap loosely on top to prevent a vacuum lock while pumping.
3.Connect the Catch Bottle to the Bleeder Screw:Prevents back-siphonage.
Attach one end of the 3/16-inch clear vinyl tube firmly over the right rear bleeder nipple. Submerge the opposite end of the tube beneath 2 inches of clean brake fluid in your catch bottle. This liquid seal prevents atmospheric air from traveling back into the wheel cylinder.
4.Build Hydraulic Line Pressure:Pumper role.
Instruct the Pumper to depress the brake pedal 3 to 4 times slowly through its full range of motion, then maintain firm, continuous downward pressure on the pedal. The Pumper must hold the pedal down without pumping further until instructed.
5.Open the Bleeder Valve:Flusher role.
Using a 6-point box wrench or line wrench, turn the bleeder valve counter-clockwise 1/4 to 1/2 turn. Fluid and trapped air bubbles will rush through the clear tube into the catch bottle, and the brake pedal under the Pumper’s foot will drop toward the floorboard.
6.Close the Bleeder Valve:Time-critical action.
Once the fluid stream slows down (after approximately 1 to 2 seconds) and before the brake pedal hits the floorboard, tighten the bleeder screw clockwise until snug. The Flusher must call out “Closed” to confirm the line is sealed.
7.Release and Repeat Until Clear:Cycle 5 to 8 times per wheel.
Upon hearing “Closed,” the Pumper releases the brake pedal. Repeat steps 4 through 6 roughly 5 to 8 times for the right rear wheel until no air bubbles pass through the clear tube and the fluid runs light and clear.
8.Replenish Fluid and Move to Next Wheel:Maintain.
25% capacity”>
Check the master cylinder reservoir and refill it with fresh brake fluid. Repeat the entire procedure for the Left Rear wheel, followed by the Right Front, and finally the Left Front wheel.
How Do Vehicle Layout Exceptions Alter the Drum Brake Bleeding Sequence?
Vehicle layout exceptions alter the drum brake bleeding sequence whenever the distance between the master cylinder and the wheels changes from the standard configuration. Modifying the bleeding sequence based on specific chassis design ensures air is moved outward from the master cylinder without re-entraining air into previously cleared circuits.
- Right-Hand Drive (RHD) Vehicles: Because the master cylinder sits on the right side of the firewall, reverse the standard order: Left Rear $\rightarrow$ Right Rear $\rightarrow$ Left Front $\rightarrow$ Right Front.
- Diagonal-Split Hydraulic Systems: Modern front-wheel-drive vehicles split hydraulic circuits diagonally across wheels (Right Front paired with Left Rear; Left Front paired with Right Rear). If the standard method leaves a soft pedal, bleed in this sequence: Right Rear $\rightarrow$ Left Front $\rightarrow$ Left Rear $\rightarrow$ Right Front.
- Rear-Engine Vehicles: On vehicles with front-mounted master cylinders and rear-mounted engines (such as classic air-cooled Volkswagen Beetles or vintage Porsches), maintain the absolute physical line length rule: start at the rear wheels furthest from the front reservoir.
How Do You Bleed Drum Brakes on Trucks with a Height Sensing Proportioning Valve?
To bleed drum brakes on a truck or SUV equipped with a Height Sensing Proportioning Valve (HSPV), the rear suspension must be compressed to simulate vehicle payload. The HSPV sits along the frame rail connected to the rear axle by a mechanical linkage, regulating fluid pressure based on load weight.
When a truck is jacked up by its frame, the rear axle hangs loose, signalling the valve that the vehicle is unloaded. This causes the HSPV to restrict hydraulic fluid flow to the rear drum brakes, making bleeding impossible or incomplete.
| Vehicle Setup State | Suspension Position | HSPV Action | Bleeding Outcome |
| Frame-supported (Axle hanging) | Fully extended | Restricts rear fluid pressure | Failed / Blocked fluid flow |
| Axle-supported on jack stands | Compressed (Normal ride height) | Opens full rear fluid pressure | Successful rear drum bleed |
| Wheel ramps / Weight on wheels | Fully compressed | Opens full rear fluid pressure | Successful rear drum bleed |
To perform a proper bleed, position jack stands directly beneath the rear axle housing or drive on drive-on ramps. Alternatively, manually unbolt the proportioning valve lever and zip-tie it upward into the full-load position during the bleeding procedure.
How Do You Fix a Frozen or Snapped Drum Brake Bleeder Screw?
Fixing a frozen drum brake bleeder screw requires heat application and penetrating fluid, while a snapped bleeder screw is best resolved by replacing the wheel cylinder entirely. Wheel cylinders are constructed from cast iron or aluminum, while bleeder screws are made of steel, making them prone to galvanic corrosion and rust welding over time.
Loosening a Frozen Bleeder Screw
- Clean rust off the hex head using a wire brush.
- Spray a generous layer of penetrating oil onto the threads and allow it to soak for 15 minutes.
- Place a 6-point box wrench or line wrench securely over the hex fitting (avoid open-ended wrenches, which round off soft fittings).
- Tap the end of the wrench lightly with a brass hammer to break the corrosion bond.
- If the screw remains immobile, apply gentle local heat around the wheel cylinder body surrounding the screw using a propane torch, then attempt to turn the screw counter-clockwise.
Handling a Snapped Bleeder Screw
If a hollow bleeder screw snaps off flush with the wheel cylinder housing, attempt extraction using a small screw extractor tool. However, because new drum brake wheel cylinders cost between $10 and $25 for most passenger vehicles, replacing the entire wheel cylinder assembly is faster, safer, and far more reliable than attempting complex extraction on damaged internal threads.
Why Does Air Keep Entering the Brake Lines During Bleeding?
Air continues entering the brake lines during bleeding either because external atmospheric air is being sucked past loose bleeder valve threads during vacuum/manual operations, or because an internal hydraulic component has suffered seal failure.
To diagnose and stop continuous air entry, check the following points:
- Unsealed Bleeder Threads: When a bleeder valve is loosened 1/2 turn, air can bypass the outer threads and enter the fluid stream. Unscrew the bleeder screw completely, clean the threads, and wrap two turns of PTFE (Teflon) tape around the middle threads, leaving the tapered tip completely clear.
- Depleted Master Cylinder Reservoir: If the fluid level in the master cylinder reservoir drops below 25%, the intake ports draw atmospheric air directly into the master cylinder pistons, distributing air throughout all four brake lines.
- Failed Wheel Cylinder Piston Seals: Inspect the rubber dust boots at both ends of the drum brake wheel cylinder. If fluid seeps out when pulling back the rubber boots, internal cup seals are worn out. These defective seals draw air into the wheel cylinder during pedal release.
What Causes No Fluid to Exit the Drum Brake Bleeder Valve?
No fluid exiting the drum brake bleeder valve indicates a physical blockage in the bleeder orifice, a collapsed rubber flex hose acting as a check valve, or a stuck proportioning valve piston.
[Master Cylinder] ──> [Hard Line] ──> [Collapsed Flex Hose] (Blocked) ──x──> [Wheel Cylinder]
Follow this step-by-step diagnostic order to locate the blockage:
- Clogged Orifice: Unscrew the bleeder screw completely from the wheel cylinder. Insert a thin mechanics wire or a 1/16-inch drill bit through the center bore and cross-hole to clear out packed rust and dirt particles.
- Collapsed Internal Brake Hose: Rubber flexible brake lines degrade internally over time. The inner synthetic layer can delaminate, flaking off to create a one-way flap valve that allows high pedal pressure through but blocks gravity or low-pressure fluid exit. If fluid flows out of the hard line fitting when disconnected, but fails to pass through the flexible hose, replace the rubber brake hose immediately.
- Tripped Metering or Combination Valve: Rapid pedal pumping during a leak event can trip the internal safety spool inside the vehicle’s combination valve, cutting off fluid supply to the rear drums. Centering the valve spool requires depressing the brake pedal firmly while briefly opening a front bleeder valve to equalize pressure differential.
Can You Bleed Drum Brakes Alone Without a Helper?
Yes, you can bleed drum brakes alone using specialized single-person tools including vacuum pump kits, positive pressure tank bleeders, or check-valve bleeder hoses. These methods eliminate the requirement for a second person inside the vehicle operating the brake pedal.
- Vacuum Bleeder Kit: A hand-operated vacuum pump connects directly to the bleeder screw via clear tubing. Drawing a vacuum (10 to 15 in-Hg) inside the tube pulls fluid and air out of the wheel cylinder when the bleeder screw is cracked open.
- Pressure Bleeder Tank: A pressurized reservoir tank clamps directly onto the master cylinder top opening. Pressurizing the tank to 10–15 psi forces fresh fluid down through the entire hydraulic network, allowing you to walk to each wheel and open the bleeder screw until fluid runs clear.
- One-Way Check-Valve Hose (Solo-Bleeder): A clear hose equipped with an internal spring-loaded check valve attaches to the bleeder screw. When you press the brake pedal, fluid pressure opens the check valve; when you release the pedal, the check valve snaps shut, preventing air from being sucked back into the wheel cylinder.
Do You Need to Bleed Drum Brakes After Replacing Brake Shoes?
No, you do not need to bleed drum brakes if you only replaced mechanical components such as brake shoes, return springs, hold-down pins, or the brake drum itself. As long as you did not open hydraulic lines, loosen bleeder valves, or allow the wheel cylinder pistons to pop out of their bores, the hydraulic circuit remains fully sealed.
However, you must bleed drum brakes if any of the following service events occurred during your repair work:
- Replacement of the wheel cylinder, master cylinder, or flexible rubber brake hoses.
- Disconnection of any metal brake line or flare nut fitting.
- Accidental over-extension of the wheel cylinder pistons, which breaks the rubber cup seal and introduces air into the cylinder bore.
- Brake fluid replacement as part of biennial routine hydraulic maintenance.
Why Is the Brake Pedal Still Soft or Spongy After Bleeding Drum Brakes?
The brake pedal remains soft or spongy after bleeding drum brakes primarily because the drum brake shoes are out of mechanical adjustment, leaving excessive air gap between the friction linings and the inner drum wall. While air trapped in fluid causes a spongy feel through compression, improper shoe clearance forces the wheel cylinder pistons to travel too far before making physical contact, producing identical pedal travel and soft feedback.
To correct drum brake shoe adjustment:
- Locate the rubber access plug on the lower back side of the brake backing plate.
- Remove the plug and insert a brake adjusting tool (spoon) or flat-head screwdriver into the slot to engage the star-wheel adjuster.
- Rotate the star wheel to expand the brake shoes outward until you feel firm drag when spinning the brake drum by hand.
- Back off the star wheel by 2 to 3 teeth until the brake drum spins freely with only slight friction contact.
Once the mechanical clearance is set correctly, test the pedal again. If the soft pedal persists, perform a secondary bleed to eliminate residual micro-bubbles trapped inside the master cylinder bore.
Can You Reuse Brake Fluid Purged During the Bleeding Process?
No, you must never reuse brake fluid that has been purged from a vehicle during the bleeding process. Brake fluid is glycol-ether based and highly hygroscopic, meaning it actively absorbs humidity directly from the surrounding atmosphere upon exposure.
Reusing expelled fluid introduces water molecules, dissolved rubber particles, and microscopic metal rust into your braking system. Water inside brake fluid drops its boiling point drastically (from roughly 400°F dry down to under 284°F wet for DOT 3 fluid). Under heavy braking, this absorbed water vaporizes into steam bubbles, leading to sudden pedal fade and total hydraulic brake failure. Always collect used fluid in a clean sealed vessel and dispose of it at an authorized automotive recycling facility.
How Much Brake Fluid and Time Does a Complete Drum Brake Bleed Take?
A complete drum brake bleed takes between 45 and 60 minutes for a four-wheel system and consumes approximately 16 to 32 fluid ounces (1 to 2 pints) of fresh brake fluid.
| Metric / Specification | Recommended Value |
| Required Fresh Fluid Volume | 1 to 2 quarts (32 to 64 fl oz) |
| Fluid Volume Purged per Wheel | 2 to 3 fluid ounces (60 to 90 mL) |
| Bleeder Screw Tightening Torque | 7 to 9 lb-ft (10 to 12 Nm) |
| Minimum Master Cylinder Fluid Level | Keep above 25% total reservoir height |
| Estimated Time (Two-Person Method) | 45 to 60 minutes |
| Estimated Time (Pressure Bleeder) | 20 to 30 minutes |
How Do You Know When Drum Brake Bleeding Is Fully Completed?
Drum brake bleeding is fully completed when three distinct physical conditions are met at all four wheels across the vehicle:
- Bubble-Free Fluid Stream: Fluid discharging through the clear vinyl tubing contains zero suspended air bubbles during pedal compression.
- Clear Fluid Color: The exiting fluid changes from dark amber or brown to the clear, light-yellow color of fresh brake fluid.
- Firm Pedal Resistance: The driver’s brake pedal feels firm and high under foot pressure, with no progressive dropping or spongy compression when held continuously for 30 seconds.
The Bottom Line
Bleeding drum brakes restores firm hydraulic pressure by systematically purging air bubbles through bleeder valves, starting at the wheel furthest from the master cylinder (Right Rear $\rightarrow$ Left Rear $\rightarrow$ Right Front $\rightarrow$ Left Front). Always maintain the master cylinder reservoir above 25% capacity, use clear vinyl tubing submerged in clean fluid, and torque bleeder screws carefully to 7–9 lb-ft (10–12 Nm). If a soft pedal persists after removing all visible air bubbles, adjust the internal star-wheel mechanism to eliminate excessive clearance between the brake shoes and the drum.


