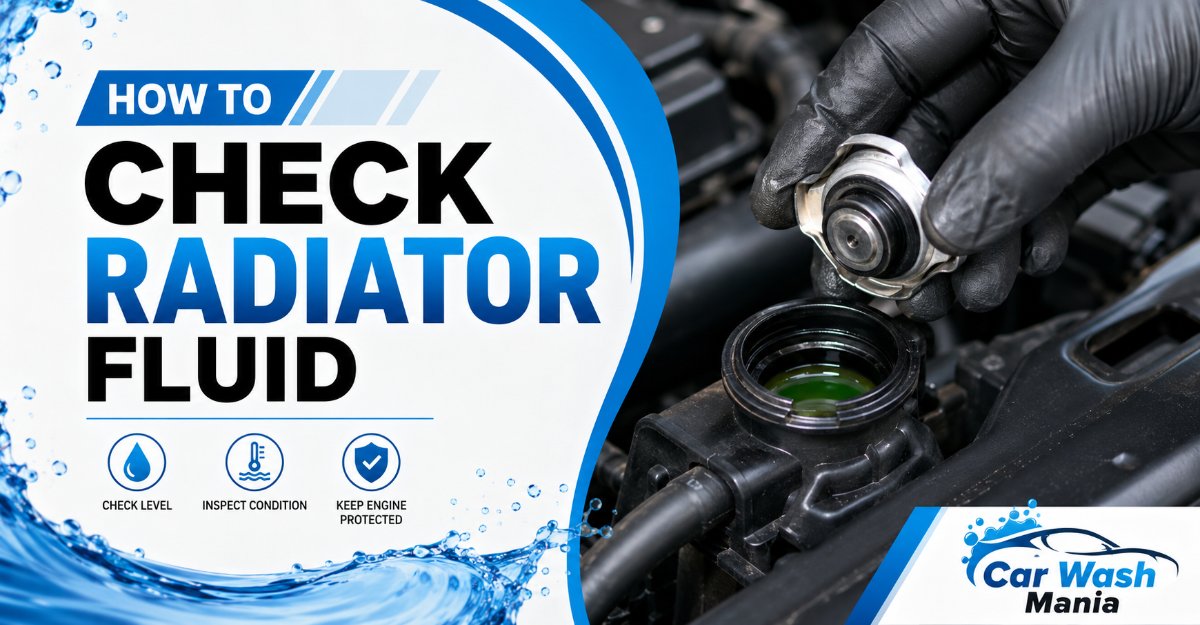
To learn how to check radiator fluid, park on level ground, let the engine become completely cold, identify the correct coolant reservoir and specification, inspect the level and condition, check for leaks, add compatible coolant only if necessary, and verify the level again. The job takes 5–15 minutes, requires beginner-level skill, and depends most on checking a genuinely cold engine.
Critical warning: Never loosen a radiator cap, coolant pressure cap, or pressurized reservoir cap while the engine is hot. Hot coolant and steam can escape under pressure and cause serious burns. Toyota owner guidance gives the same warning for both radiator and coolant-reservoir caps.
Before You Start
| Requirement | What you need |
|---|---|
| Time | 5–10 minutes for inspection; 10–15 minutes if topping up |
| Difficulty | Beginner |
| Typical cost | $0 for inspection; about $15–$30 for premixed coolant |
| Vehicle condition | Parked level, engine off, parking brake applied |
| Cooling time | Preferably overnight; otherwise wait until fully cold |
| Main reference | The vehicle owner’s manual |
| Main success factor | Correct coolant specification, not coolant color |
Tools and Materials Checklist
- Vehicle owner’s manual or official manufacturer specification
- Flashlight
- Nitrile or mechanic’s gloves
- Clean shop towel
- Correct vehicle-approved coolant
- Small clean funnel, if adding coolant
- Distilled or deionized water, only if mixing approved concentrate
- Cardboard or clean paper, optional for detecting drips
- Coolant tester or refractometer, optional for advanced testing
Use 50/50 premixed coolant for a simple top-up unless the manufacturer specifies something different. Premix is ready to use and eliminates measuring errors. Concentrate must be diluted exactly as directed, normally with distilled or deionized water.
Prerequisites and Conditions
You should be able to identify warning labels, distinguish the coolant reservoir from the brake-fluid and washer-fluid reservoirs, and read the owner’s manual.
Do not perform the check beside moving traffic or with the engine running. Keep coolant away from children and animals. Antifreeze may be harmful or fatal if swallowed, and skin or eye contact should be avoided.
Phase 1: Make the Vehicle Safe
Step 1: Park the Vehicle on Level Ground
Park on a flat surface, switch off the engine, apply the parking brake, and remove the key or disable the ignition.
A sloped driveway can shift coolant inside the reservoir and create a misleading reading. Choose a level garage floor, parking space, or driveway. Put an automatic transmission in Park or a manual transmission in first gear or reverse.
Do not leave the vehicle in accessory mode with cooling fans or electrical systems operating unnecessarily. On a hybrid, confirm that the vehicle’s READY indicator is off because the engine can start automatically while the vehicle appears quiet.
You’ll know it worked when the vehicle cannot roll, the engine is off, and the reservoir can be viewed from a stable position.
Common mistake: Checking at a fuel station immediately after driving. Move the vehicle to a safe level location, shut it down, and postpone the inspection until the engine is cold.
Step 2: Let the Cooling System Become Cold
Wait until the engine, radiator, hoses, and coolant pressure cap are completely cold before touching any cooling-system cap.
The safest method is to check the vehicle before its first drive of the day. After normal driving, a small engine may cool sufficiently in 2–3 hours, while a large engine, turbocharged vehicle, towing vehicle, or car in hot weather may remain dangerously pressurized longer.
Do not rely only on the dashboard gauge. It may show “cold” before trapped coolant and metal components are safe to open. Do not use a rigid upper radiator hose as permission to remove a cap; hose feel is not a dependable pressure test.
You do not need to open any cap for the initial visual check.
You’ll know it worked when the vehicle has been sitting for several hours, no heat is radiating strongly from the engine bay, and all inspection steps can be completed without opening a hot system.
Common mistake: Covering a hot cap with a towel and opening it slowly. A towel does not make a pressurized hot system safe. Wait for full cooling instead.
Phase 2: Identify the Correct Fluid and Tank
Step 3: Confirm the Required Coolant Specification
Read the owner’s manual and identify the exact coolant standard required for your make, model, year, and engine.
Look under headings such as:
- Engine coolant
- Cooling system
- Fluid specifications
- Capacities and specifications
- Maintenance and care
Record the manufacturer specification, product name, and whether the vehicle requires premix or concentrate. Examples may include manufacturer-specific formulas or standards such as Ford Yellow, Toyota Super Long Life Coolant, Honda Type 2, GM Dex-Cool, Volkswagen TL 774 variants, or Mercedes-Benz approval numbers.
Do not select coolant solely because it is green, orange, pink, blue, or yellow. Different formulas may share a color, and one brand may market products compatible with multiple technologies. Prestone, for example, sells both vehicle-specific formulas and products advertised for broad compatibility, demonstrating why color by itself is not a technical specification.
For the lowest compatibility risk, use a product that explicitly lists the specification required by the owner’s manual.
You’ll know it worked when you can state the required specification without relying on the existing coolant’s color.
Common mistake: Buying “the same color” from a store shelf. Match the written specification or manufacturer approval instead.
Step 4: Locate the Correct Coolant Reservoir
Find the coolant expansion tank or overflow reservoir by following the owner’s-manual diagram and reading the cap and tank labels.
The tank is commonly a translucent plastic container with markings such as:
- ENGINE COOLANT
- COOLANT
- MIN and MAX
- LOW and FULL
- COLD FILL RANGE
- A thermometer-over-waves warning symbol
It is usually connected to the radiator or cooling circuit by a hose. Do not confuse it with the windshield-washer reservoir, which often has a windshield-spray symbol, or the brake-fluid reservoir near the firewall.
There are two common designs:
Pressurized Expansion Tank
The tank is part of the pressurized cooling circuit and normally has a pressure-warning cap. Never open it hot.
Non-Pressurized Overflow Bottle
The bottle receives expanding coolant through a hose from a separate radiator cap. The bottle itself may not be pressurized, but the radiator cap remains dangerous when hot.
Some vehicles have no conventional radiator cap accessible to the owner. Others have more than one coolant reservoir for an engine, inverter, turbocharger, battery, or separate low-temperature circuit.
You’ll know it worked when the tank label, cap symbol, hose routing, and manual diagram all identify the same reservoir.
Common mistake: Pouring coolant into the washer-fluid bottle. Stop and verify every cap symbol before opening or adding anything.
Phase 3: Inspect the Coolant
Step 5: Read the Cold Coolant Level
View the reservoir from the side and compare the liquid line with the manufacturer’s cold-level marks.
Use a flashlight behind or beside the translucent tank. Wipe dust from the outside with a damp cloth so dirt does not look like the liquid line.
Most vehicles are correct when cold coolant is:
- Between MIN and MAX
- Between LOW and FULL
- Within a marked COLD FILL RANGE
- At a manufacturer-specific cold line
The level does not normally need to sit exactly at MAX. Leaving expansion space is intentional. Likewise, MIN is usually the lowest acceptable boundary, not the preferred target for every vehicle.
Check only against the marks specified for the engine’s current temperature. Do not compare a cold level with a HOT mark.
If the tank is opaque or badly stained, shine the flashlight through the filler neck only after confirming the system is cold and the manual permits cap removal. A clean plastic dipstick or manufacturer-provided float may be used where specified; do not insert a dirty tool.
You’ll know it worked when you can classify the level as within range, below range, apparently empty, or above range.
Common mistake: Assuming an empty-looking upper section means the reservoir is empty. Coolant normally occupies only part of the tank. Locate the actual MIN and MAX lines first.
Step 6: Inspect the Coolant’s Visible Condition
Inspect the visible coolant for clarity, consistent color, contamination, deposits, and separation.
Healthy coolant is usually uniformly colored and sufficiently clear to transmit light, although appearance varies by formula and age. Focus on changes and contamination rather than judging the product by one “correct” color.
Look for:
- Oil-like film or floating globules
- Creamy, tan, or milky emulsion
- Heavy brown discoloration
- Rust particles
- Gel or thick sludge
- Crystalline deposits
- Black debris
- Different-colored layers
- Unexplained foam when the engine is cold
A slightly darker version of the original coolant is not automatically proof of failure. However, visibly dirty coolant should not simply be topped up; coolant manufacturers recommend replacement procedures when the fluid has become dirty because contamination can contribute to corrosion, restrictions, and component damage.
Do not remove coolant with your mouth, taste it, or intentionally smell directly over the opening.
You’ll know it worked when you can describe the coolant as uniformly clean, questionable, or clearly contaminated.
Common mistake: Diagnosing a failed head gasket from color alone. Milky or oily coolant is serious, but testing is needed to distinguish a head-gasket leak from an oil-cooler, heat-exchanger, or other internal failure.
Step 7: Check the System for Evidence of Leakage
Inspect the reservoir, hoses, radiator area, water-pump area, and ground for signs of coolant escaping.
With the engine cold and off, use the flashlight to inspect:
- Reservoir seams and cap area
- Small overflow and return hoses
- Upper and lower radiator-hose connections
- Radiator side tanks and lower corners
- Thermostat-housing area
- Water-pump area
- Engine undertray
- Ground beneath the front of the vehicle
- Passenger footwell for possible heater-core leakage
Signs of leakage include wetness, colored droplets, dried white or colored crust, staining, a persistent sweet chemical odor, or repeated loss from the reservoir.
Place clean cardboard under the engine bay overnight if the leak is too slow to see. Remember that clear water beneath a vehicle may be normal air-conditioning condensate; coolant is usually colored, slippery, and slower to evaporate.
A cooling system is designed to retain its coolant. A small level movement between hot and cold is normal, but repeated cold-level decline needs diagnosis.
You’ll know it worked when you have either found no visible evidence of loss or identified a location that needs pressure testing or repair.
Common mistake: Repeatedly topping up a falling level. Mark the cold level, record the date and mileage, and investigate further loss.
Phase 4: Correct and Verify the Level
Step 8: Add the Correct Coolant in Small Amounts
Add approved coolant slowly until the cold level reaches the specified range without exceeding MAX.
Only perform this step when all four conditions are true:
- The system is completely cold.
- The level is genuinely below the cold minimum.
- The correct coolant specification is known.
- There is no severe leak, overheating, steam, or obvious internal contamination.
Clean dirt from around the cap before opening it. Use a clean funnel reserved for coolant. Add approximately 100–200 mL, or 3–7 fluid ounces, at a time, then pause for the level to settle.
For a minor top-up, 50/50 premix is the simplest choice. When using concentrate, measure coolant and distilled or deionized water in a clean container according to the vehicle and product directions. Never assume that adding straight concentrate will improve cooling; excessive glycol can reduce heat-transfer performance and may exceed the manufacturer’s permitted concentration.
Do not exceed MAX. If you accidentally overfill by a few millimeters, follow the owner’s manual; if substantially overfilled, remove excess cold coolant with a clean fluid-transfer tool and store or dispose of it safely.
Tighten the cap fully to its specified stop. A loose pressure cap may prevent the system from maintaining its designed pressure.
You’ll know it worked when the cold level remains within the marked range, no coolant has spilled, and the cap is secure.
Common mistake: Adding coolant directly to the radiator because the reservoir is low. Fill only at the location specified by the manufacturer; some systems require a special bleeding or vacuum-filling procedure after substantial loss.
Step 9: Recheck the Level and Monitor the Vehicle
Recheck the cold level after the next complete heat cycle and investigate any renewed loss.
After securing the cap, wipe away every spill. Start the vehicle only if there were no stop-driving symptoms. Observe the dashboard temperature indicator and warning lights during normal use.
Do not open the system again after it warms up.
Let the engine cool completely, preferably overnight, and inspect the level at the same parking location. Compare it with the previous reading. A tiny change caused by trapped air settling may occur after a minor top-up, but a meaningful or repeated drop indicates leakage or an improperly purged system.
Record:
- Date
- Odometer reading
- Cold coolant level
- Amount and product added
- Any temperature warning or odor
You’ll know it worked when the cold level remains stable within the specified range and the engine maintains normal temperature without warnings.
Common mistake: Declaring the repair complete immediately after pouring. The follow-up cold check is what confirms whether the system is retaining coolant.
When to Stop Driving
Stop the vehicle safely, switch off the engine, and arrange professional assistance when you notice:
- A red coolant-temperature warning
- A temperature gauge entering the hot zone
- Steam from under the hood
- Rapid coolant loss
- A visibly empty reservoir after overheating
- Coolant pouring onto the ground
- Thick oil-like contamination in the reservoir
- Repeated overheating after topping up
- Misfiring, heavy white exhaust vapor, or poor running alongside coolant loss
Do not open the hood immediately when heavy steam is escaping toward you. Do not pour cold coolant into an overheated engine; rapid temperature change can damage components, and the pressurized system may erupt when opened.
Common Mistakes and How to Fix Them
Opening the Cap While the Engine Is Warm
Problem: The system may release pressurized steam and coolant.
Fix: Stop touching the cap and allow the vehicle to cool completely. Use the translucent tank for a visual check without opening it. If a cap was loosened and fluid began escaping, move away and do not retighten it until the system is safe to approach.
Choosing Coolant by Color
Problem: Color is a dye choice, not a universal engineering standard.
Fix: Find the required specification in the owner’s manual or official service information. Buy a product that explicitly lists that specification. When the existing fluid is unknown, do not create a homemade mixture; have the system identified and serviced properly.
Filling Above the MAX Line
Problem: The coolant needs room to expand as it heats.
Fix: Check again when fully cold and parked level. Remove substantial excess with a clean transfer pump or have a workshop correct it. Do not siphon coolant by mouth.
Adding Tap Water to Concentrate
Problem: Mineral-rich water can promote scale or leave deposits.
Fix: Use distilled or deionized water in the ratio specified by the vehicle and coolant manufacturer. For small top-ups, use approved premix to avoid measuring and water-quality errors.
Ignoring Repeated Coolant Loss
Problem: A leak can worsen suddenly and cause overheating.
Fix: Mark the cold level, photograph it, and recheck after each complete cooling cycle. Arrange a cooling-system pressure test, cap test, combustion-gas test, or dye inspection if the level continues to fall.
Treating Contaminated Coolant as a Simple Top-Up
Problem: Adding clean coolant does not remove oil, rust, incompatible fluid, or degraded additives.
Fix: Do not keep driving when oil-like or heavy contamination is present. Have the cause diagnosed before flushing. Repairing the underlying oil-cooler, gasket, radiator, or transmission-cooler fault must come before refilling.
Variations for Different Vehicles and Situations
Vehicles With a Radiator Cap and Overflow Bottle
Check the overflow bottle first. When the cold bottle level is normal and no symptoms exist, there is usually no reason to open the radiator cap.
If the bottle repeatedly stays full while the radiator becomes low, the return hose or pressure cap may not be drawing coolant back into the radiator. That requires diagnosis rather than another top-up.
Pressurized Expansion-Tank Systems
Many modern vehicles use the reservoir as the filling and pressure-control point. Treat its cap exactly like a radiator cap.
Check the cold level against the tank’s markings. Do not open the cap merely to see the coolant more clearly unless the engine is completely cold and the manual permits it.
Hybrids and Electric Vehicles
A hybrid or EV may have separate loops for the internal-combustion engine, inverter, power electronics, cabin heater, electric motor, or high-voltage battery.
Do not assume all reservoirs use the same fluid. Match each tank to the manual diagram and use only its specified coolant. Do not open or service high-voltage battery cooling circuits unless the manufacturer identifies the reservoir as owner-serviceable.
Emergency Low-Coolant Situation
If the vehicle is cold, the reservoir is slightly low, and no overheating or major leak is present, add the correct premix to the cold range and monitor closely.
If the required coolant is unavailable, consult the owner’s manual before using water. Emergency allowances differ. Water is not a permanent substitute because it lacks the required freeze, boil, corrosion, and lubrication protection.
Opaque or Unreadable Reservoir
Do not guess from stains on the outside of the tank. Clean the exterior and use a strong flashlight.
Where the level remains invisible, follow the manufacturer’s alternative method, which may involve a dipstick, float, sight tube, or cold filler-neck inspection. A mechanic can also inspect or replace a severely discolored reservoir.
How Long Does It Take and What Does It Cost?
A straightforward visual inspection takes 5–10 minutes, excluding cooling time. Confirming the specification and adding a small amount normally takes 10–15 minutes.
Cooling time is not work time, but it controls the schedule:
- Overnight: safest and easiest
- Light driving in mild weather: often several hours
- Towing, high ambient heat, turbocharging, or a large engine: potentially longer
Typical expenses are:
| Item | Typical range |
|---|---|
| Visual check | $0 |
| 50/50 premixed coolant | $15–$30 per gallon |
| Funnel and gloves | $5–$15 |
| Basic hydrometer | $5–$20 |
| Refractometer | $20–$80 |
| Cooling-system pressure test | $40–$150 |
| Coolant drain, refill, or flush | $100–$250+ |
| Leak repair | Varies by failed component |
Service prices vary by region, coolant capacity, access, bleeding requirements, and whether repairs are needed. A complete flush is not part of a routine level check and should follow the vehicle’s maintenance schedule or a confirmed contamination problem.
Radiator Fluid Condition and Testing
Visual Inspection
Visual inspection can identify severe contamination, but it cannot prove that coolant still has adequate freeze protection, corrosion inhibitors, or correct concentration.
Hydrometer Testing
A hydrometer estimates freeze protection from coolant density. It must be compatible with the coolant chemistry and used at the specified sample temperature. Contamination and unusual formulations can affect accuracy.
Refractometer Testing
An automotive refractometer generally provides a more repeatable concentration estimate. Calibrate it with distilled water, place a small cold sample on the prism, close the cover, and read the correct ethylene-glycol or propylene-glycol scale.
Neither tool determines whether the coolant meets the vehicle’s required additive specification.
Frequently Asked Questions
Can I check radiator fluid while the engine is running?
No. Turn off the vehicle and perform the inspection when the system is completely cold. A running engine has moving belts and fans, and an electric cooling fan may start unexpectedly. The coolant is also circulating and expanding, so the reservoir reading will not represent the specified cold level.
Should coolant be at MIN or MAX when cold?
Follow the markings and owner’s manual. On most vehicles, any stable cold level between MIN and MAX is acceptable. It does not have to touch MAX. A level below MIN needs attention, while filling above MAX removes the expansion space designed into the reservoir.
Can I add coolant without flushing the system?
Yes, when the coolant is only slightly low, its condition is acceptable, and the added product meets the required specification. A top-up is not a substitute for scheduled replacement, contamination removal, or leak repair. Investigate the cause when the cold level keeps falling.
Is radiator fluid the same as engine coolant?
In everyday automotive use, “radiator fluid,” “engine coolant,” and “antifreeze” often refer to related products in the cooling system. Technically, antifreeze concentrate becomes usable engine coolant after dilution, while a 50/50 premix is already diluted and ready to pour.
Does coolant color show which type I need?
No. Color may help you notice a change or leak, but it does not reliably establish chemistry or compatibility. Read the written manufacturer specification and the coolant product’s approvals. Products sold for different standards may use similar colors, while broad-compatibility products may work with several colors and technologies.
How often should I check the coolant level?
A monthly visual check and a check before long trips are practical routines, but follow the manufacturer’s inspection and replacement schedule. Check sooner after cooling-system work, a top-up, an overheating event, or any new odor, puddle, warning light, or temperature change.
Conclusion
The safest way to learn how to check radiator fluid is to treat the owner’s manual, cold-level marks, and written coolant specification as the controlling references. Park level, wait until the engine is fully cold, inspect the correct reservoir, evaluate fluid condition, look for leaks, top up cautiously, and confirm that the level remains stable after another complete cooling cycle.


