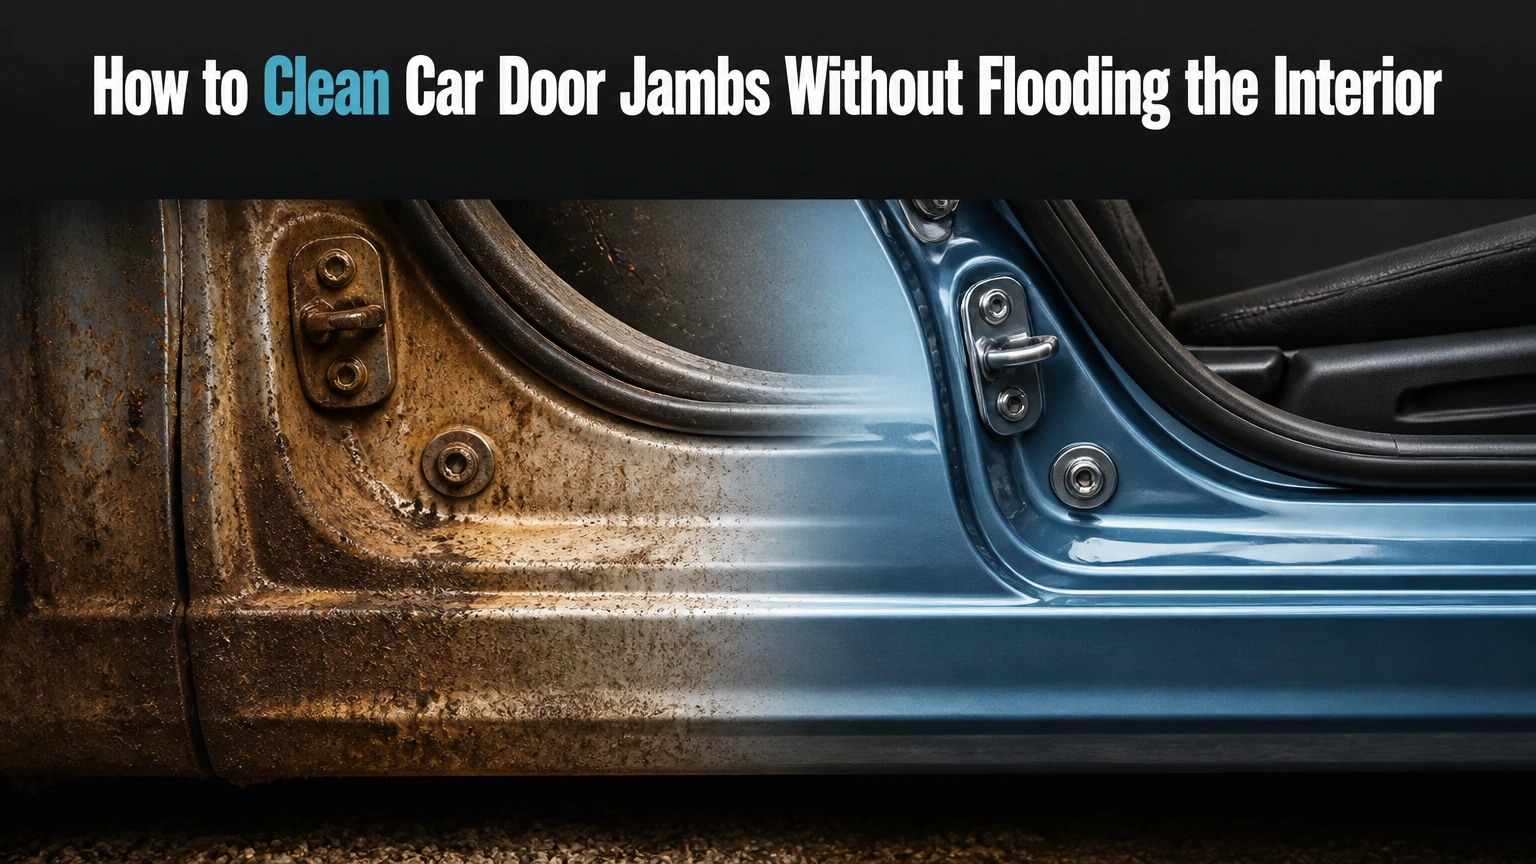
Car door jambs can be cleaned safely in about 15-30 minutes with a rinseless wash or diluted automotive all-purpose cleaner, soft brushes, microfiber towels, and limited water. The safest process is to work from clean upper surfaces toward dirty lower areas, protect the cabin, avoid flooding wiring and drains, dry every seam, and restore only the lubricant removed from hinges.
Key Facts at a Glance
A routine four-door cleaning typically takes 15-30 minutes and uses 4-8 microfiber towels.
A diluted automotive APC is suitable for moderate road grime, while rinseless wash is safer for light dust and apartment cleaning.
Pressure washers should not be aimed continuously at hinges, wiring boots, weatherstripping, or door drains.
White lithium grease belongs on suitable metal hinge pivot points; silicone protectant belongs on rubber seals.
Door jambs should be wiped at every regular wash and deep-cleaned about every 3-6 months.
Chemicals must remain wet during their dwell period and should be tested on an inconspicuous area first.
What Are Car Door Jambs?
Car door jambs are the painted structural areas and hardware around an open vehicle door. A jamb normally includes the vertical door frame, threshold or sill, hinge area, latch and striker, rubber weatherstripping, drain openings, fasteners, and the flexible wiring boot between the door and body.
The exact layout varies by vehicle. A modern SUV may have exposed wiring connectors, plastic trim, multiple rubber seals, and a deep lower sill, while an older sedan may show more painted metal and heavily greased hinges. The door itself also has an inner edge that should be cleaned as part of the same operation.
Door jambs are not the same as the interior door panel. Interior trim can contain leather, fabric, switches, speakers, and window controls, so overspray and rinse water should stay away from those materials. The jamb’s painted surfaces can usually tolerate careful exterior detailing chemicals, but bare metal, rubber, adhesives, and electrical connectors require more conservative handling.
Which parts need different treatment?
| Jamb component | Typical contamination | Suitable treatment | Main risk |
|---|---|---|---|
| Painted frame and sill | Dust, salt, water spots | Diluted APC, rinseless wash, microfiber | Scratches from trapped grit |
| Door hinges | Old grease, grit, oxidation | Small brush, controlled cleaner, fresh lubricant | Removing useful grease |
| Rubber weatherstrip | Dust, wax residue, mildew | Damp microfiber, mild cleaner, silicone protectant | Swelling or drying rubber |
| Latch and striker | Grease, metallic dust | Small brush, damp towel, light lubricant if specified | Seizing or over-lubricating latch |
| Wiring boot and connectors | Dust, road film | Damp towel only | Water intrusion or connector damage |
| Door drains | Mud, leaves, wax buildup | Compressed air or soft brush | Blocked drainage and corrosion |
Why Do Door Jambs Get Dirty?
Door jambs collect contamination because each door opening exposes the frame to rainwater, road spray, dust, pollen, and clothing contact. Hinges and latches add a second contamination source: lubricant holds abrasive grit against metal surfaces, especially near the lower hinge.
Water does not always rinse a jamb clean. Road salt can dry into a crystalline film, while oily road residue bonds to the lower sill and hinge area. Automatic car washes can also leave detergent or wax overspray along the vertical frame. Coastal air adds salt, and gravel-road use adds fine mineral dust that can scratch paint during wiping.
The dirtiest area is often the lower rear corner of the front door or the lower hinge pocket. Those locations receive spray from the front tire and have poor airflow after the door closes. A neglected jamb can therefore develop staining, sticky residue, corrosion at fasteners, or a musty smell from trapped organic debris.
How Does Door-Jamb Cleaning Work?
Effective door-jamb cleaning combines chemical softening, controlled agitation, and towel removal. Cleaner loosens oily soil, a properly matched brush breaks the film free, and a clean microfiber towel lifts suspended particles without grinding them into the clear coat.
Water temperature matters less than dwell control. Warm water can soften grease slightly, but hot water is unnecessary and may affect adhesives, seals, or skin safety. Steam can loosen heavy grease in professional hands, although a damp towel and diluted cleaner are safer for most home users.
A chemical’s strength should match the surface and contamination. Rinseless wash is appropriate for light dust when used with lubrication and clean towels. A diluted APC handles ordinary road grime. Strong degreasers are limited to localized metal hardware, because repeated exposure can dull finishes, dry rubber, and remove protective lubricant.
Before You Start
A safe four-door cleaning requires a cool vehicle, shade, four to eight clean microfiber towels, one soft detailing brush, one small medium-stiff brush, a spray bottle, nitrile gloves, and either rinseless wash or diluted automotive APC. A hose is optional, not mandatory.
Preparation checklist
| Item | Typical quantity or setting | Purpose | Replacement rule |
|---|---|---|---|
| Microfiber towels | 4-8 towels, 300-500 GSM | Wipe and dry jamb surfaces | Change when visibly dirty |
| Soft detailing brush | 1 brush, 20-30 mm head | Paint, rubber, trim | Rinse after greasy work |
| Medium-stiff brush | 1 small brush | Hinges and latch hardware | Keep off painted surfaces |
| Spray bottle | 500-750 mL | Controlled application | Label chemical and dilution |
| Rinseless concentrate | Product-labeled dilution | Light soil and low-water cleaning | Follow the bottle label |
| Automotive APC | Commonly 10:1 light, 4:1 heavy | Moderate to heavy grime | Verify the manufacturer ratio |
| Nitrile gloves | 1 pair | Skin protection | Replace after chemical contamination |
Park in shade and confirm that the jamb paint is cool to the touch. Open one door at a time, because leaving every door open can expose the cabin to windblown dust and can drain the battery on some vehicles if interior lights remain on.
Remove leaves and loose grit with compressed air, a blower, or a dry brush. Place a towel over the interior door panel and seat edge before spraying. Locate the door drains, wiring boots, speakers, and any exposed electrical connectors so you can avoid directing liquid toward them.
How to Clean Car Door Jambs: Seven Safe Steps
The following process works for painted metal, ordinary road film, dirty thresholds, and moderately greasy hardware. Severe corrosion, damaged paint, or contaminated latch mechanisms may require a professional inspection rather than stronger chemicals.
Step 1: Remove Loose Debris
Vacuum or blow loose dust, sand, leaves, and hair from the jamb, door edge, hinge pocket, and sill. Use short bursts of air rather than forcing debris deeper into the wiring boot or drain openings.
Start with the upper frame and work downward. Dry debris removal reduces the amount of grit that later moves under a towel. Do not wipe visibly sandy paint with a dry towel, because the towel can create fine circular scratches.
You will know this step worked when loose particles no longer fall onto the sill after a light tap on the door. The common mistake is blowing debris toward the interior instead of outward from the cabin.
Step 2: Choose and Dilute the Cleaner
Select rinseless wash for light dust, diluted APC for moderate road grime, or a localized degreaser for thick grease on suitable metal hardware. Use the product manufacturer’s dilution instructions; typical APC starting points are 10:1 for light cleaning and 4:1 for heavier contamination.
Spray the cleaner onto a microfiber towel or brush when the jamb is close to the cabin. Direct spraying is acceptable on open painted metal, but towel application gives better control near switches, speakers, wiring boots, and upholstery.
Test the solution on a hidden section for 60 seconds. Wipe and inspect for discoloration, gloss change, sticky residue, or rubber swelling. The checkpoint is a clean test area with no finish change. The common mistake is assuming every household degreaser is safe for automotive paint.
Step 3: Let the Cleaner Dwell
Apply enough cleaner to wet the contaminated surface without creating runoff. Allow approximately 30-120 seconds of dwell time, depending on the product label and soil level, then agitate before the solution dries.
Keep the door jamb shaded during dwell. If the cleaner begins drying, add a small amount of fresh product or wipe immediately; never allow a strong APC or degreaser to bake onto warm clear coat.
The cleaner has done its job when grease becomes visibly fluid and a light brush pass changes the film into a uniform slurry. The common mistake is increasing chemical strength when more dwell time and gentler agitation would remove the same soil safely.
Step 4: Agitate by Surface
Use a soft brush on painted metal, rubber seals, plastic trim, and the door edge. Use a smaller medium-stiff brush only on metal hinges and latch hardware, keeping bristles away from exposed paint and delicate wiring.
Work in sections of roughly 20-30 centimeters. Brush with short, overlapping strokes, then wipe the loosened soil with a folded microfiber towel. Refold to a clean face after each section so removed grit does not return to the surface.
Clean hinges from the outside inward only as far as visible contamination allows. Do not pack a brush into a sealed bearing, force dirt into a wiring boot, or scrub factory grease away merely because it looks dark. You will know the section is clean when the towel remains lightly soiled after one final pass. The common mistake is using a kitchen sponge or abrasive pad, which can permanently dull jamb paint.
Step 5: Wipe or Rinse With Minimal Water
For most vehicles, wipe the jamb with a second microfiber towel dampened with clean water or rinseless solution. A low-pressure hose can rinse open painted sections, but use brief downward bursts and keep the nozzle away from seals, connectors, speakers, and drain openings.
A pressure washer is unnecessary for routine jamb cleaning. If professional equipment is used, maintain distance, use a wide spray pattern, and never blast directly into the wiring boot, hinge pivot, door latch, or weatherstrip edge.
Wipe from the clean upper frame toward the lower sill. Check the towel after each pass. The checkpoint is no visible cleaner residue and no runoff entering the cabin. The common mistake is rinsing from the side toward the interior, which can carry dirty water across upholstery or carpet.
Step 6: Dry Every Seam and Drain Area
Dry the jamb immediately with a dedicated microfiber towel, then use a second dry towel for the hinge pocket, weatherstrip channel, latch recess, and sill seam. Compressed air can push water from crevices, but use low, controlled pressure and direct moisture outward.
Open and close the door slowly once, then inspect the bottom edge and carpet-facing seal. Water trapped behind a seal can appear several minutes later, so perform a second towel check before closing the vehicle.
The jamb is dry when no water beads emerge from seams after the door moves. The common mistake is using one towel for all four doors; a saturated or gritty towel spreads contamination and leaves water behind.
Step 7: Protect Paint, Rubber, and Hinges Separately
Apply a spray sealant, wax, or ceramic detailer to clean painted metal according to its label, then buff it with a dry towel. Use a dedicated rubber protectant sparingly on weatherstripping, and apply only the lubricant specified by the vehicle manufacturer to hinge pivots or latch contact points.
White lithium grease is commonly suitable for exposed metal hinge pivots, but it should not be sprayed indiscriminately into electrical areas or latch interiors. Silicone lubricant is generally intended for rubber seals, not as a universal substitute for hinge grease.
Protection is complete when painted surfaces feel slick without oily streaks, rubber looks even rather than wet, and hinges move without squeaking. The common mistake is coating the entire jamb in greasy dressing, which attracts dust and can transfer onto clothing.
Which Cleaner Should You Use?
The best cleaner depends on contamination, water access, and surface sensitivity. Rinseless wash is the safest choice for light maintenance, diluted APC is the practical choice for normal road grime, and a stronger degreaser belongs only on localized, compatible hardware after testing.
| Cleaning option | Best contamination level | Typical use time | Typical DIY cost | Main limitation |
|---|---|---|---|---|
| Rinseless wash | Light dust and pollen | 10-15 minutes | $0.50-$2 per wash | Weak against old grease |
| Automotive APC, 10:1 | Moderate road film | 15-25 minutes | $1-$4 per wash | Can dry if neglected |
| Automotive APC, 4:1 | Heavy grime and oily film | 20-35 minutes | $2-$5 per wash | Requires careful rinsing |
| Dedicated degreaser | Localized thick hinge grease | 20-40 minutes | $3-$8 per treatment | May affect rubber or finish |
| Steam cleaner | Professional restoration | 30-60 minutes | Equipment often $100-$1,000+ | Heat and moisture risks |
Household dish soap can remove some oil, but it is a poor default because its concentration, fragrance, and additives vary, and repeated use may leave residue on rubber and trim. A labeled automotive cleaner provides a more predictable surface response.
Is steam safe for car door jambs?
Steam is safe only when used briefly, indirectly, and away from electronics, adhesives, seals, and interior trim. A professional can use a low-moisture steamer to soften hinge grease, then immediately towel and dry the area, but steam is not the best first choice for routine home cleaning.
Keep the nozzle moving rather than dwelling on one spot. Do not steam a wiring connector, speaker, door-mounted control module, weatherstrip adhesive, or painted panel with damaged clear coat. The low-water appearance of steam does not eliminate the possibility of heat damage or condensation inside a connector.
What Should You Avoid?
Avoid high-pressure water, abrasive pads, undiluted degreaser, household solvents, and uncontrolled aerosol spraying around the cabin. These methods can force water into electrical boots, scratch clear coat, discolor rubber, soften adhesive, or strip grease from components that still need lubrication.
- Do not spray directly into the door’s wiring boot or speaker opening.
- Do not use steel wool, melamine foam, or green abrasive scouring pads.
- Do not let APC, degreaser, or tar remover dry on paint.
- Do not use a dirty towel on a glossy sill.
- Do not lubricate a latch without checking the owner’s manual.
- Do not block or pack the door drains with wax, grease, or dressing.
- Do not close a wet door and assume the jamb will dry by itself.
A counterintuitive detailing rule is that more water does not always produce a cleaner jamb. Controlled towel wiping removes soil while reducing the chance of wet carpets, trapped moisture, and corrosion behind seals.
How Do the Main Cleaning Methods Compare?
| Method | Equipment | Water exposure | Best user | Typical result |
|---|---|---|---|---|
| Towel and rinseless wash | Spray bottle, 4 towels | Very low | Apartment dweller | Clean light film in 10-15 minutes |
| APC and brush | APC, 2 brushes, 6 towels | Low to moderate | Weekend detailer | Removes ordinary grime in 15-30 minutes |
| Hose rinse and brush | Hose, nozzle, brushes | Moderate | Driveway washer | Faster rinse, higher leak risk |
| Steam and towel | Steamer, towels, air | Low liquid, high heat | Professional detailer | Softens heavy grease in 30-60 minutes |
The rinseless method has the lowest flooding risk but cannot dissolve thick hinge grease efficiently. The hose method removes loosened dirt quickly but demands careful spray direction. Steam reaches crevices well, yet its heat makes it less forgiving around rubber, adhesive, and electronics.
How Much Time and Money Does It Take?
A routine four-door cleaning usually takes 15-30 minutes and costs approximately $5-$25 in reusable DIY supplies if the owner already has towels and brushes. A neglected vehicle with hardened grease, tar, or mineral deposits may require 45-90 minutes and additional specialty chemicals.
Professional pricing varies by region and service scope. A standalone door-jamb add-on commonly costs about $20-$60, while a full interior and exterior detail may include jamb cleaning without a separate line item. Prices in Bangladesh, for example, may commonly fall around 1,500-3,500 BDT for reusable DIY supplies and 2,500-6,000 BDT for a professional add-on, but local labor and product costs determine the actual figure.
| Service situation | Typical time | Typical DIY spend | Typical professional range |
|---|---|---|---|
| Light maintenance, four doors | 10-15 minutes | $1-$8 | $10-$25 |
| Normal road grime, four doors | 15-30 minutes | $5-$25 | $20-$60 |
| Heavy grease and neglected jambs | 45-90 minutes | $10-$40 | $50-$125 |
| Rust, damaged paint, or water intrusion | 1-3 hours | Case-dependent | $100-$300+ |
These are typical planning ranges, not fixed market prices. Rust repair, paint correction, trim removal, or electrical diagnosis should be priced separately from ordinary cleaning.
How Often Should You Clean Them?
Wipe door jambs during every regular vehicle wash and perform a more complete brush cleaning every 3-6 months. Clean them sooner after winter salt exposure, coastal driving, muddy roads, construction dust, or a spill that reaches the sill.
| Driving environment | Quick wipe | Deep clean | Extra action |
|---|---|---|---|
| Dry urban roads | Every 2-4 weeks | Every 6 months | Inspect drains |
| Wet or coastal climate | Weekly | Every 2-3 months | Rinse salt residue |
| Winter road salt | After salty drives | Monthly in winter | Dry seams thoroughly |
| Gravel or muddy roads | After each dirty trip | Every 1-3 months | Blow out grit |
| Garage-kept weekend car | Monthly | Every 6-12 months | Check rubber condition |
Frequency protects more than appearance. Salt and damp grit around fasteners can accelerate corrosion, while blocked drains can keep moisture against seams after the outside looks dry.
What If the Jamb Still Looks Dirty?
A clean jamb that still feels rough may have bonded contamination rather than removable surface dirt. Identify the residue before escalating: tar feels sticky, iron fallout may create orange or purple specks, mineral scale appears chalky, and clear-coat failure looks cloudy or permanently rough.
Rough painted surface
Use an automotive iron remover only on compatible painted exterior surfaces, rinse or wipe according to its label, and then use a clay mitt or clay bar with lubricant if contamination remains. Clay should be a final decontamination step, not the first response to ordinary grime, because it can create marring that requires polishing.
White residue on rubber
Remove residue with a damp microfiber towel and mild automotive cleaner, then dry the seal completely. If the rubber remains pale or dry, apply a rubber-safe protectant sparingly; avoid oily products that attract grit or transfer onto clothing.
Sticky black residue
Use a bodywork-safe tar remover on a towel rather than flooding the jamb. Allow short dwell time, wipe gently, and follow with automotive shampoo or rinseless wash to remove solvent residue. Test first on hidden paint.
Rust around a hinge or fastener
Surface rust may be cleaned and stabilized, but bubbling paint, flaking metal, or rust returning after washing indicates corrosion beneath the finish. Stop scrubbing aggressively and have a body shop inspect the area, especially if the corrosion affects a hinge mount or structural seam.
Water reaches the carpet
Blot immediately, remove floor mats, and use a wet-dry vacuum if carpet padding is saturated. Inspect the door drain and weatherstrip position, then use less liquid during the next cleaning. Persistent leaks require a seal, drain, or door-alignment diagnosis.
Situation-Specific Methods
Apartment and low-equipment method
Use a rinseless wash diluted according to the product label, two spray bottles, four clean towels, and one soft brush. Spray the solution onto the towel, wipe the upper jamb first, agitate only the dirty section, and switch towel faces frequently.
This approach is suitable for light dust, pollen, and fingerprints. It is not suitable for thick grease, heavy mud, or salt crust that needs flushing from seams. A controlled towel method is safer than carrying a pressure washer into a parking garage.
Winter-salt method
Remove dry salt with a blower first, then use a damp towel or low-pressure rinse on open painted areas. Work one door at a time, dry the lower seam and drains, and inspect fasteners for early corrosion.
Salt residue is water-soluble, so a stronger degreaser is usually unnecessary. The important variable is complete drying, particularly where the weatherstrip contacts the body.
Newly purchased or ceramic-coated vehicle
Use a pH-neutral rinseless wash or the coating manufacturer’s maintenance product. Avoid aggressive degreasers unless a specific oily contaminant requires spot treatment, because the jamb may have a fresh coating, sealant, or dealer-applied dressing.
Protection does not make the surface immune to grit. The same clean-towel rule applies, even when ceramic protection makes residue easier to remove.
Heavy grease restoration
Use a small amount of compatible degreaser on a brush or towel, not a broad spray over the entire door opening. Work in repeated short applications, wipe the dissolved grease away, and re-lubricate only the hinge points that lost their original lubricant.
Professionals may add steam or compressed air, but equipment does not remove the need for surface testing. Heat can soften grease quickly while also damaging adhesive or forcing moisture into a connector.
Common Mistakes and How to Fix Them
| Mistake | Result | Recovery | Prevention |
|---|---|---|---|
| Cleaner dries on paint | Streaks or etching | Re-wet, rinse, polish if needed | Work in shade, 30-120 second dwell |
| Pressure washer aimed at seals | Wet carpet or connector | Blot, vacuum, inspect drains | Use towel or low-pressure rinse |
| One towel used everywhere | Swirled or smeared paint | Rewash with clean towels | Use 4-8 towels |
| Degreaser strips hinge grease | Squeak or stiff movement | Apply approved lubricant | Clean only visible excess |
| Abrasive pad used on sill | Permanent dullness | Light polish may reduce marks | Use soft microfiber and brush |
| Drains ignored | Standing moisture and corrosion | Clear debris and dry seams | Inspect drains after every deep clean |
One professional rule of thumb is to reserve a brush for a single soil category. A brush used on greasy hinges should not return to painted metal until it has been thoroughly cleaned, because retained grit can create scratches.
Another is to use a separate “dirty-side” towel for lower hinges and latch areas. The towel may look usable after rinsing, but microscopic grit can remain embedded in the fibers.
FAQ
Can I use WD-40 to clean car door hinges?
WD-40 Multi-Use Product can displace moisture and loosen some residue, but it is not a universal long-term hinge lubricant. Use it only if the vehicle manufacturer permits it, wipe away excess, and apply the specified grease afterward when the hinge requires durable lubrication.
Can I clean door jambs with car shampoo?
Yes, car shampoo works for light dust and water-soluble road film when applied with a microfiber towel or soft brush. Car shampoo is usually too weak for old hinge grease, tar, or thick oily residue, so use a tested automotive APC for those localized areas.
How do I clean door jambs without a hose?
Spray rinseless wash onto a microfiber towel, wipe from the upper frame downward, agitate dirty hardware with a soft brush, and follow with a second damp towel. Dry every seam immediately. The method works best for light or moderate soil, not caked mud or heavy grease.
Should I lubricate the door hinges after cleaning?
Lubricate hinges only when cleaning removed or diluted their original lubricant, or when the owner’s manual specifies a service interval. Apply a small amount to the pivot point, move the door several times, and wipe away excess so it does not attract abrasive grit.
Why do my car door jambs smell?
Odors usually come from trapped leaves, damp carpet edges, mildew on seals, or stagnant moisture near blocked drains. Remove debris, clean and dry the jamb, inspect the weatherstrip and drain openings, and investigate persistent odor inside the cabin for hidden water intrusion.
Can door-jamb dirt damage the vehicle?
Accumulated dirt can hold moisture and salt against seams, stain paint, abrade weatherstripping, and contribute to corrosion around fasteners. Ordinary dust is mainly cosmetic, but wet salt, blocked drains, and abrasive grit deserve prompt cleaning.
The Bottom Line
Clean car door jambs with a cool vehicle, controlled cleaner, surface-matched brushes, clean microfiber towels, and minimal water. Start with loose debris, clean from top to bottom, protect the cabin, dry every seam, and separate paint protection, rubber care, and hinge lubrication. This method removes road grime without flooding the interior or unnecessarily stripping factory grease.


