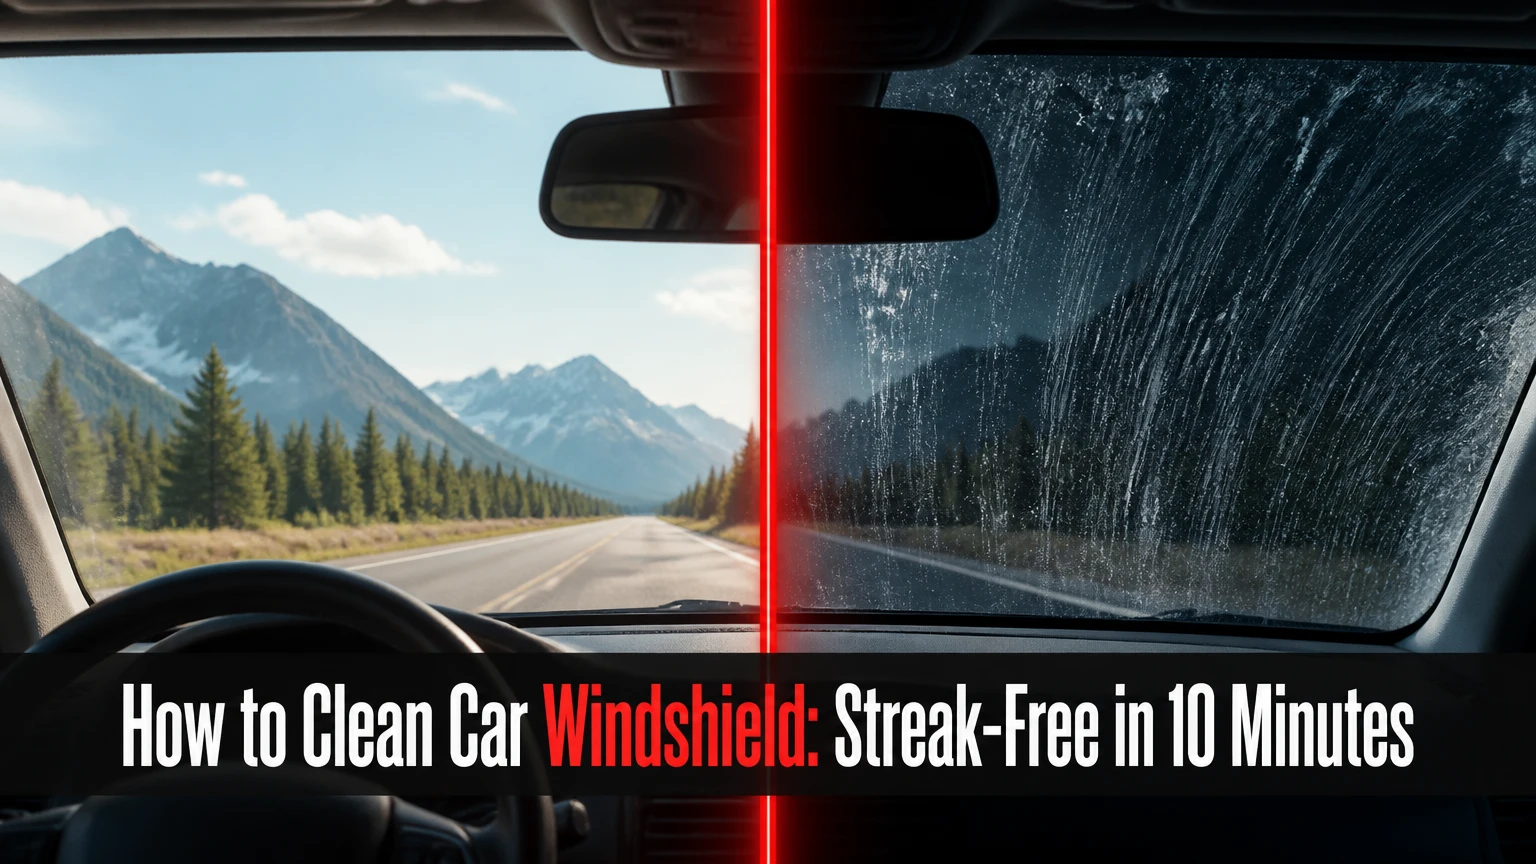
To clean a car windshield, rinse away abrasive grit, use an automotive glass cleaner on a clean microfiber towel, wipe the exterior in a crosshatch pattern, and buff with a dry towel. Clean the interior separately, wash the wiper blades, and work on cool glass in the shade. A typical maintenance cleaning takes 5-10 minutes.
Key facts at a glance
Automotive glass cleaner should be sprayed onto the towel, not directly at the dashboard, speakers, sensors, or window-film edges.
A 300-400 GSM microfiber or dedicated glass waffle-weave towel removes residue with less lint than a worn cotton cloth.
Ammonia-free cleaner is the safer default for aftermarket window tint, while factory-tinted glass is usually tinted within the glass itself.
A dry, clean towel is required for final buffing; a saturated towel redistributes oil and creates haze.
Clay removes bonded surface contamination only when used with adequate lubricant and light pressure.
Scratches, deep pitting, and mineral deposits etched into glass cannot be removed by ordinary spray-and-wipe cleaning.
What a Clean Windshield Requires
A clean windshield has no loose grit, oily road film, insect residue, interior vapor film, streaks, or distracting mineral deposits in the driver’s viewing area. Cleaning improves optical clarity, especially when low sunlight, oncoming headlights, or rain exposes a thin film that is difficult to see in ordinary daylight.
Windshield contamination has different sources. Dust and sand sit loosely on the surface, while traffic film contains oil, diesel residue, soot, and detergent minerals. Insects and tree sap can bond tightly. Interior glass collects plasticizer residue from dashboards, smoke particles, hand oils, and volatile compounds released by cabin materials.
The cleaning chemistry is straightforward. Surfactants in glass cleaner loosen oily and particulate contamination, while water carries it away. Alcohol can dissolve some oils and evaporate quickly, but fast evaporation is a disadvantage on hot glass because it leaves partially dissolved residue behind.
A clean windshield does not mean a visually perfect windshield. Fine pits from highway driving scatter light, and wiper scratches or mineral etching remain after cleaning. Cleaning removes contamination; polishing may reduce some deposits; glass replacement is the remedy for structural damage or severe visibility impairment.
Before You Start
Use the following setup for a normal exterior and interior cleaning. Increase towel quantities when the windshield has heavy road film, smoke residue, or many insect marks.
| Item | Typical specification or quantity | Purpose |
|---|---|---|
| Automotive glass cleaner | 30-60 mL per windshield | Dissolves film without excessive residue |
| Microfiber towels | 3-5 towels, 300-400 GSM | Washing, drying, and final inspection |
| Glass waffle-weave towel | 1-2 clean towels | Low-lint finishing and buffing |
| Clean water | 1-2 liters | Initial rinse and towel rinsing |
| Soft detailing brush | 1 brush, 15-25 mm head | Seams, sensor housings, and cowl debris |
| Nitrile gloves | 1 pair | Protects hands from cleaner and dirty runoff |
| Clay bar, optional | 15-30 g with lubricant | Removes bonded contamination |
Choose a shaded location with glass below roughly 32°C, if possible. Direct sun is not automatically dangerous, but it shortens working time and makes residue flash before you can level it. Close the doors after interior cleaning so wind does not carry dust onto wet glass.
Do not begin with a dry towel on visibly gritty glass. Dry wiping can drag sand across the surface and create fine scratches. Remove watches, rings, and hard objects from the hand that will touch the towel.
Which Cleaner Should You Use?
Use an automotive, ammonia-free glass cleaner as the default for most windshields, particularly when aftermarket window film, hydrophobic coatings, or unknown trim materials are present. A dedicated automotive product usually leaves less fragrance, dye, wax, and detergent residue than a general household cleaner.
Ammonia deserves a precise qualification. Ammonia can cut grease effectively, but repeated exposure may affect some aftermarket tint films, adhesives, rubber, and nearby plastics. Factory-tinted glass is different because the color is generally incorporated into the glass rather than applied as a plastic film. When the vehicle’s tint type is unknown, ammonia-free cleaner avoids the uncertainty.
| Cleaner or method | Best use | Main limitation | Tint or coating note |
|---|---|---|---|
| Ammonia-free automotive cleaner | Routine interior and exterior film | May need a second pass on heavy oil | Safest general default |
| Ammonia-based glass cleaner | Greasy, uncoated glass | Can affect some film and trim | Avoid with unknown aftermarket tint |
| Diluted isopropyl alcohol | Small oily patches and final spot work | Evaporates quickly and can dry trim | Keep off film edges and leather |
| Distilled water | Light dust and residue removal | Does not dissolve substantial oil | Useful where tap water leaves minerals |
| Vinegar solution | Limited mineral residue testing | Smell, weak grease removal, trim risk | Never mix with bleach or other cleaners |
| Clay and lubricant | Bonded overspray, fallout, roughness | Can mar glass if used dry | Follow with glass cleaner and inspection |
A homemade mixture of equal parts isopropyl alcohol and distilled water can work for isolated oily residue, but it is not a universal windshield cleaner. Adding vinegar does not make the mixture automatically safer or more effective, and acidic liquid can contact trim, coatings, or wiper rubber. Use a labeled automotive product when the glass has tint or a manufacturer-applied coating.
Avoid dish soap for routine windshield cleaning. Dish detergents can remove grease, but they may leave surfactant residue and create excessive foam. Avoid wax-containing “wash and wax” products because they can leave a hydrophobic film that produces glare or wiper chatter.
How Do You Clean a Car Windshield Step by Step?
Clean the windshield in a controlled sequence: remove loose grit, clean the wipers, wash the outside, treat bonded spots, clean the inside, and inspect from the driver’s seat. The order matters because dirty wipers and dashboard overspray can immediately recontaminate otherwise clean glass.
Step 1: Park in Shade and Lower the Wipers
Park on a stable surface, switch off the ignition, and lift the wiper arms only if the vehicle manufacturer permits it. Some modern arms can strike the hood or require a service position before lifting. Place the arms gently on a folded towel if they must rest near the glass.
Remove leaves and grit from the lower cowl. Dirt in the cowl can wash onto the windshield during the first rinse. Open the doors only as needed, because a dusty cabin can contaminate the inside surface.
You’ll know it worked when: the glass is cool to the touch and no loose debris remains along the bottom edge.
Common mistake: forcing a wiper arm upward when it is locked under the hood or in a recessed service position.
Step 2: Rinse Away Abrasive Debris
Rinse the exterior with clean water from the top down. Use enough flow to carry dust and sand toward the lower edge rather than rubbing them into the glass. If the windshield is heavily muddy, repeat the rinse before touching it with a towel.
A pressure washer can damage wiper edges, seals, or sensor covers when used too close. Keep a domestic hose or low-pressure stream moving across the glass, and avoid forcing water behind the windshield molding.
You’ll know it worked when: your fingertips, through a wet microfiber towel, encounter no gritty drag on a rinsed area.
Common mistake: applying cleaner before removing sand, which turns a cleaning pass into an abrasive pass.
Step 3: Clean the Wiper Blades
Raise each blade and wipe its rubber edge with a damp microfiber towel. For oily transfer, use a small amount of automotive glass cleaner or diluted isopropyl alcohol on the towel, then wipe until the edge stops leaving black or brown residue.
Do not soak the blade assembly or leave alcohol pooled on rubber. Inspect for splits, hardened sections, missing edges, and uneven pressure. A blade that is torn or permanently deformed will smear even after careful cleaning.
You’ll know it worked when: the rubber edge feels continuous and leaves no dark transfer on a white section of towel.
Common mistake: cleaning the windshield while leaving a visibly dirty blade that will sweep its contamination across the finished glass.
Step 4: Apply Cleaner to a Microfiber Towel
Fold a clean microfiber towel into quarters, then apply two or three sprays to one face. For a large windshield, treat one half at a time rather than allowing cleaner to dry across the whole surface.
Spraying the towel controls overspray around the dashboard, instrument cluster, speakers, camera housings, and trim. It also gives the towel a damp cleaning face and preserves a dry face for a second pass. Use a separate towel for the interior because exterior road film transfers easily.
You’ll know it worked when: the towel glides over the glass and leaves a thin, even wet film rather than dry skips or large liquid runs.
Common mistake: oversaturating the towel, which increases drying time and leaves cleaner trapped at the lower seal.
Step 5: Wipe the Exterior in a Crosshatch Pattern
Wipe the exterior with overlapping vertical strokes, followed by horizontal strokes. Use light hand pressure and short sections, especially around the lower corners where road film accumulates. A tight crosshatch pattern exposes missed areas more reliably than random circular wiping.
For insect residue, hold the damp towel on the spot for 10-20 seconds before wiping. Do not scrape with a razor, knife, abrasive sponge, or dry clay. Glass is hard, but surface coatings and trapped grit can still create visible damage.
Work from the cleanest area toward the dirtiest area, changing to a fresh towel face after each section. If the towel becomes visibly gray, oily, or saturated, replace it instead of adding more cleaner.
You’ll know it worked when: the wet glass shows an even film with no isolated greasy arcs or insect outlines.
Common mistake: using circular-only wiping, which can conceal residue inside overlapping arcs and makes directional inspection harder.
Step 6: Dry and Buff the Exterior
Turn the towel to a dry face or use a separate glass towel to remove residue. Use straight horizontal strokes on the outside, then inspect from several angles. A final light buff with a dry waffle-weave towel should take 30-60 seconds.
The towel must be dry enough to absorb residue. A towel that feels cool, damp, or oily will smear the cleaner instead of removing it. Keep one towel exclusively for final glass finishing and do not use it on tires, paint, or interior plastics.
You’ll know it worked when: the windshield remains optically clear as you move your head through the reflection of a bright sky or lamp.
Common mistake: buffing in direct sun, where evaporated cleaner leaves a thin residue before the towel can remove it.
Step 7: Clean the Interior Glass
Sit in the passenger seat to reach the lower driver-side corner without pressing against the steering wheel. Spray cleaner onto the towel, not the glass, and wipe the interior in horizontal strokes. Use a second dry towel for immediate buffing.
Interior residue often appears as a greasy gray haze, especially at night when headlights create starbursts. A horizontal interior pattern and vertical exterior pattern make the source easy to identify: the direction of a visible streak tells you which side needs another pass.
Use a soft brush or wrapped towel around the edges, but do not push liquid into the defroster vents, dashboard seams, camera module, or rain sensor. If the vehicle has a forward-facing driver-assistance camera mounted behind the mirror, keep liquid away from its housing and clean only the accessible glass around it.
You’ll know it worked when: the windshield stays clear under interior light and no cleaner has reached the dashboard or sensor housing.
Common mistake: using one dirty exterior towel inside, which transfers road oil to the cabin-facing surface.
How Should Different Contamination Be Treated?
The correct treatment depends on whether contamination is loose, oily, bonded, or etched. Spray cleaner handles routine film, clay handles bonded particles, and glass polish may handle some mineral deposits, but no surface treatment repairs deep scratches or impact pitting.
| Contamination | Visual or tactile sign | First treatment | Escalation point |
|---|---|---|---|
| Loose dust and sand | Gritty feel before washing | Water rinse | Repeat rinse, never dry scrub |
| Road film | Gray or rainbow smear in rain | Automotive glass cleaner | Alcohol spot treatment |
| Insect residue | Dull, stuck outlines | Dwell with damp towel 10-20 seconds | Lubricated clay |
| Tree sap | Sticky transparent spots | Dedicated bug-and-tar remover | Professional glass-safe solvent |
| Bonded fallout | Rough feel after washing | Lubricated clay, 15-30 g | Detailer assessment |
| Mineral spots | White rings or crust | Water-spot remover | Cerium-oxide polish |
| Scratches or pitting | Damage remains when wet | No chemical cleaner | Glass professional or replacement |
How Do You Remove Water Spots?
Use a dedicated automotive water-spot remover on cool glass after normal cleaning, then rinse or wipe according to the product label. Mineral spots form when calcium and magnesium in evaporated water remain on the surface; repeated spray-and-wipe cleaning will not necessarily dissolve deposits that have bonded or etched.
Test a small corner first. Keep acidic products off painted trim, aluminum, rubber, and window-film edges, and never combine them with bleach, chlorine products, or other cleaners. Vinegar may reduce fresh mineral residue, but it is less predictable on old deposits and does not replace a formulated glass product.
If the spot remains after chemical treatment, the mineral deposit may be etched into the glass. A cerium-oxide glass polish used with the correct pad and controlled pressure can reduce some marks, but aggressive polishing can distort the viewing area by creating optical waviness.
Why Is My Windshield Still Streaky?
Persistent streaks usually come from towel saturation, oily residue, dirty wiper blades, or cleaner drying too quickly. Reclean the glass with a fresh, lightly damp towel, then buff immediately with a dry waffle-weave towel before changing products.
| Symptom | Likely cause | Corrective action | Expected result |
|---|---|---|---|
| Rainbow film in rain | Oil or plasticizer residue | Automotive cleaner, then alcohol spot work | Uniform water-free clarity |
| Fine arcs after wipers | Dirty or worn blades | Clean and inspect blades | Cleaner blade sweep |
| Haze only at night | Interior film or coating residue | Passenger-side interior cleaning | Reduced headlight flare |
| White rings remain | Mineral deposits | Water-spot remover | Reduced or removed rings |
| Streaks appear in sun | Cleaner dried on hot glass | Rewash in shade | Even, residue-free finish |
| Black marks at lower edge | Cowl or blade contamination | Clean cowl and blade rubber | Less immediate recontamination |
A useful practitioner rule is to diagnose direction before changing chemistry. If streaks run vertically on the inside and horizontally on the outside, each surface may be clean in one direction but missed in the other. Change the towel and pattern first.
Do not keep adding cleaner to a hazy windshield. More liquid often increases residue. Fresh towel fibers and lower product volume solve many streaking failures faster than a stronger chemical.
What Changes in Difficult Conditions?
Cleaning in Direct Sun
Use smaller sections, one spray at a time, and remove the product immediately. If the glass becomes hot enough that cleaner flashes in seconds, move the vehicle or wait for shade. A damp towel can cool the surface briefly, but it does not eliminate rapid evaporation.
Cleaning in Winter
Remove loose ice with a proper scraper and use the vehicle’s defroster gradually. Never pour boiling water on a cold windshield because rapid temperature change can worsen existing chips or cracks. Clear snow from the roof and cowl before driving so it does not slide onto the glass.
Cleaning Smoke or Heavy Cabin Film
Use two interior passes. The first pass dissolves the oily film, while the second pass with a clean towel removes the remaining surfactant and dissolved residue. Clean the dashboard afterward, because a dusty or oily dashboard can continue releasing particles onto the windshield.
Cleaning Around Tint and Sensors
Use ammonia-free cleaner near aftermarket film and spray only onto the towel. Keep liquid away from the film edge, camera module, rain sensor, and mirror mount. If a coating manufacturer specifies a particular cleaner, that instruction takes priority over a generic glass-cleaning routine.
How Should You Finish the Job?
Run the cleaned wipers over a wet windshield with washer fluid, then observe the sweep from the driver’s seat. Refill the washer reservoir with a seasonally appropriate automotive washer fluid, not plain water alone, because washer fluid contains detergents and freeze protection suited to its labeled temperature range.
Check the blade path for chatter, skipped arcs, and repeating oily lines. Chatter can result from contaminated rubber, incorrect blade pressure, a damaged blade, or a glass coating that was applied unevenly. Cleaning may fix contamination, but it will not restore a hardened or torn blade.
Inspect the windshield from the normal driving position. Look toward low sunlight, headlights, and a bright wall rather than relying only on a straight-on view. Any remaining mark that disappears when wet but returns when dry may be residue; a mark that remains visible through wet glass is more likely etching, pitting, or a scratch.
How Much Time and Money Does It Take?
A routine windshield cleaning typically takes 5-10 minutes and costs approximately $5-$20 when cleaner and towels are already available. A first-time setup commonly costs $15-$40, while clay, lubricant, and glass polish can raise a deep-cleaning session to $30-$80 depending on product quality and whether professional labor is involved.
| Job type | Typical time | Typical DIY materials cost | Suitable equipment |
|---|---|---|---|
| Exterior maintenance | 3-5 minutes | $1-$4 per session | Cleaner, 2 towels |
| Interior maintenance | 3-6 minutes | $1-$5 per session | Cleaner, 2 towels |
| Bug and road-film removal | 10-20 minutes | $5-$15 | Cleaner, bug remover, towels |
| Clay decontamination | 30-45 minutes | $15-$35 | Clay, lubricant, 3 towels |
| Mineral-spot treatment | 15-30 minutes | $10-$30 | Spot remover, polish, applicator |
| Professional glass polishing | 1-3 hours | $75-$250 typical | Detailer-grade machine and compound |
Costs vary by country, product size, labor rate, and whether the vehicle needs all windows cleaned. The cheapest safe routine is not necessarily a household cleaner: a low-cost automotive cleaner and several washable microfiber towels often produce a more repeatable result with fewer trim risks.
Common Mistakes and How to Fix Them
| Mistake | Why it fails | Recovery | Prevention |
|---|---|---|---|
| Dry-wiping gritty glass | Abrasive particles drag across glass | Rinse and restart | Always rinse first |
| Spraying the dashboard side | Liquid enters seams and sensors | Wipe immediately with dry cloth | Spray the towel |
| Using a saturated towel | Oil and cleaner are redistributed | Replace towel and buff dry | Rotate towel faces |
| Cleaning only in circles | Missed streaks are difficult to trace | Use directional passes | Vertical outside, horizontal inside |
| Ignoring wipers | Blades transfer old film back | Clean or replace blades | Inspect every windshield wash |
| Using abrasive pads | Coatings and glass can be marred | Stop and inspect under light | Use microfiber only |
| Scraping cured residue | Hard tools can scratch or chip glass | Use dwell time and lubricant | Soften before agitation |
One counterintuitive detail matters: more pressure does not equal cleaner glass. Pressure compresses microfiber fibers and reduces their ability to capture particles, while a clean towel face and correct dwell time provide the chemical and mechanical action.
Another practitioner rule is to use fewer products, not more. Changing from household glass cleaner to vinegar to alcohol without removing the previous residue can create layered films that are harder to diagnose. Rinse or reclean between chemistry changes.
Cleaning paper towels is not automatically unsafe because paper itself cannot scratch ordinary glass under clean conditions, but paper can shed lint, become abrasive when loaded with grit, and leave fibers around seals. Microfiber is the more reliable choice for automotive glass.
When Will Cleaning Not Fix the Glass?
Cleaning will not remove deep scratches, widespread pitting, cracks, chips, or optical distortion caused by improper polishing. A simple test is to wet the affected area: removable surface residue often changes or disappears when wet, while damage within the glass remains visible.
Stop DIY work if a crack reaches the edge, a chip sits in the driver’s primary viewing area, or a damaged area interferes with cameras or sensors. Windshield glass contributes to vehicle restraint performance, and replacement or repair should follow the vehicle manufacturer’s requirements and the applicable local safety standard.
Do not use a razor blade, abrasive scouring pad, dry clay, or aggressive rotary polishing on a windshield without the proper process. The glass may survive the treatment physically while developing visible distortion that is more distracting than the original spot.
How Often Should You Clean a Car Windshield?
Clean the exterior whenever road film becomes visible in rain or when wipers leave a continuous smear, usually every 1-2 weeks for a daily-driven vehicle. Clean the interior monthly, or more often when the vehicle carries smokers, pets, children, or produces frequent cabin condensation.
Wash wiper blades during routine exterior cleaning and replace them when the rubber is split, hardened, skipping, or leaving repeating arcs after cleaning. Seasonal pollen, coastal salt, dusty roads, and frequent highway driving shorten the useful interval.
A light maintenance pass prevents heavy decontamination. Waiting until insect residue, smoke film, and mineral deposits accumulate makes the job slower and increases the temptation to scrub aggressively.
Frequently Asked Questions
Can I Use Windex on a Car Windshield?
You can use a household glass cleaner on uncoated exterior glass, but an ammonia-free automotive glass cleaner is the safer default when tint, coatings, rubber, or nearby plastics are involved. Apply any cleaner to a microfiber towel, control the quantity, and follow the window-film or glass-coating manufacturer’s instructions.
Is Rubbing Alcohol Safe for Windshield Glass?
Diluted isopropyl alcohol is generally compatible with ordinary automotive glass and can dissolve small oily patches, but it should not be allowed to pool on tint edges, rubber, leather, or plastic trim. Use it as a targeted treatment rather than the only cleaner for a heavily contaminated windshield.
Can I Clean a Windshield With Vinegar?
Vinegar can help with some fresh mineral residue, but it is weak against oily road film and may affect nearby trim or coatings if repeatedly applied. Use a dedicated water-spot remover for persistent deposits, keep acidic products away from seals, and never mix vinegar with bleach or chlorine cleaners.
Why Does My Windshield Smear Only When It Rains?
Rain reveals an invisible oily film that scatters light and interacts with the wiper blade. Clean the exterior with automotive glass cleaner, clean the blade edge, and buff with a dry towel. If the smear returns immediately, inspect for worn rubber, coating residue, or etched mineral deposits.
Can a Clay Bar Scratch a Windshield?
A clay bar can mar or scratch glass when used dry, with insufficient lubricant, excessive pressure, or trapped grit. Use a small piece with plenty of glass-safe lubricant, light pressure, and frequent inspection. Clay is for bonded surface particles, not scratches, deep water etching, or damaged glass.
Should I Replace My Wipers After Cleaning the Windshield?
Replace wipers when cleaning does not stop skipping, chatter, split edges, or repeating streaks. A dirty blade can be cleaned, but hardened rubber cannot be restored by glass cleaner. New blades are often the correct solution when the windshield becomes smeared immediately after every sweep.
The Bottom Line
The most reliable way to clean a car windshield is to rinse first, use a small amount of ammonia-free automotive glass cleaner on microfiber, wipe in controlled directions, and finish with a dry glass towel. Clean the wipers and interior separately, treat bonded or mineral contamination according to its type, and recognize when pitting or scratches require professional glass service.


