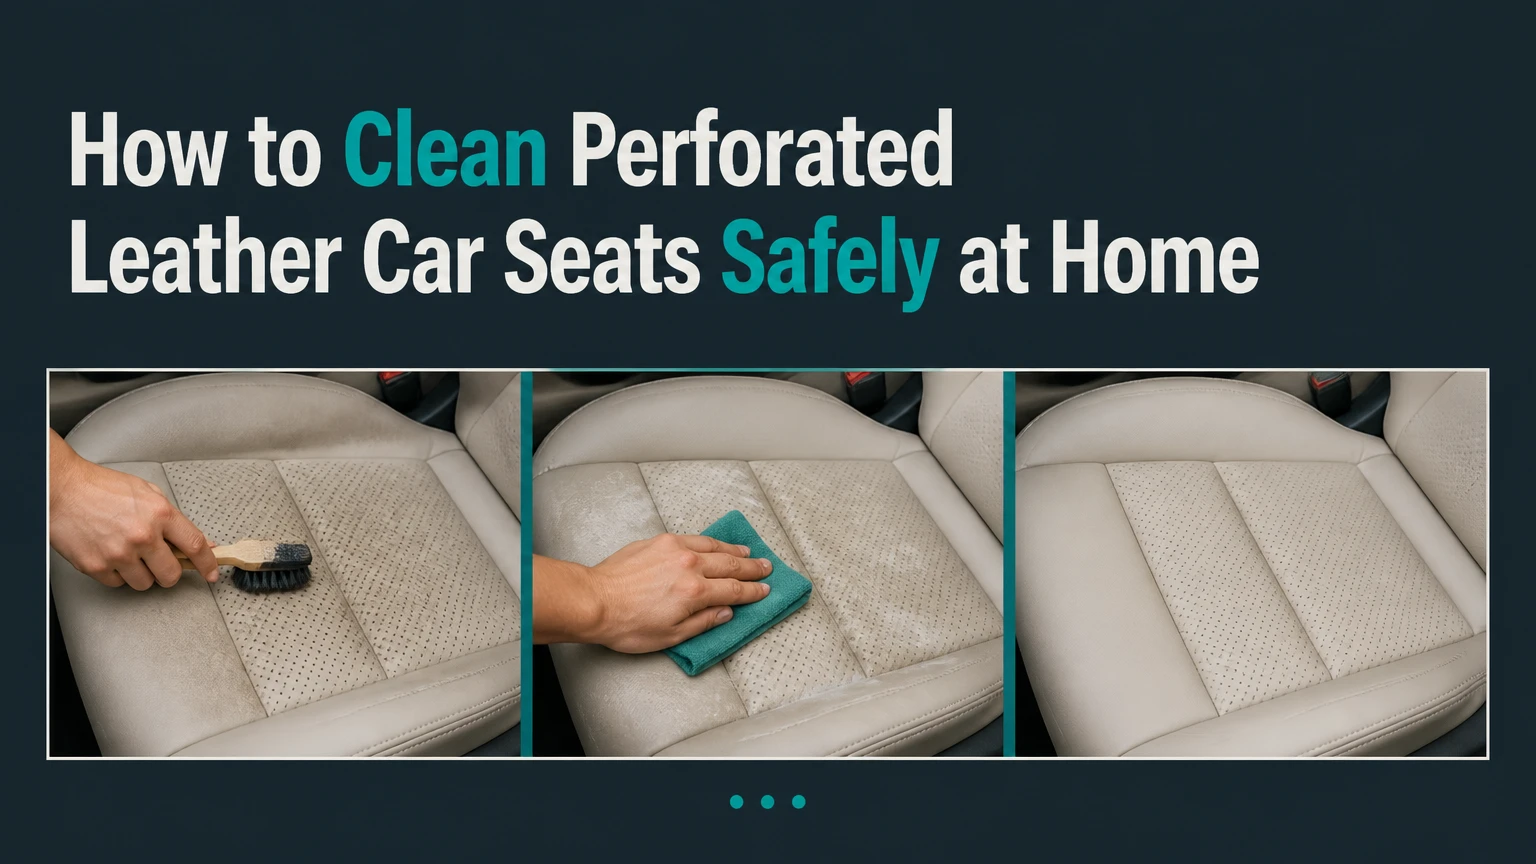
To clean perforated leather car seats, remove dry debris first, test a pH-balanced automotive leather cleaner, work with controlled foam on a soft brush, and wipe before liquid reaches the holes. Clean 30-by-30-centimeter sections, use minimal moisture, clear blocked perforations carefully, and dry the seat completely before conditioning.
Key Facts at a Glance
Perforated automotive leather can transfer cleaner into the foam cushion, seat heater, ventilation channels, or occupancy-sensor area.
Vacuuming before liquid cleaning prevents sand and grit from becoming an abrasive paste.
Spray leather cleaner onto a brush or towel, never directly onto a perforated seat surface.
A typical front-seat cleaning takes 15-25 minutes per seat, excluding drying.
Foam cleaners provide better moisture control than watery sprays for routine maintenance.
Conditioner should be applied in a thin film only after the leather and perforations are fully dry.
Why Perforated Leather Needs a Different Method
Perforated leather contains machine-punched holes that allow air to move through heated or ventilated seats, but the holes also provide a direct path into the seat backing. Automotive leather is usually a coated surface rather than absorbent furniture leather, yet the exposed perforations can still admit liquid, dirt, body oil, and product residue.
Moisture inside the cushion is difficult to verify from the surface. A dark ring around several holes, a sour smell, slow drying, or a persistent damp feel can indicate that cleaner reached the backing. Heated seats and ventilation fans can complicate drying because electrical components and air channels sit beneath or beside the leather.
The safest principle is controlled transfer: put the cleaner on the cleaning tool, create a light foam, agitate briefly, and remove the residue immediately. Excess product is not evidence of deeper cleaning.
What to check before cleaning
Read the vehicle owner’s manual before applying any product. Manufacturer instructions may specify water-based cleaners, prohibit conditioners, restrict steam, or require the seat ventilation and heating systems to remain off during cleaning.
Identify whether the seat is coated leather, synthetic leather, or a mixture of leather and vinyl. A stitched leather-look seat may use polyurethane upholstery on the bolsters and leather only on selected panels. Product compatibility matters more than the label’s claim that it works on “all leather.”
Before You Start
| Requirement | Typical specification | Why it matters |
|---|---|---|
| Active cleaning time | 15-25 minutes per front seat | Prevents foam from drying on the surface |
| Total project time | 45-90 minutes for four seats | Includes setup and wiping, not full drying |
| Drying time | 1-2 hours in normal conditions | Longer in cold or humid weather |
| Cleaner quantity | 10-30 ml per front seat | Limits liquid reaching the perforations |
| Working area | About 30 x 30 cm | Keeps residue under control |
| DIY material cost | $15-$45 | Covers cleaner, towels, and brush |
| Difficulty | Low to moderate | Requires pressure and moisture control |
Gather a vacuum with a narrow crevice attachment, a soft horsehair or soft nylon detailing brush, at least four clean microfiber towels, an automotive leather cleaner, a small applicator pad, and a soft interdental brush. Keep a dry towel available for accidental spills.
Park in shade with the doors open if weather permits. Cool leather is easier to inspect, while hot leather can make cleaner evaporate unevenly and leave streaks. Turn off seat heating and ventilation during application unless the owner’s manual gives different instructions.
How to Clean Perforated Leather Car Seats
The complete process has eight steps. Dry extraction comes first, foamed cleaner comes second, and conditioning comes last; reversing that order pushes grime into the holes and makes residue harder to remove.
Step 1: Vacuum the Seat Without Pressing Down
Use a vacuum with a soft brush or crevice attachment and remove crumbs, sand, hair, and grit from the seat surface, seams, bolsters, and perforations. Hold the nozzle just above the leather or let the soft bristles touch lightly without compressing the cushion.
Vacuum in two directions. Move front to back, then side to side, while gently opening seams with your fingers so the nozzle can reach trapped debris. Do not drag a hard plastic nozzle across the coating.
You’ll know it worked when: no loose particles appear when you brush the seat lightly toward the seam.
Common mistake: applying downward pressure to “pull out” dirt. Pressure can force grit deeper into holes and may mark the leather coating.
Step 2: Test the Cleaner on a Hidden Area
Apply one small drop, approximately 1-2 ml, to an inconspicuous lower side panel or rear seat edge. Wipe it away after 30-60 seconds, then inspect the towel and leather for color transfer, gloss change, stickiness, swelling, or altered texture.
A product test is especially important on white leather, older dyed leather, aftermarket recoloring, and seats with a ceramic or polymer coating. If the towel picks up substantial color, stop and use a professional leather technician.
You’ll know it worked when: the tested area looks and feels identical to the surrounding leather after five minutes.
Common mistake: testing only for discoloration. A cleaner can preserve color while changing gloss or making a failing topcoat tacky.
Step 3: Put Cleaner on the Brush
Choose a dedicated automotive leather cleaner labeled as compatible with coated leather. Spray two or three pumps onto the brush, not the seat, and work the bristles until they produce a dense, aerated foam with little free liquid.
Foam is easier to control because it stays on the brush longer than watery spray. A liquid cleaner can still work when the manufacturer approves it, but dilute or dose it according to the label rather than assuming a universal ratio. The often-repeated pH target of 6.5-7.5 is a useful selection reference, not a guarantee of safety, because leather coatings and synthetic coverings vary.
You’ll know it worked when: the brush is damp and foamy, but no liquid drips when you hold it bristle-side down.
Common mistake: spraying enough cleaner to soak the brush. Watery foam defeats the main protection perforated leather needs.
Step 4: Agitate One Small Section
Work on one 30-by-30-centimeter area at a time. Move the soft brush in overlapping circles with light pressure for 10-20 seconds, then stop and inspect the foam.
The brush should lift body oil and dust from the coating without flooding the holes. Do not scrub aggressively around stitching, piping, perforation edges, or worn bolsters, where the protective finish may already be thin.
You’ll know it worked when: the foam turns gray or brown and the leather’s original uniform sheen returns without wet borders.
Common mistake: allowing foam to sit until it dries. Dry residue can lodge in the holes and require more mechanical disturbance later.
Step 5: Wipe Away Dirty Foam Immediately
Use a clean, dry microfiber towel to press and wipe the section before the foam collapses into liquid. Fold the towel into quarters, use one face for a small area, and rotate to a dry face as soon as it becomes damp or dirty.
A flat wiping motion is safer than pushing the towel into each hole. Finish with a light crosswise wipe, then inspect the perforation field under bright light.
You’ll know it worked when: the surface feels clean and dry, with no streaks, sticky film, or visible white product in the holes.
Common mistake: using one towel for the entire seat. A saturated towel redistributes dirty moisture instead of removing it.
Step 6: Clear Individual Blocked Holes
Inspect blocked perforations only after the surface is mostly dry. First use a dry soft brush or a soft interdental brush with a diameter smaller than the hole; reserve a blunt wooden toothpick for a single stubborn plug and use almost no force.
Never twist, widen, or scrape the leather around a hole. Do not use a metal pick, sewing needle, drill bit, or compressed air aimed directly at the seat, because those tools can enlarge the opening or drive contamination into the cushion.
Vacuum loosened particles immediately. If dozens of holes are blocked, repeated picking is the wrong repair strategy; a detailer can use controlled extraction and magnification without damaging the perforation pattern.
You’ll know it worked when: light passes through the hole and the surrounding leather remains perfectly round and undistorted.
Common mistake: pushing a paste plug inward. Break the plug apart and extract it instead.
Step 7: Dry the Seat Completely
Leave the doors open for 15-20 minutes in a dry, ventilated space, then allow additional drying time before conditioning. Use the vehicle’s ventilation function only if the manual permits it and the seat surface is nearly dry; forced airflow is not a substitute for removing excess liquid.
Do not use a hair dryer, heat gun, or high-temperature heater. Concentrated heat can harden coatings, shrink adjacent materials, or create uneven color. Avoid turning seat heaters on high to dry a wet cushion, because moisture may remain around electrical elements even when the surface feels warm.
You’ll know it worked when: the leather feels room-temperature and dry, the holes show no dark halos, and no odor appears after the car is closed for 30 minutes.
Common mistake: conditioning while the backing is still damp. Conditioner can seal moisture and extend drying time.
Step 8: Condition Only If the Manual Allows It
Modern coated leather often needs cleaning and UV protection more than heavy conditioning. If conditioning is approved, place roughly 1-2 ml on a microfiber applicator, spread it across the pad, and apply an extremely thin film to the solid leather areas.
Keep cream away from the perforation openings and stitched channels. After 5-10 minutes, buff the seat with a dry towel until it feels smooth rather than oily. Do not leave a glossy, slippery film on the driving surface.
You’ll know it worked when: the surface has an even low sheen and does not transfer residue to a clean fingertip.
Common mistake: pouring conditioner onto the seat. Excess cream hardens inside holes and attracts dust.
Which Cleaner Should You Use?
A dedicated foaming leather cleaner is usually the safest first choice for perforated automotive leather because the user can control the dose and remove it before it becomes liquid. Product labels and the vehicle manual outrank a generic pH number, particularly when seats contain synthetic leather, coatings, perforated Alcantara, or factory-applied protection.
| Product type | Typical price | Moisture control | Best use | Main limitation |
|---|---|---|---|---|
| Automotive leather foam | $15-$35 | High | Routine soil and body oil | May need two passes on heavy grime |
| pH-balanced leather liquid | $15-$30 | Medium | Light cleaning with brush control | Runs quickly into holes if oversprayed |
| Diluted interior cleaner | $10-$25 concentrate | Low to medium | Approved hard-wearing synthetic trim | Formula may be too strong for leather |
| Leather cleaning wipes | $8-$20 pack | Medium | Immediate spill response | Can spread dye or leave surfactant residue |
| Mild distilled-water wipe | Under $2 | High | Fresh water-based spill | Does not dissolve old body oil |
Spray-bottle cleaners are not automatically unsafe. The problem is uncontrolled application. Dispensing onto a brush, towel, or foam pump gives the operator a chance to remove the cleaner before gravity carries it through the perforation field.
Which products should you avoid?
Avoid dish detergent, vinegar, bleach, ammonia, disinfectant, solvent-based degreaser, abrasive melamine sponges, furniture polish, and undiluted all-purpose cleaner. These products can alter gloss, strip surface protection, dry the coating, or leave salts and surfactants behind.
A magic eraser is especially unsuitable for routine leather care because its melamine foam acts as a fine abrasive. It may remove dye transfer while also removing the finish that protects the underlying color.
Which Cleaning Method Gives the Most Control?
Foam cleaning is the preferred DIY method for routine perforated leather maintenance. Liquid spray can clean effectively but carries a higher pooling risk, while steam is better left to trained professionals who understand seat construction and can control heat, moisture, and dwell time.
| Method | Typical cost | Moisture risk | Working temperature or setting | Appropriate use |
|---|---|---|---|---|
| Brush-applied foam | $15-$35 product | Low | Ambient temperature | Routine dirt and body oil |
| Towel-applied liquid | $10-$30 product | Medium | Ambient temperature | Small spot with careful dosing |
| Steam | $80-$200 professional visit | High | Often 100°C or more at nozzle | Specialist restoration only |
| Wet extraction | $100-$250 professional visit | Very high | Water plus vacuum recovery | Cushions and fabric, not casual leather care |
Steam does not “sanitize” every contaminated seat safely. Heat and vapor can reach perforations, adhesives, foam, sensors, and heating elements, and the surface may look dry before the backing is dry. Steam is not a sensible first response to ordinary fingerprints or sunscreen.
How Should You Treat Common Stains?
Fresh spills require blotting and controlled cleaning, not aggressive scrubbing. Remove the contaminant from the surface before it can migrate through the perforations, then use the least aggressive approved cleaner that dissolves the residue.
| Stain | First response | Suitable follow-up | Escalation point |
|---|---|---|---|
| Water, coffee, or tea | Blot within 5 minutes | Brush-applied leather foam | Dark halo after drying |
| Milk or formula | Blot, then use a barely damp towel | Approved cleaner, repeated light passes | Sour odor after 24 hours |
| Grease or sunscreen | Lift excess with a dry towel | Leather cleaner on brush | Oily feel after two passes |
| Blue-jean dye | Dry wipe first | Tested leather cleaner | Color remains after one gentle pass |
| Ink or permanent marker | Do not spread it | Professional leather specialist | Any color transfer during testing |
| Vomit or biological residue | Wear gloves and blot solids | Follow manufacturer sanitation advice | Odor, seepage, or visible contamination |
Coffee and milk are different problems. Coffee usually leaves a surface pigment and tannin mark, while milk can leave protein and fat inside the cushion, where odor may persist after the leather looks clean. Do not flood either stain in an attempt to rinse it through the holes.
What Should You Do if Moisture Reaches the Cushion?
Stop adding cleaner when a dark halo, damp seam, or sour odor appears around the perforations. Blot the surface, keep the seat heater off unless the manufacturer specifically authorizes low heat for drying, ventilate the cabin, and contact a professional if dampness or odor persists beyond 24 hours.
A wet-dry vacuum should not be pressed directly against perforated leather unless the vehicle manufacturer or a trained technician approves the method. Strong suction can stress the surface, while the vacuum may still fail to remove moisture trapped beneath the leather.
Electrical seat controls, occupancy sensors, side airbags, and ventilation ducts differ by vehicle. Moisture near a seat-mounted airbag or wiring harness deserves professional inspection rather than experimentation.
Common Mistakes and How to Fix Them
| Failure mode | Likely cause | Recovery action | When to stop DIY work |
|---|---|---|---|
| White plugs in holes | Excess conditioner or dried foam | Soft dry brush, then soft interdental brush | Plug remains across many holes |
| Stiff or tacky surface | High cleaner concentration or residue | Wipe with a barely damp approved towel, then dry | Coating feels rough or color changes |
| Dark ring around holes | Moisture in backing | Stop liquid use and ventilate | Ring remains after 24 hours |
| Sour odor | Milk, sweat, or damp foam | Professional odor and cushion treatment | Odor returns after drying |
| Uneven gloss | Abrasive cleaner or over-scrubbing | Stop polishing and assess coating | Visible finish loss or color mismatch |
| Dye transfer | Aggressive cleaner or unstable dye | Stop and photograph the area | Towel continues picking up color |
One practitioner rule matters more than product brand: if a seat requires force to look clean, the process has already become too aggressive. Repeated light passes are safer than one wet, abrasive pass.
Another counterintuitive point is that a clean-looking perforation can still contain conditioner. Product residue may sit below the visible opening and emerge later as a white plug when the cabin heats up.
How Much Time and Money Does the Job Need?
A typical DIY cleaning costs $15-$45 and takes 45-90 minutes of active work for a complete interior, followed by one to two hours of drying. Professional cleaning commonly costs $75-$200 for front seats or $150-$350 for a full leather interior, with regional labor rates and stain severity creating substantial variation.
| Service level | Typical materials or labor | Active time | Best fit |
|---|---|---|---|
| Spill response | $0-$10 | 5-10 minutes | Fresh water-based spill |
| Routine DIY clean | $15-$35 | 15-25 minutes per seat | Monthly or quarterly upkeep |
| DIY clean and condition | $25-$45 | 20-30 minutes per seat | Dry, lightly soiled leather |
| Professional detail | $150-$350 interior | 2-4 hours | Multiple seats or heavy soil |
| Leather repair or recoloring | $200-$800+ | 1-3 days | Cracked, worn, or damaged finish |
Cost rises quickly when staining has reached the foam. A $20 cleaner can maintain a healthy surface, but it cannot reliably reverse dye migration, microbial odor, peeling topcoat, or a failed seat heater.
How Often Should You Clean Perforated Leather Seats?
Vacuum perforated seats every two to four weeks, wipe fresh spills immediately, perform a light cleaner pass every one to three months, and condition only when the manufacturer recommends it or the surface shows dryness. High-use family vehicles and pet vehicles need shorter intervals than lightly driven cars.
A practical schedule is:
- Every two weeks: vacuum seams, perforations, and seat tracks.
- Monthly: inspect for blocked holes, dye transfer, and sticky body-oil areas.
- Every one to three months: clean high-contact panels with controlled foam.
- Every three to six months: assess whether conditioning is actually needed.
- Immediately: blot coffee, milk, sunscreen, grease, and ink before they spread.
Regular dry extraction prevents more damage than frequent wet cleaning. Keeping sand and grit out of the perforations also reduces abrasion at the hole edges.
How Can You Prevent Future Staining?
Prevention works best when it reduces contact time and product migration. Keep drinks in sealed containers, remove pet hair before it becomes embedded, use approved seat covers only when they do not interfere with airbags or ventilation, and wipe sunscreen from armrests and bolsters the same day.
Do not apply an interior coating without checking compatibility with the factory finish. Ceramic leather coatings can reduce wetting on some coated surfaces, but they do not make perforated seats waterproof, eliminate cleaning, or authorize harsh chemicals. A coating may also change gloss or complicate later repair.
The most useful maintenance item is a clean microfiber towel stored in the vehicle. Immediate blotting usually requires less liquid than later stain removal.
FAQ
Can I clean perforated leather with a damp microfiber cloth?
Yes, a barely damp microfiber cloth is suitable for fresh surface dust and small water-based spills when the cloth is thoroughly wrung out. Wipe a small area, follow with a dry towel, and avoid pushing moisture into the perforations. Use a tested automotive leather cleaner for body oil, sunscreen, or older stains.
Can I use a toothbrush on perforated leather seats?
A household toothbrush is usually too stiff for delicate coated leather and may abrade the finish around the holes. Use a soft horsehair detailing brush or a soft automotive interior brush instead. A soft interdental brush is safer for clearing an individual blocked perforation than a hard toothbrush or metal pick.
Should I use leather conditioner on ventilated seats?
Use conditioner only when the owner’s manual and product label permit it, and apply a thin film to dry solid leather areas. Conditioner should not fill the holes or sit in seams. Many modern coated automotive seats need residue-free cleaning and UV protection more often than repeated conditioning.
How do I remove a bad smell from perforated leather?
First determine whether the smell comes from the surface or damp cushion. Clean and dry the leather without flooding it, then close the vehicle for 30 minutes and reassess. If odor returns, especially after milk, sweat, or a spill, moisture or contamination may be inside the foam and requires professional extraction or odor treatment.
Can I use a shop vacuum to clean the perforations?
A shop vacuum is useful for dry debris when the nozzle remains just above the surface and suction does not deform the leather. Avoid wet extraction through the holes unless the vehicle manufacturer or a trained technician approves it. Dry vacuuming removes loose contamination without adding moisture to the cushion.
What is the safest way to clean white perforated leather?
Vacuum first, test the cleaner on a hidden area, and use a small amount of foamed automotive leather cleaner on a soft brush. Work in short sections and change towels frequently. Do not use bleach, melamine sponges, solvent, or aggressive scrubbing, because white leather can lose its protective finish while the stain remains.
The Bottom Line
The safest way to clean perforated leather car seats is to control moisture from beginning to end: vacuum dry debris, test the product, foam the brush, clean small sections, wipe immediately, clear holes gently, dry fully, and condition sparingly. Foam control and restraint protect the seat more effectively than stronger chemicals or harder scrubbing.


