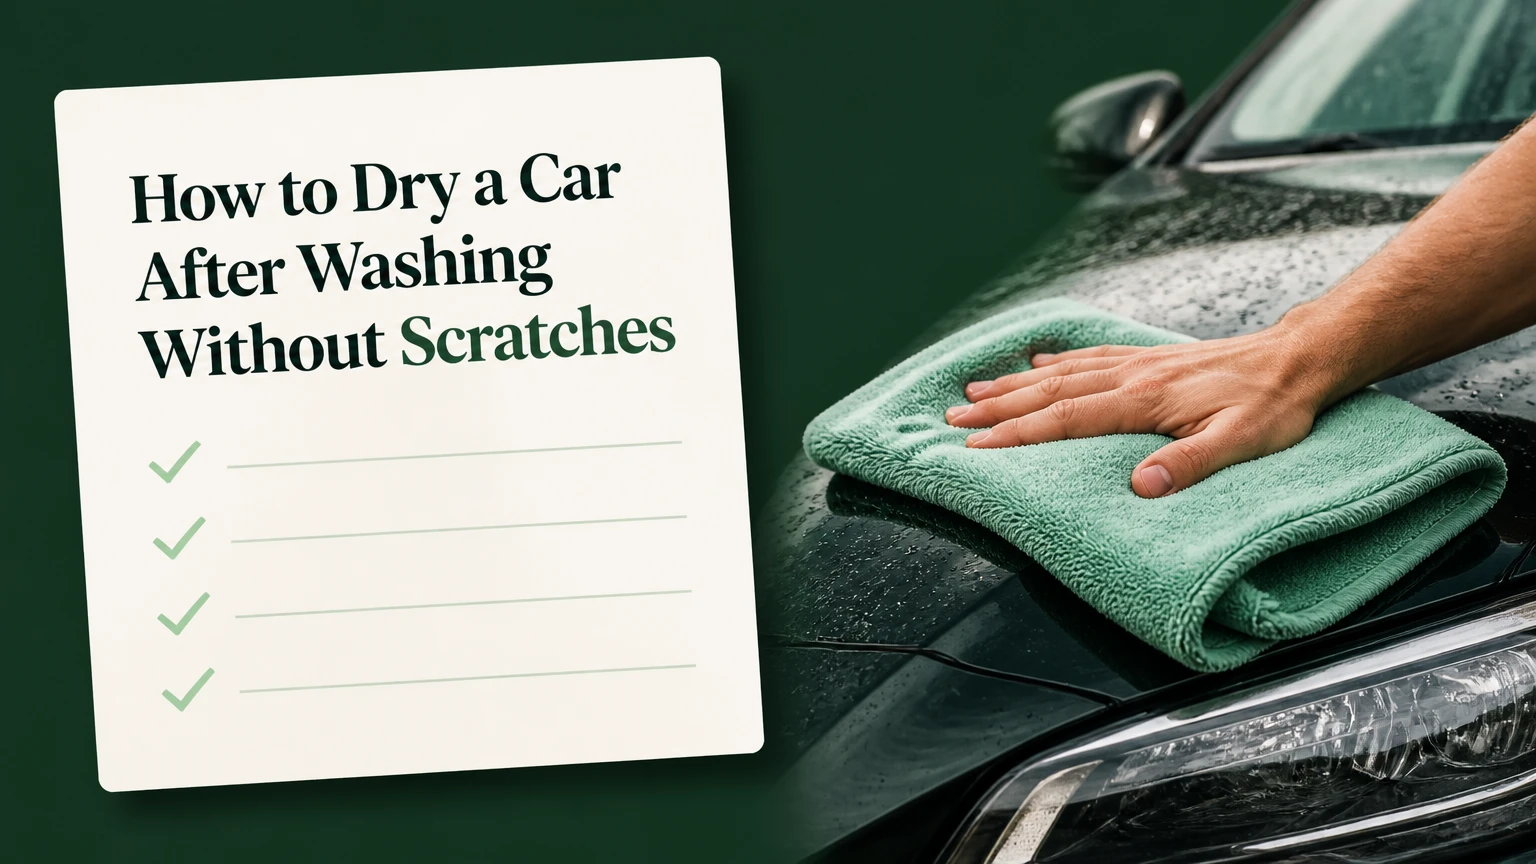
To dry a car after washing, remove most rinse water with an open-hose sheeting rinse, then use a clean microfiber drying towel or filtered blower from the roof downward. Work in shade, keep the towel lubricated and uncontaminated, clear water from crevices, and finish with separate towels for jambs and wheels. The process typically takes 10-20 minutes.
Key Facts
A clean, high-pile microfiber drying towel is safer than a contaminated chamois or rough cloth.
Open-hose sheeting can remove much of the standing water before the first towel pass.
Dry glass, roof, and upper panels before lower panels, rocker panels, and wheels.
A drying towel should glide with light pressure, never require force to remove water.
Blowing out mirrors, badges, grilles, handles, and trim prevents later water streaks.
Fresh water spots may respond to a dedicated mineral-removal product, while etched spots require polishing.
How to Dry a Car After Washing
The safest general method combines water reduction, low-friction towel drying, and compressed-air cleanup. The most important variable is not the towel’s advertised GSM rating. It is whether the towel and paint are free of abrasive grit.
Dry the vehicle immediately after the final rinse whenever practical. Tap water contains dissolved minerals, including calcium and magnesium, that remain when droplets evaporate. Hard-water areas create visible rings more quickly, especially on black paint, glass, horizontal panels, and hot bodywork.
Use a clean drying towel with a high-pile or twisted-loop surface. Lay the towel flat and pull it gently in straight lines, or use a blotting motion on delicate paint. If the towel begins dragging, stop and change or wring it out rather than increasing pressure.
A professional detailer’s rule of thumb is simple: the towel should remove water while barely touching the paint. A towel that needs scrubbing is either saturated, dirty, poorly lubricated, or working on a surface that still contains bonded contamination.
Before You Start
Prepare the drying area before the final rinse because a wet vehicle can spot within minutes in direct sun or dry wind. Shade, low wind, and a cool panel provide more working time than a particular towel brand.
| Item | Typical quantity | Typical cost | Purpose |
|---|---|---|---|
| Twist-loop microfiber towel | 1-2 towels, 60 x 90 cm | $15-$35 each | Main painted-panel drying |
| Waffle-weave microfiber towel | 1 towel, 40 x 60 cm | $8-$20 | Glass and final inspection |
| Older utility microfiber | 2 towels | $2-$8 each | Jambs, exhaust area, wheels |
| Drying aid or rinseless lubricant | 30-60 mL per car | $10-$25 per bottle | Lower towel friction |
| Filtered blower or leaf blower | 1 unit, 100-200 mph typical output | $60-$500 | Crevices and touchless drying |
| Wash bucket or storage bag | 1 clean container | $5-$20 | Prevent ground contamination |
Costs are typical retail ranges in the United States, not fixed prices. A large 1,000 GSM towel is not automatically superior: very dense towels absorb well but become heavy and difficult to maneuver when saturated.
Which Drying Aid Should You Use?
Use a product labeled as a drying aid, spray sealant, ceramic detailer, or compatible quick detailer, and follow its dilution and application instructions. Avoid spraying a concentrated product onto a hot panel or allowing a high-solids sealant to dry on glass.
Apply a light mist to the wet panel or directly to the towel. A typical passenger car uses roughly 30-60 mL of ready-to-use product, although a heavily hydrophobic surface may need less. Drying aids improve lubrication and can increase water behavior, but they do not replace a clean towel.
Silicone-heavy cockpit products, household glass cleaner, and undiluted rinseless wash are poor substitutes. They can leave streaks, interfere with later coatings, or contain solvents that are unsuitable for exterior paint and trim.
Step-by-Step Car Drying Process
A standard sedan usually takes 10-20 minutes with a towel and 15-30 minutes with a small blower. A large SUV, a heavily beaded ceramic coating, strong wind, or trapped water can extend the task.
Step 1: Reduce the Water Before Touching Paint
Rinse the vehicle with a gentle, open stream of clean water rather than a high-pressure jet for the final pass. Hold the hose near the panel and allow water to sheet across the surface, moving from the roof downward.
A hydrophobic wax, sealant, or ceramic coating encourages water to gather into larger beads and slide away. Unprotected paint may retain a continuous film, so the towel will carry more water and reach saturation earlier.
You’ll know it worked when: horizontal panels show thin sheets or isolated beads instead of a continuous layer of standing water.
Common mistake: using a narrow, forceful nozzle for the final rinse. High pressure breaks water into small droplets and leaves more residue behind.
Step 2: Dry the Glass and Roof First
Start with the windshield, side windows, roof, and sunroof. Use a clean waffle-weave towel for glass if streak control matters, then use the main drying towel on the roof.
Glass is visually unforgiving, and water that dries there can affect visibility or leave mineral marks. Drying the roof early also prevents water from running down onto panels that have already been finished.
Use overlapping straight passes with almost no downward force. Flip to a dry side when the working face becomes visibly wet.
You’ll know it worked when: the glass has no continuous water film and the roof shows no loose beads around rails or roof seams.
Common mistake: drying the lower doors first. Water from the roof and windows will flow down and force a second pass.
Step 3: Dry Upper Body Panels Downward
Move from the hood and upper fenders to the upper doors, rear quarter panels, trunk, and tailgate. Pull a large towel in long, straight passes, or place it flat and gently drag it using its own weight.
A 60 x 90 cm towel can often dry one side of a sedan before saturation, but that depends on towel thickness, paint protection, weather, and how much water the sheeting rinse removed. Keep a second towel available rather than wringing the first towel over the paint.
Straight-line motion does not make a contaminated towel safe, but it makes any resulting marks easier to identify and correct than circular wiping. The real protection comes from removing grit and limiting pressure.
You’ll know it worked when: the panel looks uniformly dry under angled light, with no towel trails or isolated beads along body creases.
Common mistake: pressing hard on a water-resistant surface. Add a little drying aid or change towels instead.
Step 4: Blow Out Trapped Water
Use a filtered blower, compressed air, or a compact electric blower on mirrors, door handles, badges, grilles, window trim, fuel doors, charging ports, roof rails, and panel gaps. Keep the nozzle several inches away and direct water toward an already-wet or easily cleaned area.
Air drying is especially useful for vehicles with intricate grilles, loose exterior trim, aftermarket badges, and ceramic coatings that hold beads in narrow recesses. Unfiltered shop air can contain oil or moisture, so it is unsuitable for final paint drying unless the air system has a separator and clean nozzle.
You’ll know it worked when: water no longer emerges from mirrors, badges, or handles after the vehicle is moved or a door is opened.
Common mistake: using maximum air power close to soft trim. The air can move dirt across paint, dislodge loose weather stripping, or force water deeper into seals.
Step 5: Dry Lower Panels and Rocker Areas
Use the main towel on lower doors and fenders only after the upper panels are clean and dry. These areas receive more road grit, so inspect the towel frequently and switch to a clean face or separate towel.
Rocker panels and the bottom edge of bumpers should receive less pressure than upper paint. If the wash did not remove oily road film or tar, towel drying can spread that contamination.
You’ll know it worked when: the towel remains clean after a short pass and the lower panel has no visible road film.
Common mistake: using the same towel face from the rocker panel on the hood. Reserve the cleanest towel surfaces for the least contaminated paint.
Step 6: Finish Door Jambs and Interior Edges
Open the doors, trunk, hatch, and fuel door, then wipe the jambs and sills with an older clean microfiber. These locations commonly retain rinse water and can create streaks after the vehicle is driven.
Do not use the paint towel for greasy hinges, rubber seals covered in dirt, or the underside of a hatch. Keep those surfaces separate from clear coat.
You’ll know it worked when: opening and closing the doors produces no water trail on the sill or exterior panel.
Common mistake: spraying a glossy dressing into jambs. Dressing can transfer onto clothing and attract dust; a clean, dry wipe is normally sufficient.
Step 7: Dry Wheels Last
Dry wheels, tires, and wheel wells with dedicated towels or a blower. Brake dust contains abrasive particles, and a towel used on a wheel should never return to painted panels or glass.
Use a separate towel for each especially dirty area when practical. Dry behind spokes and around lug nuts only after confirming that loose grit has been rinsed away.
You’ll know it worked when: the wheel face is dry without dark towel marks and no water remains around lug nuts or valve stems.
Common mistake: drying wheels before the body. Wheel contamination can transfer through hands, clothing, and towels.
Which Car-Drying Method Is Best?
For most hand-washed vehicles, a clean twist-loop microfiber towel used after water sheeting offers the best balance of cost, speed, and paint safety. A filtered blower is the lowest-contact option, while waffle-weave towels excel on glass and a well-maintained synthetic chamois can work when the surface is exceptionally clean.
| Method | Typical price | Typical time | Best use | Main limitation |
|---|---|---|---|---|
| Twist-loop microfiber | $15-$35 | 10-20 minutes | Painted panels | Becomes heavy when saturated |
| Filtered car blower | $100-$500 | 15-30 minutes | Crevices and touchless drying | Noise, cost, electrical access |
| Cordless leaf blower | $60-$250 | 15-25 minutes | Apartment or driveway use | Battery runtime and filtration |
| Waffle-weave microfiber | $8-$20 | 15-25 minutes | Glass and light water removal | Lower capacity on large panels |
| Synthetic chamois | $8-$25 | 15-25 minutes | Very clean, smooth surfaces | Can drag grit across paint |
Are Twist-Loop Towels Better Than Waffle-Weave Towels?
Twist-loop towels generally remove more water from large painted panels, while waffle-weave towels provide better control on glass and narrow areas. Towel construction matters more than GSM alone because loop shape, edge design, fiber quality, and cleanliness affect friction and lint.
| Towel type | Typical GSM | Typical size | Best surface | Saturation behavior |
|---|---|---|---|---|
| Twisted loop | 500-1,200 GSM | 60 x 90 cm | Roof, hood, doors | High capacity, heavy when wet |
| Plush microfiber | 600-1,000 GSM | 40 x 60 cm | Final paint wipe | Soft, slower to wring |
| Waffle weave | 300-500 GSM | 40 x 60 cm | Glass and trim | Dries quickly, lower capacity |
| Short-pile utility | 200-350 GSM | 40 x 40 cm | Jambs and wheels | Easy to separate by task |
The “10 times its weight” absorption claim sometimes appears in microfiber marketing, but real-world capacity varies with weave, towel size, wringing method, and water type. Treat that figure as a laboratory-style maximum, not a reliable vehicle-drying specification.
Is a Chamois Safe for Car Paint?
A chamois can be safe on clean paint, but a microfiber towel is usually more forgiving because its pile can hold small particles away from the surface. A flat chamois has little ability to isolate grit, and it can create drag when the panel becomes nearly dry.
Natural leather and PVA synthetic chamois products are not equivalent. Both require rinsing and clean storage, and neither should touch paint after falling on the ground. A chamois that becomes tacky, stiff, cracked, or visibly dirty should be replaced.
Chamois products remain useful for some glass, boats, and very clean freshly rinsed surfaces. They are a poor choice on vehicles with neglected paint, loose road grit, textured trim, or a wash process that did not thoroughly remove contamination.
How Do You Dry a Car Without a Towel?
A blower can dry a car without direct towel contact, but the vehicle must first be thoroughly washed and rinsed, and the air must be clean and dry. Touchless drying works best on waxed, sealed, or ceramic-coated paint because hydrophobic surfaces release water more readily.
| Blower type | Typical air output | Typical runtime or supply | Best scenario | Limitation |
|---|---|---|---|---|
| Cordless leaf blower | 100-200 mph | 15-40 minutes per battery | Driveway without outlet | Battery may not finish an SUV |
| Electric car dryer | 100-200 mph | Continuous | Detail bay or garage | Costs more than towels |
| Compressed-air nozzle | 90-150 psi supply | Depends on compressor | Badges and seams | High air consumption |
| Shop vacuum exhaust | 60-120 mph | Continuous | Emergency crevice work | Filtration may be inadequate |
Air speed figures are typical advertised ranges and are not directly comparable between manufacturers. Nozzle shape, distance, airflow volume, and filtration determine practical performance.
A blower does not remove bonded grime. Air can also move loose sand across the clear coat. For that reason, touchless drying is safest after a careful contact wash, not after spraying a dirty car with water.
What Changes With Paint Protection or Special Finishes?
Paint protection changes water behavior, not the need for a clean drying process. Ceramic coatings, synthetic sealants, waxes, and paint protection film usually shed water more readily, but trapped droplets can remain in badges, seams, mirrors, and trim.
Ceramic-Coated Cars
Use a coating-compatible drying aid only if the coating manufacturer permits it. Many ceramic coatings are designed to be maintained with neutral shampoos and compatible toppers, while a heavy wax or petroleum-based product may alter water behavior or leave residue.
A blower is particularly effective on coated paint because beads release from edges and panel gaps. Do not interpret strong beading as proof that the surface is clean enough to wipe without lubrication.
Matte and Satin Paint
Dry matte and satin finishes with a clean, soft microfiber and minimal pressure. Avoid abrasive polishing, aggressive spot compounds, and products that add uneven gloss unless the vehicle manufacturer specifically approves them.
Water spots can be more difficult to correct on matte paint because polishing one area can change its texture or sheen. Prevention has greater value than correction.
Paint Protection Film
Use low pressure around lifted film edges and avoid directing compressed air into a damaged seam. A blower can reveal loose edges, while an aggressive nozzle can worsen them.
Electric Vehicles
Dry charging-port doors, seals, cameras, sensors, and grille openings carefully. Do not force high-pressure air or water into charging connectors, and follow the vehicle manufacturer’s instructions for drying exposed electrical interfaces.
How Long Does Car Drying Take and What Does It Cost?
A typical hand-drying setup costs $25-$80 initially and takes 10-20 minutes for a clean sedan after an effective sheeting rinse. A touchless setup costs more, but it can reduce paint contact and shorten crevice cleanup.
| Vehicle or condition | Towel-only time | Towel plus blower time | Typical towel count |
|---|---|---|---|
| Small hatchback, shaded | 8-12 minutes | 8-15 minutes | 1 main, 1 glass |
| Mid-size sedan | 10-20 minutes | 10-18 minutes | 1-2 main, 1 glass |
| Large SUV | 18-30 minutes | 15-25 minutes | 2-3 main, 1 glass |
| Unprotected paint | 15-25 minutes | 12-25 minutes | 2 main, 1 glass |
| Ceramic-coated vehicle | 8-18 minutes | 8-15 minutes | 1 main, 1 glass |
These are typical practitioner ranges, not guaranteed performance figures. Wind, humidity, water hardness, panel temperature, body design, and the quality of the final rinse can change the result substantially.
Common Drying Problems and Their Fixes
Why Is the Towel Dragging?
Towel dragging usually indicates saturation, contamination, insufficient lubrication, or a dry panel with too much remaining water tension. Stop wiping, inspect the towel, mist a compatible drying aid, and switch to a clean dry face.
Do not solve drag by pressing harder. Clear-coat marring often begins when a person applies force to a towel that has already collected grit.
Why Are Water Spots Still Appearing?
Water spots form when mineral-bearing droplets dry on the surface. Fresh residue may be removed with a lubricated microfiber and a dedicated water-spot remover, but older deposits can chemically etch clear coat and require machine polishing.
Avoid assuming that household vinegar is a universal fix. Diluted white vinegar may dissolve some mineral residue on suitable hard surfaces, but its acidity, concentration, dwell time, and compatibility with coatings vary. A manufacturer-labeled automotive mineral remover is the more controlled choice, especially on protected paint, trim, and glass.
Why Is the Towel Leaving Lint?
Lint can result from a low-quality towel, damaged fibers, excess detergent, fabric softener, or washing microfiber with cotton textiles. Wash microfiber separately with a suitable detergent, use no fabric softener, and dry it on low heat or air-dry it away from dust.
New towels may shed during their first wash. Inspect them on dark glass before using them for final paint drying.
What If the Towel Falls on the Ground?
Remove a dropped towel from paint immediately and place it in the wash pile. Do not shake it and continue, because grit can remain embedded between fibers even when the towel looks clean.
A ground-contact towel can be reassigned to wheels or jambs only after thorough laundering and inspection. Reuse depends on the towel’s condition, not on whether the ground looked clean.
Can You Dry a Car in Direct Sun?
You can dry a car in direct sun, but shade is safer because hot panels accelerate evaporation and reduce the time available to remove mineral-bearing water. Work one small section at a time, keep the surface wet, and use a drying aid compatible with the finish.
If shade is unavailable, wash and dry early in the morning or late in the day. A movable canopy can help, but it must be secured against wind and positioned so it does not contact the wet vehicle.
How Should You Maintain Car-Drying Towels?
Wash drying towels separately from wheel towels and household laundry. Use clean water, a microfiber-safe detergent, no fabric softener, and no chlorine bleach unless the towel manufacturer explicitly permits it.
Avoid high heat, which can deform synthetic fibers and reduce absorbency. Do not store damp towels in a sealed bucket or vehicle trunk because mildew and odor can develop quickly.
Inspect towels under bright light. Retire a towel from paint use when it feels hard, contains embedded particles, has a damaged edge, or leaves lint after washing. Labeling towels by job, such as paint, glass, jambs, and wheels, prevents accidental cross-contamination.
A useful professional rule is to own more towels than the minimum required for one wash. If a sedan needs one large towel when conditions are perfect, keeping two main towels prevents the common mistake of forcing a saturated towel to finish the car.
Which Setup Fits Your Situation?
Budget Home Setup
Use one 60 x 90 cm twisted-loop towel, one waffle-weave glass towel, two older microfiber towels, and a compatible drying aid. Perform an open-hose sheeting rinse first and work in shade.
This setup typically costs $30-$80 and handles a small car or sedan. It does not provide touchless drying, and the main towel may need to be changed halfway through a large SUV.
Apartment or No-Outlet Setup
Use two medium microfiber towels and a cordless blower if building rules permit outdoor noise. Dry the glass and upper panels quickly, then use the blower on mirrors, badges, handles, and grilles before finishing the lower body.
Confirm that runoff is allowed and avoid washing near storm drains where local rules prohibit contaminated discharge. A cordless blower is convenient, but battery capacity and charging time limit repeated vehicle drying.
Paint-Safety-Focused Setup
Use a filtered electric car dryer, a low-lint glass towel, and one clean backup microfiber for jambs. Start with air on crevices and protected panels, then use a towel only where a thin water film remains.
This setup minimizes contact but cannot compensate for a poor wash. Touchless drying is not a substitute for removing road film, iron particles, or sand before the rinse.
Expert Rules That Prevent Most Drying Damage
- Dry the dirtiest surfaces last. Lower panels, rocker areas, and wheels carry more contamination than roofs and glass, so their towels must never return to upper paint.
- Use water reduction before absorbency. An open-hose sheeting rinse often saves more effort than buying a larger towel because every liter removed without contact reduces saturation and wiping passes.
- Treat towel resistance as diagnostic feedback. Drag means the process needs correction. More pressure converts a minor drying inconvenience into possible clear-coat marring.
- Inspect hidden water after the first drive. Mirrors, handles, badges, grilles, and hatch seams can release water several minutes later. A short post-drive wipe prevents streaks without re-drying the whole vehicle.
FAQ
Is it better to towel-dry or air-dry a car?
Towel drying is usually faster and less expensive, while filtered air reduces direct contact and reaches crevices better. The safest choice depends on wash quality: a clean car can tolerate either method, but air alone will not remove bonded contamination and unfiltered air can blow grit across paint.
Can I use a regular bath towel to dry my car?
A clean, soft bath towel is not automatically abrasive, but most bath towels have cotton loops that hold less water efficiently and may leave lint. Dedicated microfiber towels are easier to separate by task, dry quickly, and provide better control on automotive clear coat.
Should I dry my car after a touchless car wash?
Yes, if the rinse water is mineral-bearing or the vehicle will sit in heat. A touchless wash may leave road film and water in mirrors, trim, and panel gaps, so use a blower or clean microfiber only after checking the surface for remaining grit.
How many towels do I need to dry one car?
A small hatchback can use one main towel and one glass towel, while a sedan normally benefits from two main towels, one glass towel, and separate towels for wheels and jambs. Keep a spare main towel available whenever the vehicle is large or the paint is unprotected.
Can I dry my car with compressed air?
Compressed air works well for badges, mirrors, grilles, handles, and seams when the air is clean and moisture-free. Use a separator and a clean nozzle, keep the tip away from paint, and avoid high pressure around damaged trim, film edges, and weather seals.
How do I remove water spots without damaging paint?
First determine whether the spots are loose mineral residue or etched defects. Try a lubricated microfiber and automotive water-spot remover on a cool panel; if the marks remain after chemical treatment, polishing may be required, while matte paint and coatings need manufacturer-approved correction methods.
The Bottom Line
To dry a car after washing safely, reduce water with an open-hose sheeting rinse, use clean microfiber from the roof downward, and apply only enough lubricant for the towel to glide. Blow out crevices, reserve separate towels for jambs and wheels, and work in shade whenever possible. The best drying method is the one that removes water with the fewest contaminated, high-pressure contact passes.


