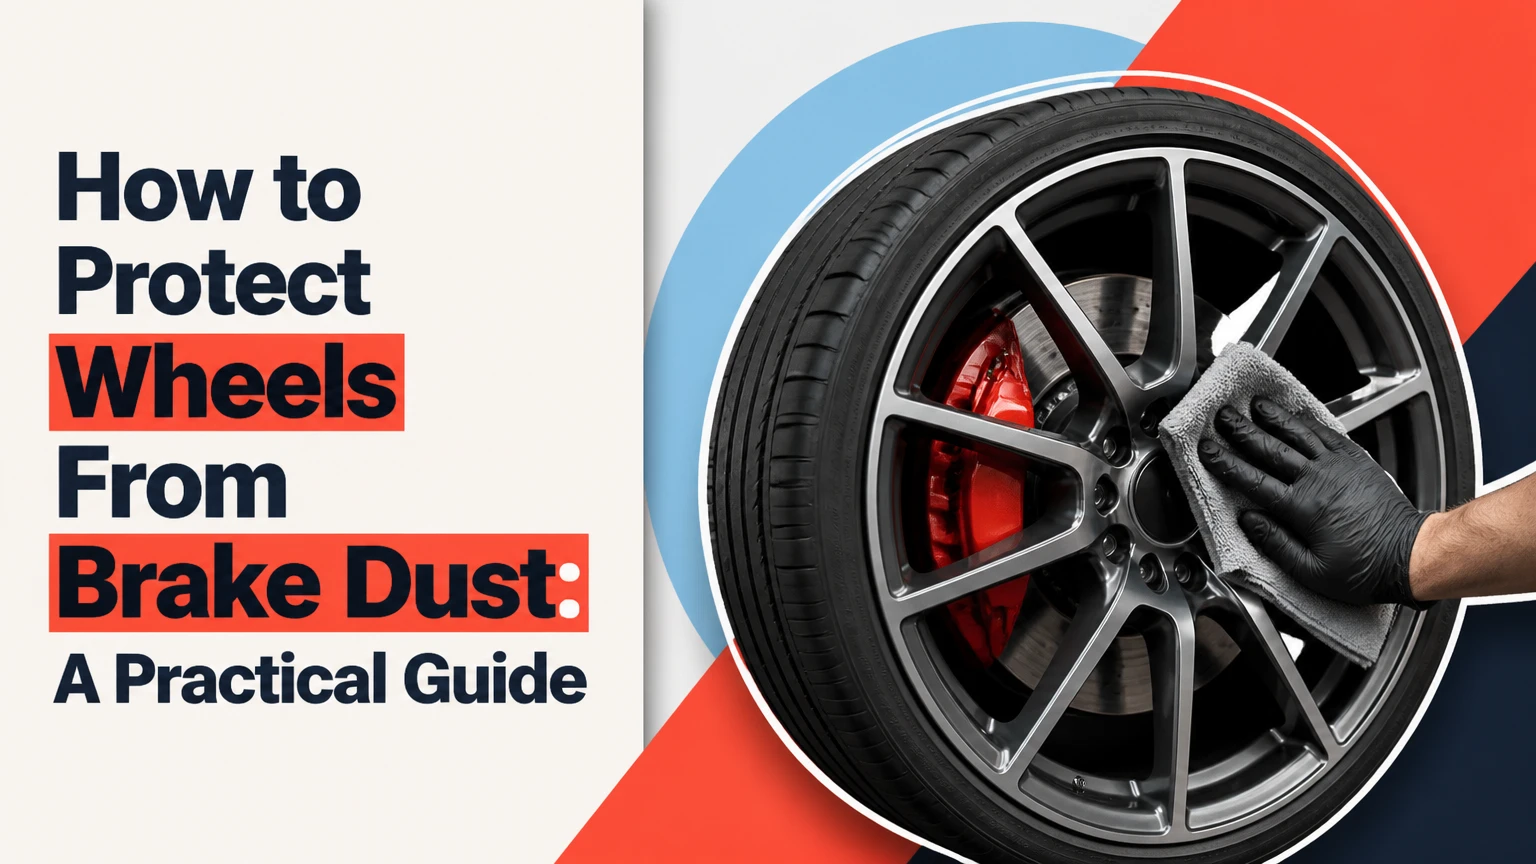
To protect wheels from brake dust, first remove bonded iron and road film from cool wheels, then apply a wheel-safe sealant, wax, or ceramic coating to the clean finish. Wash protected wheels every 1-2 weeks with pH-neutral soap, avoid abrasive or highly acidic cleaners, and renew the barrier when water no longer sheets or beads consistently.
Key Facts at a Glance
- Brake dust contains wear particles from brake pads and rotors, plus road grime, moisture, and salt.
- Iron fallout can bond to painted, clear-coated, powder-coated, and some polished wheel surfaces.
- A wheel sealant reduces adhesion; it does not stop brake dust from being produced.
- Typical DIY protection costs $15-$120, depending on product type and preparation needs.
- Wheel coatings adhere best below approximately 30°C, or 86°F, on dry, residue-free surfaces.
- Ceramic coatings usually need 12-24 hours without rain, washing, or heavy condensation.
Why Protect Wheels From Brake Dust?
Wheel protection matters because brake dust can remain attached to a wheel finish, where moisture and road salt accelerate staining, oxidation, and clear-coat deterioration. The risk is highest on neglected wheels, vehicles driven in winter, and wheels with chips or damaged lacquer that expose more vulnerable material.
Brake dust is a variable mixture. Pad and rotor wear contribute ferrous particles, non-ferrous particles, carbonaceous material, and binder residues, while the road adds sand, salt, and oily film. Some dust is strongly magnetic; some is not. An iron remover can react with ferrous contamination, but it cannot dissolve every substance on a wheel.
Temperature also varies widely. Light urban braking does not produce the same particle temperature as repeated mountain descents or track braking. Therefore, the often-repeated claim that all brake dust reaches 360°C, or 700°F, is too broad. High heat can bake contamination onto the finish, but the wheel, brake system, airflow, and braking event determine the actual exposure.
The practical goal is simple: keep contamination from bonding strongly, remove it before it accumulates, and avoid cleaners that attack the wheel finish. That approach protects appearance and makes routine washing faster.
How Does Wheel Protection Work?
Wheel waxes, polymer sealants, and ceramic coatings create a low-surface-energy layer that makes water, soap, and loose contamination easier to remove. The layer does not form an invulnerable shield, and hot metal particles can still land on the surface, but weaker adhesion reduces the time contaminants remain attached.
A sealant also separates the wheel finish from some environmental contamination. That separation can reduce direct contact with moisture and salts. Ceramic coatings add a chemically bonded, thin inorganic-organic film when correctly installed, while wax relies on a sacrificial film that gradually wears away.
A protected wheel still needs washing. Product hydrophobicity is not a substitute for maintenance because accumulated dust can hold water and salts against the surface. A useful practitioner rule is to clean wheels when the dust is loose and gray, not after it has become dark, damp, and heat-baked.
Manufacturer instructions control application details. Flash times, cure times, compatible cleaners, and temperature limits differ between products, so a generic schedule should not override the label.
Which Wheel Protection Type Should You Choose?
The best wheel protection depends on wheel finish, heat exposure, washing frequency, budget, and willingness to prepare the surface correctly. A spray sealant suits most daily drivers, while a ceramic coating makes more sense for removable wheels, expensive finishes, or owners willing to perform meticulous preparation.
| Protection type | Typical DIY price | Typical life | Application time | Best operating situation |
|---|---|---|---|---|
| Synthetic wheel wax | $15-$35 | 4-10 weeks | 30-45 minutes | Weekend cars below 150°F wheel temperature |
| Spray polymer sealant | $15-$35 | 2-6 months | 10-20 minutes | Daily commuters washed every 1-2 weeks |
| SiO2 spray coating | $20-$50 | 3-9 months | 20-40 minutes | Owners wanting slickness with simple renewal |
| Consumer ceramic coating | $50-$120 | 1-3 years | 2-5 hours | Clean, intact wheels with controlled curing |
| Professional ceramic coating | $150-$500 per set | 2-5 years | 1-2 days | High-value wheels or removable wheel installation |
These are typical market ranges, not guarantees. Wheel wax generally offers the shortest life under heavy heat and alkaline washing. Ceramic coatings usually resist detergents and heat better, but incorrect preparation can leave high spots, streaks, or permanent-looking defects that require polishing.
“9H” on a consumer coating label usually describes a pencil-hardness rating under a particular test method. It does not mean a wheel becomes scratch-proof, impact-proof, or immune to brake-dust etching. Coating hardness and chemical resistance are separate properties.
Which Product Works for Each Driving Situation?
| Driver or vehicle | Recommended protection | Reapplication interval | Important limitation |
|---|---|---|---|
| Urban commuter | SiO2 or polymer spray sealant | Every 3-6 months | Needs frequent washing during winter |
| Luxury vehicle owner | Wheel-specific ceramic coating | Every 1-3 years | Preparation determines final appearance |
| Track-day driver | High-temperature coating or frequent cleaning | Inspect monthly | No coating replaces post-session washing |
| Winter-salt commuter | Polymer sealant plus pH-neutral washing | Every 2-4 months | Salt can remain in barrels and behind spokes |
| Show-car owner | Synthetic wax on a verified finish | Every 4-8 weeks | Wax requires more frequent renewal |
For most drivers, a spray sealant is the sensible starting point. It provides meaningful cleaning benefits without demanding coating-level correction and curing. A ceramic coating is worthwhile when the wheels are already clean, the finish is stable, and the owner values reduced maintenance over the lowest initial cost.
What Do You Need Before Starting?
A four-wheel DIY application typically takes 2-4 hours for deep cleaning and 30-60 minutes for a spray sealant, excluding ceramic cure time. Difficulty is moderate because the coating result depends more on decontamination, temperature control, and residue removal than on physical strength.
Before You Start
| Requirement | Typical amount or condition | Purpose |
|---|---|---|
| Wheel-safe iron remover | 500-1,000 ml | Dissolves reactive iron fallout |
| pH-neutral wheel or car shampoo | 30-60 ml per 10 L water | Removes ordinary road film |
| Wheel brushes | 2-3 sizes | Reaches spokes, barrels, and lug recesses |
| Clay towel or clay bar | 1 piece plus lubricant | Removes bonded surface contamination |
| Panel-prep spray or IPA | 250-500 ml | Removes oils and polishing residue |
| Microfiber towels | 8-12 towels, 300-500 GSM | Drying, leveling, and final wipe-off |
| Protection product | 1 wax, sealant, or coating | Forms the sacrificial barrier |
| Work conditions | 15-30°C, shade, dry air | Slows premature flash and curing |
Use wheel stands or remove the wheels if you need complete barrel coverage. Never place hands inside a wheel near a vehicle that is unsupported by correctly rated axle stands.
How to Protect Wheels From Brake Dust Step by Step
Step 1: Wash and Iron-Decontaminate Cool Wheels
Park the vehicle in shade and wait until the wheel and brake assembly are cool to the touch. Rinse loose grit from the wheel, apply a wheel-safe iron remover according to its label, allow the stated dwell time, agitate with dedicated brushes, and rinse thoroughly.
Many iron removers change color as they react with ferrous contamination. The color change is a reaction indicator, not proof that every contaminant has dissolved. Do not allow the product to dry, and do not use an iron remover on a hot surface.
Clean one wheel at a time. Start with the inner barrel, then the rear face of the spokes, the front face, lug recesses, and valve-stem area. Use separate towels for wheels and paint because metallic grit transferred to a drying towel can scratch bodywork.
Success checkpoint: The wheel feels clean after rinsing, with no visible brown or purple-reactive deposits.
Common mistake: Using a strong cleaner at full strength because the wheel looks heavily soiled. Product strength does not replace dwell-time control and can stain sensitive finishes.
Step 2: Remove Remaining Bonded Contamination
Run a clean, wet fingertip inside a thin plastic bag over the wheel surface. If the surface feels rough after washing, use a clay bar or clay towel with dedicated lubricant on small sections.
Use light pressure and straight passes. Clay only until the section feels smooth, then wipe it dry. Folding a clay bar frequently prevents one contaminated face from dragging abrasive particles across the entire wheel.
Claying is not always necessary. A well-maintained wheel that feels smooth after chemical cleaning can proceed to preparation. Excessive claying can create fine marring on soft paint, polished aluminum, or delicate clear coat.
Success checkpoint: The surface feels consistently smooth through the plastic-bag test.
Common mistake: Claying a dry surface or using shampoo water as insufficient lubricant. Friction can mar the finish and create more correction work.
Step 3: Inspect and Correct the Wheel Finish
Inspect the wheel under bright, indirect light before applying protection. Look for clear-coat failure, white oxidation, curb rash, deep chips, powder-coat lifting, lacquer peeling, and embedded tar.
Protection does not repair these defects. A coating can preserve a stable finish, but it can also make an existing high spot or stain more difficult to remove. If the wheel has exposed bare aluminum, confirm product compatibility before using an acidic cleaner, polish, or coating.
Light surface staining may respond to a wheel-safe polish. Severe clear-coat failure requires refinishing rather than chemical sealing. Photographing each wheel before correction helps distinguish later damage from pre-existing damage.
Success checkpoint: The finish is stable, uniform, and free from loose coating or visible oily residue.
Common mistake: Treating peeling clear coat as contamination. Polishing or coating unstable lacquer will not restore adhesion.
Step 4: Strip Oils and Prepare the Surface
After the wheel dries, wipe the protected area with the product maker’s panel-prep spray. A diluted IPA wipe can work on many painted and clear-coated wheels, but the concentration and compatibility must be verified first.
A practical starting range is 50% IPA with distilled water for ordinary residue removal, provided the wheel manufacturer and coating instructions permit it. Stronger alcohol is not automatically better. On sensitive finishes, an approved panel wipe is safer than improvising a solvent mixture.
Use a short-pile microfiber towel for the first wipe and a fresh towel for the final inspection. Fold towels into quarters and change faces frequently. Any silicone, tire dressing, wax, or detergent film left behind can create uneven bonding.
Success checkpoint: The surface squeaks lightly under a clean towel and shows no rainbow film or smears.
Common mistake: Applying protection immediately after washing without removing tire-dressing overspray and polishing oils.
Step 5: Apply, Level, and Cure the Protection
Apply a thin layer to one wheel section at a time. For wax, use a small foam applicator; for spray sealant, apply one or two sprays to the towel rather than flooding the wheel; for ceramic coating, follow the manufacturer’s panel size and flash instructions.
Most coatings require leveling within a short window that changes with temperature and humidity. Inspect from several angles for rainbowing or high spots. Use a second clean microfiber to level the residue before it hardens.
Keep newly coated wheels dry for the stated cure period. A typical consumer ceramic coating needs 12-24 hours without rain, washing, or road spray, while some formulations require longer. Do not assume a garage is dry enough if condensation forms overnight.
Success checkpoint: The finish is visually uniform, residue-free, and evenly hydrophobic after curing.
Common mistake: Applying too much product. Excess material increases streaking and does not create proportionally thicker protection.
How Should You Maintain Protected Wheels?
Wash protected wheels every 1-2 weeks in normal use and weekly during winter, high-mileage commuting, or repeated wet driving. Rinse first, use pH-neutral car shampoo, agitate with soft dedicated tools, and dry the wheel before mineral deposits form.
Clean the wheel barrel as far as practical. Dust hidden behind spokes can remain damp against the finish even when the wheel face looks clean. A pressure washer can help with rinsing, but keep the nozzle at least 30-45 cm from tire valves, wheel weights, coating edges, and damaged lacquer.
| Maintenance condition | Cleaning interval | Product choice | Inspection trigger |
|---|---|---|---|
| Dry summer commuting | 14 days | pH-neutral shampoo | Visible gray film |
| Wet winter roads | 7 days | Shampoo plus occasional iron remover | Salt residue or brown specks |
| Track use | Same day after cooling | Mild shampoo, then iron remover as needed | Heat-baked dust |
| Stored show vehicle | 30-60 days | Rinseless or gentle wash | Loss of beading |
| Coating near end of life | 7-14 days | Coating-safe cleaner | Water no longer sheets or beads |
Avoid routine use of hydrofluoric-acid cleaners, strong wheel acids, and highly alkaline degreasers unless a trained technician has confirmed that the wheel finish can tolerate them. Even acid-free products can damage a finish when allowed to dry or used at excessive concentration.
Do not judge protection only by beading. Oils and traffic film can temporarily flatten water behavior, while a coating may still provide chemical resistance. Cleaning response, surface slickness, and the manufacturer’s expected service interval provide better evidence.
Does Changing Brake Pads Reduce Brake Dust?
Changing brake pads can reduce visible dust, but the result depends on the pad compound, rotor pairing, vehicle weight, driving style, and required friction performance. Low-dust ceramic formulations often produce lighter-colored residue, yet they are not dust-free and may not suit every vehicle or driving condition.
Follow the vehicle manufacturer’s friction-material specification. The Federal Motor Vehicle Safety Standards, including FMVSS 135 for light-vehicle brake systems, concern braking performance rather than cosmetic dust output. A pad selected only for low dust can create unacceptable compromises in cold bite, noise, wear, or high-temperature performance.
| Brake-pad choice | Typical visible dust | Heat-use suitability | Main trade-off |
|---|---|---|---|
| Original-equipment semi-metallic | Medium to high | Daily and many utility vehicles | Strong bite with darker residue |
| Low-dust ceramic street pad | Low to medium | Normal street driving | Compatibility and cold-performance limits |
| Performance street pad | Medium to high | Spirited road use | More noise and rotor wear possible |
| Track-oriented pad | High | Repeated high-temperature braking | Poor street manners when cold |
| Fleet or towing pad | Medium to high | Heavy loads and long descents | Cosmetic cleanliness is secondary |
A pad change should address braking needs first. Wheel protection and timely washing are safer cosmetic controls than replacing a correctly specified pad solely to change dust color.
Which Wheel Finishes Need Special Treatment?
Painted and clear-coated alloy wheels are the easiest candidates for a wheel-specific sealant or ceramic coating. Chrome, polished aluminum, anodized surfaces, powder coating, and matte finishes require a test spot because chemical and abrasive tolerance differs substantially.
Matte wheels should not receive gloss-enhancing waxes or polishes unless the finish manufacturer explicitly approves them. Products containing fillers can create uneven sheen. Chrome can stain from aggressive acids, while bare polished aluminum can oxidize if its protective layer is compromised.
| Wheel finish | Usually suitable | Avoid or verify first | Test-spot location |
|---|---|---|---|
| Gloss painted alloy | Polymer sealant, ceramic coating | Strong acid, abrasive pads | Inner spoke |
| Clear-coated aluminum | Sealant, wheel wax, coating | Metal polish without inspection | Barrel edge |
| Matte paint | Matte-safe sealant | Gloss wax, polishing compound | Rear spoke |
| Chrome-plated wheel | Chrome-safe sealant | Unverified acid or alkaline cleaner | Lower barrel |
| Bare polished aluminum | Manufacturer-approved sealant | Water left to dry, harsh iron remover | Hidden barrel section |
| Powder-coated wheel | Coating-compatible sealant | Solvent-heavy products | Inside spoke |
A test spot takes five minutes and can prevent an expensive refinishing decision. If the test area changes gloss, color, or texture, stop and use a product approved for that finish.
Common Mistakes and How to Fix Them
Applying Protection Over Brake Dust
Contamination under a sealant can remain bonded and become harder to remove. Strip the product, chemically decontaminate the wheel, clay only if necessary, and reapply on a residue-free surface.
Working on Hot Wheels
Heat accelerates evaporation and shortens the product’s working time. Move the vehicle into shade, wait until the wheel is cool, and work on one wheel at a time.
Using Too Much Product
Heavy application increases streaking and wastes material without delivering a proportionally thicker film. Remove excess while still workable, then apply a thinner second layer only if the product instructions permit it.
Letting Cleaner Dry
Dried cleaner can leave stains or mineral marks, particularly on chrome, bare aluminum, and damaged clear coat. Re-wet the area, rinse thoroughly, and use a manufacturer-approved neutralizer if the label specifies one.
Using the Same Brush on Wheels and Paint
Metallic particles from wheels can scratch painted panels. Keep wheel brushes, buckets, wash mitts, and drying towels separate from paint-care equipment.
Coating an Unstable Finish
A ceramic coating cannot bond reliably to peeling clear coat or loose powder coat. Refinish the wheel first, then protect the restored surface after the required paint or powder-coat cure period.
How Much Does Professional Wheel Protection Cost?
Professional wheel protection typically costs $150-$500 for four mounted wheels and approximately $400-$1,000 when wheels are removed, deeply decontaminated, corrected, and coated on both faces. Regional labor rates, wheel size, finish condition, and coating brand create substantial variation.
| Service level | Typical price for four wheels | Typical time | Included work |
|---|---|---|---|
| Mounted spray sealant | $50-$150 | 1-2 hours | Wash, dry, seal face |
| Mounted ceramic coating | $150-$500 | 4-8 hours | Decontamination, prep, face coating |
| Removed wheel coating | $400-$1,000 | 1-2 days | Barrel access, correction, cure |
| Wheel refinishing plus coating | $800-$2,000 | 3-7 days | Repair, repaint or powder coat, protection |
Professional installation makes financial sense when wheels are expensive, intricate, heavily contaminated, or difficult to remove safely. DIY spray sealant is usually the better value when the wheels are sound and the owner can wash them regularly.
The Bottom Line
The most reliable way to protect wheels from brake dust is a maintenance system, not a single product. Cool the wheels, remove iron and bonded residue, verify the finish, strip oils, apply a thin wheel-safe barrier, and wash before contamination bakes on.
For most daily drivers, a polymer or SiO2 spray sealant offers the best balance of cost, application time, and durability. Choose ceramic protection for high-value wheels or demanding maintenance schedules, and remember that no wax, sealant, coating, or brake pad eliminates brake dust completely.
Frequently Asked Questions
Can Brake Dust Permanently Damage Alloy Wheels?
Brake dust can permanently stain or etch alloy wheels when it remains attached with moisture, salt, and heat. Damage is more likely after clear-coat failure, repeated neglect, or exposure to aggressive cleaners. A coating reduces adhesion and simplifies washing, but it cannot reverse existing oxidation, peeling lacquer, or deep pitting.
Are Ceramic Brake Pads Completely Dust-Free?
Ceramic brake pads are not dust-free. Many produce less visible or lighter-colored residue than some semi-metallic pads, but dust output varies by formulation, rotor condition, vehicle weight, and driving style. Use the vehicle maker’s approved pad specification, because cosmetic dust reduction should not override braking performance or warranty requirements.
Can You Protect Wheels Without Removing Them?
You can protect the visible faces of mounted wheels without removing them, but barrel coverage will be incomplete and access around spokes will be limited. Removing wheels allows better cleaning, correction, and coating coverage, especially on intricate wheels. Never work under a vehicle supported only by a jack.
How Often Should You Reapply Wheel Sealant?
Reapply a spray sealant every 2-6 months under typical conditions, or sooner when cleaning becomes harder and water behavior changes consistently. Winter salt, strong detergents, frequent highway mileage, and repeated high-temperature braking shorten service life. Follow the product label rather than relying on beading alone.
Is Wheel Wax Better Than Ceramic Coating?
Wheel wax is cheaper and easier to remove or renew, while ceramic coating generally lasts longer and tolerates stronger maintenance chemicals. Wax suits low-mileage or show vehicles; ceramic suits owners prioritizing durability and reduced cleaning effort. Neither option prevents brake dust generation or protects a failing wheel finish.
What Removes Baked-On Brake Dust?
A wheel-safe iron remover can loosen ferrous deposits, while shampoo removes road film and clay removes remaining bonded contamination. Severe baked-on dust may require repeated chemical treatment, mechanical correction, or professional refinishing. Avoid scraping with metal tools, abrasive household pads, or unverified acid cleaners because those methods can create permanent finish damage.


