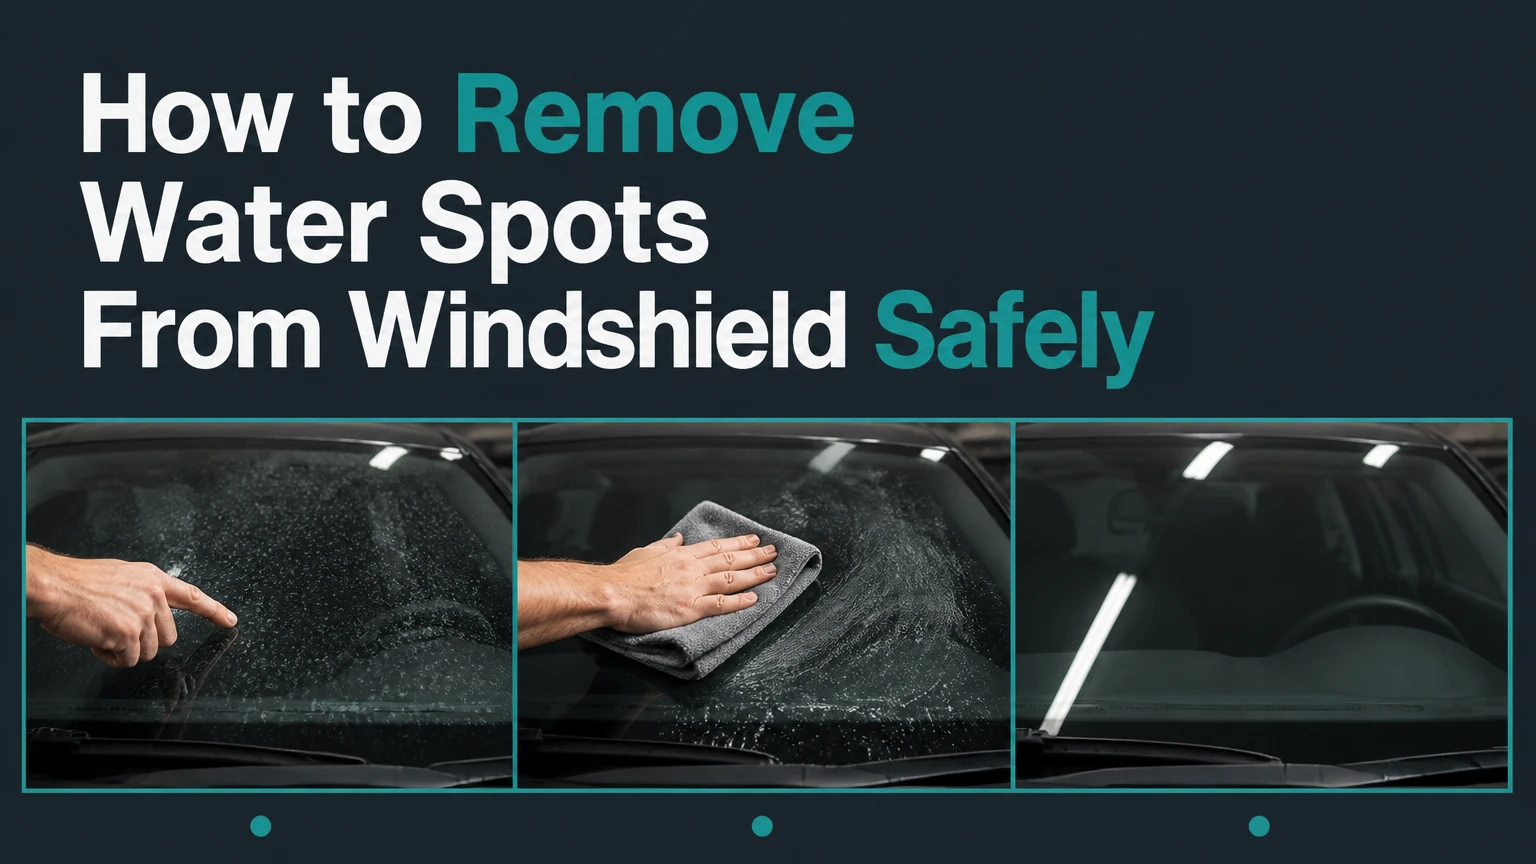
To remove water spots from a windshield, wash and dry the glass, dissolve fresh mineral deposits with a 1:1 mixture of distilled white vinegar and distilled water, then rinse thoroughly. If marks remain visible when the glass is wet, they are likely etched and require a dedicated glass polish or professional correction rather than more acid.
Key Facts at a Glance
Fresh mineral deposits usually respond to a 1:1 vinegar-and-distilled-water treatment within 5 minutes.
Water spots that remain visible on wet glass are probably etched below the surface.
Household abrasives, kitchen scouring pads, and contaminated clay can scratch automotive glass.
A chemical water-spot remover can damage rubber, plastic, paint, or existing glass coatings if it dries.
Cerium oxide can reduce light etching, but aggressive polishing can create optical distortion.
Drying the windshield after washing prevents most new mineral rings, especially in hard-water areas.
What Water Spots Are
Windshield water spots are mineral residues left when water evaporates from automotive glass. Tap water, well water, sprinkler spray, road spray, and acid rain can leave calcium, magnesium, silica, and other dissolved solids behind as pale rings or cloudy patches.
The residue is usually above the glass surface at first. Mineral deposits feel slightly rough when a clean fingertip or plastic bag moves across the dry windshield. A separate problem occurs when contaminants chemically alter the glass surface, creating shallow etching that looks like a stain but cannot be wiped away.
Automotive glass is manufactured as a smooth, nonporous material. The common explanation that minerals sink into “microscopic pores” and form strong ionic bonds with the glass is too broad for normal windshield care. Deposits adhere to surface irregularities, while prolonged heat, ultraviolet exposure, alkaline residue, and acidic contamination can damage the surface itself.
Are Water Spots Dangerous?
Water spots become a safety concern when they scatter headlights or streetlights across the driver’s field of view. Heavy spotting can create glare, halos, and wiper streaks, particularly at night or when the windshield is wet.
A few superficial rings do not usually weaken a windshield. Pitting, deep scratches, cracks, and severe etching are different because they can impair optical clarity and may justify professional assessment or glass replacement.
Do not polish a windshield aggressively merely to improve appearance. The driver’s primary viewing area requires consistent optical clarity, not simply a uniformly shiny surface.
How Do You Diagnose the Windshield Damage?
The wet-glass test distinguishes removable mineral residue from permanent etching. Clean a small area, dry it, inspect it under angled light, and then mist it with water; deposits that disappear while wet but return after drying are usually surface residue, while marks that remain visible through the water film are likely etched.
Use this sequence before choosing a chemical or abrasive:
- Run a clean fingertip over the dry glass. Roughness suggests mineral scale or bonded contamination.
- Wipe with a fresh glass towel. Oily smears that move across the surface indicate film, not water spots.
- Wet a test area. If the mark vanishes completely, try chemical removal first.
- Inspect through the wet area at night or under a bright LED. Persistent halos indicate etching, pitting, or scratches.
- Check the wiper path. Uniform marks inside the blade sweep may involve worn blades or transferred residue rather than water alone.
| Appearance or feel | Most likely cause | First treatment | Escalation point |
|---|---|---|---|
| White rings, rough texture | Fresh calcium or magnesium deposit | Vinegar solution | Dedicated water-spot remover |
| Smooth haze, oily smears | Road film, silicone, or interior vapors | Automotive glass cleaner | Isopropyl alcohol spot test |
| Marks remain on wet glass | Mineral etching or pitting | Glass polish test | Professional polishing or replacement |
| Horizontal repeating streaks | Wiper contamination or worn rubber | Clean or replace blades | Inspect arm pressure and glass |
| Rainbow sheen near edges | Coating, adhesive, or chemical residue | Product-specific cleaning | Glass professional inspection |
| Tiny dark craters | Road pitting or sand impact | No chemical cure | Evaluate visibility and replacement |
What Supplies Do You Need?
A basic removal job requires car shampoo, two clean microfiber towels, distilled water, distilled white vinegar, a spray bottle, and masking tape. A moderate job may also require a dedicated automotive water-spot remover, nitrile gloves, eye protection, and a separate rinse towel.
Prepare the vehicle in shade with the windshield below approximately 90°F (32°C). Hot glass accelerates evaporation and makes dwell times unreliable. Never work on a windshield that is freezing, visibly cracked, or coated with loose grit.
| Supply | Typical quantity | Typical cost | Purpose |
|---|---|---|---|
| Car shampoo | 15-30 milliliters | $1-$3 per wash | Removes loose road film |
| Distilled water | 1-2 liters | $1-$3 | Limits new mineral residue |
| White vinegar | 250-500 milliliters | $2-$5 | Dissolves light alkaline scale |
| Microfiber towels | 3-5 towels | $8-$20 | Washing, wiping, and drying |
| Automotive spot remover | 100-250 milliliters | $12-$25 | Treats heavier mineral deposits |
| Glass polish and felt pad | 100-250 grams | $20-$45 | Reduces light etching |
| Masking tape and gloves | 1 roll, 1 pair | $8-$15 | Protects trim and skin |
How to Remove Water Spots From Windshield
A safe windshield treatment uses the mildest method that matches the damage: wash first, test vinegar on fresh deposits, move to a labeled automotive remover for stubborn scale, and reserve cerium-oxide polishing for genuine etching. The complete DIY process normally takes 20-45 minutes, excluding machine polishing.
Step 1: Wash Away Loose Contamination
Rinse the windshield with clean water, apply diluted car shampoo, and wash with a clean microfiber mitt or towel. Use straight passes rather than circular scrubbing, because circular motion can spread gritty particles across the glass.
Rinse until no soap remains. Dry immediately with a dedicated glass towel or a clean, short-pile microfiber towel. Do not use the same towel that cleaned tires, wheels, engine parts, or painted lower panels.
You’ll know it worked when: the glass feels clean and does not drag under a dry microfiber towel.
Common mistake: treating mineral rings before removing sand and road grit. Grit trapped under a towel can scratch the windshield.
Step 2: Protect Surrounding Materials
Lower the windshield wipers away from the glass and cover nearby painted edges, rubber seals, plastic trim, washer-nozzle areas, and camera housings with automotive masking tape. Do not allow acidic products to run into the cowl or remain on black trim.
Modern vehicles may place forward-facing cameras, rain sensors, or heating elements near the windshield. Keep liquids away from exposed electrical connectors and follow the vehicle manufacturer’s instructions if a camera calibration area is marked.
You’ll know it worked when: the treatment area is exposed and every vulnerable edge has a visible barrier.
Common mistake: assuming a product labeled safe for glass is safe for rubber, paint, ceramic coatings, or plastic.
Step 3: Treat Fresh Deposits With Vinegar
Mix 250 milliliters of distilled white vinegar with 250 milliliters of distilled water. Saturate a microfiber towel or spray the mixture onto a small section of cool glass, allow 2-5 minutes of contact time, and agitate gently before rinsing.
Do not let the solution dry. A towel laid flat over the area maintains contact more evenly than a light mist, especially on vertical glass. Use a second damp towel to remove the residue, then wash the windshield with car shampoo and dry it.
Test a corner first if the windshield has a hydrophobic coating, aftermarket film, printed markings, or nearby delicate trim. Vinegar is mild, but “safe for glass” does not mean safe for every surrounding material or coating.
You’ll know it worked when: rough rings disappear and the dry glass looks clear under angled light.
Common mistake: increasing acid strength or extending dwell time after a failed test. Failure usually indicates etching, not a need for stronger vinegar.
Step 4: Use an Automotive Water-Spot Remover
Apply a dedicated automotive glass water-spot remover to a cool, dry test section according to its label. Many products use acidic chemistry and surfactants, but formulas differ, so the manufacturer’s dwell time and surface restrictions override generic instructions.
Work in sections of approximately 1 square foot. Apply with a microfiber applicator, keep the surface wet for the specified period, agitate lightly, and rinse with plenty of water before the product dries. Repeat once only after inspecting the result.
Avoid mixing acidic cleaners with bleach, alkaline degreasers, or other chemicals. Wear gloves and eye protection, provide ventilation, and keep the product away from windshield washer jets, wiper rubber, paint, and unprotected metal.
You’ll know it worked when: the glass becomes smooth and the mineral outline no longer reappears after drying.
Common mistake: using a household bathroom limescale cleaner without checking its safety data. Automotive glass products are easier to control around vehicle materials.
Step 5: Polish Light Etching With Cerium Oxide
Cerium oxide polishing is the appropriate next step when water spots remain visible on wet glass after chemical cleaning. Mix cerium oxide powder with water to a yogurt-like paste, use a felt or rayon glass pad, and polish a small 12-by-12-inch test area while keeping the glass cool and evenly wet.
A dual-action polisher is generally easier to control than a rotary machine. Use the lowest effective speed recommended by the pad and tool manufacturer, keep the pad flat, use overlapping passes, and inspect after each short cycle. Do not treat a fixed 1,500-2,000 RPM range as universal because machine gearing, pad diameter, pressure, and tool type change the actual cutting behavior.
Polishing removes a minute amount of glass. Excessive pressure or prolonged work in one place can create haze, heat, uneven correction, or optical distortion. Stop if the test area looks wavy, develops a new halo, or requires aggressive pressure.
You’ll know it worked when: the test section has less glare and matches the surrounding glass without visible distortion.
Common mistake: trying to remove deep pitting with repeated polishing. Pits are voids in the glass, and removing enough surrounding glass to erase them can compromise optical quality.
Step 6: Final-Rinse and Inspect
Rinse the windshield with distilled or low-mineral water, wipe it with a clean glass towel, and inspect from the driver’s seat. Check both daylight and nighttime conditions if possible, because shallow haze may be more visible under oncoming headlights than under garage lighting.
Clean the wiper blades with diluted car shampoo and a separate towel. Replace blades that are cracked, hardened, torn, or older than roughly 6-12 months in demanding climates. A clean windshield cannot compensate for degraded rubber.
You’ll know it worked when: the wipers move quietly, leave no repeating film, and the driver’s viewing area remains clear through a complete sweep.
Common mistake: applying a rain repellent before confirming that all residue has been removed. Sealants can lock in streaks and make later correction harder.
Which Windshield Water-Spot Removal Method Should You Choose?
The best method depends on whether the contamination is above the glass, chemically etched, or actually caused by pitting and wiper failure. Vinegar is the lowest-cost first test, a commercial remover is more practical for established mineral scale, and cerium oxide is reserved for shallow etching.
| Method | Typical time | Typical cost | Best condition | Main limitation |
|---|---|---|---|---|
| Vinegar solution | 15-30 minutes | $2-$5 | Fresh, light deposits | Ineffective on etching |
| Automotive remover | 20-45 minutes | $12-$25 | Moderate mineral crust | Can harm trim if dried |
| Clay bar with lubricant | 15-25 minutes | $10-$25 | Bonded surface particles | Does not repair etching |
| Hand glass polish | 30-90 minutes | $15-$40 | Very light surface marks | Slow on broad damage |
| Machine cerium oxide | 1-3 hours | $20-$150 | Shallow etching | Distortion risk |
| Professional correction | 2-4 hours | $150-$300 | Severe or widespread damage | Higher cost, appointment needed |
Can a Clay Bar Remove Windshield Water Spots?
A clay bar can remove bonded particles from a windshield, but it cannot dissolve mineral scale reliably or repair etching. Clay is most useful after washing when the glass feels gritty because of overspray, industrial fallout, or embedded road contamination.
Use a dedicated clay lubricant, a clean fine-grade bar, and very light pressure on a small test area. Fold the clay frequently, discard it if it touches the ground, and stop if the surface develops haze or fine scratches. Some automotive glass specialists avoid clay on windshields because trapped grit can create visible marring.
Chemical treatment is usually the better first choice for white mineral rings. Clay is a decontamination step, not a substitute for glass polishing.
Is Household Glass Cleaner Enough?
Household glass cleaner is useful for fingerprints, interior film, and light grease, but it is not a dependable treatment for calcium or magnesium deposits. Ammonia-free automotive glass cleaner is preferable around tint, rubber, dashboards, and aftermarket coatings.
Cleaners can also create a misleading result. An oily film may disappear temporarily, making the windshield appear clearer, while the underlying mineral outline remains. Always rinse and inspect the dry glass before deciding that water spots are gone.
What Should You Avoid When Removing Spots?
Avoid any method that introduces uncontrolled abrasion, concentrated acid, heat, or prolonged chemical contact. Windshield glass is hard, but sand and embedded mineral particles can scratch it, and polishing errors can produce optical defects that are more distracting than the original spots.
- Do not use green kitchen pads, powdered scouring cleaners, pumice, or coarse steel wool.
- Do not scrape the windshield with a razor unless the tool and technique are specifically approved for automotive glass and the surface is fully lubricated.
- Do not polish over loose dirt, chips, cracks, or a damaged windshield.
- Do not let vinegar or commercial remover dry on glass, trim, paint, or rubber.
- Do not work in direct sun or on hot glass.
- Do not combine acid products with bleach or alkaline chemicals.
- Do not repeatedly polish one small area until it looks different from the surrounding glass.
- Do not assume a ceramic coating marked “9H” makes glass scratch-proof or permanent.
One practitioner rule matters more than product strength: if a mark survives the wet-glass test, stop escalating chemical strength and diagnose the surface before polishing.
Why Do Water Spots Return After Cleaning?
Water spots return because dissolved minerals remain in the next water film, or because the first treatment removed residue without correcting the etched outline. A windshield that dries under sprinklers, hard tap water, road spray, or automatic car-wash water can redevelop rings within one or two drying cycles.
Use a clean drying towel after every wash. In severe hard-water areas, finish with a deionized-water rinse or dry the glass with distilled water. Avoid parking where lawn sprinklers reach the windshield, and clean washer nozzles if they leave a visible mineral trail.
A glass sealant or rain-repellent coating can reduce water retention and improve runoff, but it does not repair existing etching. Coating durability varies from several weeks for basic repellents to several months for more durable products, depending on preparation, weather, wiper use, and maintenance.
How Do You Fix Wiper Chatter After Removal?
Wiper chatter after spot removal usually results from contaminated or hardened blades, remaining cleaner residue, or a newly stripped surface with insufficient lubrication. Clean each blade with shampoo and water, rinse it, and replace it if the rubber leaves repeating lines or feels brittle.
Inspect the windshield again with a dry microfiber towel. If the towel catches on residue, repeat the final rinse rather than adding more repellent. Apply a compatible glass sealant only after the surface is clean and dry, and keep the product off the blade edges until the label permits normal use.
When Should You Hire a Professional or Replace the Glass?
Hire a glass-detailing professional when etching covers the driver’s viewing area, machine polishing would be your first polishing job, or the windshield contains camera hardware and complex coatings. Consider replacement when deep pitting, severe scratches, cracks, delamination, or persistent optical distortion remains after inspection.
| Situation | Recommended decision | Typical time | Typical cost |
|---|---|---|---|
| Fresh rings after one sprinkler event | DIY vinegar test | 20-30 minutes | $2-$5 |
| Widespread mineral crust | Dedicated remover or detailer | 30-90 minutes | $15-$100 |
| Light etched haze outside camera zone | Experienced glass polishing | 1-3 hours | $100-$250 |
| Heavy etching in driver sightline | Professional assessment | 2-4 hours | $150-$300 |
| Deep pits, crack, or optical wave | Replacement estimate | 1-3 hours | Vehicle and glass dependent |
Professional polishing cannot restore glass that has been deeply cratered without removing substantial surrounding material. Ask the technician whether the proposed service corrects mineral deposits, etching, pitting, or all three, and ask how optical quality will be checked afterward.
Situational Variations
How Do You Remove Spots From Tinted Windows?
Clean tinted side glass with an ammonia-free automotive cleaner and a soft microfiber towel, but treat factory windshield glass differently from aftermarket film. Never use vinegar, abrasive polish, clay, or a water-spot remover on interior tint film unless the film manufacturer explicitly approves the product.
Most windshield tint is a transparent film or a shade band placed on the interior surface. Water spots are normally on the exterior glass, so diagnose and treat the outside first. If haze lies beneath the glass surface, a professional tint installer should inspect the film.
What If the Windshield Has a Rain-Repellent Coating?
Use the coating manufacturer’s maintenance cleaner before applying acid or abrasive products. Vinegar and polishing can reduce or remove hydrophobic treatments, and some coatings require a specific reapplication procedure after decontamination.
If the coating is failing unevenly, the apparent “water spots” may be coating residue rather than minerals. Test a small corner and compare water behavior before treating the entire windshield.
What If Only Night Glare Remains?
Persistent night glare after the glass feels smooth can indicate shallow etching, fine scratches, pitting, interior film, or contaminated wiper blades. Inspect from inside and outside, clean the interior with an ammonia-free product, and compare the glare before attempting machine correction.
Do not use a strong acid simply because headlights remain visible. Acid dissolves deposits; it does not level damaged glass.
Frequently Asked Questions
Does WD-40 Remove Water Spots From a Windshield?
WD-40 can temporarily mask marks with an oily film, but it does not remove mineral deposits or repair etching. The residue can smear under wipers, reduce clarity, and contaminate rubber blades. Wash the windshield with automotive glass cleaner and use an appropriate mineral treatment instead.
Will Baking Soda Remove Hard-Water Spots?
Baking soda is mildly alkaline and mildly abrasive, so it is a poor choice for windshield mineral deposits. It will not reliably dissolve calcium scale, and rubbing its particles against contaminated glass can create fine scratches. Use diluted vinegar or a labeled automotive water-spot remover for surface deposits.
Can I Use Lemon Juice Instead of Vinegar?
Lemon juice contains citric acid and may loosen light mineral residue, but its concentration varies and its sugars or pulp can leave film. Distilled white vinegar diluted 1:1 with distilled water is more predictable. Rinse and wash the glass after either treatment.
How Often Should I Clean Water Spots?
Treat water spots as soon as they appear rather than on a fixed monthly schedule. In hard-water regions, drying the windshield after every wash may prevent new marks, while a vehicle exposed to sprinklers can need immediate treatment after a single event.
Do Water Spots Mean I Need a New Windshield?
Water spots alone rarely require windshield replacement. Replacement becomes more reasonable when deep pitting, cracks, severe scratches, delamination, or optical distortion remains in the driver’s viewing area and professional polishing cannot correct it safely.
The Bottom Line
The safest way to remove water spots from a windshield is to wash first, test a 1:1 vinegar solution on fresh deposits, and use a dedicated automotive remover for mineral scale that vinegar cannot dissolve. If marks remain visible on wet glass, treat them as etching and choose controlled cerium-oxide polishing or professional assessment instead of stronger chemicals. Dry the windshield after washing to prevent the problem from returning.


