Stop a power steering leak by identifying the fluid source, triaging the severity, and applying either a chemical seal swell or a mechanical replacement. This 8-step process covers diagnosis, additive application, component replacement, and system bleeding in 1 to 4 hours. Accuracy in locating the exact failure point determines your success.
Before You Start
- Time Required: 15 minutes (diagnostic/additive) to 4 hours (mechanical).
- Difficulty: Beginner (Additive) to Intermediate (Hose/Pump Replacement).
- Cost: $10 – $100+ (varies heavily by repair path).
- Tools & Materials:
- Clean cardboard (24×36 inches minimum)
- Brake cleaner or engine degreaser (1-2 cans)
- Turkey baster (dedicated for automotive use)
- Stop leak additive (Lucas, STP, or Prestone)
- OEM-specified power steering fluid (e.g., CHF 11S for Euro, Honda Genuine)
- Flare nut line wrenches (usually 10mm, 12mm, or 14mm)
- Bulk transmission hose (low-pressure return lines only) and worm-gear clamps
- Jack and safety jack stands
- Heavy-duty flashlight
- Prerequisite Skills: Ability to safely lift and support the vehicle on jack stands; basic understanding of engine bay layout.
Phase 1: Diagnose the Leak Location
Step 1: Clean the Engine Bay and Steering Components
Spray the power steering pump, hoses, and rack with engine degreaser, then wipe them completely dry. A dirty engine bay obscures the origin point of a leak, causing misdiagnosis. Apply the degreaser to a cold engine, let it sit for 5 minutes, scrub heavy grime with a nylon brush, and rinse with low-pressure water. Dry the components with a microfiber towel or compressed air.
- Checkpoint: You’ll know it worked when the power steering components are free of old fluid, dirt, and grease.
- Common Mistake: Leaving old fluid on the serpentine belt. Power steering fluid rapidly degrades rubber belts; if your belt is soaked, it must be replaced to prevent sudden snapping.
Step 2: Perform the Overnight Cardboard Test
Place a large piece of clean cardboard under the front of the vehicle and leave it parked overnight. Slide the cardboard directly beneath the engine block and front axle line. In the morning, check the cardboard for red or pink oily fluid spots. Note the exact location of the drip: spots near the front belts indicate a pump leak, center-rear spots indicate the rack and pinion, and outer spots indicate hoses or line connections.
- Checkpoint: You’ll know it worked when you have an isolated fluid spot on the cardboard mapping to a specific component directly above it.
- Common Mistake: Confusing power steering fluid with engine oil or coolant. Power steering fluid (and ATF) is characteristically red/pink and smells slightly burnt, unlike slick amber engine oil or sweet-smelling coolant.
Step 3: Conduct an Active Lock-to-Lock Pressure Test
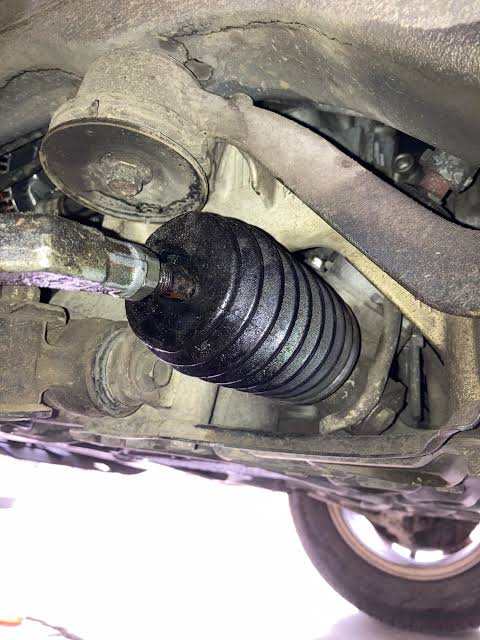
Have an assistant turn the steering wheel lock-to-lock while the engine is running to generate maximum hydraulic pressure and reveal active sprays. Ensure the vehicle is in park with the emergency brake engaged. Keep your hands, clothing, and flashlight clear of moving belts and cooling fans. Watch the pressure lines, pump shaft, and rack boots as the wheel hits full lock; the system reaches roughly 1,500 PSI, which will force fluid out of a compromised high-pressure hose.
- Checkpoint: You’ll know it worked when you visibly observe fluid weeping or spraying from a specific fitting, hose, or seal during maximum steering angle.
- Common Mistake: Holding the steering wheel at full lock for more than 5 seconds. Doing so overheats the fluid and severely damages the internal pump bypass valves.
Phase 2: Execute the Chemical Repair (For Minor Weeps)
Step 4: Extract the Old Fluid
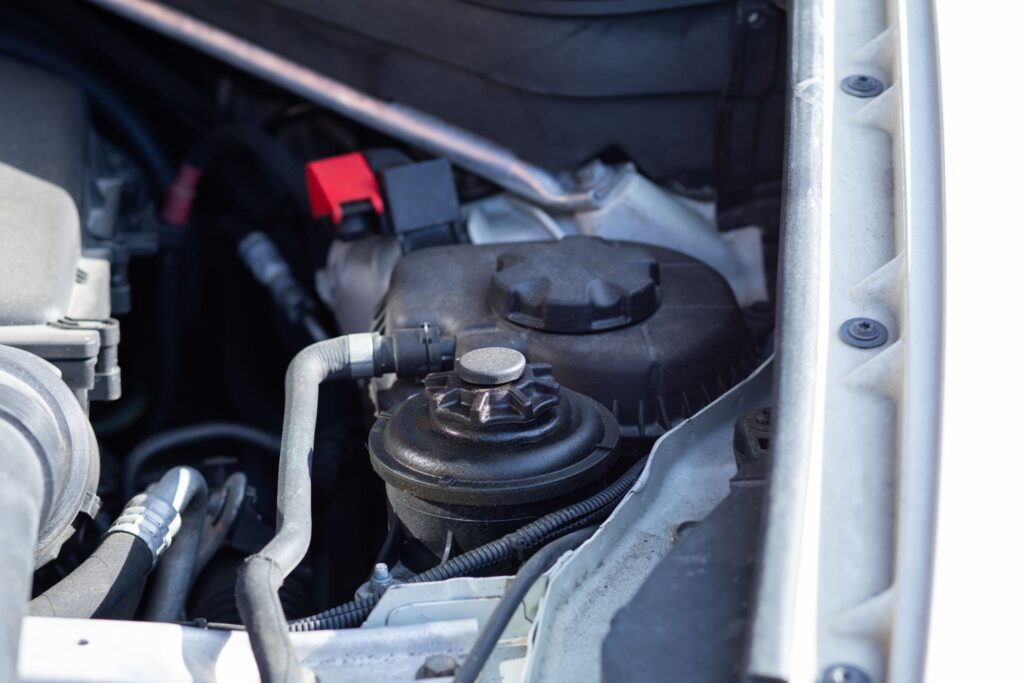
Use a clean turkey baster to remove 6 to 8 ounces of old power steering fluid from the reservoir. Locate the reservoir cap, which typically features a steering wheel icon. Insert the baster, draw out the fluid, and deposit it into a sealed drain pan. This prevents the system from overflowing and blowing out seals once you add the dense stop-leak chemical.
- Checkpoint: You’ll know it worked when the fluid level in the reservoir drops down to the “MIN” cold line on the dipstick or translucent housing.
- Common Mistake: Using a contaminated turkey baster or siphoning tool. Introducing foreign dirt or engine oil into the power steering system will quickly score and destroy the delicate pump vanes.
Step 5: Add the Stop Leak Treatment
Pour the power steering stop leak additive directly into the reservoir until the fluid reaches the “MAX” cold line. Use a funnel to prevent spilling onto hot exhaust components. Once filled, reinstall the cap securely and drive the vehicle normally. Chemical formulas require between 100 and 300 miles of circulation and heat cycles to successfully soften, swell, and seal aged O-rings.
- Checkpoint: You’ll know it worked when minor seepage and pump whining disappear completely after 200 miles of normal driving.
- Common Mistake: Pouring generic stop leak into Honda, Acura, or European vehicles (BMW/Audi/VW). These systems require specific hydraulic fluids; chemical swelling agents will turn these specific seals to mush and destroy the pump.
Phase 3: Execute the Mechanical Repair (For Active Drips)
Step 6: Replace Low-Pressure Return Lines
Remove the old rubber return line by loosening the hose clamps and install a new section of bulk transmission hose. Place a catch pan beneath the vehicle to catch draining fluid. Slip the clamps off with pliers, twist the hose to break the seal, and pull it free. Cut the new hose to the exact matching length, push it fully onto the metal barbs, and tighten new worm-gear clamps to roughly 30 in-lbs of torque.
- Checkpoint: You’ll know it worked when the new hose is seated securely without crimps, and the clamps are tight but not cutting into the rubber jacket.
- Common Mistake: Using standard heater hose instead of transmission cooler/power steering hose. Heater hose cannot withstand hydraulic fluid and will dissolve from the inside out within weeks.
Step 7: Replace High-Pressure Hoses
Disconnect the threaded metal fittings of the high-pressure hose using a flare nut wrench to prevent stripping the hex heads. Break the 12mm or 14mm fittings loose, unbolt any intermediate support brackets holding the line to the chassis, and pull the hose assembly out. Install the new hose, ensuring the pre-installed O-rings are perfectly seated, and torque the fittings to the manufacturer’s specification (typically 25–30 ft-lbs).
- Checkpoint: You’ll know it worked when the new line routes exactly like the original, remaining entirely clear of the exhaust manifold and moving suspension parts.
- Common Mistake: Attempting to patch a high-pressure line with tape or epoxy. At 1,500 PSI, any patch will instantly blow off, creating a severe fire hazard if the atomized fluid hits the exhaust.
Step 8: Bleed the Power Steering System
Lift the front of the vehicle onto jack stands and cycle the steering wheel lock-to-lock 20 times with the engine off to purge trapped air. Top off the reservoir to the cold MAX line, leave the cap off, and turn the wheel slowly left to right. You will see large air bubbles rising in the reservoir. Start the engine, run it for 10 seconds, turn it off, and re-check the fluid level. Repeat this process until the fluid remains steady and free of foam.
- Checkpoint: You’ll know it worked when the steering feels smooth and the pump operates silently without whining or groaning under load.
- Common Mistake: Starting the engine before doing the manual bleed. This immediately sucks a massive air pocket into the pump, cavitating the fluid, creating microscopic metal shards, and turning a simple repair into a $1,500 full system replacement.
Common Mistakes and How to Fix Them
- Overfilling the Reservoir: Fluid expands dramatically when hot. If you fill to the brim while cold, the fluid will foam, spill out the cap, or blow out internal seals due to excess pressure. Fix: Immediately siphon out fluid using a baster until the level sits perfectly between the MIN and MAX hot marks.
- Ignoring a Whining Sound: A whining noise indicates the pump is starving for fluid or ingesting air. Driving even 5 miles like this ruins the internal pump bearings. Fix: Pull over immediately, check the fluid level, top it up, and visually hunt for the leak before proceeding.
- Stripping High-Pressure Fittings: Using a standard open-end wrench on hydraulic fittings rounds off the soft metal corners, making removal impossible. Fix: Use locking vice grips to carefully extract the ruined fitting, and purchase a quality set of flare nut (line) wrenches for the installation.
- Rebuilding a Leaking Rack and Pinion Yourself: While pump seal kits ($20) are viable DIY rebuilds, steering racks require specialized presses and precision alignment tools. A failed rebuild leads to sudden, catastrophic loss of steering. Fix: Replace the entire rack and pinion as a remanufactured unit rather than attempting an internal rebuild.
Variations for Different Situations
- The College Student / Tight Budget: If you have a slow weep from a seal, rely heavily on Lucas Power Steering Stop Leak. If a low-pressure return hose is actively leaking, bypass expensive OEM molded hoses and splice in standard 3/8-inch bulk transmission hose with generic clamps for roughly $20.
- The Long-Term Keeper: Skip chemical additives entirely. Swelling agents soften rubber to stop leaks temporarily but eventually turn seals into mush, triggering a much larger failure later. Drain the system and replace the specific leaking O-ring, pump, or hose with an OEM part.
- Electronic Power Steering (EPS): If your vehicle has an electric steering rack (common in cars built after 2012), there is no hydraulic fluid, pump, or hoses. If steering becomes heavy, do not look for a fluid leak. You must scan the OBD-II port for electrical fault codes related to the steering angle sensor or EPS motor.
How Long Does It Take / What Does It Cost
- Stop Leak Fluid Application: Takes 5 minutes and costs $10 – $20 for the bottle. Requires 100–300 miles of driving to take effect.
- Return Hose Replacement: Takes under 1 hour. DIY part costs $15 – $40. Professional replacement runs $100 – $200.
- Pressure Hose Replacement: Takes 1 to 2 hours due to difficult routing. DIY part costs $40 – $100. Professional replacement runs $250 – $450.
- Steering Pump Replacement: Takes 2 to 4 hours. DIY pump costs $80 – $200. Professional replacement runs $350 – $700.
- Rack and Pinion Replacement: Takes 4 to 8 hours. DIY part costs $200 – $600. Professional replacement runs $800 – $1,500+. Note: This repair always requires a follow-up wheel alignment ($100–$150).
Frequently Asked Questions
Can I drive with a power steering leak?
You can drive short distances if the leak is a minor weep and you keep the fluid topped off. If it is an active drip or spray, driving will run the pump dry, sending metal shards through the system and causing catastrophic steering failure.
What fluid do I use to top off my reservoir?
Always consult your owner’s manual. Most domestic and Asian vehicles use standard power steering fluid or Dexron ATF. However, Honda, Acura, and European vehicles (BMW, Audi, VW) require highly specific synthetic fluids like CHF 11S.
Why is my power steering fluid foaming?
Foaming indicates that air is entering the system, usually through a suction leak on the low-pressure return line or because the fluid level dropped too low. It can also occur if you overfill the system and it expands rapidly under engine heat.
Will a stop leak additive fix a cracked hose?
No. Stop leak chemicals are solely designed to soften and swell rubber O-rings and internal seals. They cannot bridge gaps, seal cracked plastic reservoirs, or withstand the 1,500 PSI blow-out force of a compromised high-pressure hose.
By following these targeted diagnosis and repair strategies, you can confidently determine how to stop a power steering leak while avoiding the costly pitfalls that sideline most beginners.


