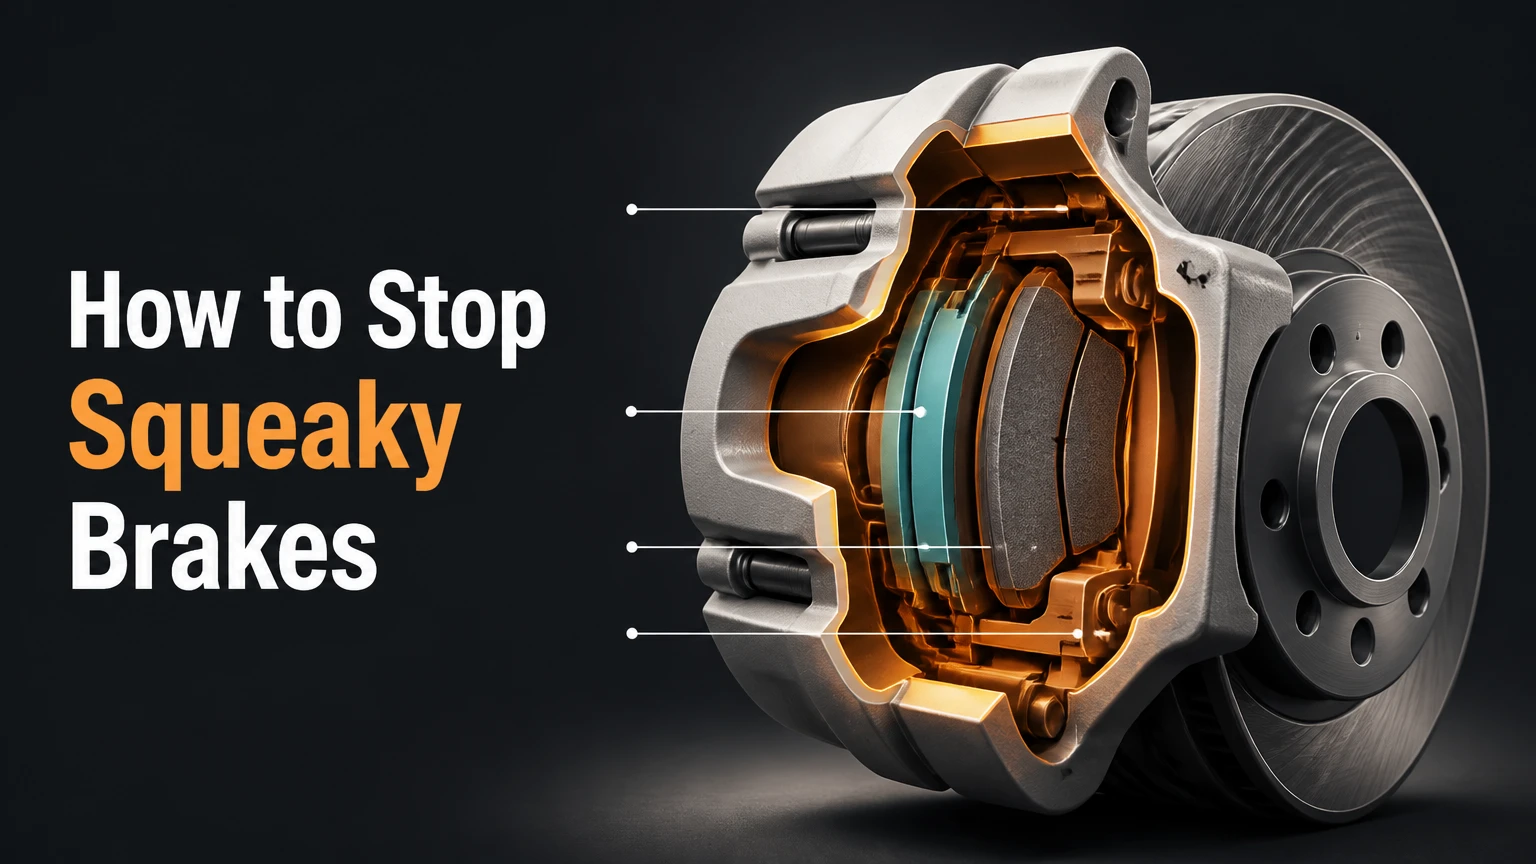
To stop squeaky brakes, first identify whether the noise comes from temporary moisture, worn brake pads, glazed friction material, contaminated rotors, or dry caliper hardware. Most lasting repairs require cleaning the brake assembly, servicing the slide pins and pad contact points, replacing worn hardware, and installing new pads or rotors when damage exceeds service limits.
Key Facts at a Glance
- Morning brake squeak that disappears after several stops usually comes from moisture or light surface rust.
- Persistent squealing during braking often indicates worn pads, glazed friction material, dry hardware, or improper installation.
- Grinding or harsh metal-on-metal noise requires immediate inspection and usually pad and rotor replacement.
- Brake lubricant belongs only on approved metal contact points, never on the rotor or pad friction surface.
- New brake pads can squeak when installed against grooved, overheated, contaminated, or improperly prepared rotors.
- A complete brake-noise repair may take 45 minutes to 2 hours per axle, depending on corrosion and component condition.
Why Do Brakes Squeak?
Brake squeak is a high-frequency vibration produced when brake pads, calipers, shims, clips, or rotors resonate during braking. The sound may begin at a tiny contact point, but the rotor, caliper bracket, and suspension components amplify the vibration until it becomes audible inside and outside the vehicle.
When the brake pedal is pressed, hydraulic pressure moves the caliper piston and clamps the brake pads against the rotating rotor. Friction slows the wheel, but the same friction can make a pad move microscopically against its clips, backing plate, piston, or bracket.
Correcting brake squeal therefore requires more than spraying the rotor. The repair must address the component that is vibrating or the condition that allows vibration to continue.
Common causes include:
- Overnight moisture or flash rust on the rotor.
- Brake pads worn down to their warning indicators.
- Pad friction material glazed by excessive heat.
- Dry, damaged, missing, or incorrectly installed hardware.
- Seized caliper slide pins.
- Oil, grease, brake fluid, or road contamination.
- Grooved, heat-spotted, warped, or excessively thin rotors.
- New pads installed without proper bedding.
- Pad material that naturally produces more noise.
- A backing plate or dust shield touching the rotor.
Diagnose the Brake Noise Before Repairing It
The correct repair depends on when the noise occurs, how long it lasts, and whether braking performance has changed. A brief morning squeak and a continuous metal-on-metal screech may sound related, but they require completely different responses.
| Noise pattern | Likely cause | Correct response | Driving risk |
| Squeak during the first 3-5 stops | Moisture or surface rust | Drive normally and monitor | Usually low |
| High-pitched squeal under light pressure | Pad vibration, glazing, or dry hardware | Inspect pads, clips, shims, and rotors | Moderate |
| Constant chirp without pressing the pedal | Dragging pad, bent shield, or seized slide pin | Inspect immediately | Moderate to high |
| Metal scraping during every stop | Worn-through pad or damaged rotor | Stop driving and repair | High |
| Squeak after pad replacement | Bedding, hardware, rotor finish, or installation problem | Reinspect the brake job | Moderate |
| Squeak with pulling or overheating | Sticking caliper or restricted brake hose | Stop and inspect | High |
| Rhythmic squeak once per wheel rotation | Rotor runout, shield contact, or localized damage | Inspect rotor and shield clearance | Moderate |
| Squeak only while reversing | Pad movement, moisture, or directional vibration | Inspect if persistent | Low to moderate |
Is Morning Brake Squeak Normal?
Morning brake squeak is often normal when humidity creates a thin oxidation layer on cast-iron rotors. The pads usually remove that layer within several normal stops.
The noise deserves inspection when it continues after the brakes warm up, returns throughout the day, or appears with vibration, pulling, weak braking, excessive pedal travel, or a burning smell.
What Does a Brake Wear Indicator Sound Like?
A brake wear indicator usually produces a sharp, repeating squeal when the pads reach their minimum usable thickness. The indicator is a small metal tab designed to contact the rotor before the friction material is completely gone.
Some indicators squeal only during braking. Others may touch the rotor while the wheel turns. Waiting until the sound becomes grinding can turn a pad replacement into a more expensive pad, rotor, and caliper repair.
Before You Start
Brake work affects a vehicle’s primary safety system. Do not disassemble the brakes unless you can lift the vehicle safely, identify the correct jacking points, use a torque wrench, and follow the manufacturer’s service procedure.
| Item | Typical requirement |
| Difficulty | Intermediate mechanical skill |
| Inspection time | 20-40 minutes |
| Cleaning and lubrication | 45-90 minutes per axle |
| Pad and rotor replacement | 1-2 hours per axle |
| Basic material cost | $10-$40 |
| Pads and hardware | $40-$150 per axle |
| Pads and rotors | $100-$350 per axle for parts |
| Professional service | Commonly $150-$600 per axle |
| Main tools | Floor jack, jack stands, sockets, torque wrench, piston tool |
| Consumables | Brake cleaner, shop towels, correct brake lubricant |
| Safety equipment | Eye protection, gloves, wheel chocks |
Check whether the vehicle uses an electronic parking brake before retracting rear caliper pistons. Many electronic parking brake systems must be placed into service mode with dashboard controls, a scan tool, or a manufacturer-specific procedure. Forcing the piston backward can damage the caliper motor.
How to Stop Squeaky Brakes Step by Step
Step 1: Test the Brakes in a Safe Area
Drive slowly in a quiet area and observe exactly when the squeak occurs. Test light, moderate, and firm braking without creating a traffic hazard.
Record whether the noise happens only when cold, only at low speed, while reversing, without touching the pedal, or during every stop. Also check for pulling, pulsation, weak braking, burning odor, or an illuminated brake warning light.
You will know the test is useful when you can connect the noise to a specific condition. Do not continue testing if the vehicle grinds, pulls severely, overheats a wheel, or loses braking force.
Step 2: Securely Lift the Vehicle
Park on firm, level ground. Apply the parking brake unless you are servicing the rear brakes and the procedure requires it released. Chock the wheels that will remain on the ground.
Loosen the lug nuts slightly before lifting. Raise the vehicle at an approved jacking point, support it with rated jack stands, and remove the wheel. Never rely on a hydraulic jack alone.
A stable vehicle should not shift when gently tested before work begins. Placing any part of the body beneath a vehicle supported only by a jack is unsafe.
Step 3: Inspect the Rotor and Pad Thickness
Inspect both the inner and outer brake pads because uneven wear may leave one pad thick while the other is nearly gone. Compare the remaining friction material with the manufacturer’s minimum specification.
Look for:
- Friction material below approximately 3 mm.
- Cracks, missing chunks, or separation from the backing plate.
- A polished, mirror-like pad surface.
- Deep rotor grooves.
- Blue or dark heat spots.
- Heavy rust on the braking surface.
- Fluid, oil, or grease contamination.
- A pronounced outer rotor lip.
- Uneven inner and outer pad wear.
A usable rotor should be above its stamped minimum thickness and free from severe cracking or structural damage. Rotor thickness, runout, and parallelism require appropriate measuring tools. Visual inspection alone cannot confirm every rotor is serviceable.
Step 4: Remove and Support the Caliper
Remove the caliper slide-pin bolts according to the vehicle’s service instructions. Lift the caliper away from the bracket without twisting or stretching the flexible brake hose.
Support the caliper with mechanic’s wire, a hook, or a strong bungee cord. Do not let it hang by the brake hose. A stretched or internally damaged hose may later restrict fluid return and cause brake drag.
The caliper should be supported securely with no load on the hose. Avoid pressing the brake pedal while the caliper is removed because the piston may extend too far.
Step 5: Clean the Brake Assembly
Use a brake-parts cleaner approved for automotive friction systems. Spray the rotor and accessible metal surfaces while preventing runoff from contacting painted parts, rubber components, or skin.
Remove loose brake dust and debris with lint-free towels or a suitable brush. Do not use oily household cleaners. Avoid blowing brake dust with compressed air because airborne particles are hazardous.
Brake cleaner can eliminate noise caused by loose dust or light residue. It cannot restore worn pads, repair grooved rotors, free seized hardware, or permanently correct glazed friction material.
You will know the parts are clean when the rotor dries without an oily film and the pad tracks are free of packed debris.
Step 6: Service the Caliper Slide Pins
Remove each slide pin and inspect it for rust, pitting, dried grease, bent surfaces, or damaged rubber boots. Clean reusable pins and replace parts that are corroded or damaged.
Apply a thin, even layer of lubricant specifically approved for caliper slide pins and compatible with rubber boots. Silicone-based or manufacturer-approved synthetic brake lubricants are commonly specified. General-purpose grease and copper anti-seize may swell rubber parts or become unsuitable under brake-system conditions.
Reinstall the pins and confirm that they move smoothly through their full travel. A binding pin can force one pad to remain against the rotor, creating heat, noise, uneven wear, and reduced fuel economy.
Step 7: Clean and Lubricate Pad Contact Points
Remove the pads and hardware clips. Clean rust and debris from the bracket lands where the pad ears slide. Excessive rust beneath stainless hardware can lift the clips and pinch the pads.
Install new clips when the old hardware is bent, corroded, weakened, or included with the replacement pad set. Apply only a very thin film of approved lubricant to specified metal-on-metal contact points, such as the pad ears and selected backing-plate areas.
Never apply lubricant to:
- The brake pad friction material.
- The rotor surface.
- Rubber friction components.
- Threaded fasteners unless the manufacturer specifies it.
- Wheel studs or lug nut seats.
The pads should move in their tracks without excessive looseness or binding. Too much lubricant attracts debris and can migrate onto the friction surface.
Step 8: Replace Glazed or Worn Brake Pads
Glazed pads often appear unusually smooth, shiny, hardened, or discolored. Mild glazing may sometimes be removed by a qualified technician, but replacement is usually more reliable when heat damage is extensive, pad thickness is low, or the friction material is cracked.
Replace pads as an axle set. Never replace only one pad or only one side of the axle. Use the correct pad shape, compound, shims, and hardware for the vehicle.
Lightly sanding a pad may temporarily change its surface, but it does not correct heat-damaged material, a sticking caliper, poor rotor condition, or an incorrect pad compound. Reusing a compromised pad often causes the squeak to return.
Step 9: Resurface or Replace Damaged Rotors
New brake pads need a flat, clean, compatible rotor surface. Installing flat pads against deeply grooved, heat-spotted, tapered, or distorted rotors can create immediate noise and uneven contact.
A rotor may be eligible for machining when it remains above the manufacturer’s minimum thickness after resurfacing and has no disqualifying damage. Replacement is more appropriate when the rotor is too thin, cracked, heavily corroded, badly scored, or affected by severe heat spots.
Clean rust from the wheel hub before installing the rotor. Debris trapped between the hub and rotor hat can create lateral runout, pedal pulsation, uneven pad transfer, and recurring noise.
Step 10: Reassemble and Torque Every Fastener
Retract the caliper piston using the correct tool and procedure. Monitor the brake-fluid reservoir because the fluid level may rise as the piston moves inward.
Reinstall the pads, hardware, caliper, and bolts. Tighten caliper fasteners and wheel lug nuts to the vehicle manufacturer’s torque specifications. Do not rely on guesswork or unrestricted impact-wrench force.
Before moving the vehicle, press the brake pedal repeatedly until it becomes firm. This seats the pads against the rotors. A soft pedal immediately after caliper service may result from piston retraction, but the vehicle must not be driven until normal pedal pressure returns.
Step 11: Bed In the Brake Pads
Brake bedding creates an even transfer layer between the pad and rotor. The correct procedure varies by pad manufacturer, so follow the instructions supplied with the brake components.
A common street-pad procedure uses several moderate decelerations from approximately 30-40 mph, followed by cooling while avoiding a complete stop with extremely hot brakes. Exact speeds and repetitions differ by product.
Improper bedding may create uneven deposits that feel like rotor warping and produce squeal or vibration. Avoid aggressive braking until the pads and rotors have completed the recommended break-in cycle.
Which Brake Pad Material Is Quietest?
Ceramic brake pads are generally the quietest common choice for everyday passenger vehicles. Semi-metallic pads usually tolerate more heat and heavy use, but they may create more noise and rotor wear.
| Pad material | Typical noise level | Heat performance | Best use | Main limitation |
| Ceramic | Low | Moderate to high | Daily commuting and low dust | Higher purchase cost |
| Semi-metallic | Moderate to high | High | Trucks, towing, performance use | More noise and rotor wear |
| Organic | Low to moderate | Low to moderate | Light-duty, budget use | Faster wear and more dust |
| Low-metallic NAO | Moderate | Moderate to high | Responsive street braking | More dust and possible squeal |
Pad material is only one factor. A premium ceramic pad can still squeak when installed with corroded clips, dry slide pins, contaminated rotors, missing shims, or poor bedding.
Common Mistakes and How to Fix Them
Applying Grease to the Pad Face
Grease on the friction material reduces braking and can permanently contaminate the pad. Replace heavily contaminated pads and clean or replace the rotor according to the product manufacturer’s procedure.
Lubricating Every Visible Surface
More lubricant does not produce quieter brakes. Excess material collects abrasive debris and may migrate onto the rotor. Remove the excess and apply only a paper-thin film at approved contact points.
Reusing Damaged Hardware
Flattened shims, corroded clips, and weakened springs cannot control pad movement correctly. Replace the hardware kit rather than bending old clips back into shape.
Installing New Pads on Bad Rotors
New pads will copy the grooves and uneven surface of a damaged rotor. Measure, machine, or replace the rotor before expecting a lasting noise correction.
Ignoring the Inner Brake Pad
A seized slide pin or piston may destroy the inner pad while the outer pad still looks usable. Inspect both pads on each wheel and compare wear across the axle.
Hanging the Caliper by the Hose
The brake hose is not a support cable. Replace any hose that becomes kinked, stretched, cracked, or internally restricted after improper handling.
How Much Does It Cost to Stop Squeaky Brakes?
A minor cleaning and lubrication service may cost less than $40 in materials, while professional pad and rotor replacement commonly costs several hundred dollars per axle. Vehicle size, electronic parking brake systems, rotor design, corrosion, labor rates, and parts quality affect the final price.
| Repair | Typical DIY parts cost | Typical shop cost | Typical time |
| Brake inspection and cleaning | $10-$30 | $80-$180 | 30-60 minutes |
| Hardware and slide-pin service | $15-$60 | $100-$250 | 45-90 minutes |
| Brake pad replacement | $40-$150 | $150-$350 per axle | 1-2 hours |
| Pads and rotors | $100-$350 | $300-$600 per axle | 1-2 hours |
| Caliper replacement | $80-$300 each | $250-$700 each | 1-3 hours |
| Brake hose replacement | $20-$100 | $150-$400 | 1-2 hours |
These ranges are typical estimates, not fixed quotes. Luxury vehicles, performance brake systems, heavy trucks, integrated wheel bearings, and severe corrosion may cost substantially more.
When Should You Stop Driving?
Stop driving when brake noise appears with grinding, weak braking, severe pulling, smoke, a burning smell, fluid leakage, an abnormally soft pedal, or a wheel that becomes much hotter than the others. These symptoms may indicate complete pad wear, a seized caliper, hydraulic failure, or severe rotor damage.
Arrange professional inspection when:
- The brake warning light remains on.
- The pedal reaches near the floor.
- The vehicle takes longer to stop.
- The steering wheel shakes strongly during braking.
- One wheel produces smoke or extreme heat.
- Brake fluid is visible near a wheel.
- The squeak changes into grinding.
- You cannot confirm correct fastener torque.
- An electronic parking brake cannot enter service mode.
Brake squeal alone is not always an emergency. Brake squeal combined with performance changes is a safety warning.
Situational Fixes
Squeaky Brakes After Rain
Drive cautiously and make several normal stops. Light oxidation should clear quickly. Persistent noise after the rotor surface is clean suggests another problem.
Squeaky Brakes at Low Speed
Low-speed squeal often occurs because light pedal pressure allows pad vibration. Inspect glazing, hardware tension, shims, slide pins, and rotor finish.
Squeaky Brakes After New Pads
Confirm the pads were bedded correctly, the rotor surfaces were prepared, the hardware was replaced, and the contact points were lubricated correctly. Also verify that the pads match the vehicle and intended use.
Squeaky Brakes While Reversing
Pads may shift slightly in their brackets when braking direction changes. Properly fitted clips and shims often reduce the noise. Morning moisture can make reverse squeal more noticeable.
Frequently Asked Questions
Can Brake Cleaner Stop Squeaky Brakes?
Brake cleaner can stop squeaking caused by loose dust, light residue, or minor surface contamination. It will not fix worn pads, seized slide pins, missing hardware, glazed friction material, or damaged rotors. Never treat cleaning spray as a substitute for removing the wheel and inspecting the complete brake assembly.
Can I Spray WD-40 on Squeaky Brakes?
No. WD-40 and similar petroleum products must not be applied to brake rotors, pads, drums, or shoes. Lubricating a friction surface can sharply reduce stopping force and contaminate the pads. Use only brake cleaner on friction surfaces and approved brake lubricant on designated metal contact points.
Will Squeaky Brakes Eventually Stop?
Temporary moisture-related squeak may stop after several brake applications. Noise caused by wear, glazing, seized components, or damaged hardware usually continues or worsens. Waiting for persistent squeal to disappear can allow a low-cost pad service to become a more expensive rotor, caliper, or hydraulic repair.
How Long Can I Drive With Squeaky Brakes?
There is no safe universal mileage limit because the cause determines the risk. A brief moisture squeak may be harmless, while a wear-indicator squeal means the pads are approaching replacement thickness. Inspect persistent noise promptly and stop driving immediately if the sound becomes grinding or braking performance changes.
Why Do My Brakes Squeak Even Though the Pads Are New?
New pads may squeak because of unprepared rotors, reused hardware, incorrect lubrication, poor bedding, incompatible pad material, rotor runout, or a sticking caliper. New friction material does not correct defects elsewhere in the assembly. The installation should be reinspected rather than assuming the pads need more time.
Are Ceramic Brake Pads Completely Silent?
No brake pad is guaranteed to remain silent in every condition. Ceramic pads generally produce less audible noise and dust during normal commuting, but they can still squeak when hardware is corroded, rotors are damaged, contact points are dry, or pad deposits become uneven.
Conclusion
The reliable way to learn how to stop squeaky brakes is to diagnose the timing and character of the noise before applying a repair. Clean the assembly, verify pad and rotor condition, service slide pins, replace damaged hardware, lubricate only approved contact points, and bed new friction components correctly.
Temporary moisture noise may disappear without repair. Persistent squealing, uneven wear, overheating, grinding, or reduced braking performance requires physical inspection. A quiet brake system depends on correct component condition and movement, not anti-squeal products alone.


