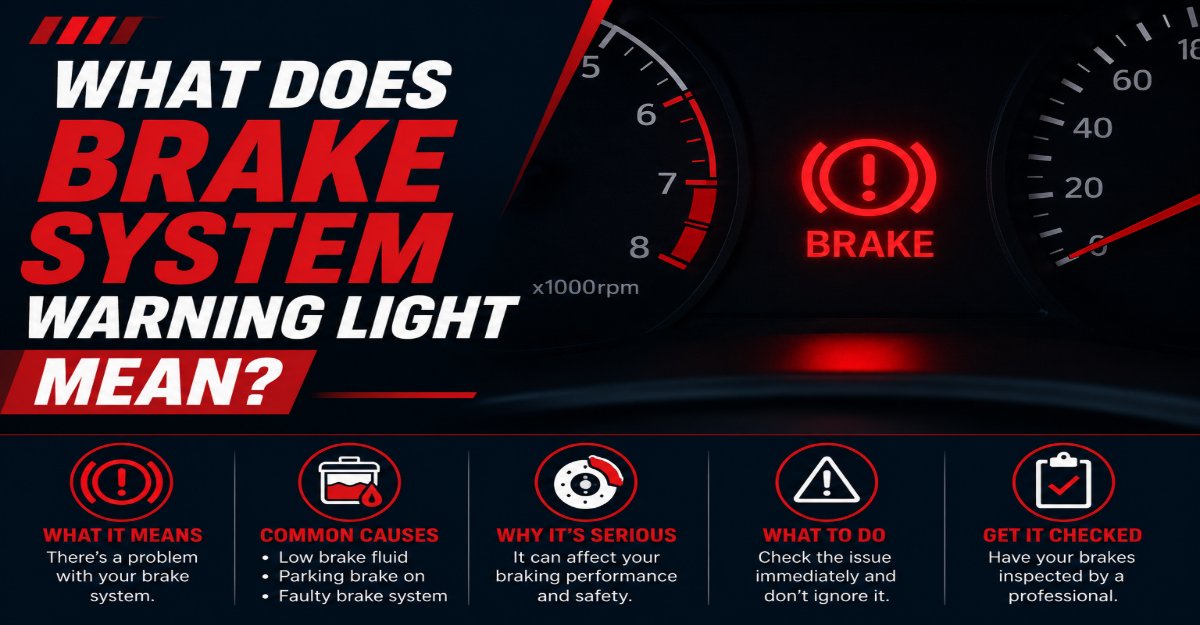
The brake system warning light means your vehicle has detected a critical failure in the hydraulic braking circuit, an engaged parking brake, or dangerously low brake fluid. Driving with this red indicator active risks total brake loss and requires immediate roadside investigation. You must pull over safely and inspect your vehicle to prevent catastrophic failure and potential accidents.
Key Facts At a Glance
- A solid red dashboard brake indicator requires an immediate stop and fluid inspection.
- Brake pads require replacement when the friction material drops below 3 millimeters in thickness.
- Mixing incompatible brake fluids will destroy internal rubber seals and cause system failure.
- Spongy brake pedals combined with full fluid reservoirs indicate an internal master cylinder leak.
- Typical automotive maintenance schedules require flushing brake fluid every 30,000-40,000 miles to remove accumulated moisture.
How Does the Hydraulic Brake System Trigger the Alert?
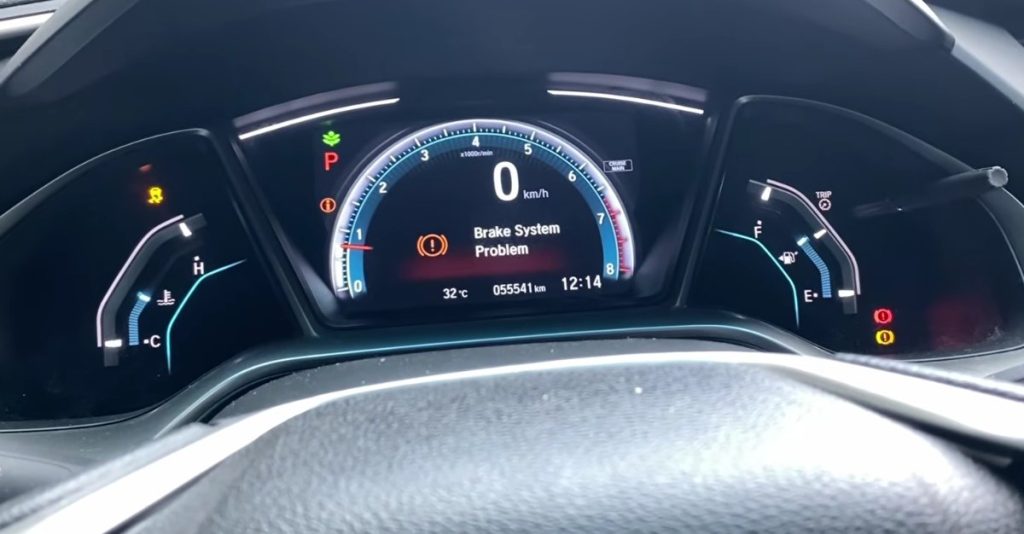
The brake warning system operates through a network of mechanical switches and fluid sensors communicating directly with your vehicle electronic control unit (ECU). The ECU constantly monitors the physical state of your braking components. When a sensor detects an anomaly, it grounds the electrical circuit. This closed circuit sends a signal through the controller area network (CAN bus) to illuminate the specific dashboard bulb or digital icon.
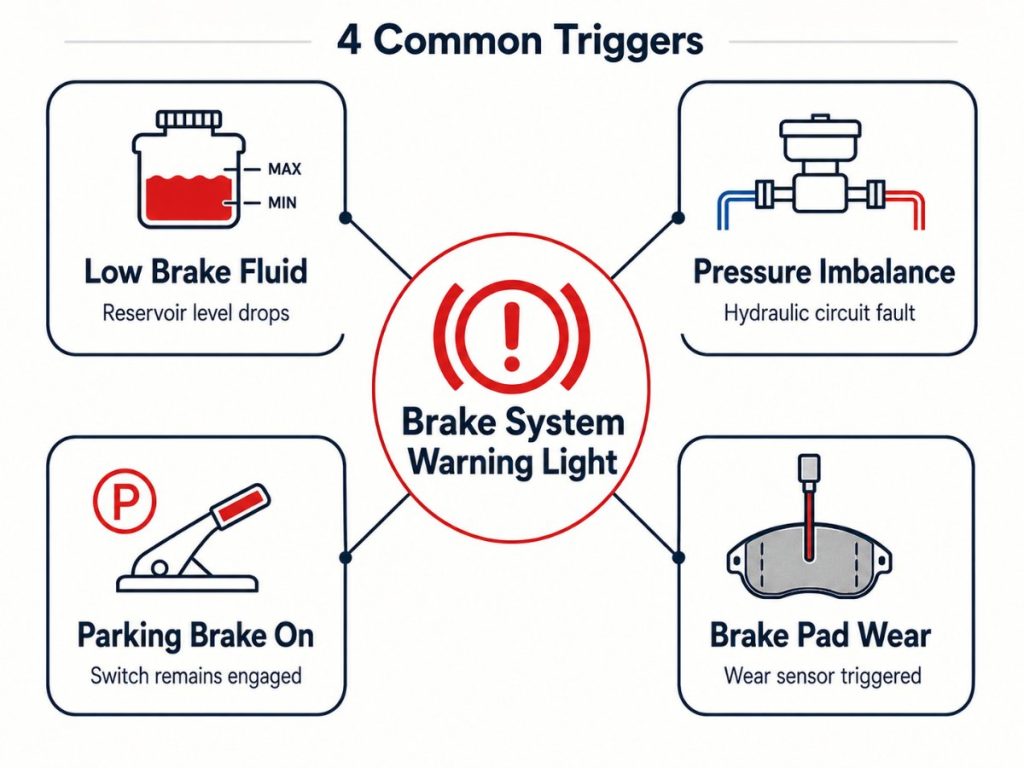
Four primary mechanisms trigger this dashboard alert
Brake Fluid Level Sensor Activation
A float switch sits inside the translucent master cylinder reservoir. This switch monitors the total volume of hydraulic fluid. As brake pads wear down over time, the caliper pistons extend outward to compensate. This extension pulls fluid from the reservoir down into the brake lines. If the fluid volume drops below the minimum threshold line, a magnetic contact closes the circuit and triggers the light.
Hydraulic Pressure Differential Switch
Modern vehicles use a dual-circuit master cylinder to split hydraulic pressure between the front and rear wheels. A pressure differential switch sits between these two distinct circuits. If a brake line rusts and bursts, that specific circuit loses hydraulic pressure entirely. The resulting pressure imbalance forces a central spool valve to shift toward the failed side. This physical movement grounds the warning light circuit.
Parking Brake Position Sensor
A simple mechanical or electronic switch sits near your handbrake lever or foot pedal assembly. Engaging the parking brake closes this switch. This reminds the driver that the rear wheels are mechanically locked. A misaligned or sticky switch will keep the warning light illuminated even after you release the brake handle.
Brake Pad Wear Indicators
Many European and high-end vehicles embed a fragile wire loop directly into the friction material of the brake pad. When the pad wears down to the critical 3-millimeter limit, the metal brake rotor grinds against this embedded wire. The friction severs the wire completely. This open electrical circuit instantly triggers the dashboard alert to signal that pad replacement is mandatory.
What Does Brake System Warning Light Mean for Immediate Safety?
If your dashboard illuminates while driving at speed, you must execute a strict safety sequence to evaluate your hydraulic integrity. Do not panic. A methodical approach prevents accidents and isolates the specific mechanical failure.
- Verify the Parking Brake Status: Ensure your handbrake lever or electronic parking brake button is fully released. Drivers frequently bump the lever accidentally.
- Test the Brake Pedal Resistance: Gently press the brake pedal with steady pressure. If the pedal feels firm and stops the car normally, your core hydraulics are likely intact. If the pedal feels spongy, sinks slowly to the floorboard, or requires frantic pumping to slow the vehicle, you have suffered a catastrophic hydraulic breach.
- Navigate to a Safe Location: Reduce your vehicle speed gradually using engine braking. Signal clearly and steer to the shoulder or a wide parking lot. Avoid sudden or aggressive braking unless absolutely necessary.
- Inspect the Master Cylinder: Turn off the engine. Open the hood and locate the brake fluid reservoir mounted near the firewall on the driver side. Look at the fluid level relative to the clearly marked minimum and maximum lines.
- Make the Final Towing Decision: If the fluid level is empty, do not drive the vehicle under any circumstances. Call a flatbed tow truck immediately. If the fluid is completely full but the pedal sinks to the floor, you have an internal master cylinder seal failure. You must also tow the vehicle. If the fluid is full and the pedal feels perfectly normal, you likely have a faulty parking brake switch and may drive cautiously to a local repair facility.
Which Dashboard Brake Symbols Should You Know?
Automakers use different colors and symbols to communicate the exact nature and severity of the braking fault. Understanding these visual cues helps you determine if the vehicle is safe to operate.
| Light Symbol / Type | Primary Meaning | System Involved | Critical Level |
|---|---|---|---|
| Standard Red (!) or “BRAKE” | Low fluid volume, hydraulic pressure loss, or engaged parking brake. | Main Hydraulic System | Extreme (Stop immediately) |
| Amber / Yellow (ABS) | Anti-lock Braking System module malfunction. | ABS Module / Wheel Speed Sensors | Moderate (Drive to shop) |
| Yellow (O) (Dotted Border) | Brake pads have worn down to their minimum safe thickness. | Mechanical Friction Pads | Low to Moderate (Schedule service) |
| Electric Parking Brake (P!) | Fault in the automatic parking brake actuator motor or wiring. | Electronic Parking Brake (EPB) | Moderate (May stick on/off) |
| Red (!) and Amber (ABS) Together | Critical failure of the Electronic Brakeforce Distribution (EBD). | Entire Braking Architecture | Extreme (Stop immediately) |
How Do You Troubleshoot a Persistent Brake Light?
Diagnosing a brake light requires isolating variables. Start with the simplest mechanical switches before assuming a major hydraulic failure.
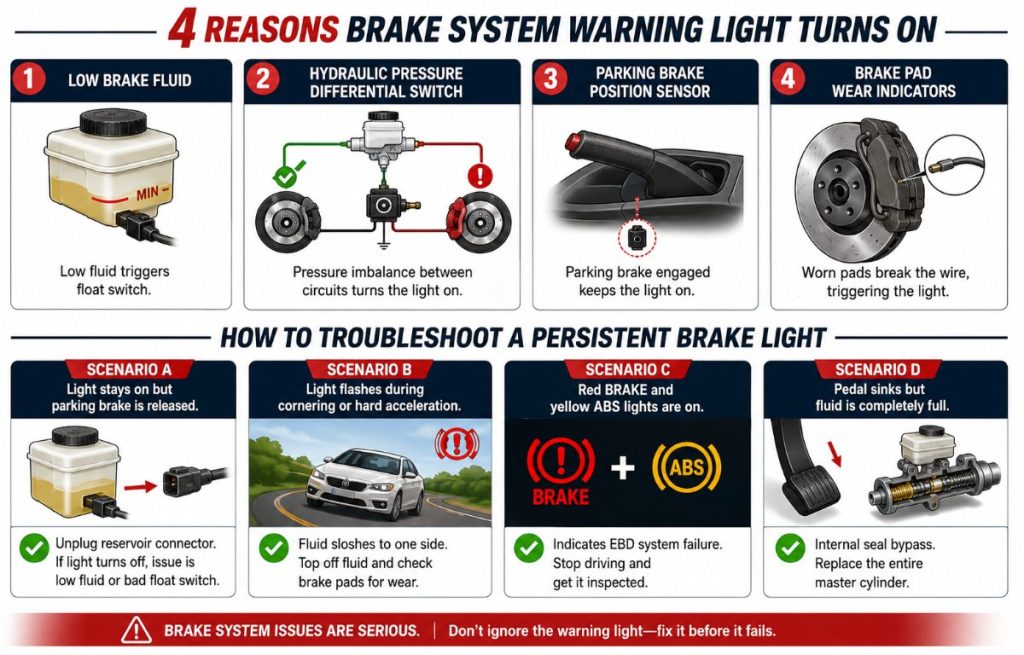
Scenario A: The light stays on but the parking brake is released.
Locate the electrical connector plugged into the side or bottom of your brake fluid reservoir. Unplug this connector while the engine is running. If the dashboard light immediately turns off, you have isolated the problem. Your fluid is either dangerously low, or the float switch inside the reservoir has failed and requires replacement.
Scenario B: The light flashes rhythmically during cornering or hard acceleration.
This specific behavior indicates that your brake fluid is hovering exactly at the minimum threshold line. As the vehicle leans through a corner, the physical fluid sloshes to one side of the reservoir. This temporary movement exposes the float switch, triggering the light for a few seconds until the fluid settles back to a level state. You must top off the fluid and inspect your brake pads for excessive wear.
Scenario C: Both the red BRAKE and yellow ABS lights are on simultaneously.
This dual warning indicates a critical failure of the Electronic Brakeforce Distribution system. The EBD apportions braking power between the front and rear axles based on vehicle load dynamics. Without EBD functioning, your rear brakes may lock up prematurely during a routine stop. This creates a high risk of spinning out of control. Stop driving immediately and arrange a tow.
Scenario D: The pedal sinks but the fluid is completely full.
If your reservoir is full but the brake pedal travels straight to the floorboard, you have a bypassed internal seal. The master cylinder contains rubber piston seals that push the fluid. When these seals tear or degrade, the fluid simply slips past them inside the metal bore. The system loses all pressure, but no fluid physically leaks onto the ground. You must replace the entire master cylinder assembly.
What Are the Most Common Diagnostic Trouble Codes?
When modern braking systems detect an electronic fault, the ECU stores a specific Diagnostic Trouble Code (DTC). Standard engine code readers cannot access these chassis codes. You need an advanced OBD-II scanner capable of reading ABS modules to retrieve them.
| OBD-II Code | Component Involved | Typical Cause of Failure | Suggested Repair Action |
|---|---|---|---|
| C1095 | ABS Hydraulic Pump | Failed pump motor circuit or blown ABS system fuse. | Inspect fuses, replace ABS pump module. |
| C1230 | Rear Wheel Speed Sensor | Sensor damaged by road debris or heavy corrosion on the tone ring. | Clean sensor mounting face, replace sensor. |
| C1155 | Front Left Speed Sensor | Wiring harness pinched or sensor internally shorted. | Test wiring continuity, replace sensor unit. |
| C1996 | Active Yaw Control | Steering angle sensor out of calibration after an alignment. | Recalibrate sensor using factory scan tool. |
| C1083 | Fluid Level Sensor | Reservoir float switch stuck in the low position permanently. | Clean reservoir, replace float switch assembly. |
How Much Does It Cost to Resolve a Brake Warning?
Ignoring a dashboard warning can turn a minor sensor issue into a catastrophic mechanical failure. A faulty five-dollar switch is a cheap fix. Destroying your rotors because you ignored the wear indicator will cost hundreds.
Typical independent mechanics charge 90-130 dollars per hour for labor, while dealership rates often exceed 180 dollars per hour. The table below outlines typical practitioner repair ranges.
| Repair Action | Avg. Parts Cost | Avg. Labor Cost | Total Estimated Time |
|---|---|---|---|
| Brake Fluid Top-off | 5 – 15 dollars | 0 dollars (DIY) | 5 minutes |
| Brake Fluid Flush & Bleed | 15 – 30 dollars | 90 – 130 dollars | 45 – 60 minutes |
| Parking Brake Switch Replacement | 20 – 50 dollars | 70 – 110 dollars | 1 hour |
| Brake Pad Replacement (per axle) | 40 – 100 dollars | 150 – 250 dollars | 1 – 1.5 hours |
| Master Cylinder Replacement | 80 – 200 dollars | 250 – 400 dollars | 2 – 3 hours |
| Brake Line Leak Repair | 30 – 100 dollars | 200 – 500 dollars | 2 – 4 hours |
Which Repair Pathway Should You Choose?
Selecting the right facility for your brake repair depends entirely on the complexity of the fault. Simple mechanical wear is easy to fix. Complex ABS module failures require specialized factory software.
| Pathway | Pros | Cons | Best Used For |
|---|---|---|---|
| DIY (Do It Yourself) | Lowest overall cost. Immediate resolution for fluid additions. | High risk of improper system bleeding. Lacks advanced diagnostic tools. | Fluid top-offs. Basic pad replacements. Cleaning wheel speed sensors. |
| Independent Mechanic | Fair regional pricing. Works on diverse makes and models. | Quality varies wildly by shop. May lack highly specialized OEM factory scanners. | Standard hydraulic leaks. Pad and rotor swaps. Replacing rusted metal brake lines. |
| Dealership Service | Factory trained technicians. OEM replacement parts guaranteed. Advanced chassis diagnostics. | Highest regional labor rates. Long wait times for basic service appointments. | Complex electrical glitches. ABS module replacements. Electronic parking brake calibration. |
What Are the Most Dangerous Maintenance Mistakes?
Attempting to service a braking system without understanding hydraulic principles can induce worse failures. Avoid these severe errors when addressing a warning light.
Mistake 1: Blindly Topping Off Fluid Without Inspecting Pads
As your brake pads slowly wear down, the metal brake calipers extend further outward. This physical extension naturally pulls more fluid down into the hydraulic lines, causing the reservoir level to drop. If you simply add new fluid without inspecting the actual brake pads, you destroy the early warning system. You will miss the vital indicator that your friction material is dangerously thin.
Mistake 2: Mixing Incompatible Brake Fluid Chemistries
Brake fluids carry Department of Transportation (DOT) ratings. DOT 3, DOT 4, and DOT 5.1 fluids rely on a polyethylene glycol base. DOT 5 fluid relies on a silicone base. Mixing glycol-based fluid with silicone-based fluid causes a violent chemical reaction. The resulting mixture thickens into a thick gel. This gel clogs the narrow hydraulic passages, destroys every rubber seal in the system, and requires a complete replacement of all hydraulic components. Always check your reservoir cap for the exact required DOT rating.
Mistake 3: Pushing Contaminated Fluid Backward During Service
When replacing worn brake pads, you must compress the metal caliper piston back into its housing to make room for the thick new pads. Many amateur mechanics simply squeeze the piston with a C-clamp. This action forces old, heavily contaminated fluid backward through the lines and directly into the sensitive ABS module. The dirt and debris can clog the microscopic valves inside the ABS block. You must always open the bleeder screw on the caliper before compressing the piston to let the dirty fluid escape outward.
Mistake 4: Using Generic Code Scanners for ABS Problems
A standard twenty-dollar code reader from an auto parts store can only read powertrain codes (P-codes) related to engine emissions. It cannot communicate with the ABS module or the body control module. If your ABS or Electronic Parking Brake light is illuminated, a cheap scanner will show zero codes found. You must use a bidirectional scanner capable of reading chassis codes (C-codes) to properly diagnose electronic brake faults.
How Do Driving Habits Affect Brake System Longevity?
Your daily driving environment dictates which components will fail first. Experienced ASE certified technicians recommend tailored inspection approaches based on your specific usage profile.
The Daily Commuter
Stop-and-go traffic places immense heat and friction loads on the front brake pads. Commuters rarely experience complete line failures, but they frequently encounter pad wear warnings. If the red warning light appears and stays solid, pull over safely and look at the ground directly under your wheels for wet fluid pools. Check your dashboard every time you start the car. Verify that all warning lights illuminate briefly during the ignition self-test and then go out completely.
The DIY Enthusiast
Home mechanics often tackle brake jobs to save money, but modern vehicles complicate this process. If your car has an Electronic Parking Brake, you cannot simply compress the rear calipers. You must use a diagnostic tool to command the EPB motors into service mode. Forcing them manually will strip the internal plastic gears. When diagnosing a low fluid light, use a digital multimeter to check electrical continuity across the fluid level switch before spending money on a new master cylinder.
The Track Day Driver
High-performance driving generates massive thermal loads. Standard brake fluid absorbs moisture from the atmosphere over time. Under heavy track braking, this moisture boils and turns into steam. Since steam compresses (unlike liquid), the brake pedal will instantly sink to the floor. Track drivers must upgrade to high-temperature DOT 4 fluid and flush it every six months. Additionally, intense track vibrations frequently crack the plastic housings on pad wear sensors. This grounds the internal wire and falsely trips the dashboard warning light even when pads are thick.
Frequently Asked Questions
Can low brake pads cause the brake light to come on?
Yes. On vehicles equipped with electronic pad wear sensors, the friction material wearing down to 3 millimeters will sever the sensor wire and trigger the light. On vehicles without sensors, worn pads cause the fluid level in the reservoir to drop significantly, which triggers the low fluid warning.
Why does my brake light turn on and off randomly?
A flickering brake light typically indicates that your hydraulic fluid is hovering exactly at the minimum sensor threshold. Accelerating, braking, or turning causes the fluid to slosh inside the reservoir, which momentarily exposes the float switch and triggers the alert.
How do you reset the brake warning light after a repair?
If the issue was low fluid or an engaged handbrake, the light will turn off automatically once the fluid is filled or the handle is released. If the light was triggered by a severed pad wear sensor, you must install a brand new sensor cable to close the electrical circuit. ABS module faults require clearing the codes with a specialized OBD-II scanner.
Is it safe to drive with the ABS light on if the red brake light is off?
Yes, it is generally safe to drive to a repair shop. The yellow ABS light indicates that the anti-lock feature is disabled, but your primary hydraulic braking power remains fully functional. You simply need to brake earlier and avoid slamming the pedal in wet conditions to prevent wheel skidding.
Does freezing weather affect the brake warning light?
Yes. In extreme cold, the mechanical switch located under the handbrake lever can freeze in the engaged position. Even if you release the handbrake, the frozen switch continues to tell the ECU that the brake is applied, keeping the dashboard light on until the cabin warms up.
What happens if brake fluid gets on car paint?
Brake fluid is highly corrosive to automotive finishes. If you spill fluid on your fender while topping off the reservoir, it will eat through the clear coat and strip the paint down to bare metal within minutes. You must immediately flush any spill with large amounts of soapy water.
The Bottom Line
Understanding what does brake system warning light mean is a fundamental requirement for safe driving. This specific red dashboard alert demands immediate respect. Whether the light signifies a harmless parking brake switch error or a catastrophic loss of hydraulic fluid, you must pull over and investigate the root cause. Never ignore a sinking pedal, always verify your fluid levels before ordering parts, and never compromise on the quality of your replacement braking components.


