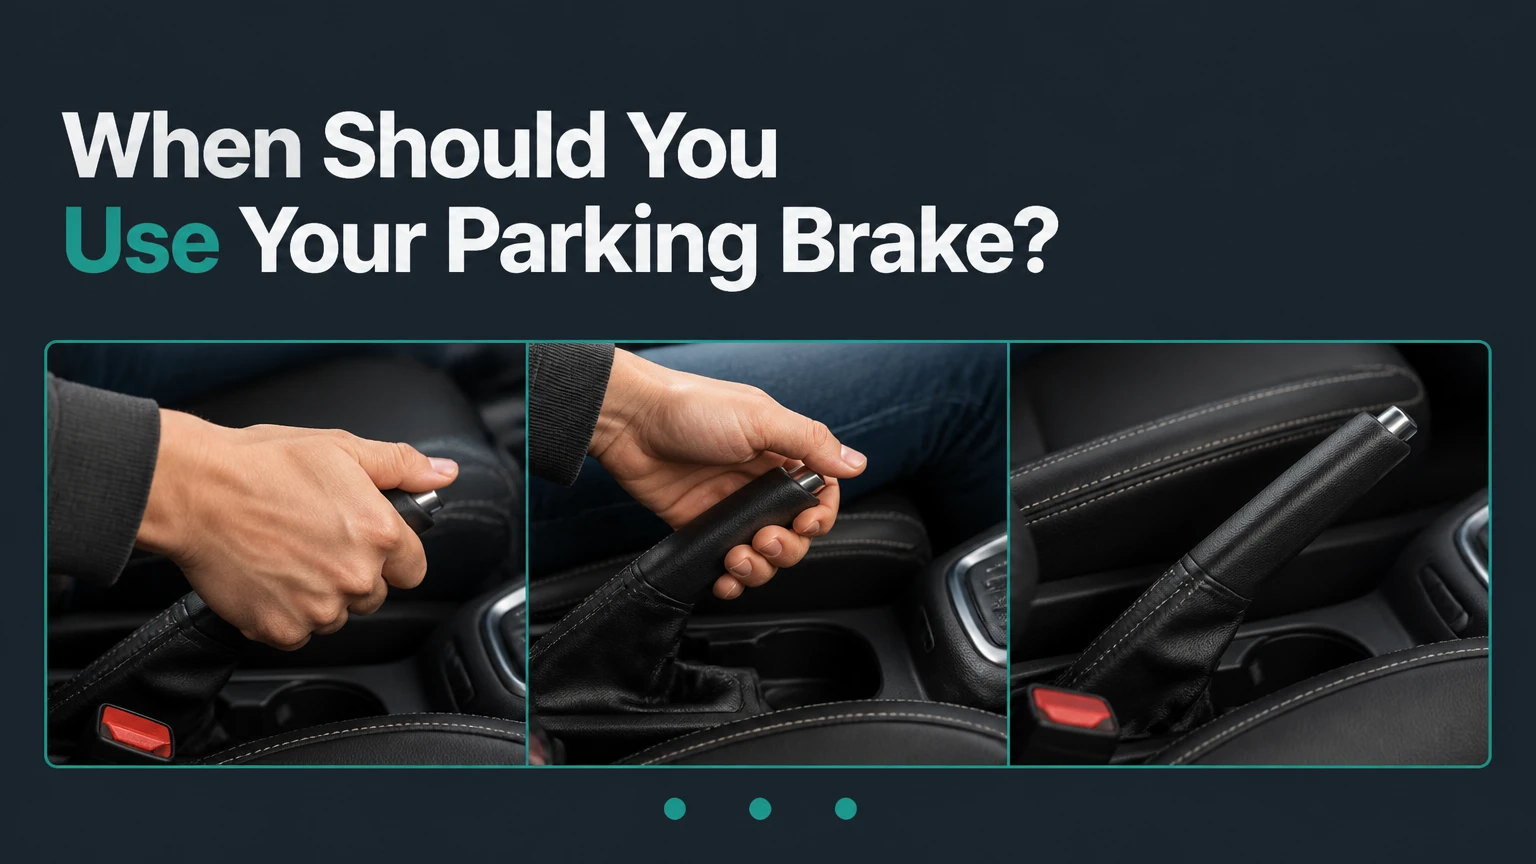
Drivers should engage the parking brake every single time they park a vehicle, regardless of whether the transmission is automatic or manual, and regardless of whether the surface is sloped or completely flat. Applying the parking brake secures the vehicle using the rear brake system rather than placing stress on the transmission components.
At a Glance: Key Rules for Parking Brake Usage
- Usage Frequency: Engage the parking brake 100% of the time when leaving a parked vehicle.
- Proper Order: Apply the parking brake before shifting into “Park” to eliminate strain on the transmission.
- Hill Distance: Keep tires 6 inches from the curb when using hill-parking wheel angles.
- Sub-Zero Risk: Avoid leaving the parking brake engaged in freezing weather on flat ground to prevent frozen brake shoes.
- Storage Limit: Do not leave the parking brake engaged for more than 2 to 3 weeks of continuous storage.
Why Should You Engage the Parking Brake Every Time You Park?
You should engage the parking brake every time you park because relying solely on an automatic transmission’s “Park” gear puts the entire weight of the vehicle on a tiny internal mechanism called a parking pawl. If the vehicle is bumped by another car or experiences stress on an incline, this component can shear off, causing the vehicle to roll freely.
In automatic vehicles, placing the gear selector into “Park” does not lock the drive wheels using the primary hydraulic brakes. Instead, it slides a small metal pin into a notched gear inside the transmission output shaft. In manual vehicles, leaving the transmission in 1st gear or reverse provides engine compression resistance, but mechanical wear or severe inclines can still force the engine to turn over and allow rolling.
Engaging the parking brake utilizes steel cables or electronic actuators to mechanically clamp the rear brake pads or shoes directly against the brake rotors or drums. This system operates independently of the transmission, securing the vehicle by leveraging friction at the wheels. Routine engagement preserves the transmission and ensures the vehicle remains stationary under all environmental conditions.
How Does a Parking Brake Protect the Transmission Parking Pawl?
The parking brake protects the transmission parking pawl by absorbing external forces and holding the weight of the vehicle before those forces reach the transmission gears. The parking pawl is a hardened steel latch measuring approximately 1.5 to 2 inches in length. Relying on this single piece of metal to hold a 4,000-pound automobile creates a single point of failure within the drivetrain.
+--------------------------------------------------------------------------+
|                        AUTOMATIC TRANSMISSION IN PARK                    |
|                                                                          |
|   [ Shift Lever in Park ] ---> [ Parking Pawl Engages Transmission Gear ]|
|                                              |                           |
|                                     (1.5 to 2 Inch Latch)                |
|                                              |                           |
|  * RISK: Entire 4,000 lb vehicle weight rests on a single metal pin.      |
+--------------------------------------------------------------------------+
                                     VS
+--------------------------------------------------------------------------+
|                     PARKING BRAKE ENGAGEMENT SEQUENCE                    |
|                                                                          |
|   [ Press Foot Brake ] ---> [ Engage Parking Brake ] ---> [ Shift Park ] |
|                                       |                                  |
|                          (Rear Pads Clamp Rotors)                        |
|                                       |                                  |
|  * RESULT: Vehicle weight held by main brakes; Pawl carries zero stress.  |
+--------------------------------------------------------------------------+
When a car is parked on a slope without the parking brake engaged, the vehicle rolls slightly until the parking pawl rests tightly against the transmission gear notch. This tension causes the familiar “clunk” sound and mechanical resistance felt when shifting out of “Park” on a hill. Over time, repeated tension wears down the tip of the pawl and strains the shift linkage.
Using the parking brake isolates the transmission from these forces. When the rear brake pads clamp down on the brake rotors, they immobilize the axle shafts directly. The parking pawl then drops into its gear notch freely without carrying any load, preventing mechanical deformation and extending the lifespan of the transmission internal assembly.
Should You Apply the Parking Brake Before or After Shifting into Park?
You must apply the parking brake before shifting the transmission into “Park”. Applying the brake first ensures that the vehicle weight settles entirely onto the heavy-duty braking system rather than resting against the transmission parking pawl.
Follow this exact sequence whenever bringing your vehicle to a complete stop:
- Maintain Foot Brake Pressure: Bring the vehicle to a complete stop and keep your right foot firmly pressed on the primary brake pedal at 0 mph.
- Engage the Parking Brake: Pull the handbrake lever, press the foot pedal brake, or lift the Electronic Parking Brake (EPB) switch until the brake is fully set.
- Release the Foot Brake Slowly: Ease your right foot off the primary brake pedal, allowing the vehicle weight to rest completely on the newly engaged parking brake.
- Shift into Park or Gear: Move the gear selector into “Park” for automatic transmissions, or engage 1st gear (uphill) or Reverse (downhill) for manual transmissions.
- Turn Off the Engine: Shut off the ignition and exit the vehicle.
When departing, reverse this sequence: press the main foot brake, start the engine, shift out of “Park” into your desired gear, release the parking brake, and then remove your foot from the main brake pedal to drive away.
How Do You Turn Your Wheels and Set the Parking Brake on a Hill?
Parking on an incline requires combining the holding force of the parking brake with proper front-wheel angles to create a physical barrier against rolling. The direction you turn your steering wheel depends on whether the vehicle faces uphill or downhill, and whether a curb is present along the roadway.
       UPHILL WITH CURB                      DOWNHILL WITH CURB
  (Turn Wheels Away / LEFT)             (Turn Wheels Toward / RIGHT)

       |       |  /                     |       |  \
       | Curb  | /  Wheel               | Curb  |   \ Wheel
       |       |/                       |       |    \
       +-------+                        +-------+
   Back of front tire touches        Front of tire wedges against
   curb to block rollback.           curb to block forward roll.
Hill Parking Wheel Positioning Rules
| Slope Orientation | Road Edge Type | Steering Wheel Angle Direction | Resulting Safety Mechanism |
| Uphill | Raised Curb | Turn wheels to the Left (away from curb) | Back of front tire catches against the curb wall |
| Downhill | Raised Curb | Turn wheels to the Right (toward curb) | Front of front tire wedges directly into the curb wall |
| Uphill | No Curb / Shoulder | Turn wheels to the Right (toward road edge) | Vehicle rolls away from traffic lanes into off-road dirt |
| Downhill | No Curb / Shoulder | Turn wheels to the Right (toward road edge) | Vehicle rolls away from traffic lanes into off-road dirt |
When executing these maneuvers with a curb present, bring your tires within 6 inches of the curb face. Allow the vehicle to roll slowly into soft contact with the curb before setting the parking brake and shifting into gear, ensuring maximum mechanical resistance.
When Should You Avoid Using Your Parking Brake in Freezing Temperatures?
You should avoid leaving your mechanical parking brake engaged in sub-zero freezing temperatures when parking on flat surfaces for extended periods. Water, slush, and road spray can enter the rubber protective boots surrounding the parking brake steel cables, or collect inside the rear drum assemblies.
When ambient temperatures drop below 32°F (0°C), this trapped moisture freezes into solid ice. The resulting ice locks the internal steel braided cable inside its housing, or freezes the brake shoes directly against the brake drum surfaces.
If you attempt to drive with a frozen parking brake, releasing the cabin lever will move the handle, but the underlying tension mechanism will remain locked in place. Driving under these conditions drags the rear tires, destroying the rubber tread, overheating the brake friction material, and risking severe drum or rotor damage.
Winter Parking Alternative Protocol
If parking in sub-zero conditions on flat ground, keep the mechanical parking brake disengaged. Place automatic transmissions in “Park” and manual transmissions in 1st gear or Reverse. If parking on a slope where safety requires secondary retention, place heavy-duty rubber wheel chocks firmly against the downhill side of the tires to prevent movement without risking cable freeze-up.
Why Should You Leave the Parking Brake Off During Long-Term Storage?
You should leave the parking brake off during long-term storage exceeding 2 to 3 weeks because moisture accumulation creates galvanic corrosion between the brake pad linings and the metal rotor or drum faces. Over extended periods of static contact, this rust process physically welds or fuses the friction material to the metal structure.
When a vehicle remains stationary in a humid environment, rust forms along the contact boundary of the cast-iron rotor. If the brake pads are clamped firmly against the rotor, oxidation binds the two materials together. When you attempt to drive the car after long storage, the rear wheels may refuse to turn, or the friction material may tear off the brake shoe backing plate completely, necessitating full replacement.
For vehicles stored long-term in garages or storage facilities:
- Leave the parking brake fully disengaged.
- Place plastic or heavy-duty rubber wheel chocks in front of and behind both rear tires.
- Inflate tires to the maximum recommended cold pressure to avoid flat-spotting while the vehicle remains immobile.
Why Is Applying the Parking Brake After High-Performance Driving Dangerous?
Applying the parking brake immediately after high-performance driving, track sessions, or steep mountain descents is dangerous because brake rotors can reach surface temperatures exceeding 500°F (260°C). Clamping cold parking brake pads against glowing hot rotors traps heat unevenly across the brake component surfaces.
       HOT ROTOR THERMAL DISTORTION RISK

   [ Hot Rotor Surface >500°F ]
               ||
   [ Clamping Cold Brake Pad Firmly ]
               ||
   [ Trapped Heat Under Pad Area ] <--- Cooling is blocked here!
               ||
   [ Unclamped Area Cools Quickly ] <--- Air cools remainder of rotor.
               ||
   * RESULT: Uneven cooling causes Permanent Rotor Warping
     and Friction Material Transfer (Brake Judder).
When a hot rotor is allowed to cool down in open air, heat dissipates uniformly across its entire circumference. Clamping a parking brake pad against one localized section of the rotor prevents that specific area from radiating heat. This extreme temperature variance across the rotor face causes two severe mechanical issues:
- Thermal Rotor Warping: The uneven expansion and contraction distort the flat plane of the metal rotor, causing severe steering wheel vibration and pedal pulsation during future braking.
- Pad Material Transfer: High heat under pressure causes the chemical binders inside the brake pad to melt and bake onto the rotor face, leaving uneven high spots that destroy smooth braking performance.
After driving aggressively, cool down the braking system by driving the vehicle at moderate speeds for 3 to 5 minutes without applying heavy pedal pressure. Once parked on flat ground, leave the parking brake off and allow the braking system to air-cool completely.
What Is the Difference Between a Mechanical Handbrake and an Electronic Parking Brake?
The difference between a mechanical handbrake and an Electronic Parking Brake (EPB) lies in how clamping force is delivered to the rear wheels. A mechanical handbrake relies on direct human input pulling a steel cable, whereas an EPB utilizes electric servo motors mounted directly onto the rear brake calipers to apply clamping pressure at the press of a switch.
Mechanical vs. Electronic Parking Brake (EPB) Comparison
| Feature / Metric | Mechanical Handbrake (Cable-Operated) | Electronic Parking Brake (EPB) |
| Actuation Method | Physical lever or foot pedal pulled by hand/foot | Console-mounted electric toggle switch |
| Force Application | Steel cable pulls mechanical caliper levers or drum shoes | Electric motor drives a screw mechanism inside the caliper |
| Dead Battery Operation | Fully functional without electrical power | Cannot be engaged or disengaged without power |
| Emergency Braking | Gradual manual modulation via lever button | Managed deceleration controlled via ABS computer |
| Automatic Engagement | Manual operation required | Automatically engages upon placing vehicle in Park |
| Maintenance Complexity | Cable adjustments and lubrication needed | Diagnostic scan tool required to retract pistons for service |
Mechanical systems provide complete manual control regardless of the vehicle battery charge, making them highly reliable in electrical failures. Electronic systems remove physical effort, save interior console space, and integrate with automated safety suites such as Hill Start Assist and auto-holding functions.
Will the Parking Brake Work if Your Main Foot Brakes Completely Fail?
A parking brake will work if your main foot brakes fail, but only if the underlying rear brake pads or shoes still retain sufficient friction material. The parking brake operates via mechanical cables or electric motors that bypass the primary hydraulic fluid lines entirely.
If your primary foot brake pedal sinks to the floor due to a blown hydraulic line, loss of brake fluid, or brake booster failure, the parking brake remains mechanically operational. Because it acts on independent linkages, pulling the handbrake lever or activating the electronic parking brake switch will apply clamping force directly to the rear wheels.
However, if your primary brake pedal failed because the friction material on the rear brake pads was completely worn down to bare metal backing plates, the parking brake will suffer the exact same loss of stopping power. Parking brakes share the same physical rear rotors, drums, and pads used by the foot brake system. Regular inspection of rear brake pad thickness is essential to preserve emergency backup capabilities.
Can Using Your Parking Brake Every Day Cause Mechanical Wear?
No, using your parking brake every day will not wear it out. Daily engagement protects mechanical parking brake systems from premature failure by preventing rust, dirt accumulation, and internal cable binding.
Mechanical parking brakes consist of braided steel cables encased inside flexible protective sheaths. When a parking brake goes unused for months or years, moisture gets inside the sheath, causing the internal steel strands to rust and corrode. Dust and road debris also accumulate within the pivot linkages at the rear wheels.
When an driver finally attempts to use a long-neglected parking brake, the rusted cable frequently snaps under tension, or the corroded mechanism seizes in the applied position, locking the rear wheels. Engaging the parking brake daily moves the steel cables back and forth inside their sleeves, clearing out surface contamination and keeping internal linkages fully lubricated and free-moving.
How Do You Release an Electronic Parking Brake with a Dead Battery?
You can release an electronic parking brake (EPB) with a dead battery by providing temporary electrical power to the vehicle or by using the mechanical manual override tool located near the spare tire compartment. Because electronic parking brakes require voltage to turn their internal servo motors, a completely discharged battery locks the system in its last applied state.
       ELECTRONIC PARKING BRAKE (EPB) MANUAL OVERRIDE

   Method A: Electrical Jump (Fastest)
   [ Dead Battery ] ---> [ Attach Jumper Cables ] ---> [ Press EPB Switch ]
                                                               |
                                                   Brake Releases Instantly

   Method B: Mechanical Override (No Power Available)
   [ Open Trunk Panel ] ---> [ Locate EPB Manual Tool ] ---> [ Turn Actuator Shaft ]
                                                               |
                                                   Piston Retracts Manually
Step-by-Step EPB Release Methods
- Electrical Jump-Start (Recommended): Connect jumper cables or a portable lithium jump-pack to the vehicle battery terminals under the hood. Once electrical power is restored to the vehicle control modules, switch the ignition to “On,” press the main foot brake, and push down on the EPB console switch to disengage the brake electrically.
- Mechanical Override Tool: If the electrical system cannot accept a charge, open the vehicle trunk and remove the floor panel. Locate the emergency brake release tool (typically shaped like a long hex key or T-handle socket stored near the jack kit).
- Manual Actuation: Consult your vehicle owner manual to locate the emergency access plug, often situated under the spare tire well or behind a plastic trim cover beneath the rear chassis. Insert the manual tool into the actuator interface and turn it counter-clockwise until the mechanical tension releases, freeing the rear wheels for towing.
How Do You Unfreeze a Stuck Mechanical Parking Brake in Winter?
To unfreeze a mechanical parking brake stuck in sub-zero weather, you must melt the ice bound within the brake cables or drum assemblies without applying destructive force. Forcing the vehicle to move while the brakes are frozen will tear the brake linings from their backing plates or burn out the transmission clutch pack.
Execute these corrective steps to resolve a frozen brake:
- Warm Up the Engine: Start the vehicle engine and let it idle for 10 to 15 minutes. The radiant heat generated by the exhaust system and rear drivetrain components helps melt ice buildup along the underbody brake cables.
- Gently Tap the Assembly: Locate the rear wheels. Using a rubber mallet or the wooden handle of a hammer, tap gently around the outside face of the rear brake drums or metal caliper housings. These light shocks shatter the thin ice bonds holding the friction pads against the metal rotors.
- Apply Directed Heat: If tapping fails, use a hair dryer or portable heat gun pointed at the rear brake cable entry points behind each rear wheel. Keep the heat source moving constantly to prevent melting plastic components or rubber brake hoses.
- Manipulate the Control: Once the components warm up, apply firm pressure to the main foot brake pedal and attempt to lift and release the cabin parking brake lever repeatedly until you feel mechanical tension drop.
Never pour boiling water over frozen brake assemblies. Boiling water quickly cools, freezes across cold metal suspensions, and exacerbates the ice blockage within seconds.
Can You Safely Use the Parking Brake While Driving in an Emergency?
You can use the parking brake while driving only as an extreme last resort when primary hydraulic foot brakes have suffered absolute failure. Modulating the parking brake correctly prevents vehicle control loss while slowing down the automobile.
                  EMERGENCY BRAKING PROTOCOL WHILE MOVING

   MECHANICAL HANDBRAKE LEVER             ELECTRONIC PARKING BRAKE (EPB)

   1. Depress releasing button.           1. Pull AND HOLD the toggle switch.
   2. Pull lever UP slowly/gradually.     2. EPB module communicates with ABS.
   3. Modulate force to avoid skid.       3. Computer brings car to safe stop.

   * CRITICAL: Pulling a mechanical handbrake violently locks rear wheels,
     causing an immediate, uncontrollable vehicle spin at high speeds.
Mechanical Handbrake Emergency Steps
If operating a traditional cable handbrake lever:
- Depress and hold the thumb release button on the end of the lever continuously.
- Pull the lever upward slowly and steadily to apply gradual resistance to the rear wheels.
- If you hear tires squeal or feel the rear end of the car begin to slide sideways, instantly lower the lever slightly to restore tire traction.
- Never jerk the lever upward rapidly without holding the release button, as this will lock the rear tires instantly, causing an uncontrollable spin.
Electronic Parking Brake (EPB) Emergency Steps
If operating an electronic toggle switch while driving:
- Pull up on the EPB switch and hold it continuously in the lifted position.
- The vehicle electronic control unit (ECU) recognizes an emergency request, activates the Anti-lock Braking System (ABS), and applies controlled, pulsed hydraulic pressure across all four wheels to bring the vehicle to an automated stop.
- Releasing the switch immediately cancels the emergency braking sequence.
How Steep of an Incline Can a Standard Parking Brake Safely Hold?
Standard automotive parking brakes are engineered to comply with international safety regulations requiring them to hold a fully loaded vehicle on slopes ranging from 20% to 30% grade (approximately 11.3 to 16.7 degrees of slope angle).
Federal Motor Vehicle Safety Standards (FMVSS Standard No. 105) dictate that a passenger vehicle parking brake must maintain static hold on a 30% grade in both forward and reverse directions under maximum gross vehicle weight rating (GVWR) conditions.
Slope Holding Limits by Grade Rating
| Slope Grade (%) | Angle in Degrees | Real-World Equivalent | Parking Brake Hold Capacity |
| 10% Grade | 5.7° | Standard steep highway mountain pass | Holds easily with nominal cable tension |
| 20% Grade | 11.3° | Steep residential street incline | Fully secured; wheel turning recommended |
| 30% Grade | 16.7° | Maximum legal municipal street grade | Upper design limit; wheel turning mandatory |
| 40%+ Grade | >21.8° | Extreme off-road terrain or boat ramps | Beyond rated capacity; wheel chocks required |
When parking on inclines exceeding a 20% grade, reliance on the parking brake alone is insufficient. Drivers should combine maximum parking brake lever application with curb-angled wheel positioning and heavy-duty wheel chocks to ensure complete vehicle stability.
The Bottom Line
Engaging your parking brake 100% of the time is the simplest habit you can adopt to prevent catastrophic drivetrain failure and protect vehicle occupants. Always follow the correct operational order: bring the car to a full stop, apply the parking brake, allow the vehicle weight to settle onto the rear brakes, and then shift into “Park.”
While routine daily engagement keeps mechanical cables clean and prevents internal seizing, remember the critical environmental exceptions. Avoid leaving the parking brake set during sub-zero freezing weather on flat ground, keep it disengaged during storage periods exceeding three weeks, and allow hot performance brakes to cool before clamping pads down after aggressive driving. Adhering to these mechanical rules ensures your vehicle remains secure under all parking conditions.


